 This work is licensed under a Creative Commons Attribution-NonComercial-ShareAlike 4.0 International license.
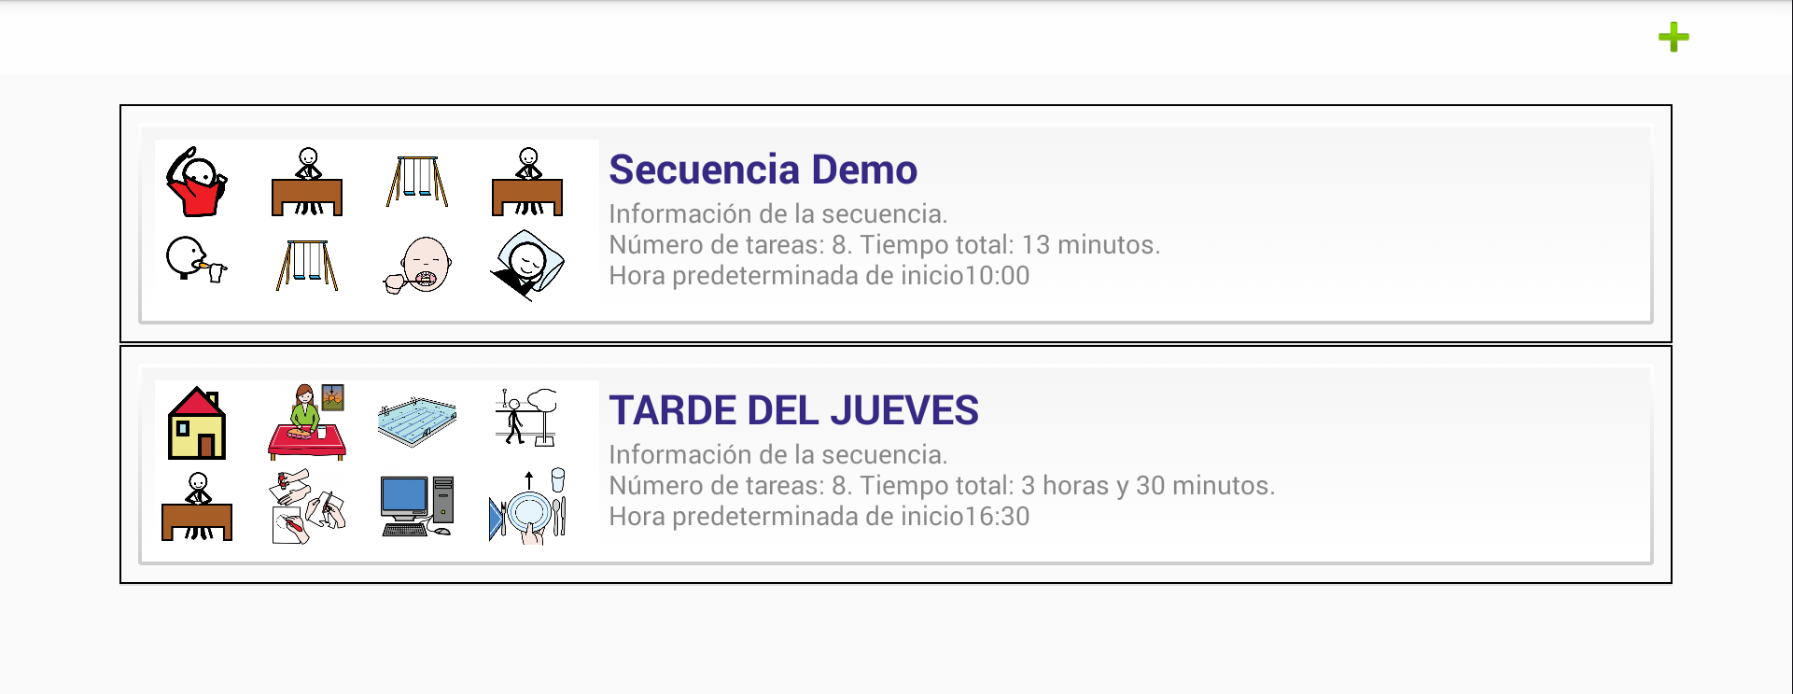
Once we have added all the necessary tasks to carry out our first sequence, we go to the Sequence Management on the main screen.

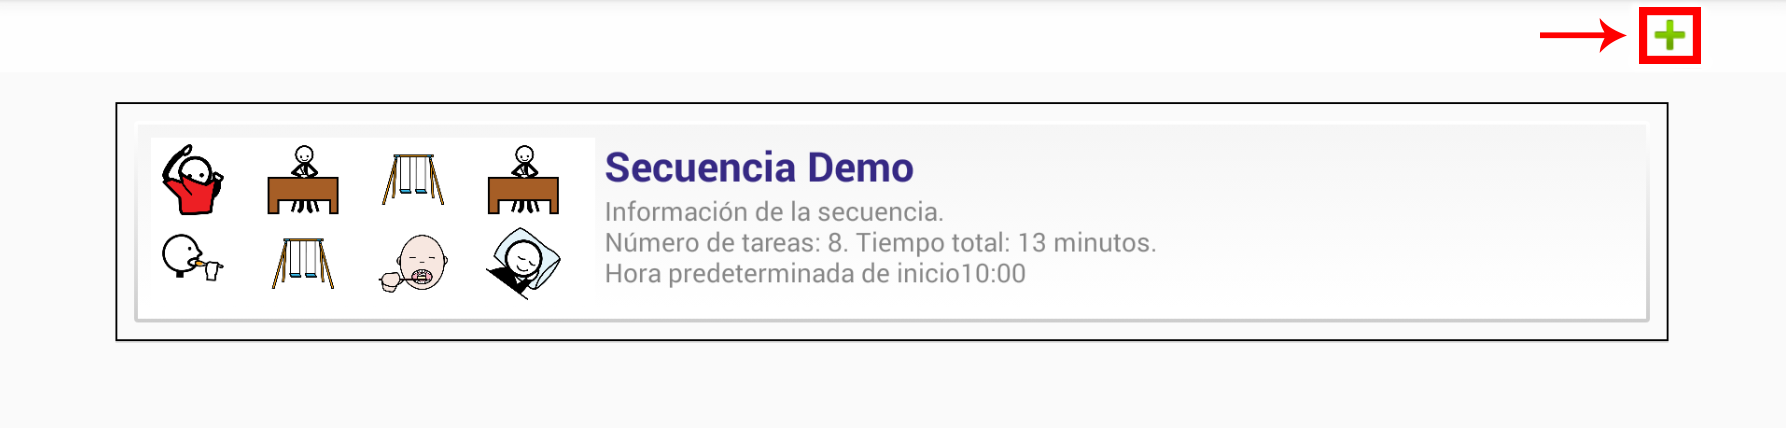
When you install the program, a Demo Sequence is installed. If we want to create a new one, click on the + icon, located in the upper right corner.
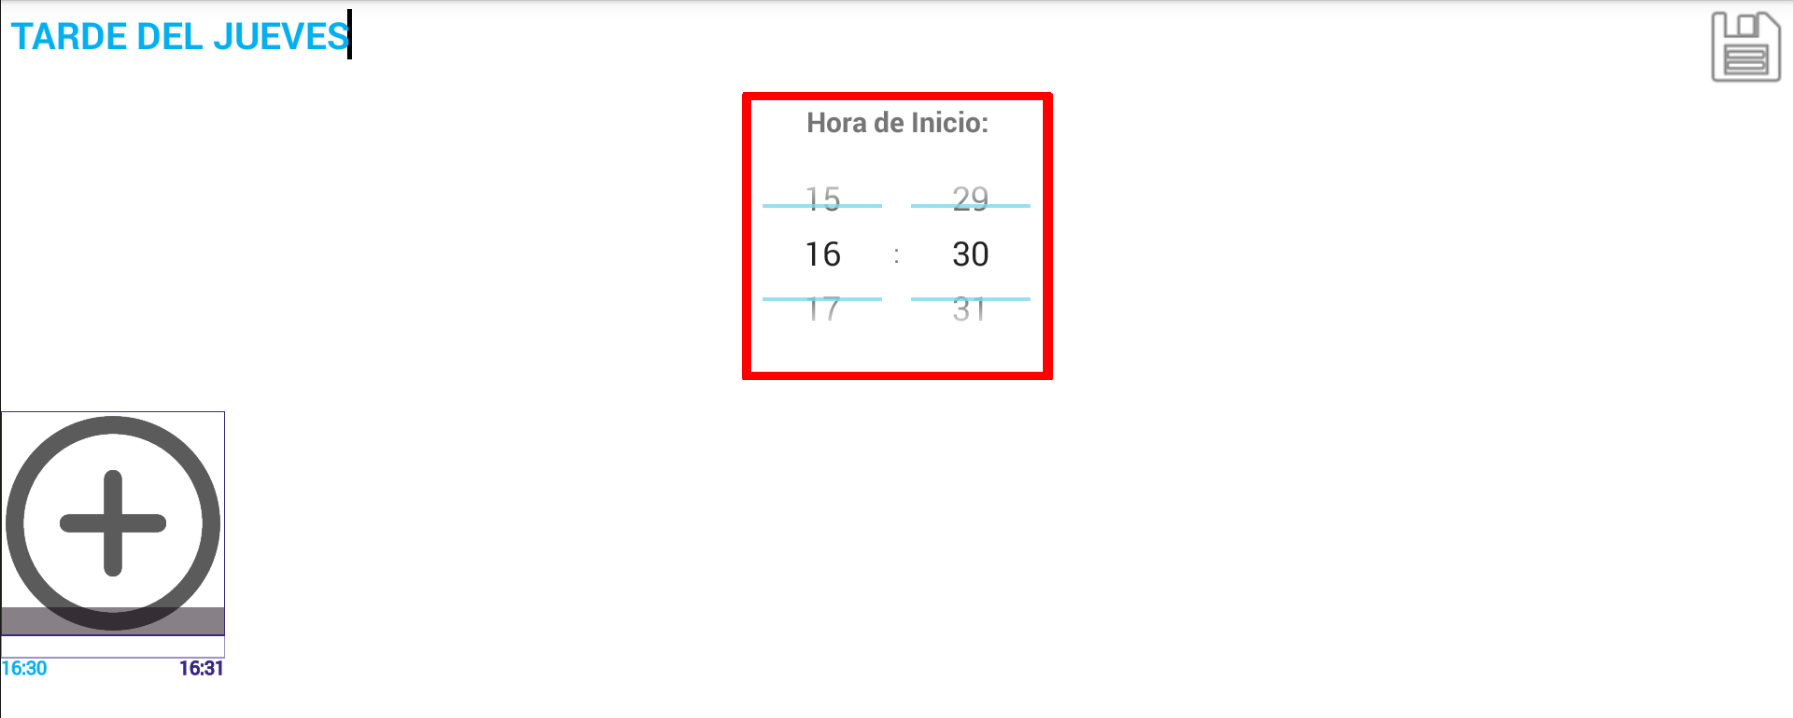
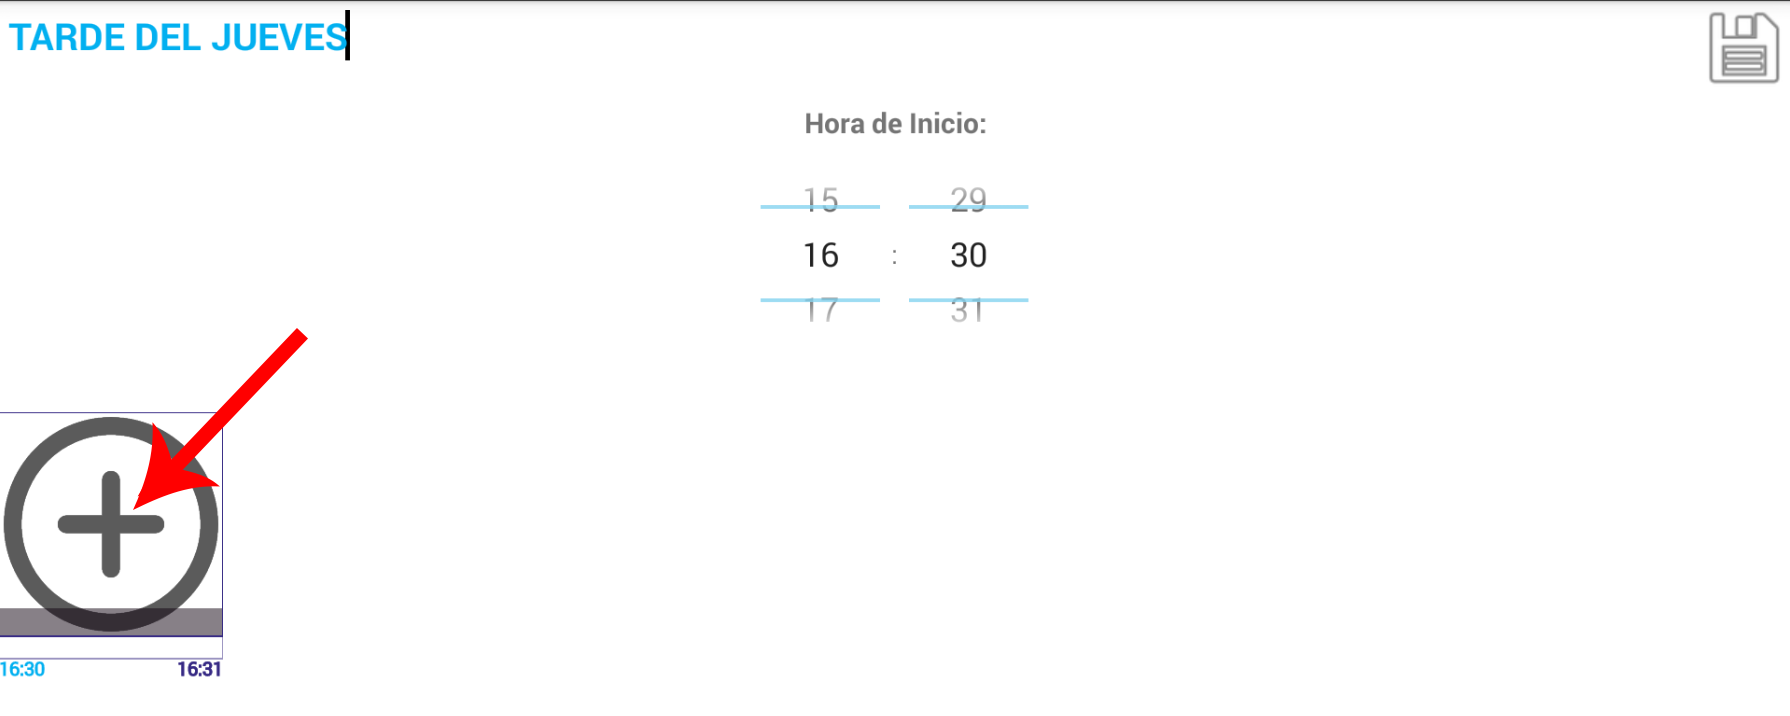
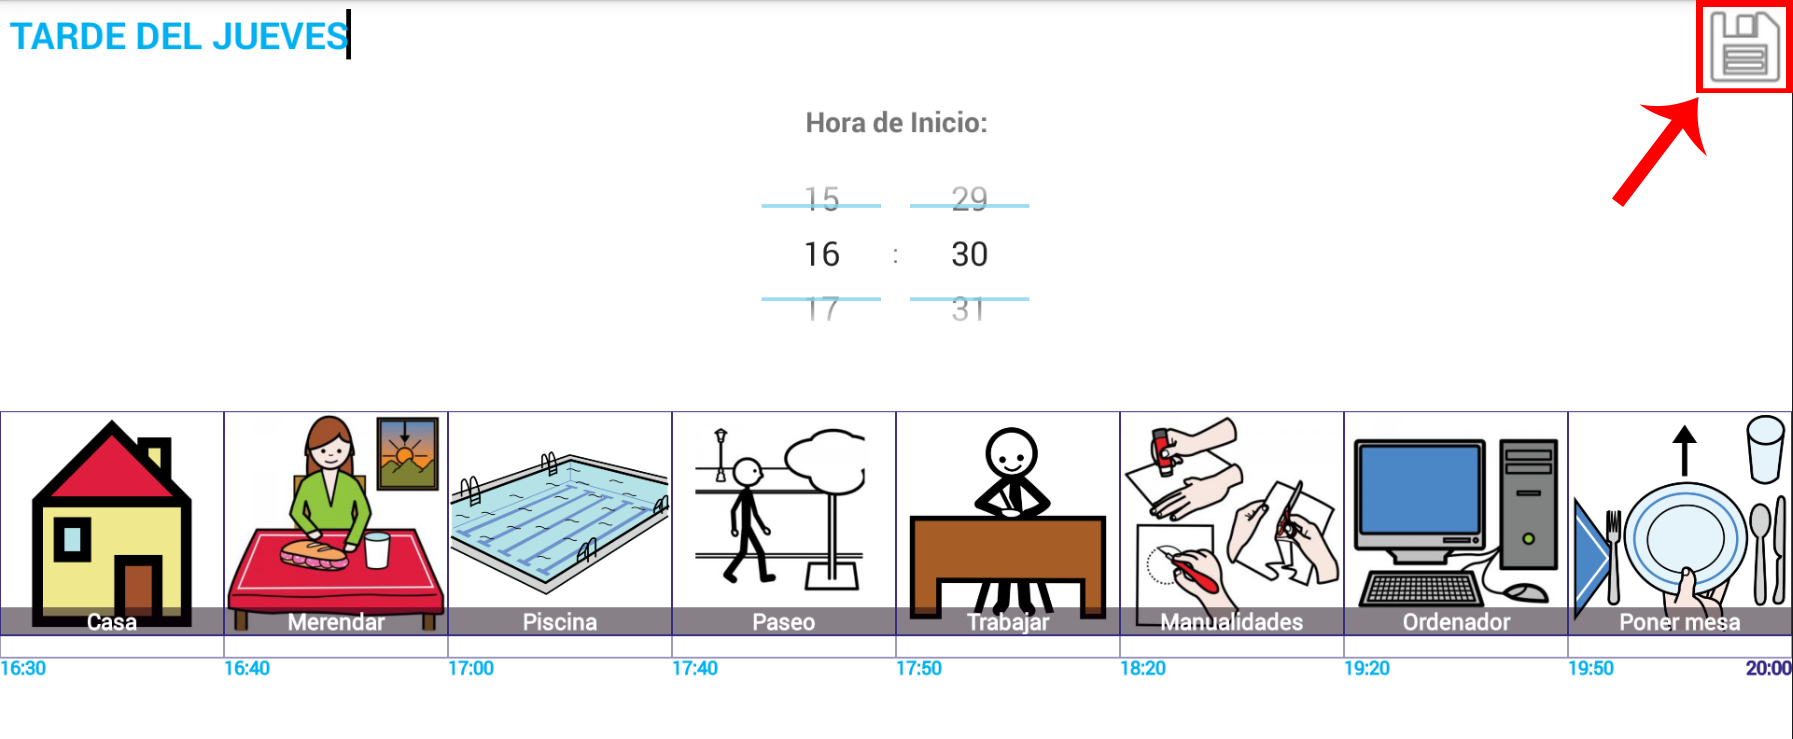
In the new screen that appears, click on the NAME OF THE SEQUENCE and enter the name of the new sequence that, in our case, we will call “THURSDAY AFTERNOON“.
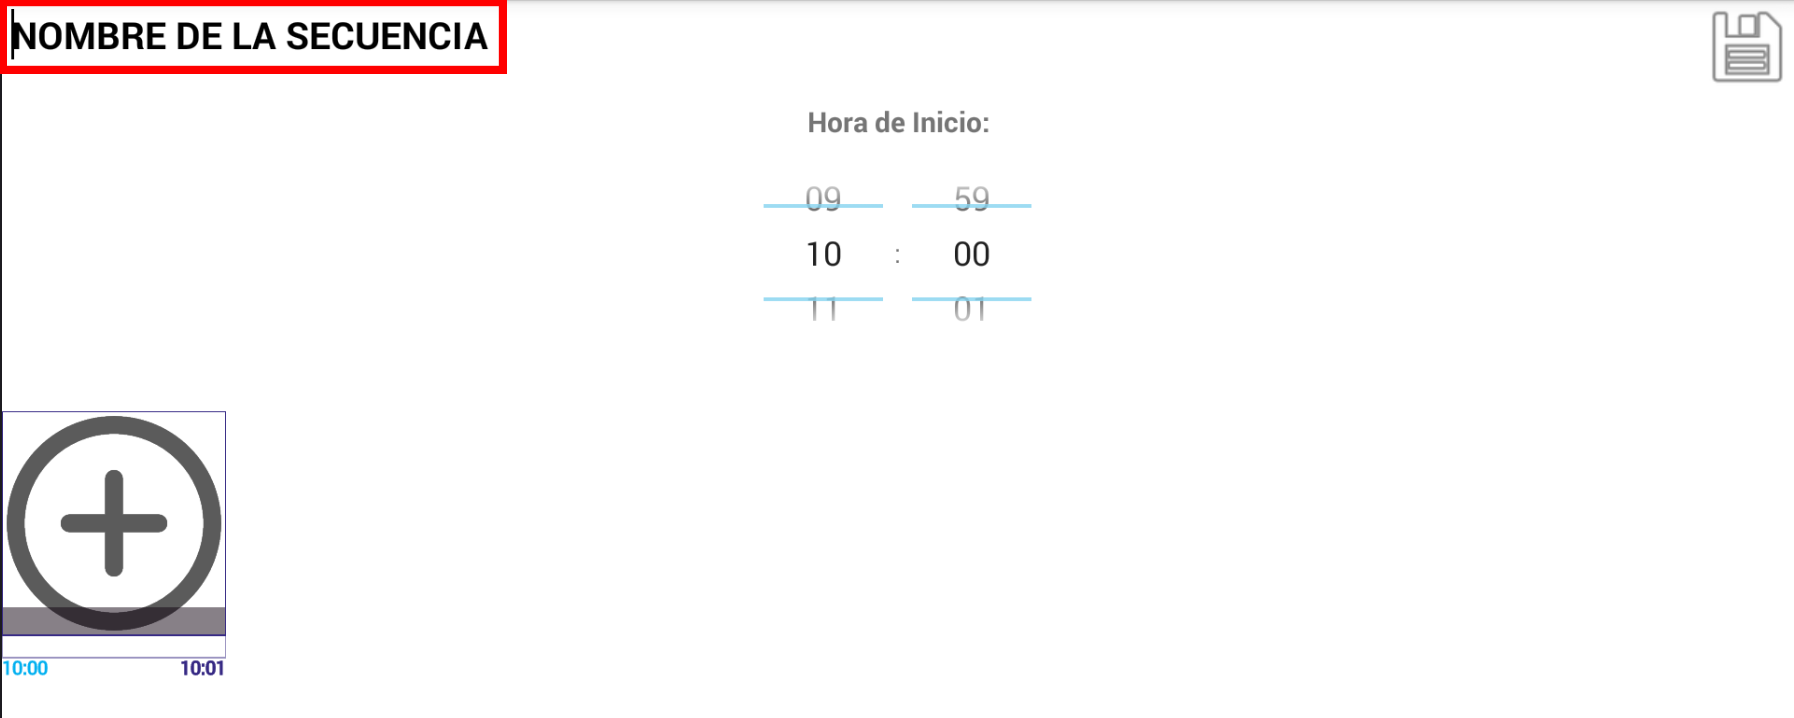
Next, we define the Start Time of the sequence. This time is “guidance” since, as we will see in the next chapter, when launching the sequence we can adapt it to the current time. In the example, we select 16:30 as the start time.
Once the name of the sequence and the start time have been established, we are going to introduce the Tasks that will make up the Sequence. We must add them in the correct order, since the application does not allow them to be reordered.
To add tasks, click on the icon that contains the + sign.
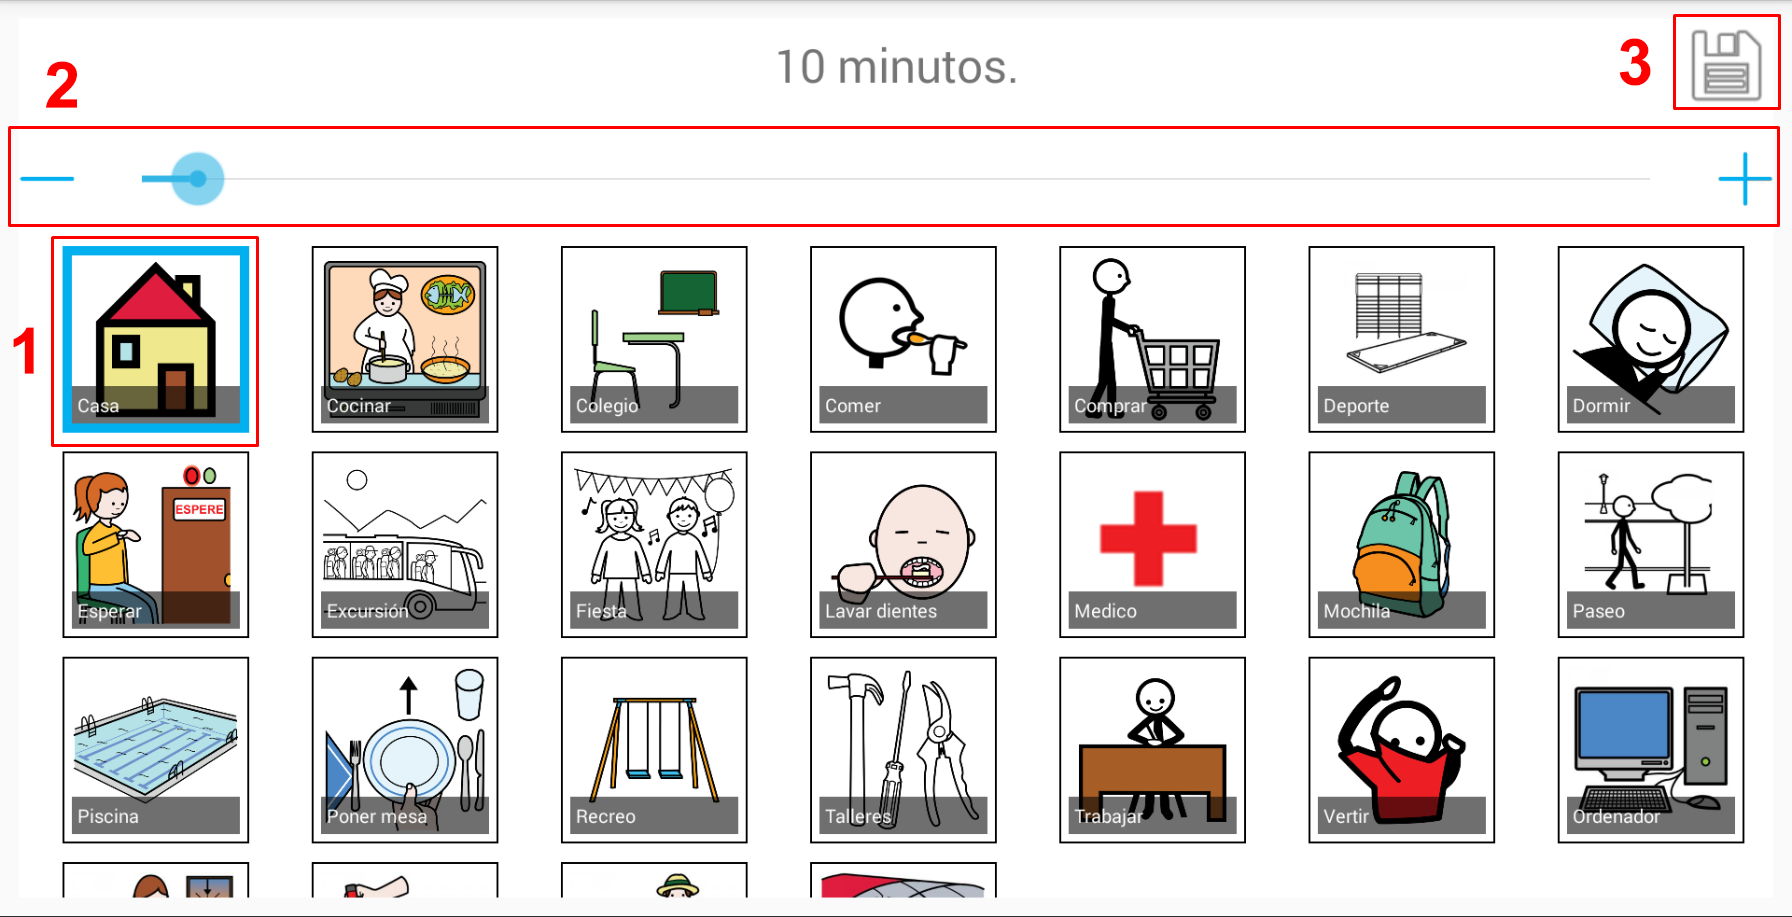
In the list of tasks that we have created, we select the Tasks that will make up our Sequence, establishing their duration in minutes or hours. Once selected, click on the Floppy to Save the entire sequence and return to the Sequence Configuration window.
In our example, we have first added House to indicate the journey from home to school and we have established a duration of 10 minutes.
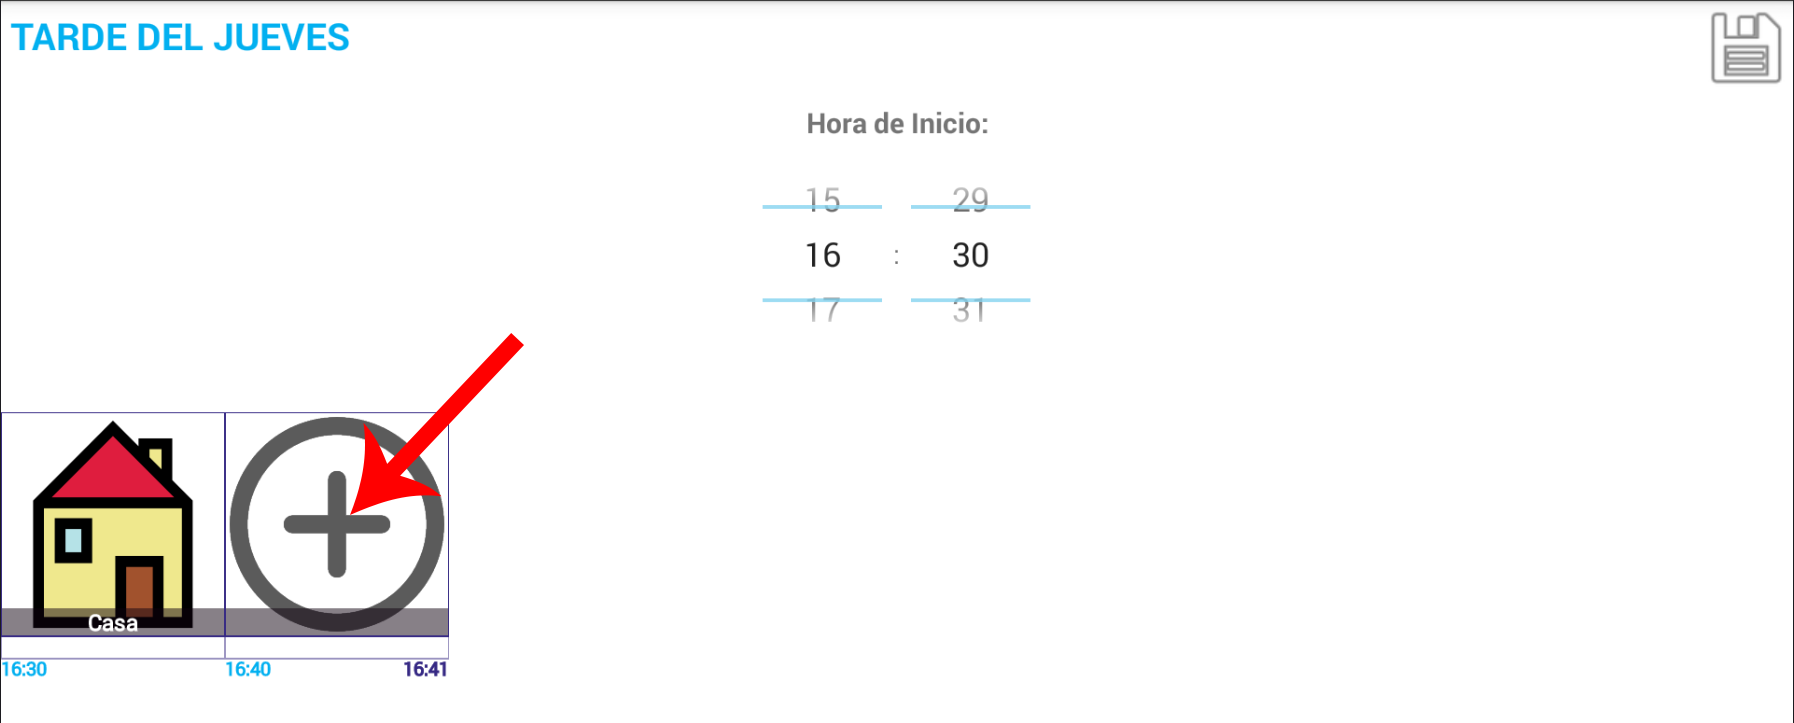
We continue adding new tasks by clicking on the + sign.
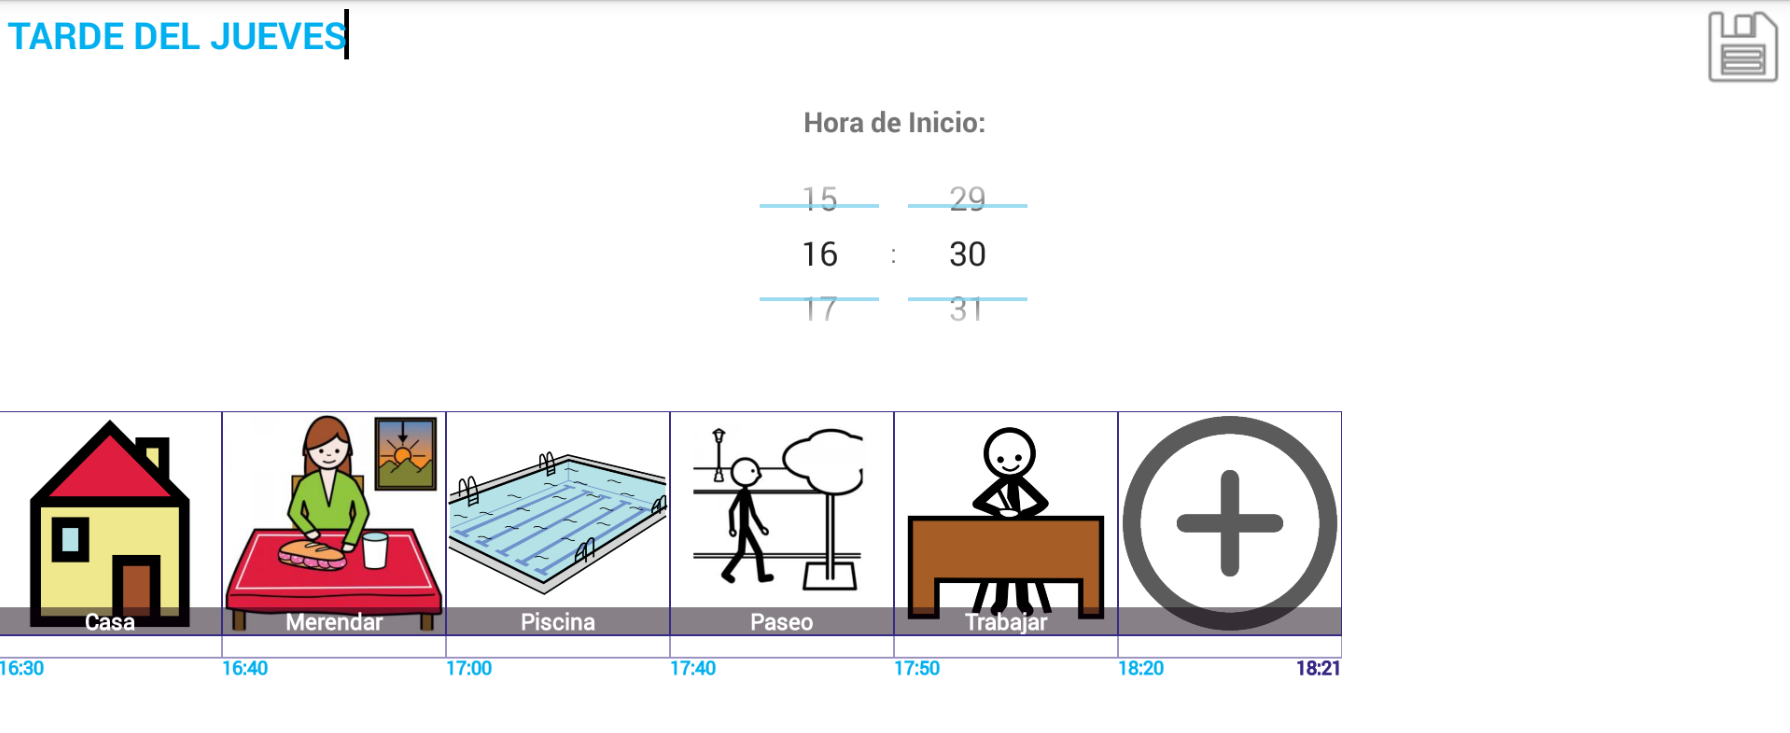
We must take into account that each sequence supports a maximum of 8 tasks.
Once we have the complete sequence, click on the Diskette to Save and return to the Sequence Management window.
 We can see that our new sequence already appears and a visual and textual summary with the information on the number of tasks that make it up, the total time used to complete the sequence and the default time for its start.