 This work is licensed under a Creative Commons Attribution-NonComercial-ShareAlike 4.0 International license.
Once our first Sequence iscreated, we go to the Start Screenand click on Launch Sequences.

The list of created sequences will appear. In our case, click on the sequence we want to launch: THURSDAY AFTERNOON.
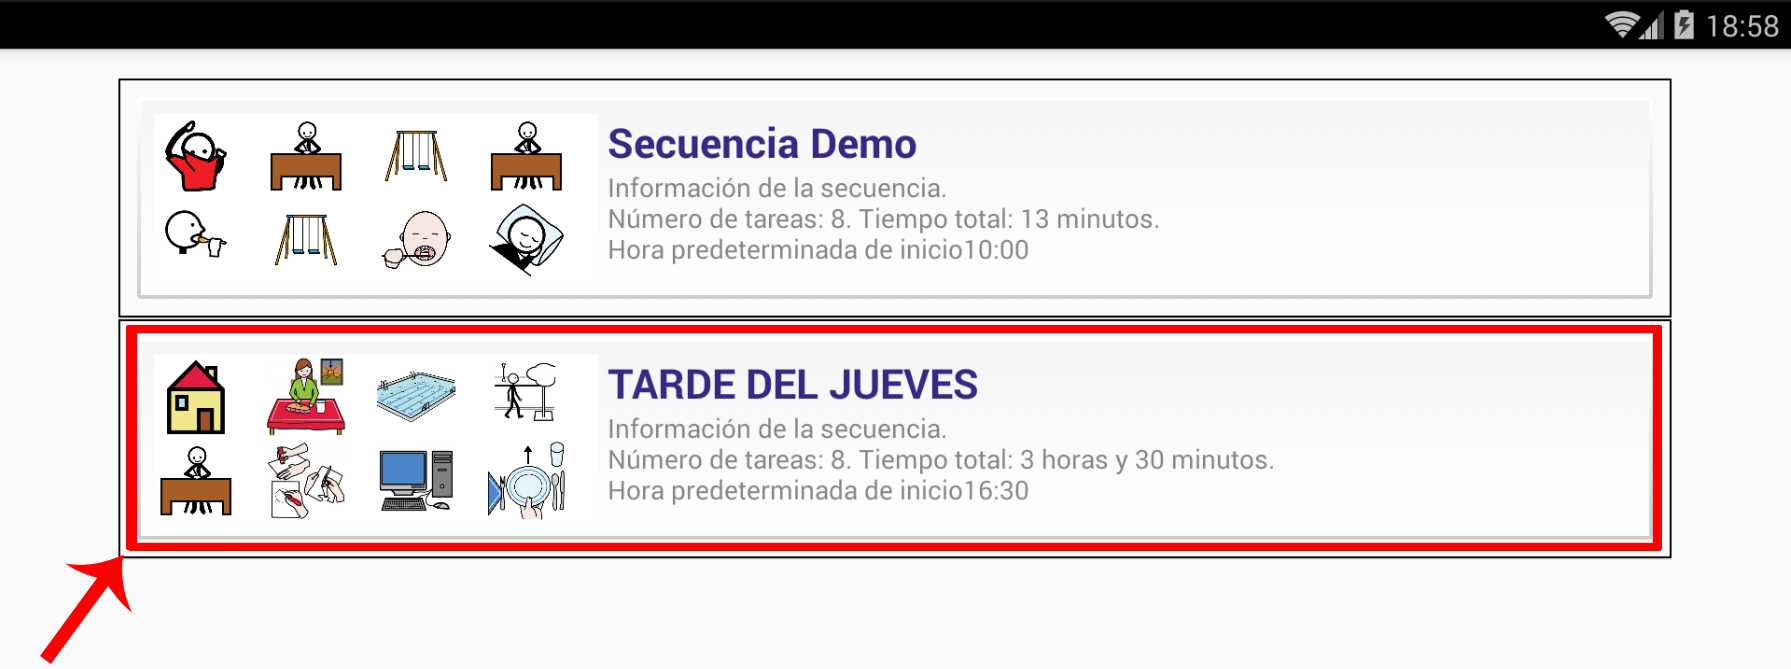
As we saw when creating the sequences in the previous chapter, we define a start time for it.
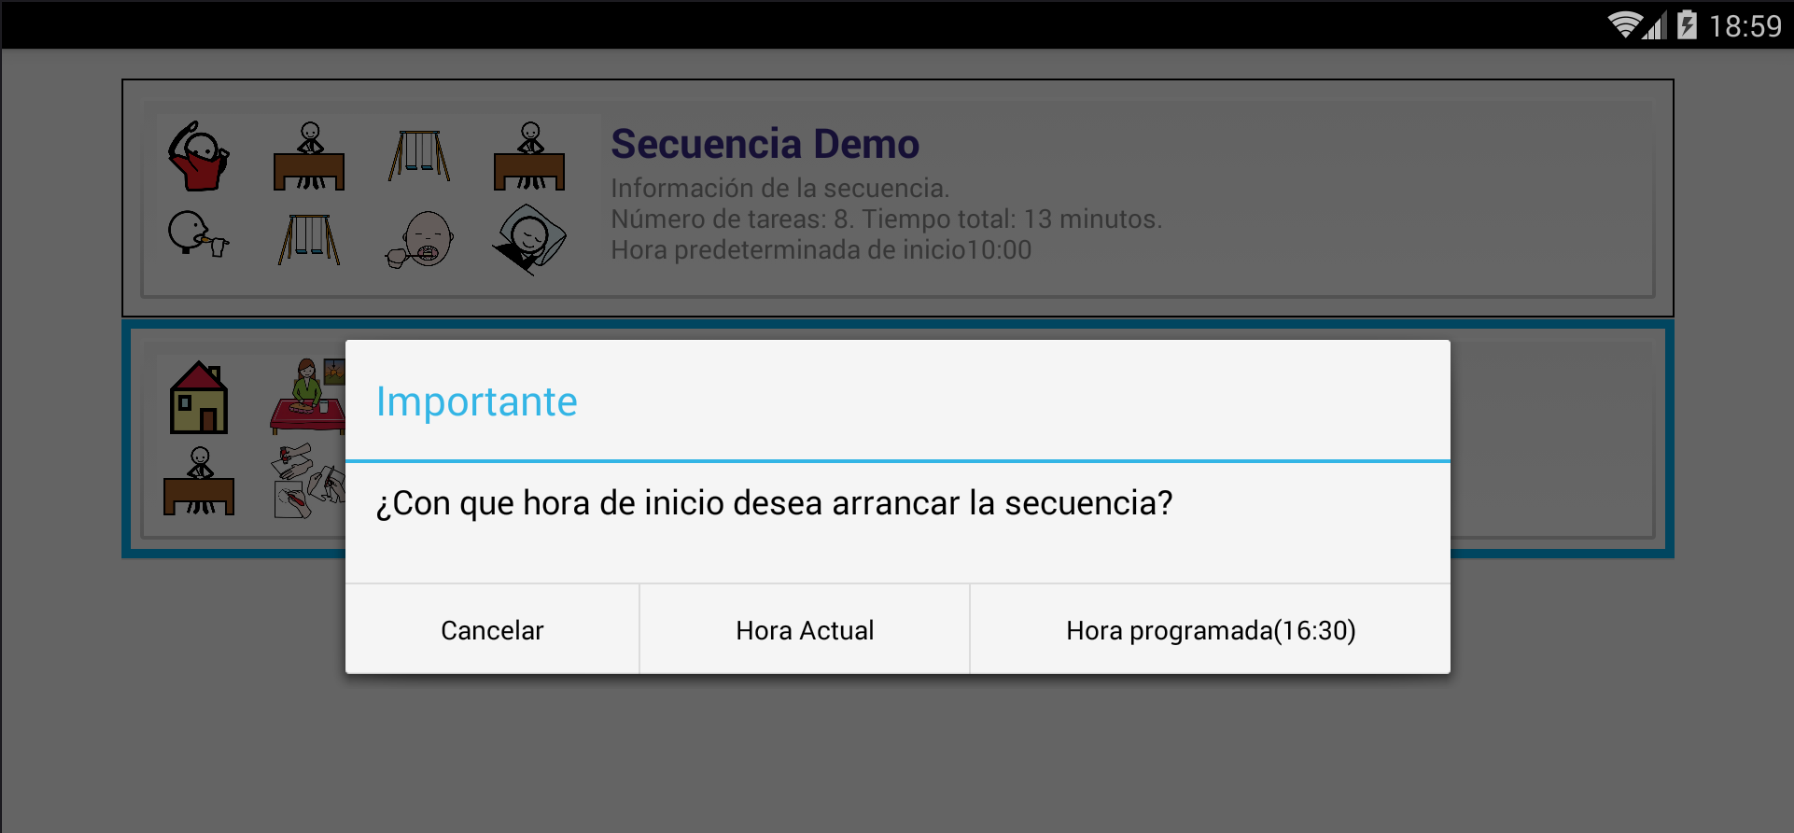
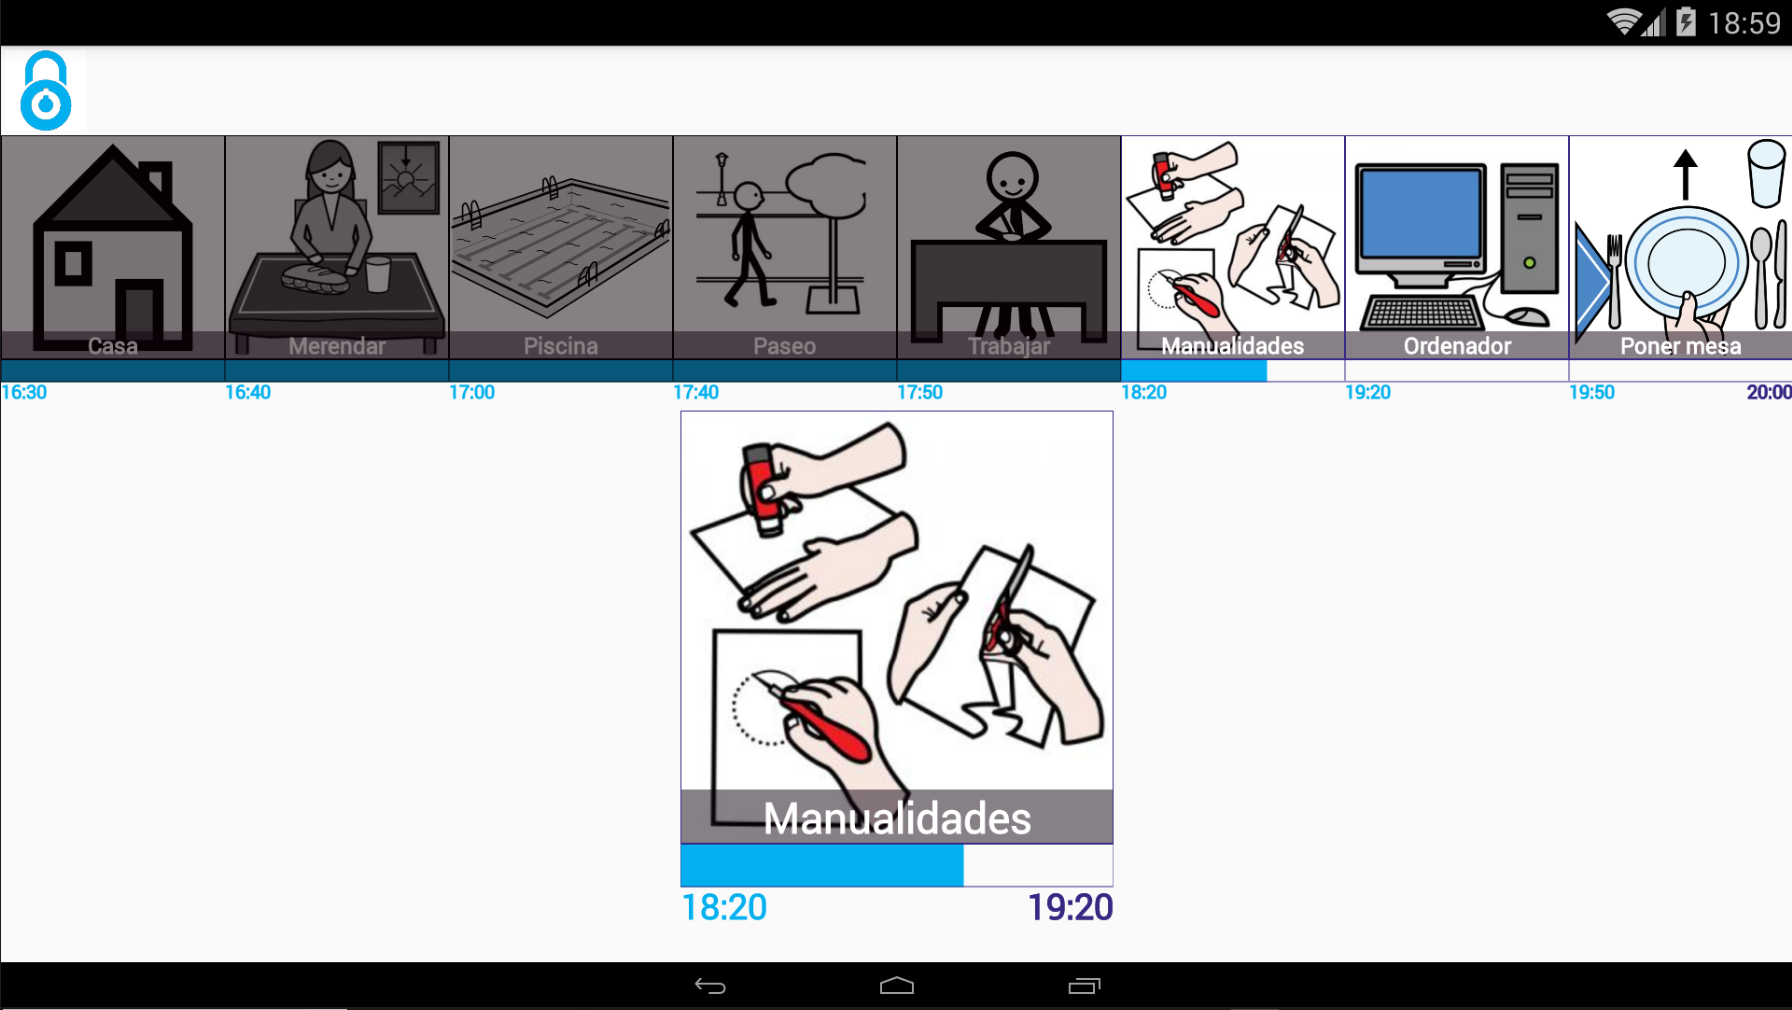
When launching the sequence,it will show us a pop-up window with two options: Launch the sequence with the Current Time or Launch the sequence with the Scheduled Time (in our case 16:30).
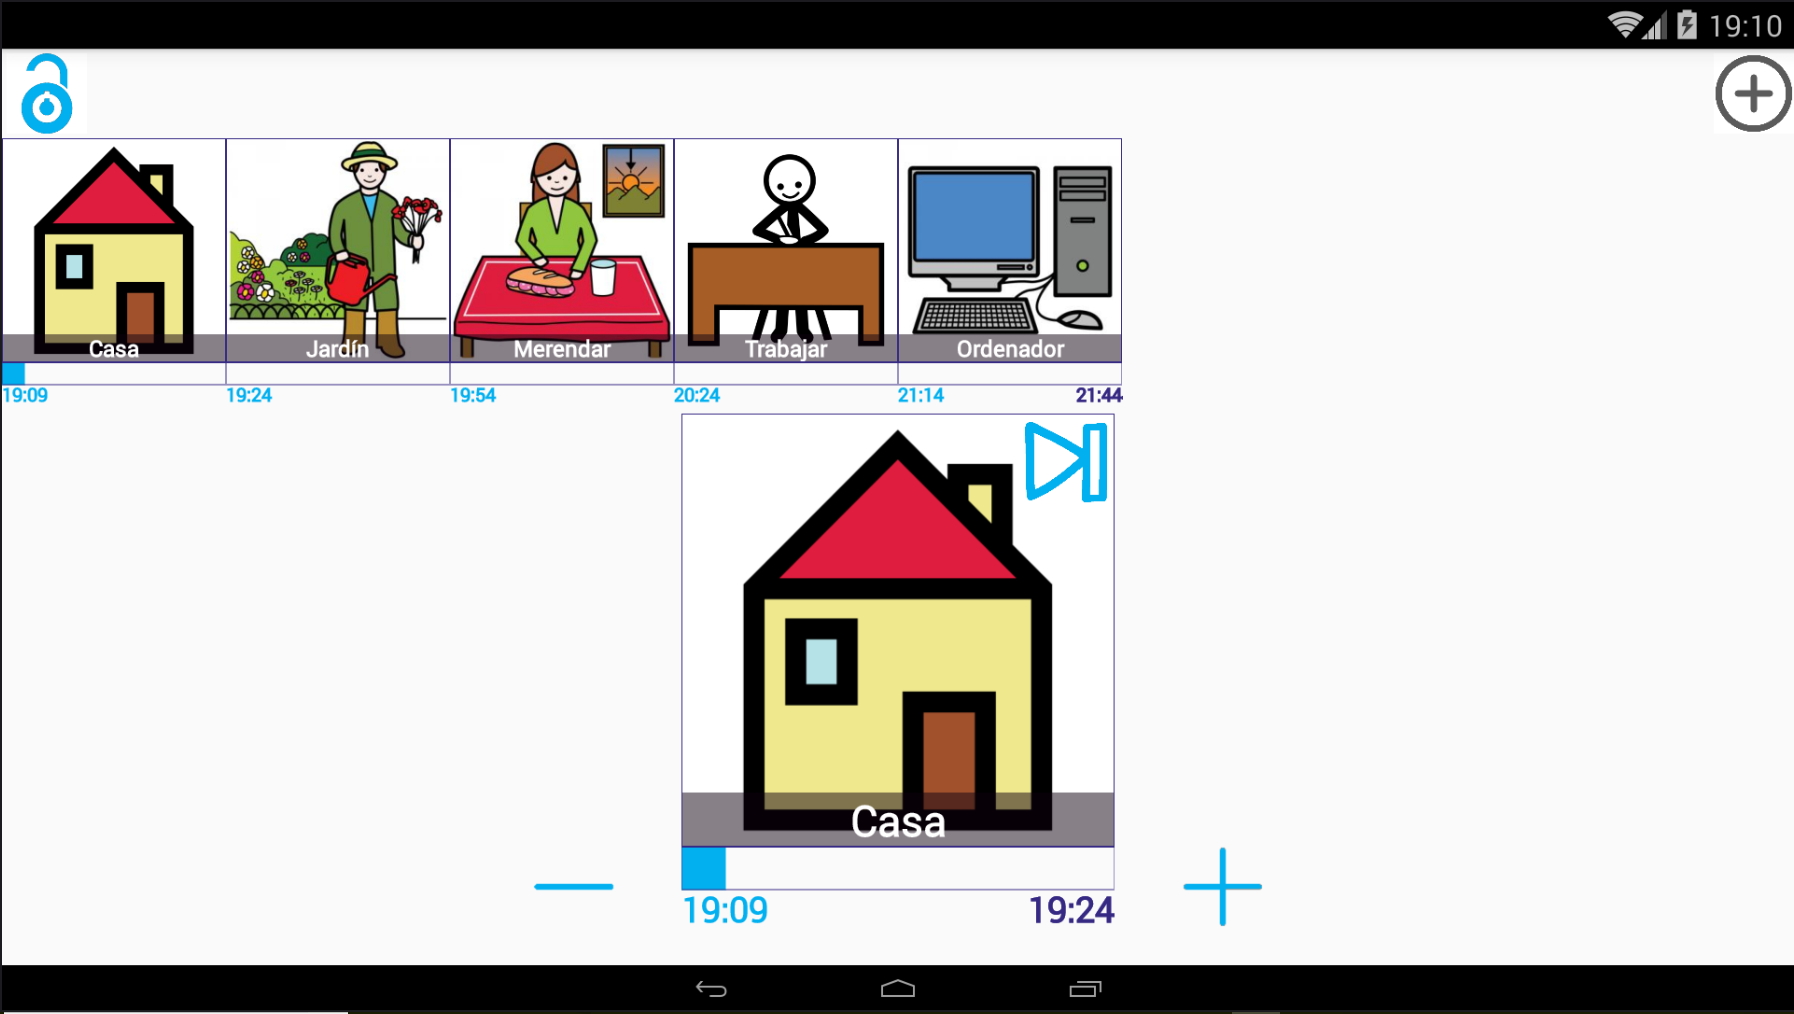
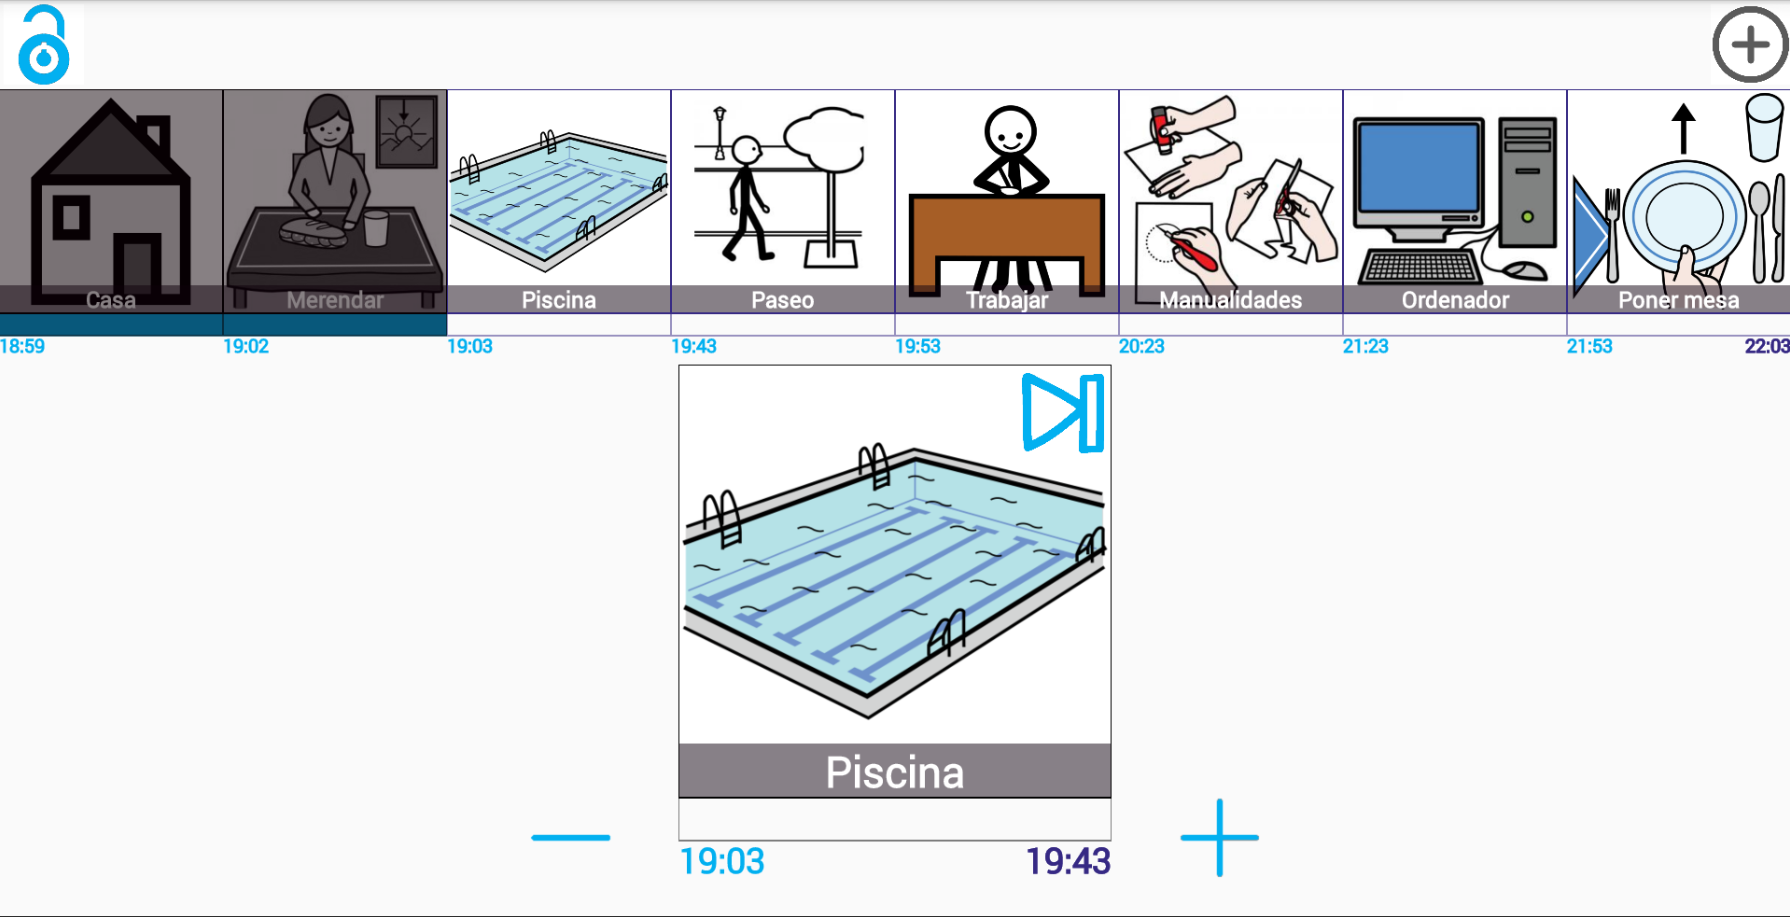
If we launch the sequence by choosing the Current Time option, we see how the sequence is set to the current time of the system 18:59. The time periods that we had established for each task are maintained and adapted to the new start time.
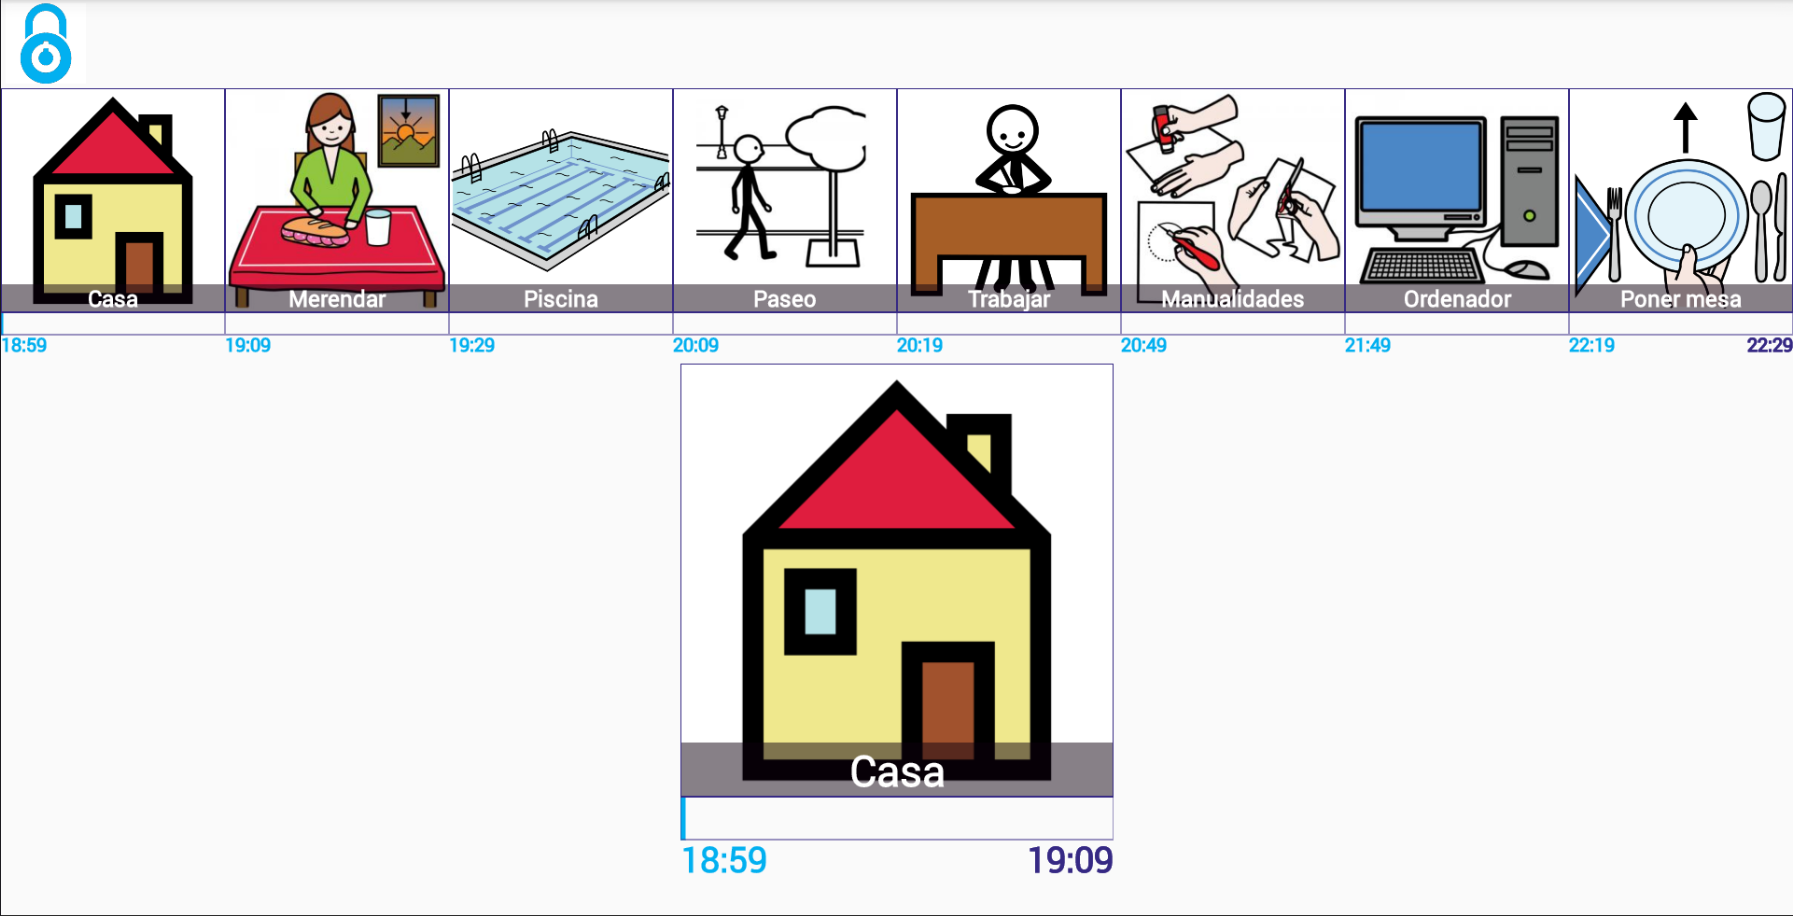
On the other hand, if we choose the Scheduled Time option, we see that the sequence dims all the tasks that have already passed and places us in the task whose time interval corresponds to the current time (18:59) and the progress bar adapts the time remaining to complete it.
Once a sequence is launched, a block is produced to prevent the user from exiting it, using the device’s Home button or physical buttons, such as the return button.
In the case of mobile devices that have a physical Home button, by clicking on this button, we return to the Android home page and GESTIAC will be minimized in the background while it continues to run. If we return to the program, we see how the sequence continues to work.
In order to unlock the sequence, click on the Padlock icon, located in the upper left corner. By default, this padlock is unprotected. In the next chapter, we will see how to set a PIN that prevents the user from being able to unlock the sequence.
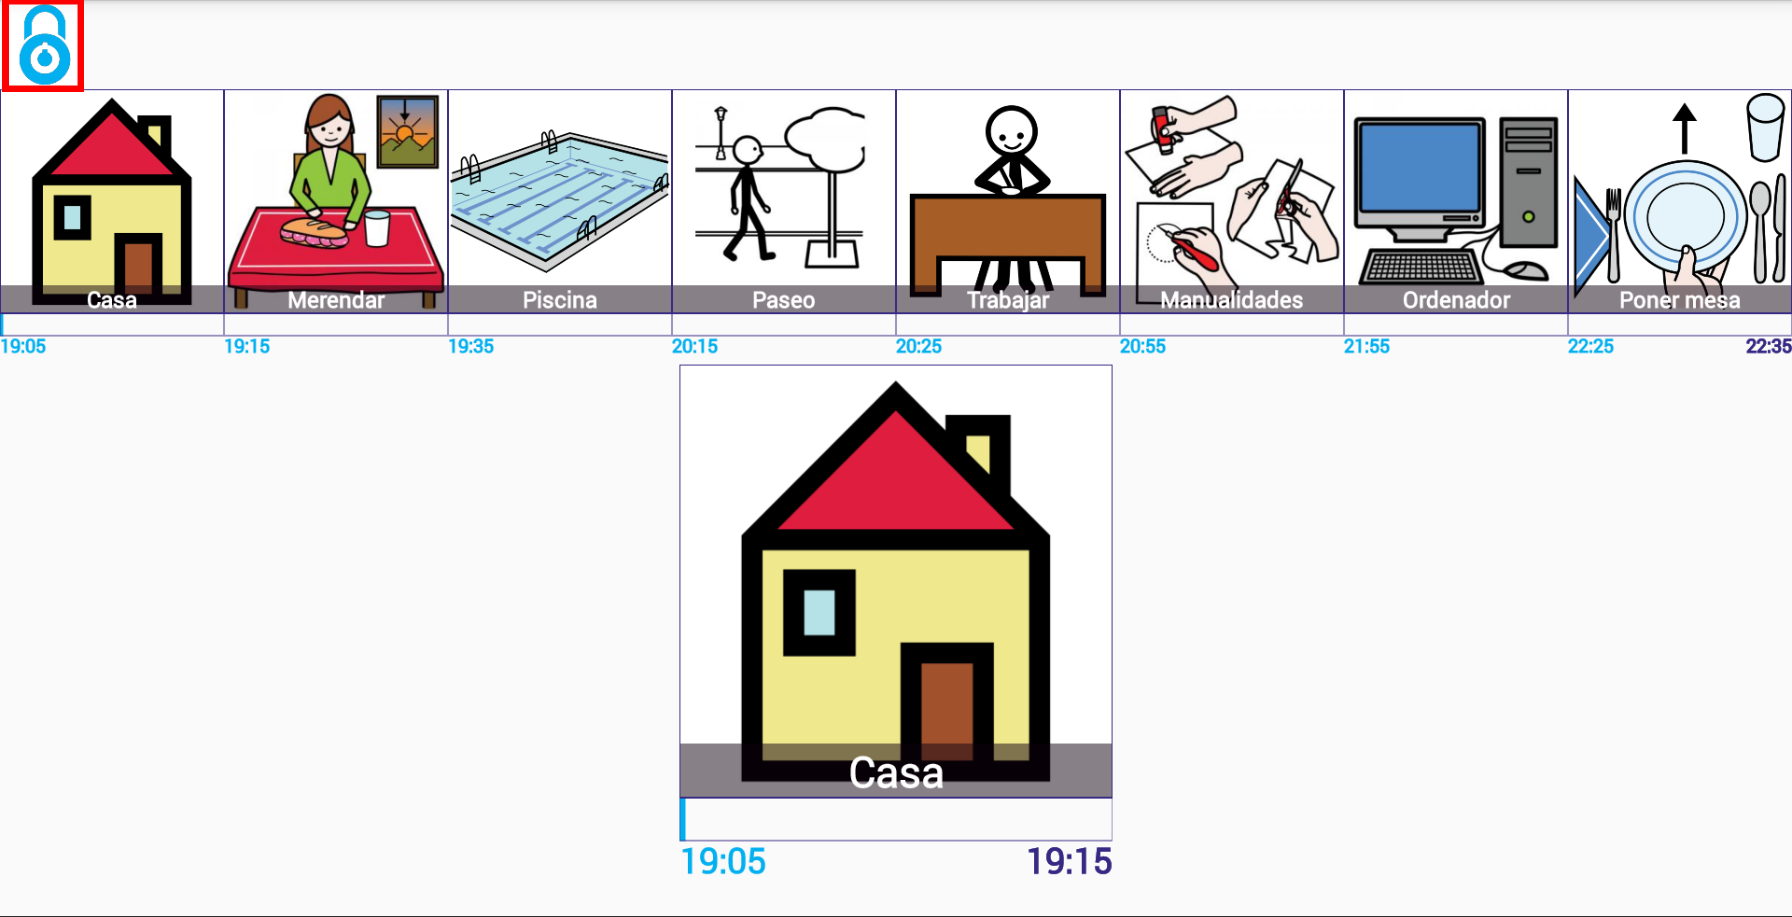
Once the padlock is unlocked, the application offers us different alternatives.
The first is the already mentioned one of being able to exit the sequence with the home or return buttons.
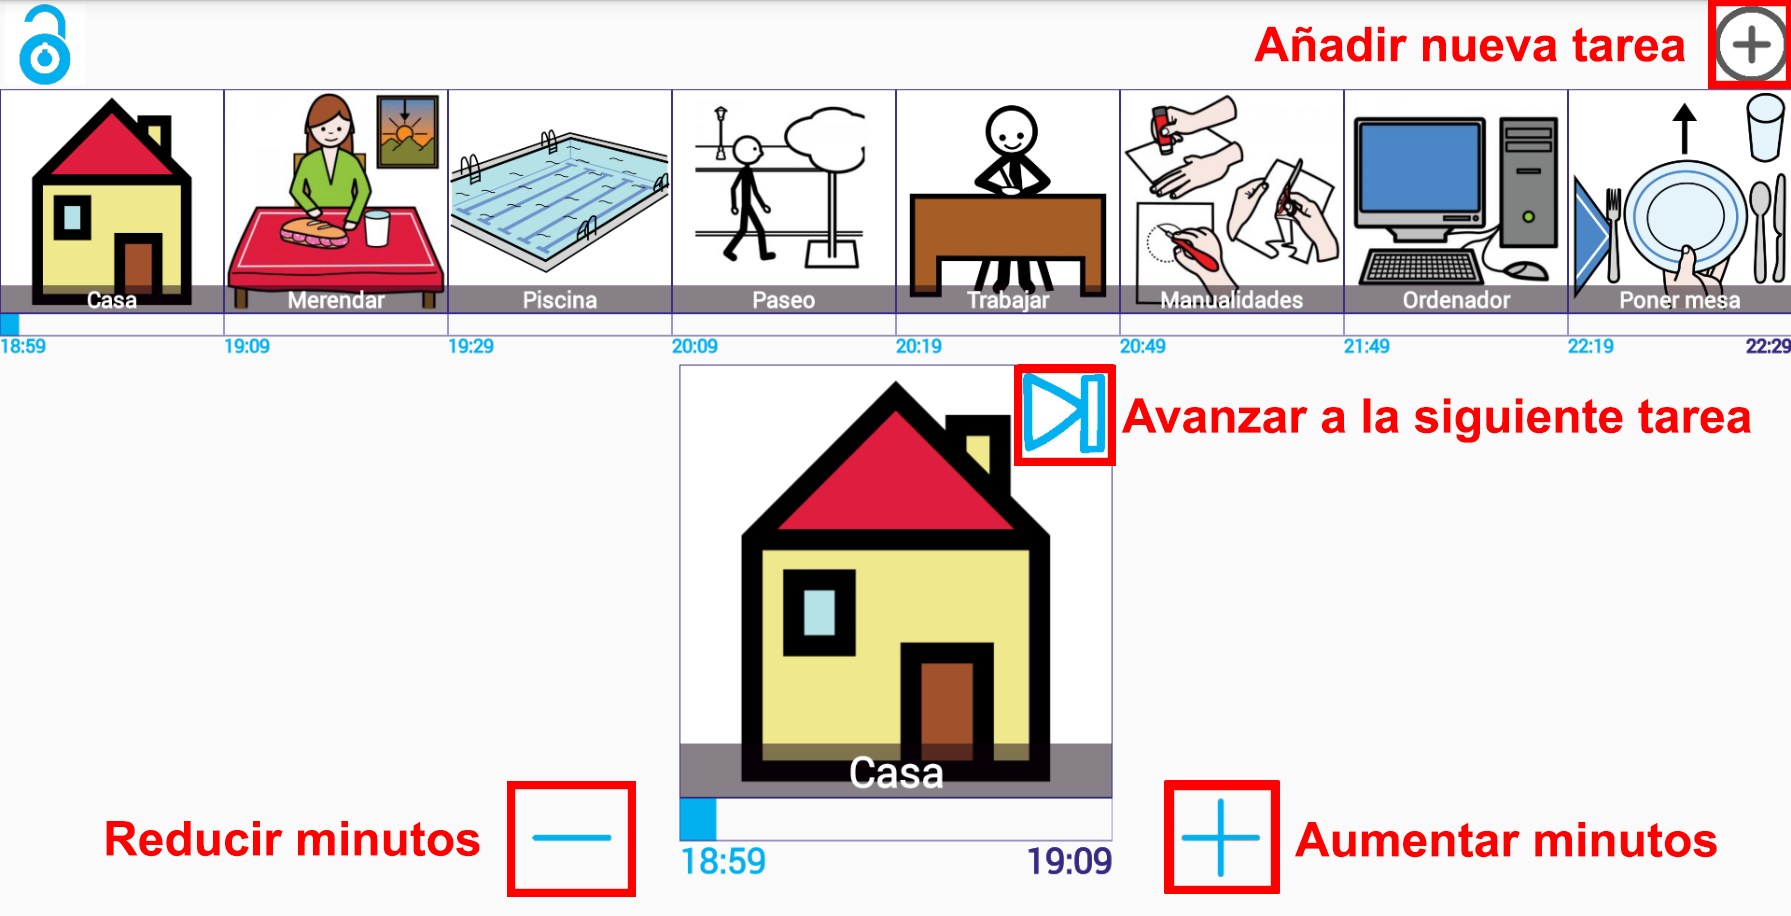
The other options would be:
- Increase or decrease the minutes of the current task.
- Advance to thenext task.
- Add a new task.
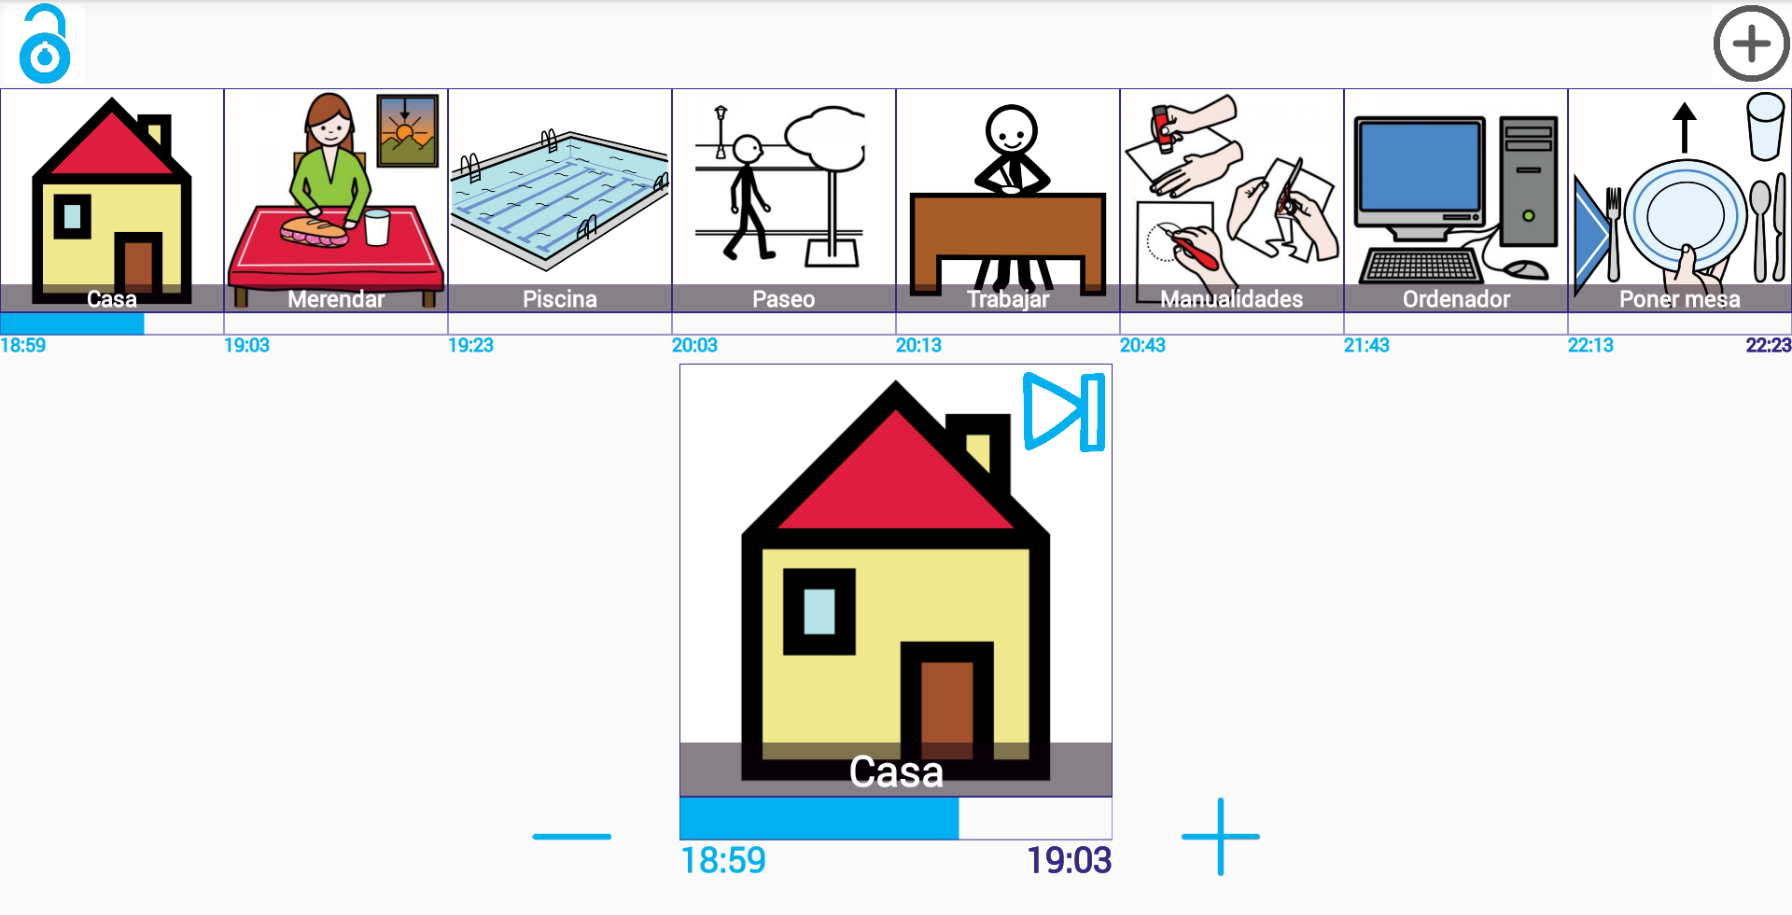
If we click on the – button, we see how the task that initially finished at 19:09 now ends at 19:03. All other tasks also automatically adjust their start and end times to fit the new duration of the current task.
The time periods set for the rest of the tasks are not affected (only the start or end time).
If we click on the Advance to the next task button, we see how the previous task fades and the system automatically adapts the start and end time of all the tasks to adapt to the current time (the snack task is advanced 1 minute on the scheduled time and the rest of the tasks too).

If we press the Advance button again to the next task, we see how the hours adapt again.
Finally, we have the option to add Tasks on the fly. This option allows that, on a predetermined sequence, we can add new tasks not initially foreseen.
These tasks added to the flight have a temporary nature, so they will not modify the original sequence when exiting it.
If we want to use this option, the sequence will have to have a maximum of 7 tasks, since we have previously commented that sequences do not support more than 8 tasks.
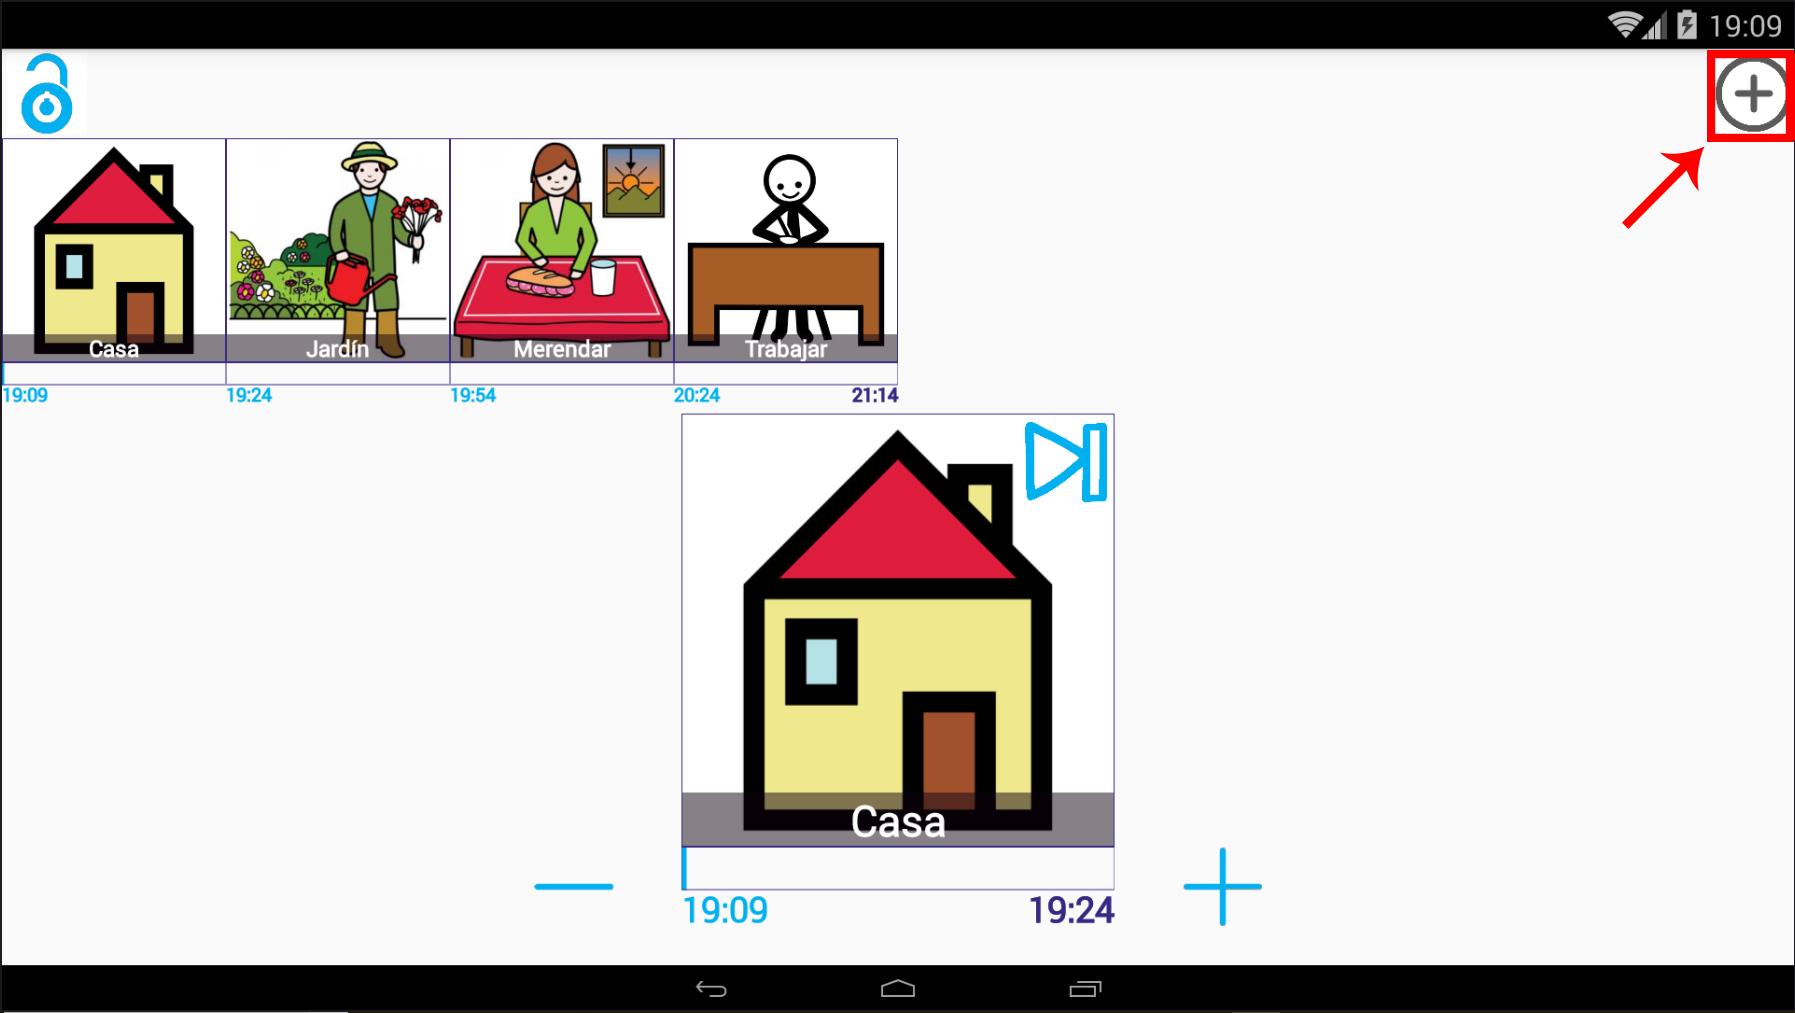
When clicking on the Add new task button, the list of tasks that we have created is displayed and, as we saw in the previous chapter, we select the desired task on the fly and establish its duration in minutes or hours.

Once the new task has been configured, simply click on the Floppy to incorporate the new task into our sequence.