


 Este obra está bajo una licencia de Creative Commons Reconocimiento-NoComercial-CompartirIgual 4.0 Internacional.
If, in addition to the ARASAAC pictograms and images, we want to use our own images in the different online tools of the portal (except in the Phrase Creator), we must resort to the “Work folder” or the “Upload files to my work folder” button. available in the different tools.
We can break down the operation of the tool into different steps depending on whether we access from the “Online tools” page or from each of the tools.
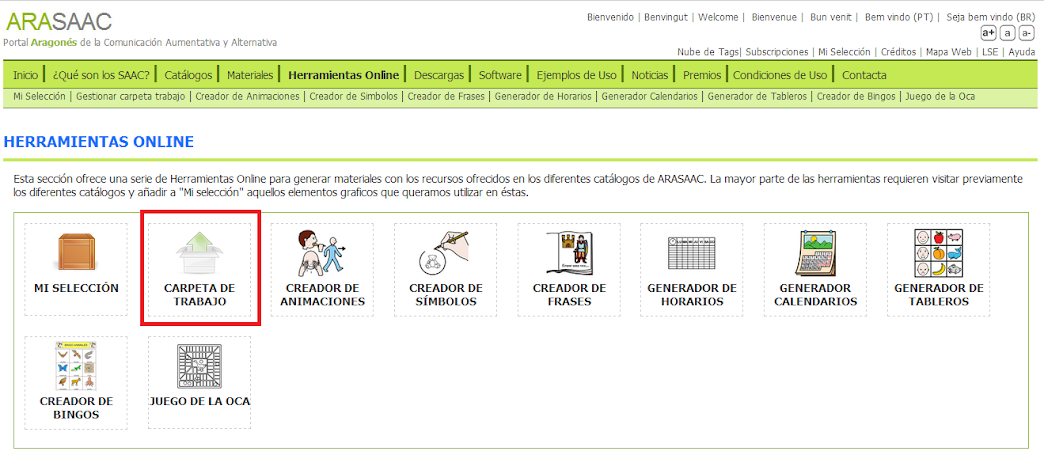
ACCESS FROM ONLINE TOOLS
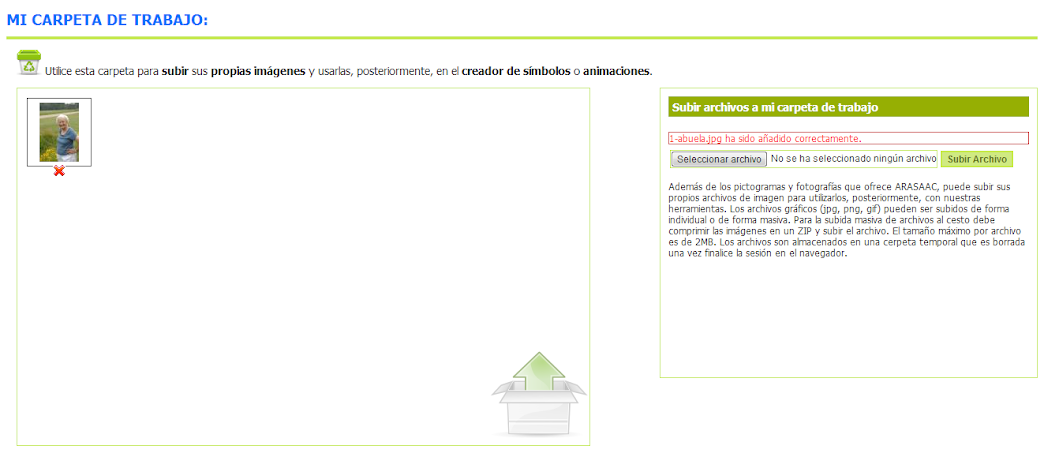
STEP 1: From the “Online tools” page of the portal, click on theWork folder option.
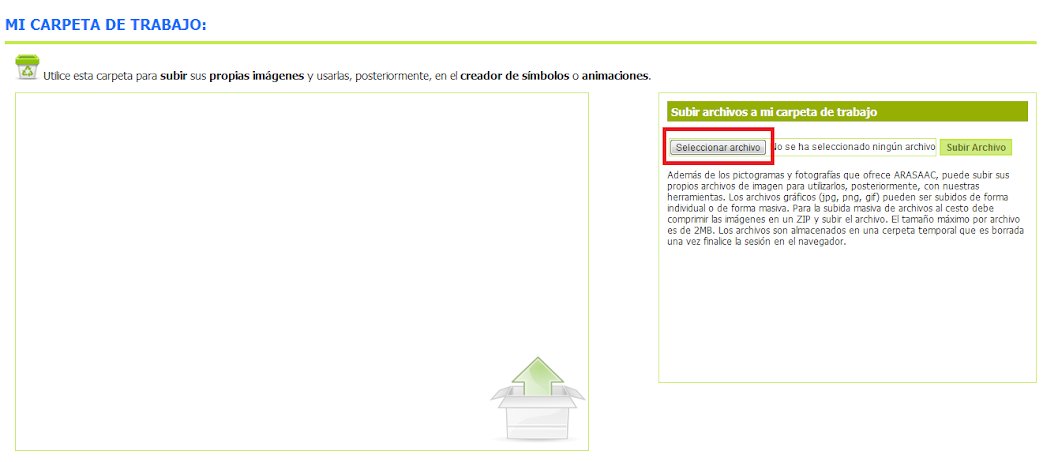
STEP 2: Once inside, click on “Select file”.
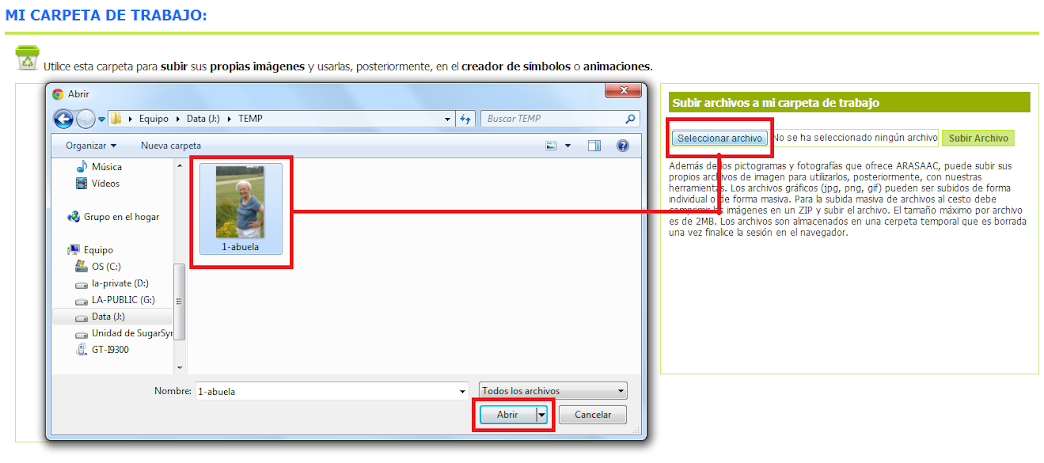
STEP 3: In the pop-up window that opens, we select the image to import from our hard drive and click Open.
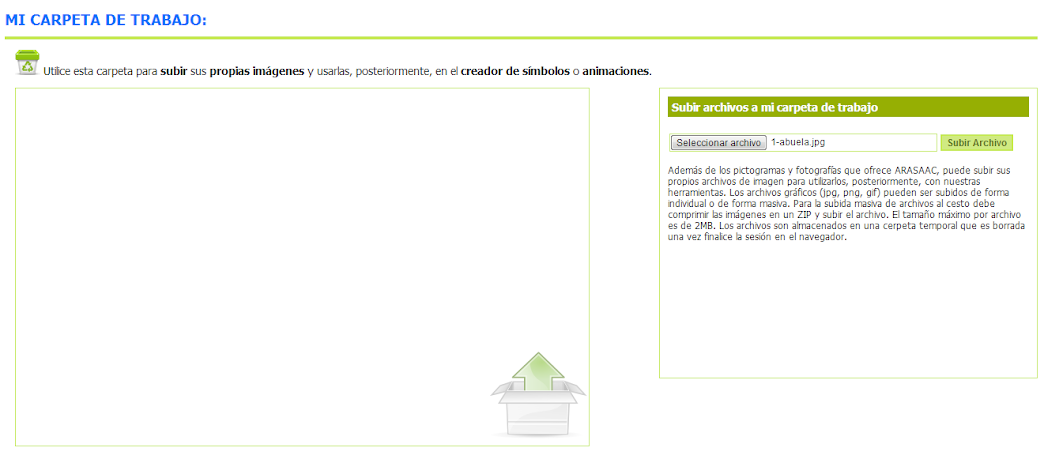
STEP 4: Back to the initial screen, click on “Upload file”.
STEP 5: Finally our image is imported and ready to be used in any of ARASAAC’s online tools (except for the Phrase creator).
ACCESS FROM EACH OF THE TOOLS
Once we have clicked, a new window will appear in which we must select the image file to upload.
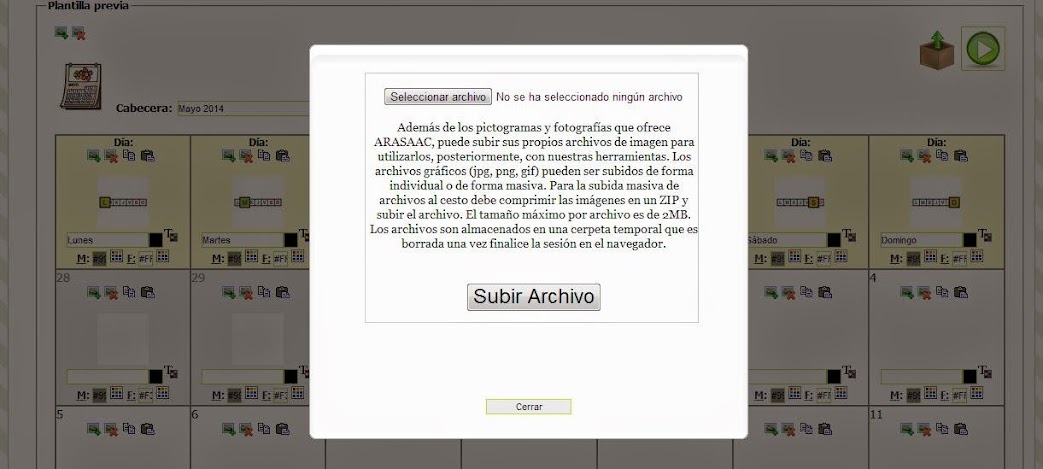
It is important to read the instructions given to us:
“In addition to the pictograms and photographs that ARASAAC offers, you can upload your own image files to be used later with our tools. Graphic files (jpg, png, gif) can be uploaded individually or inbulk. To mass upload files to the basket, you must compress the images in a ZIP and upload the file. The maximum size per file is 2MB. The files are stored in a temporary folder that is deleted once the browser session ends.”
Once read, click on “Select file.”
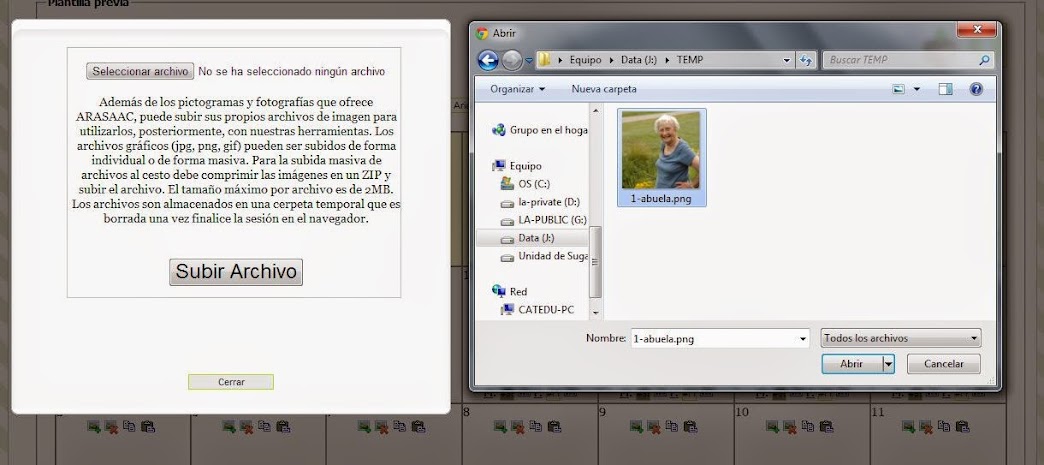
Once the hard disk image has been chosen, click on “Open“. Once back in the previous window, we click on “Upload file“. Once the file is uploaded, we will receive an information message saying if the process has been correct or if a problem has arisen.

Once the import is complete, the image becomes available for use in the tool that is being used.


