


Comunicador dinámico Asterics AAC
16 – Global Grid and Cumulative Phrase
WHAT IS THE GLOBAL GRID?
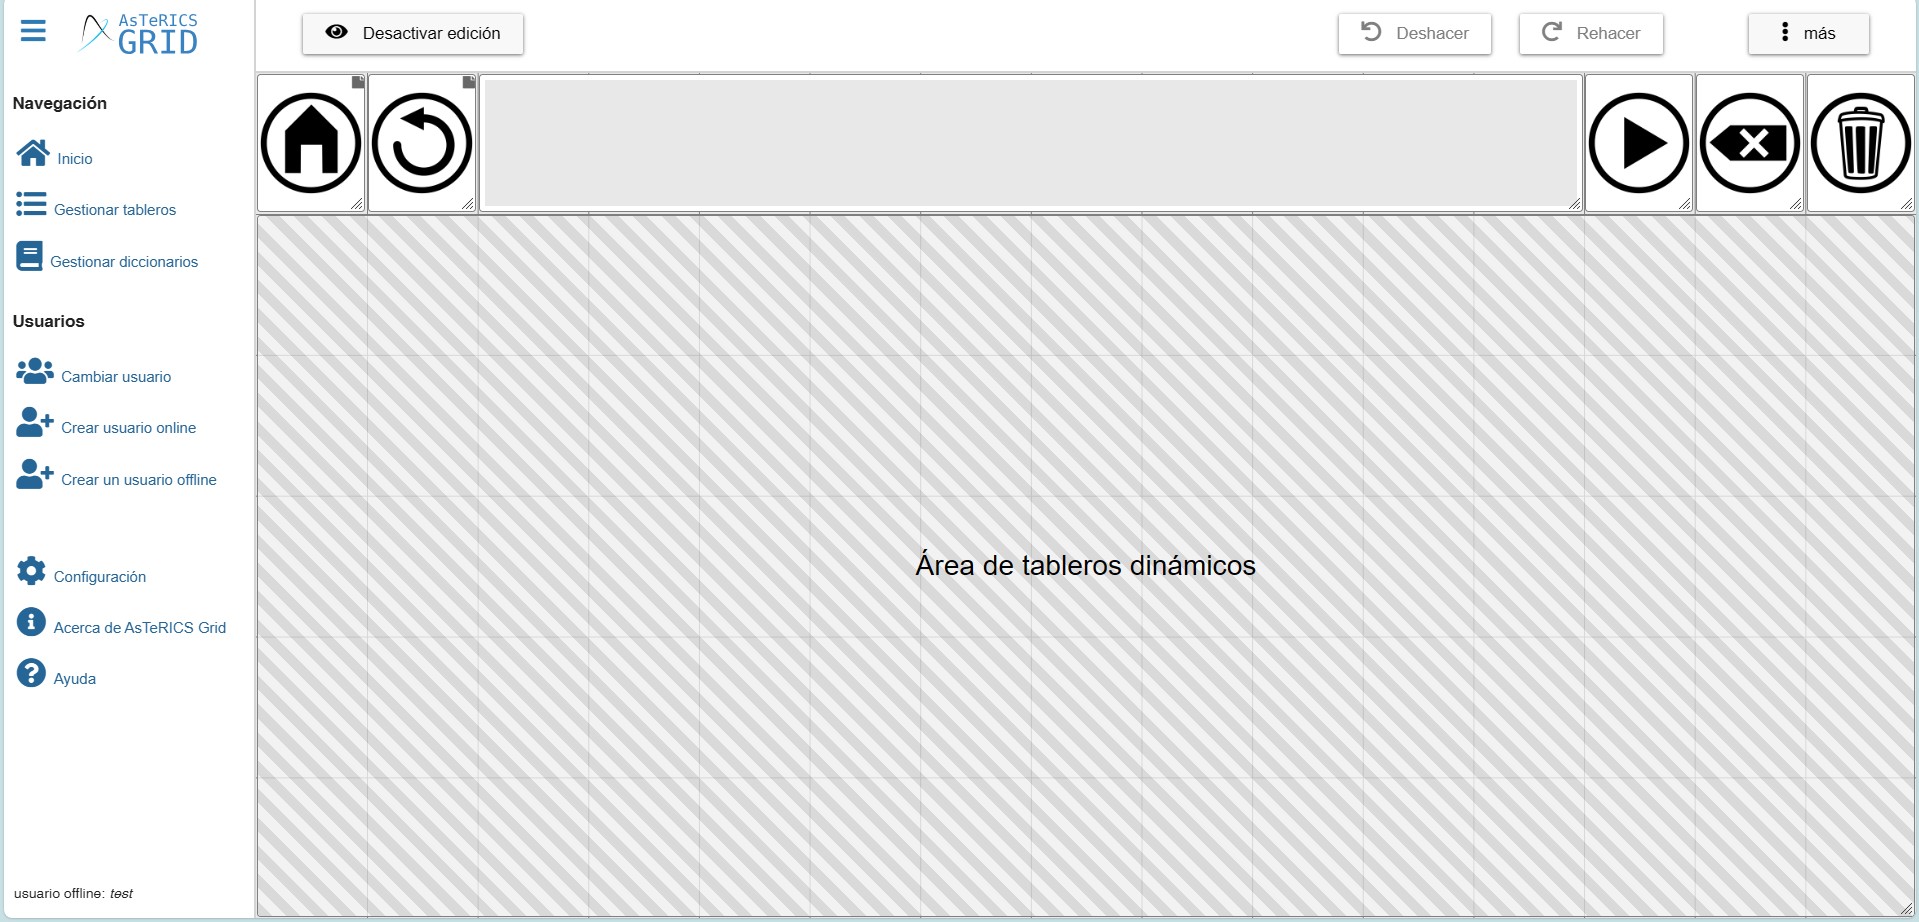
The Global Grid is a static board visible on all communication boards. In other words, unlike the other dynamic boards in the communicator that change as you navigate, the content of the Global Board always remains static in the same unchanging position.
The global grid can contain any type of cell: accumulated phrases, action buttons (e.g., start, read phrase, delete, change language, etc.), real-time information cells, and, of course, basic or core vocabulary that we want to be visible at any time. All elements placed on this global board, regardless of their position, will appear on all communication boards located in the same place, as we will see when editing and configuring it.
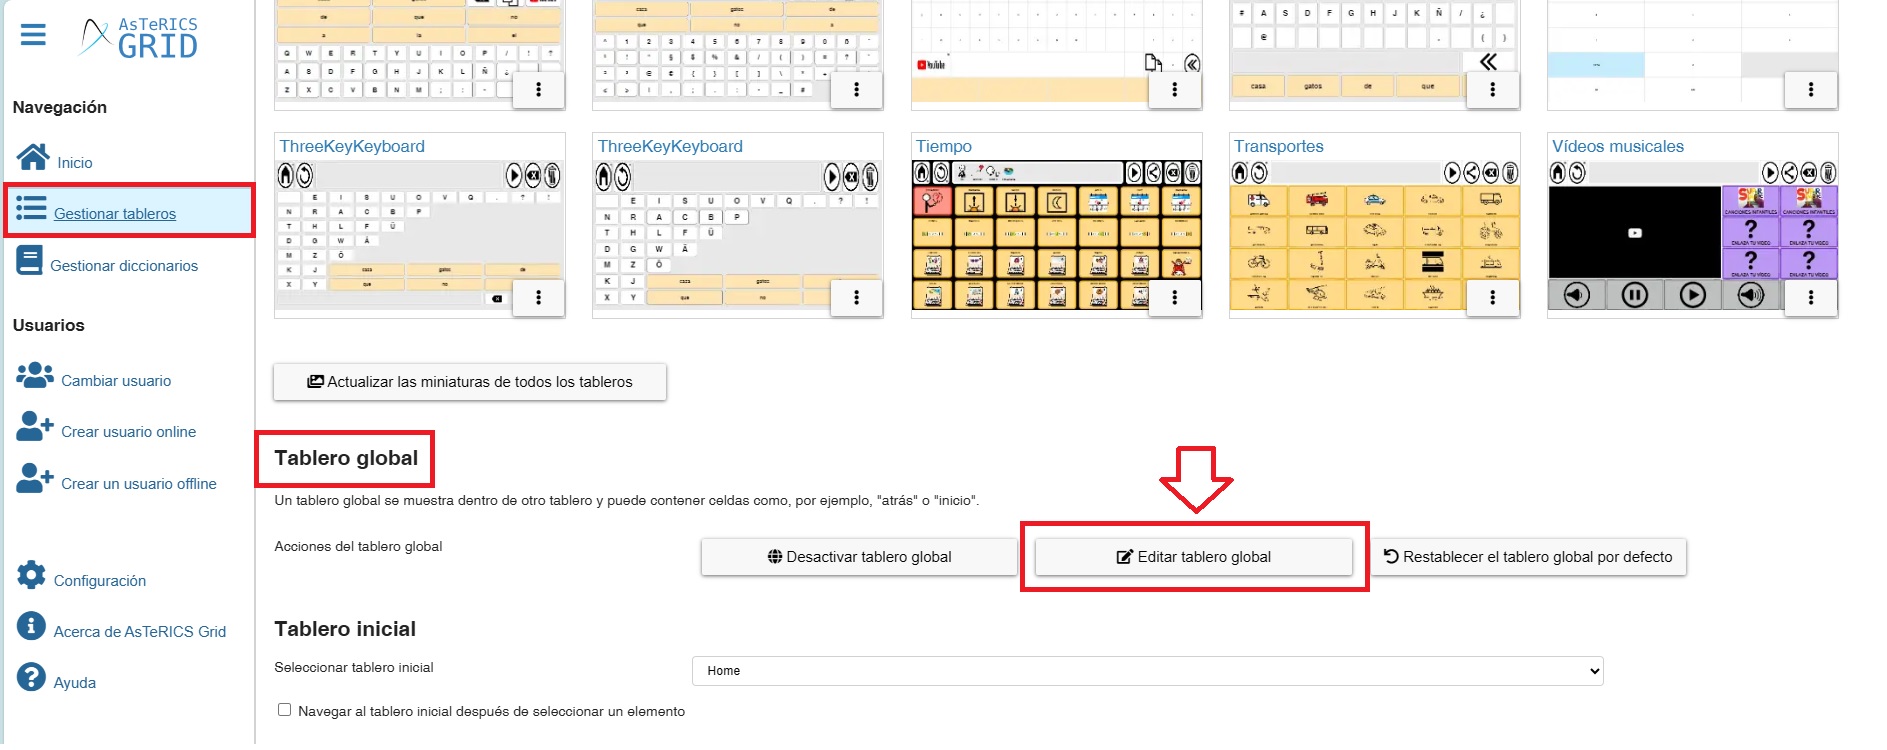
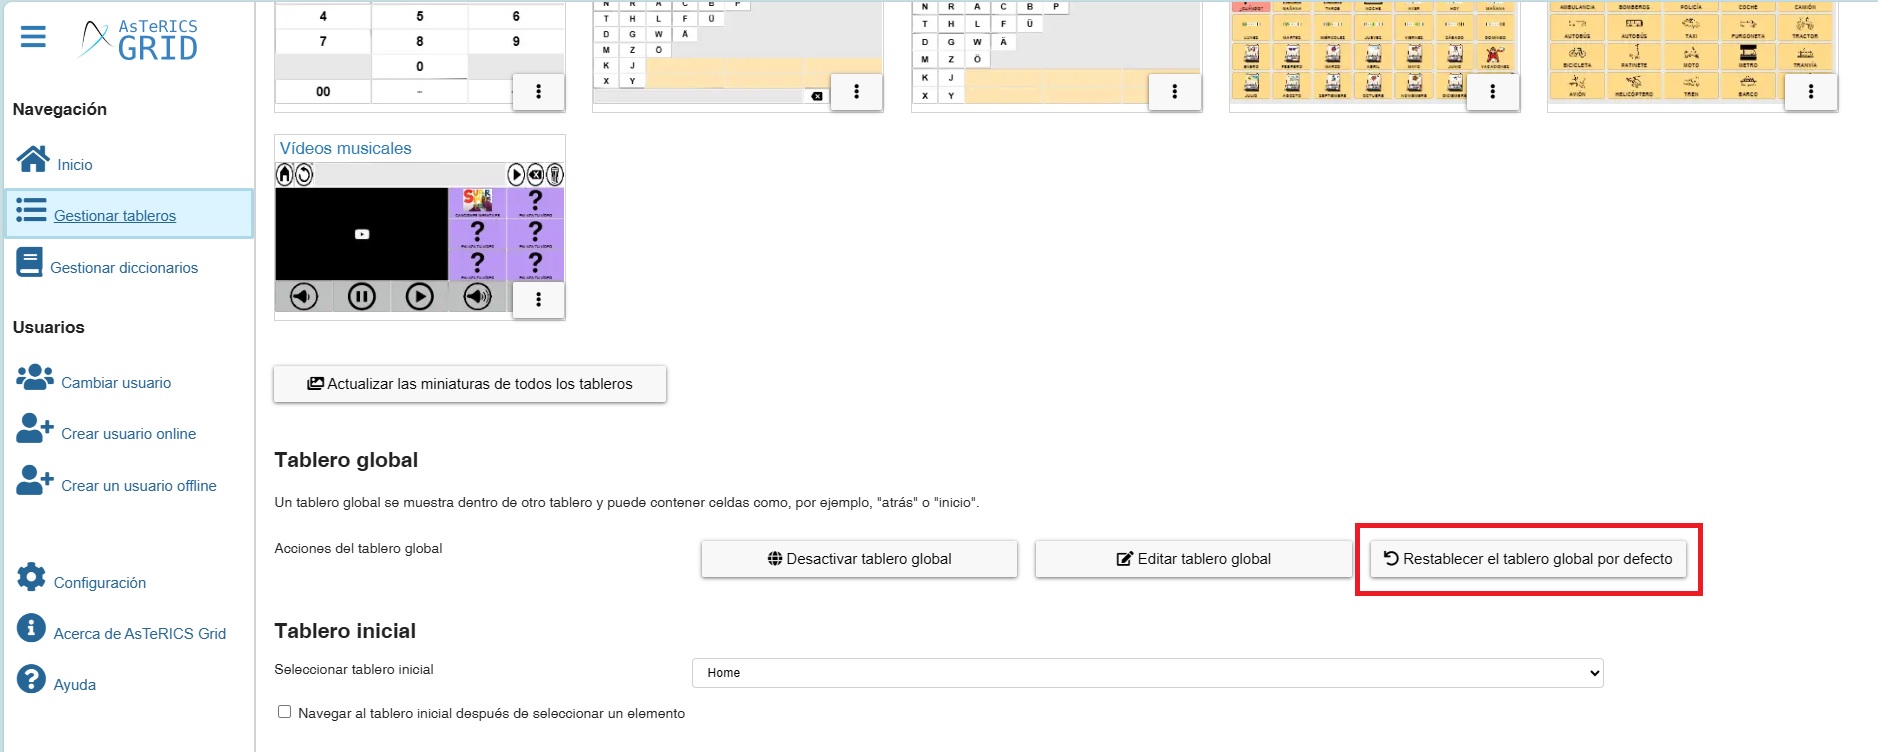
Before we continue, we should know that the Global Grid can be Activated / Deactivated from the Manage Grids section. We can also Reset the global grid when we have made changes to it and want to return it to its original state (with the phrase strip and the buttons for home, back, read phrase, delete, and the dynamic boards area) and Edit it.
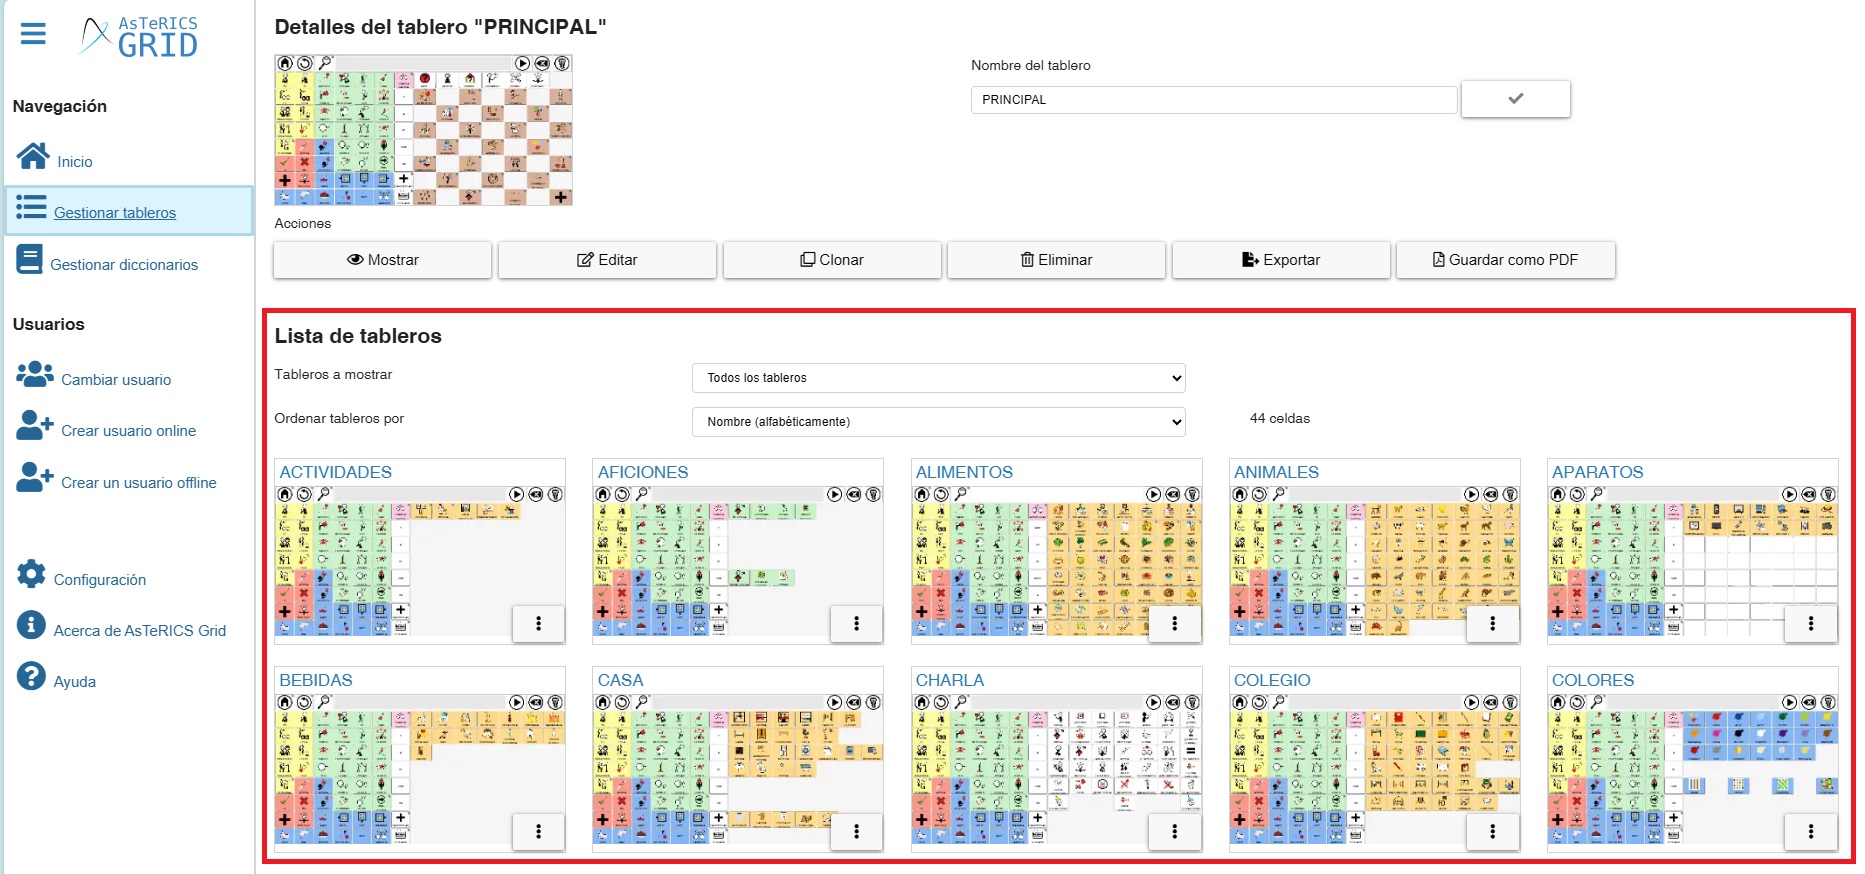
At the bottom of Manage grids, you will find a section called Global grid with all these options.
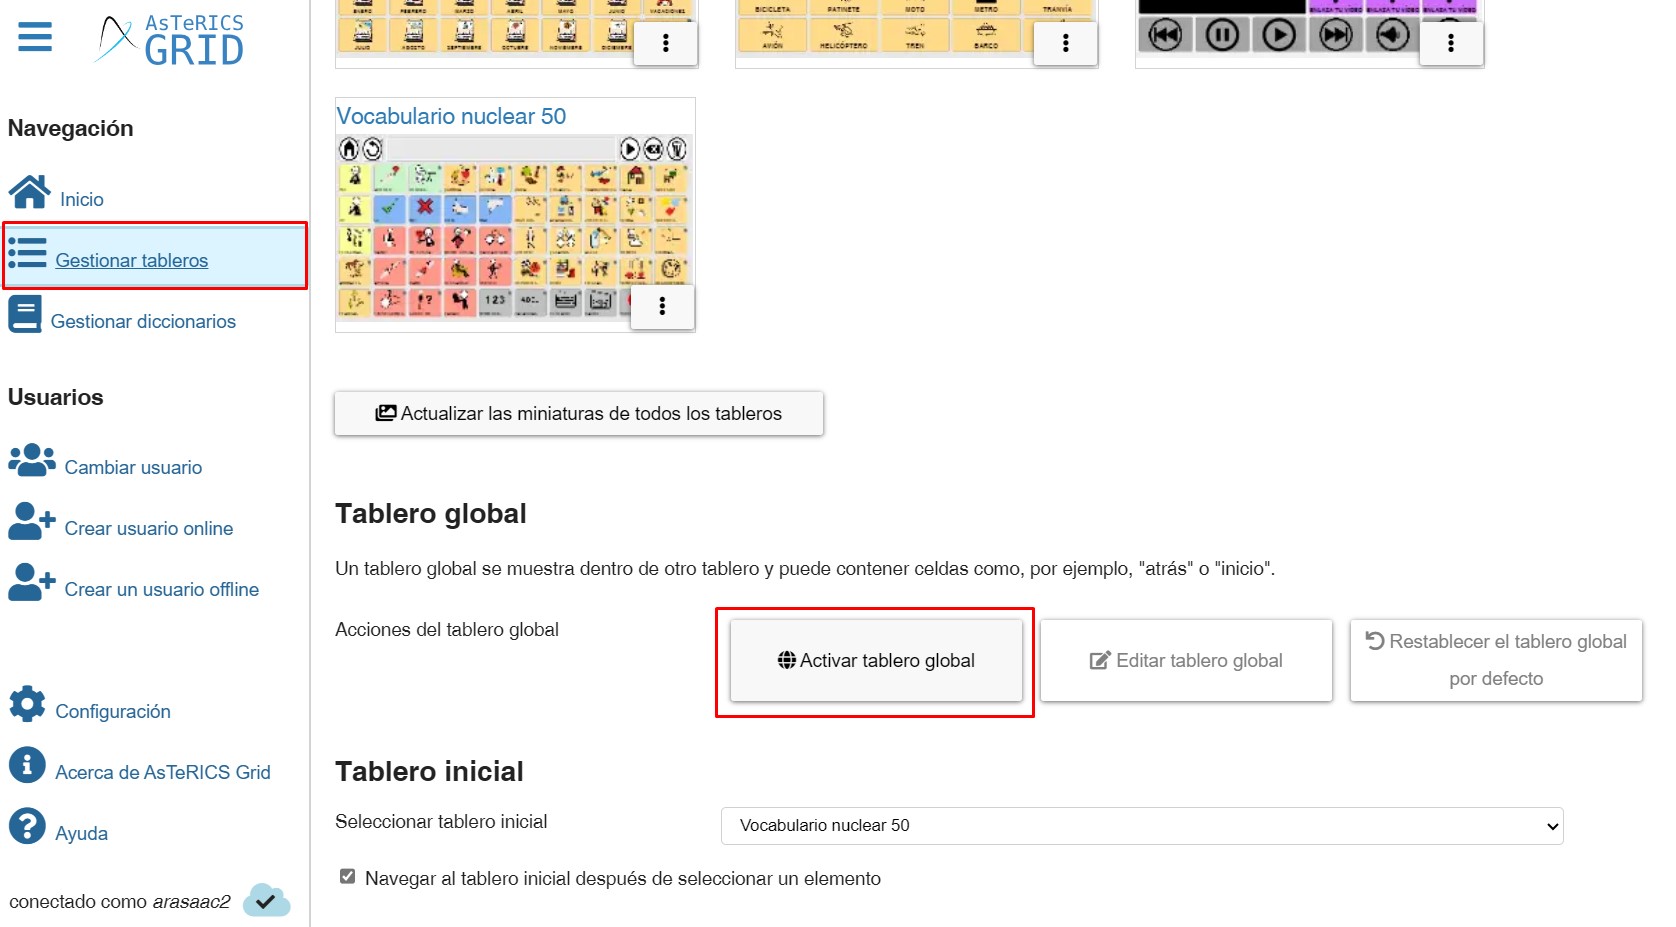
(TRICK) Sometimes our global dashboard becomes deactivated for no apparent reason, causing us to stop seeing the accumulated phrases and buttons like Home, Back, Delete, etc. In these cases, simply go to this section in Manage Dashboards and click on the Activate Global grid button, as shown in the screenshot above.
In this chapter, we will show you how to add and manage the Dynamic Boards area and the possibilities it offers for creating different designs and templates of communicators and, on the other hand, how to add the accumulated phrase and the action buttons for this phrase.
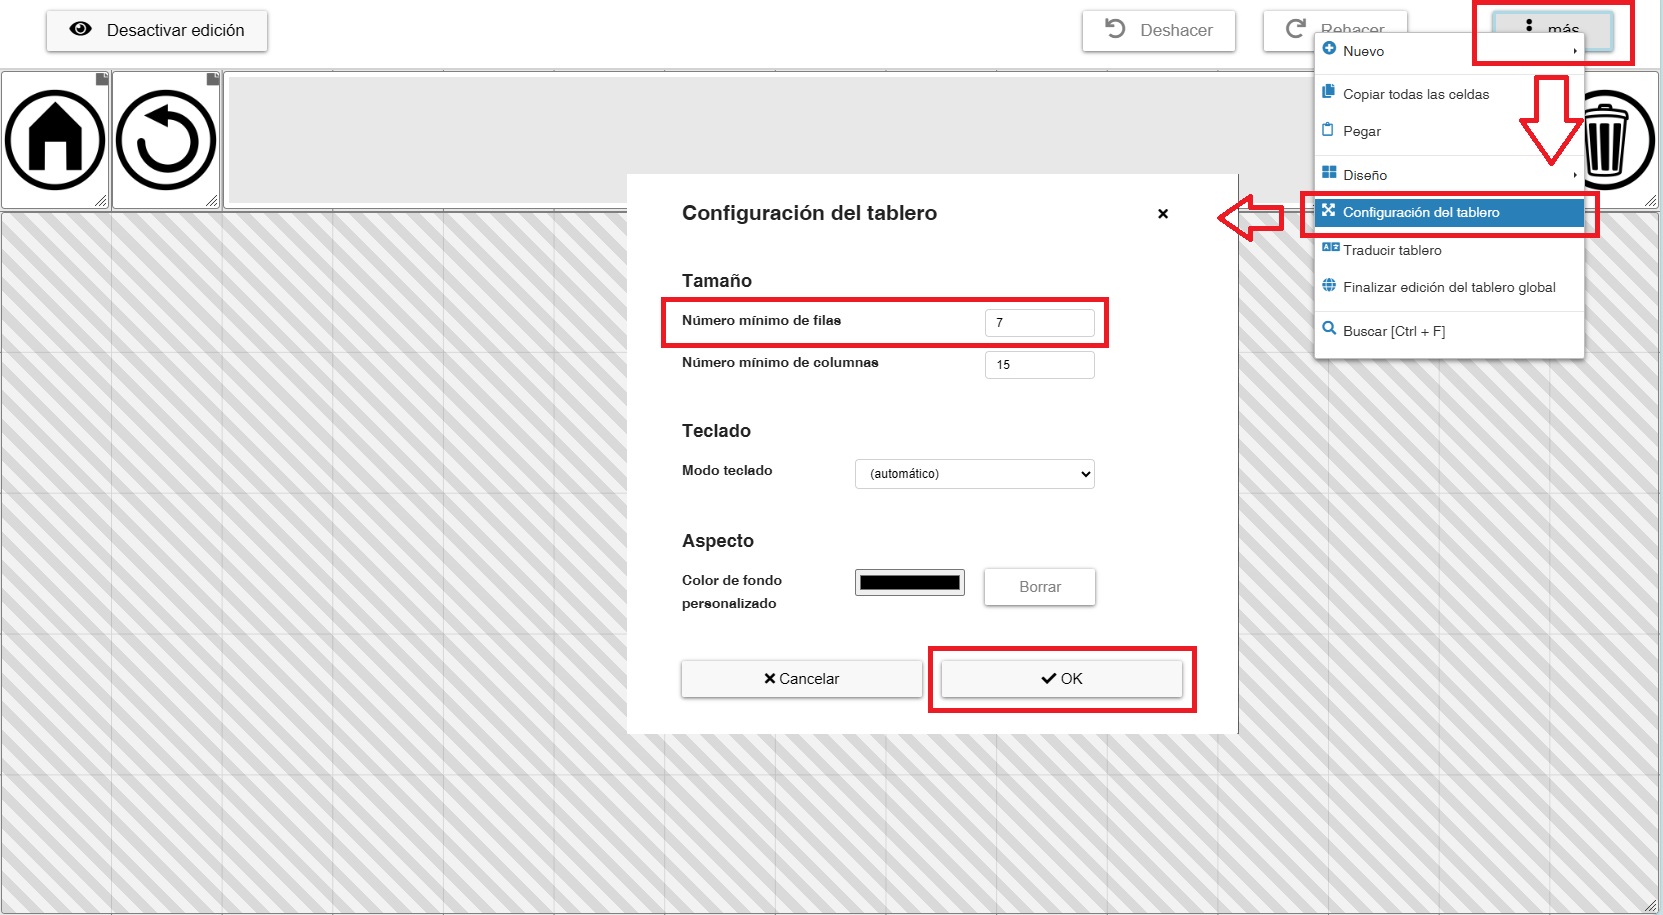
EDIT GLOBAL GRID
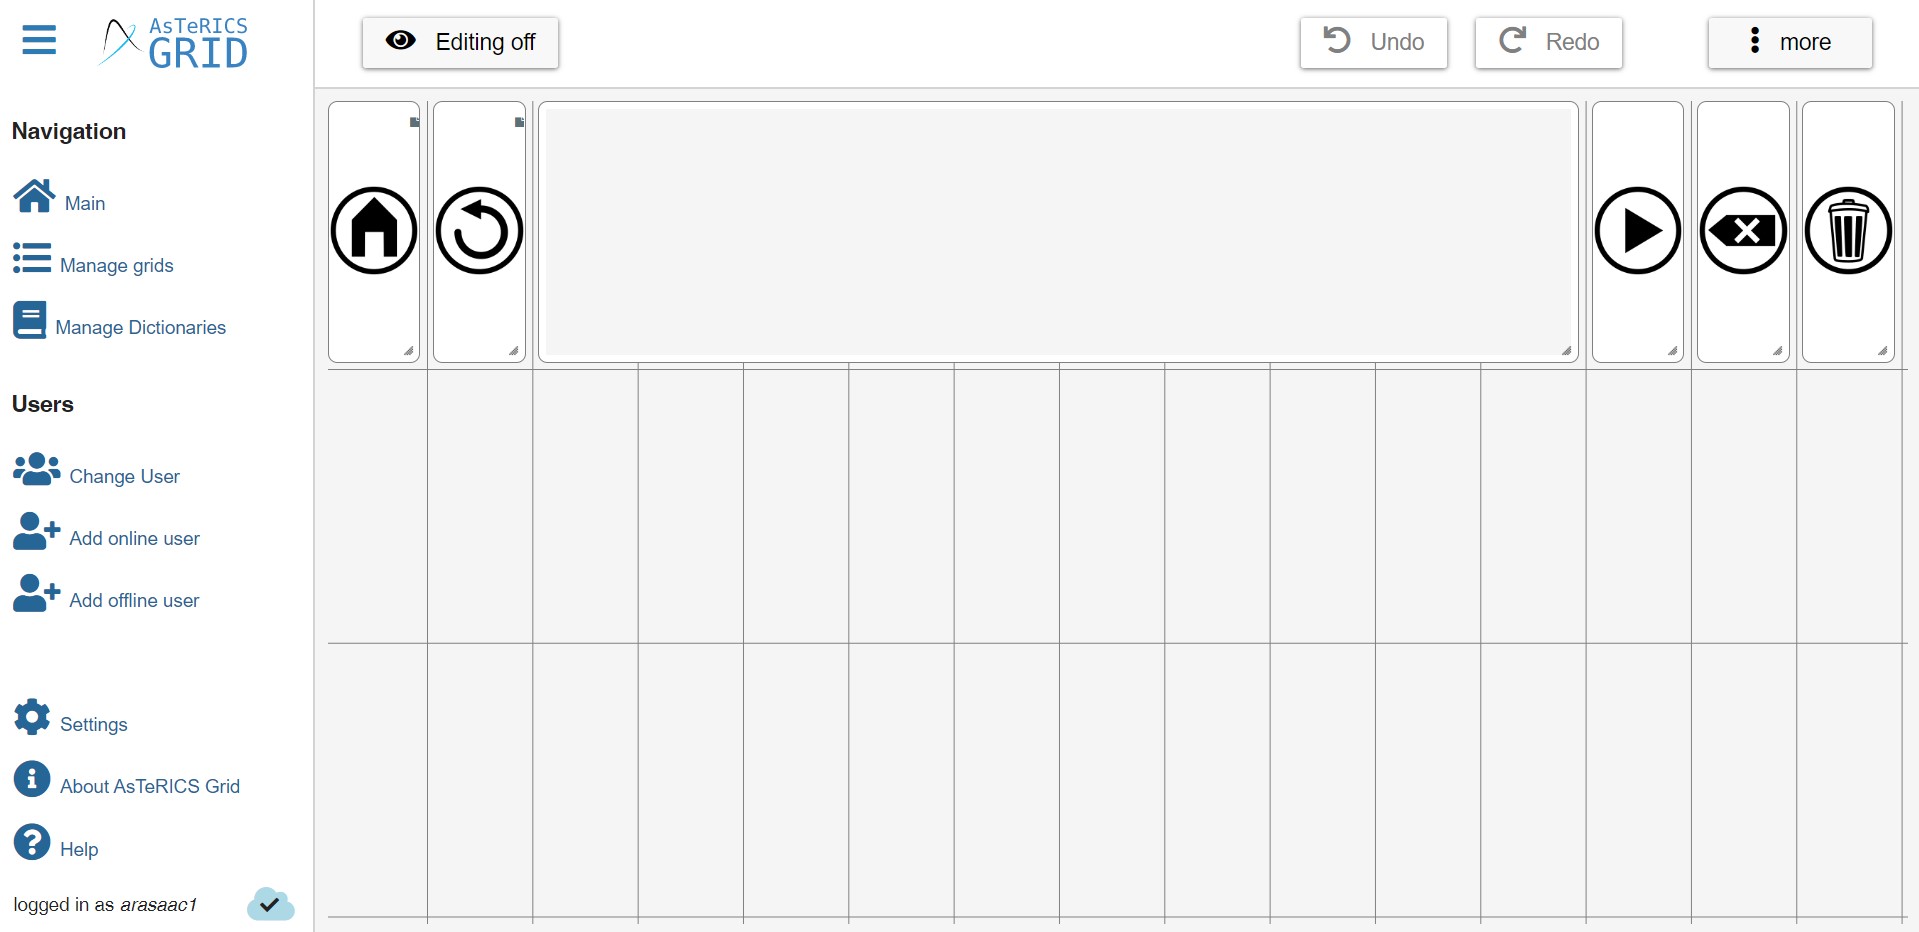
To edit our global dashboard, we have two options. The first is to click the Edit global grid button within the Global Grid section of the Manage Grids page.
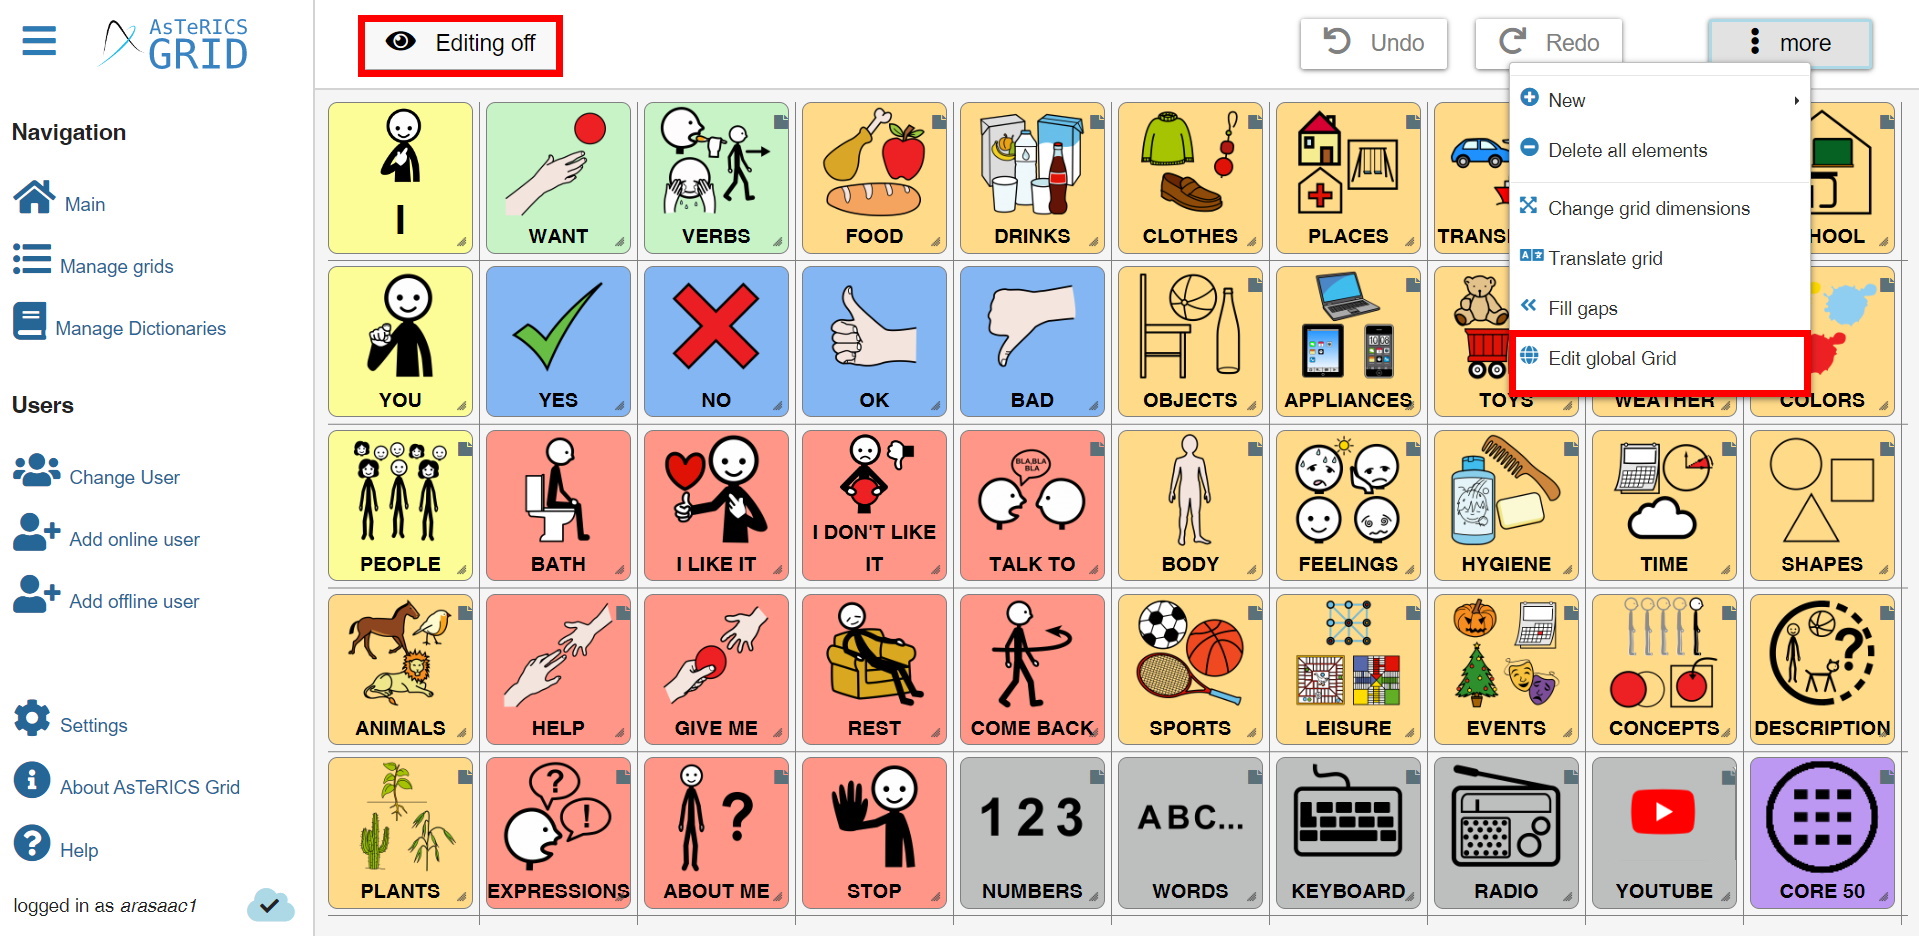
The other option is, from the editing of a board, to click on the More menu at the top and there select Edit global grid.
The Global Grid of the current communicator will then appear on the screen.
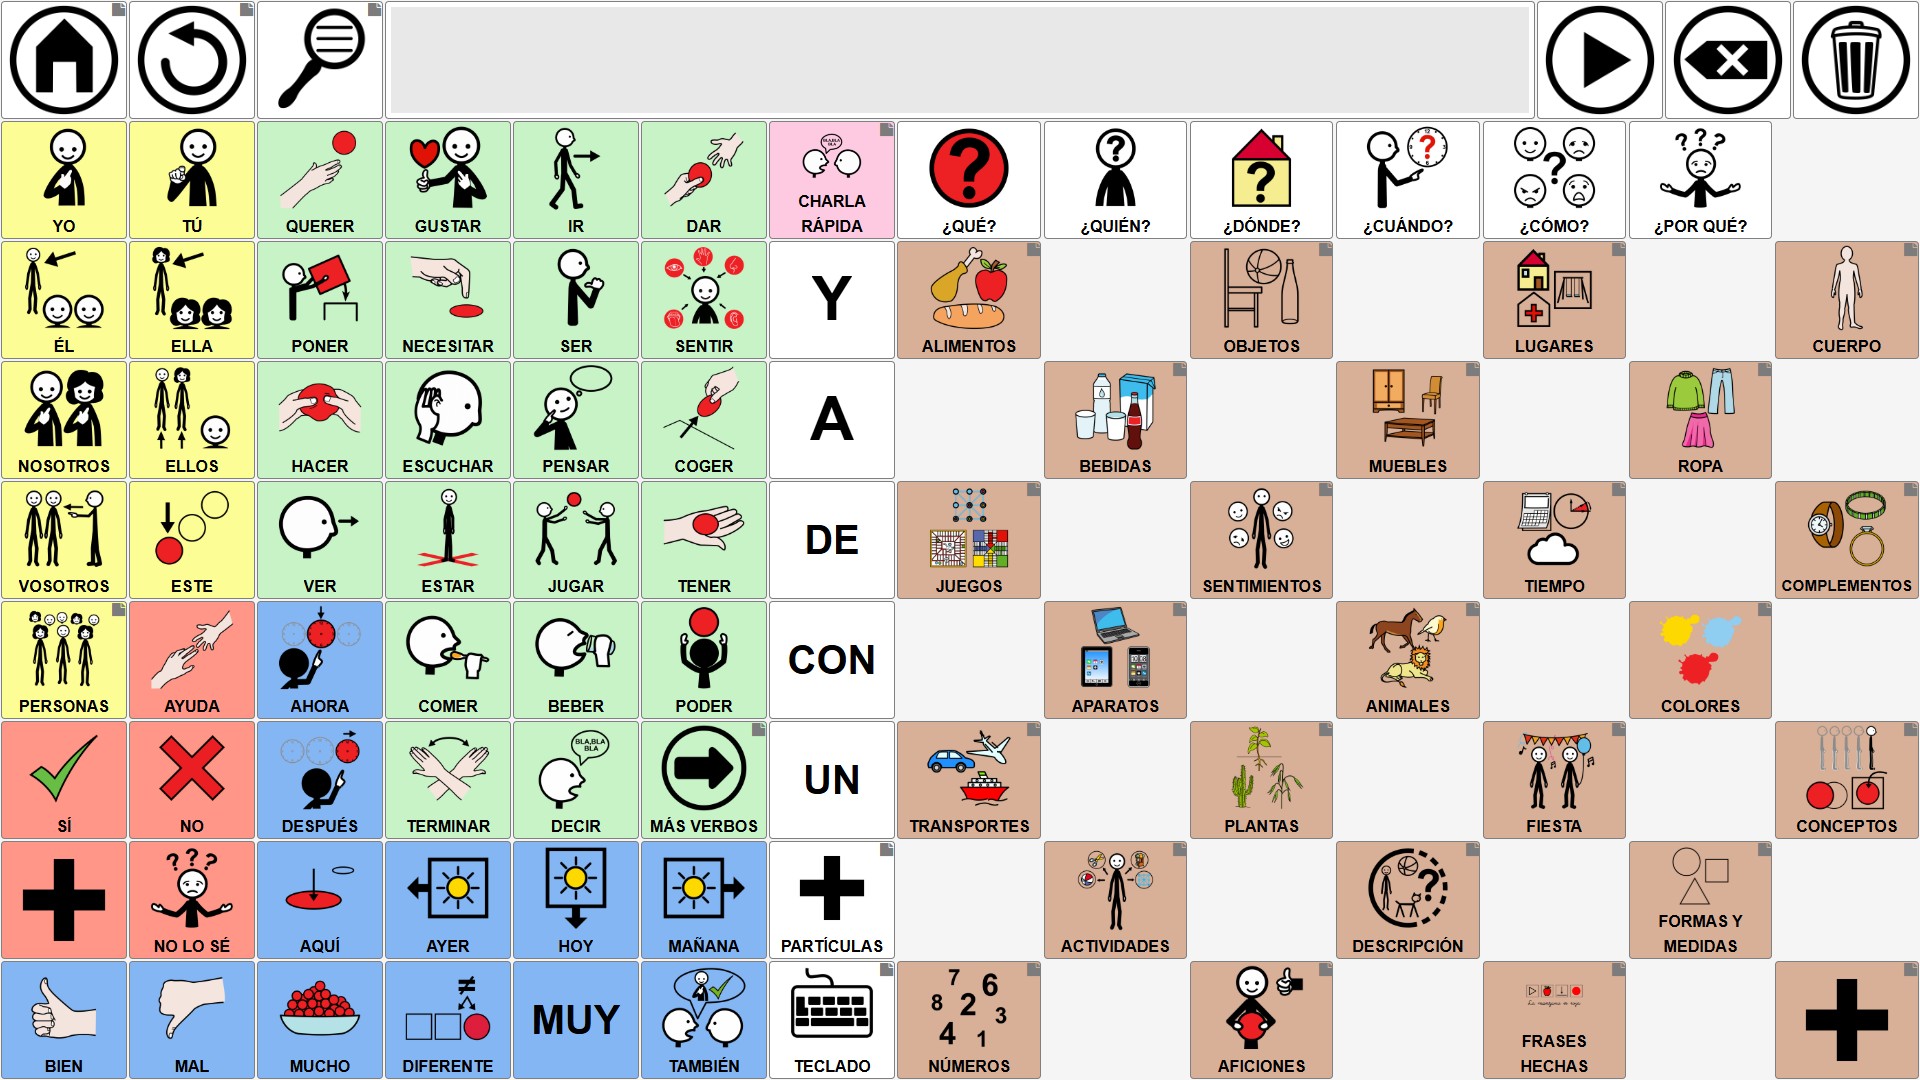
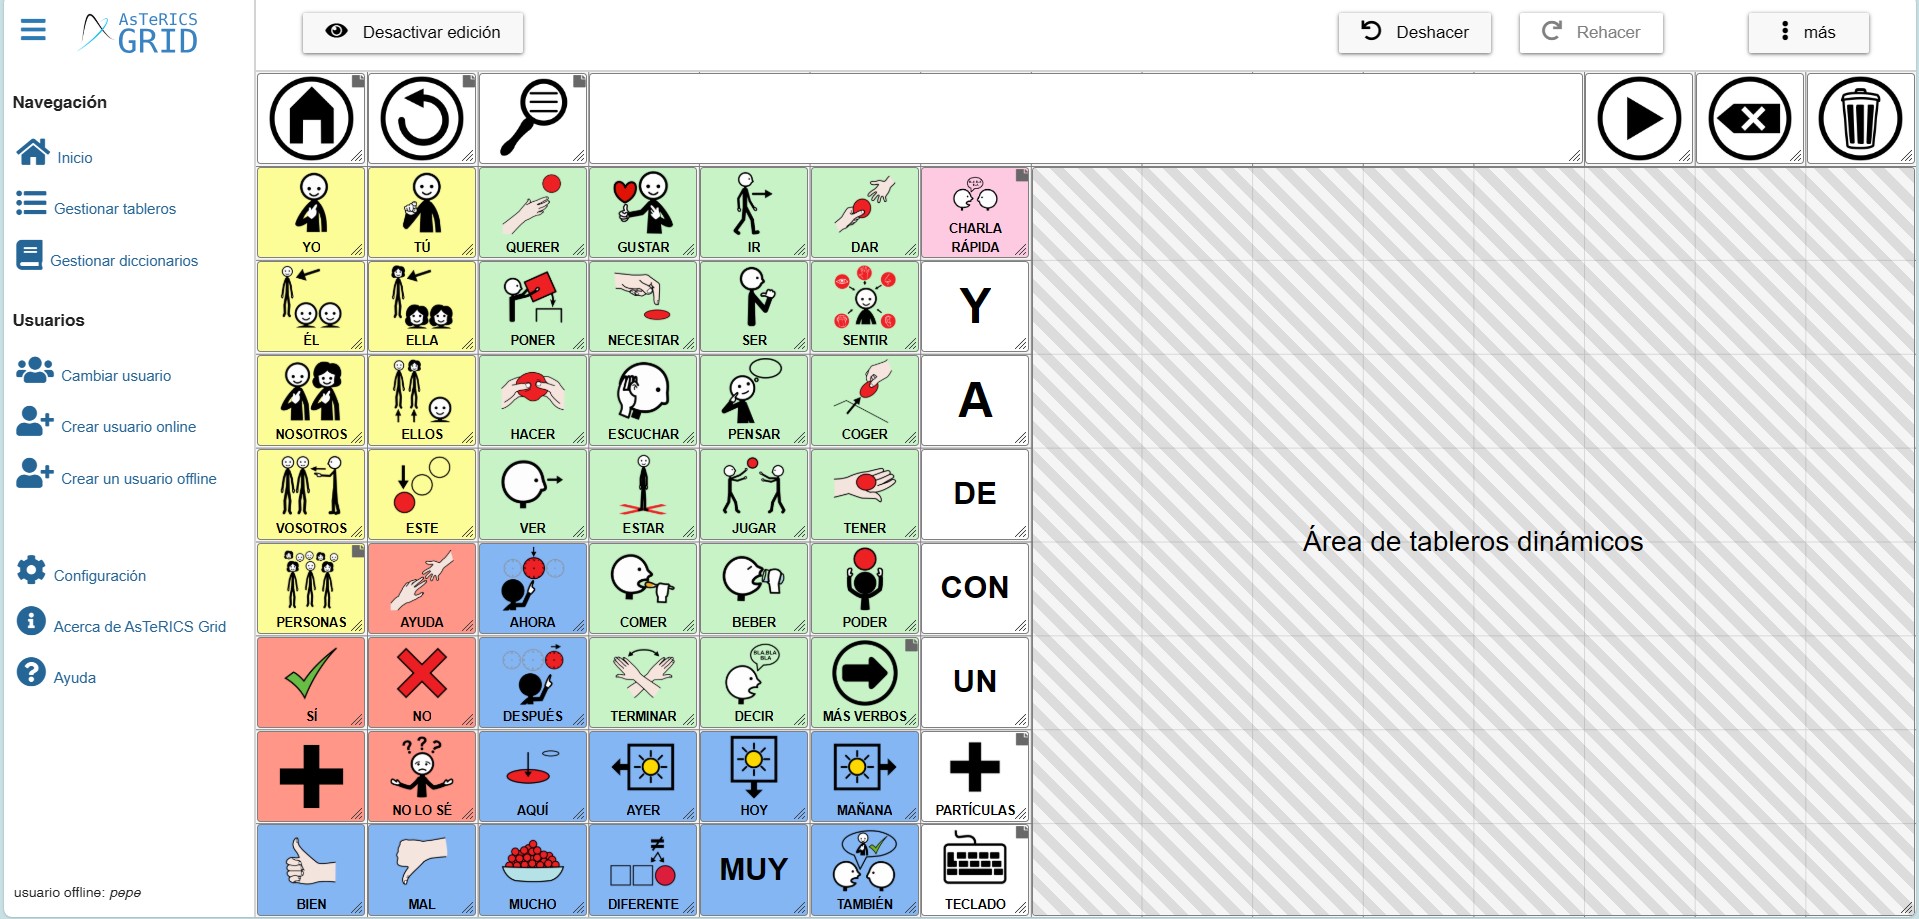
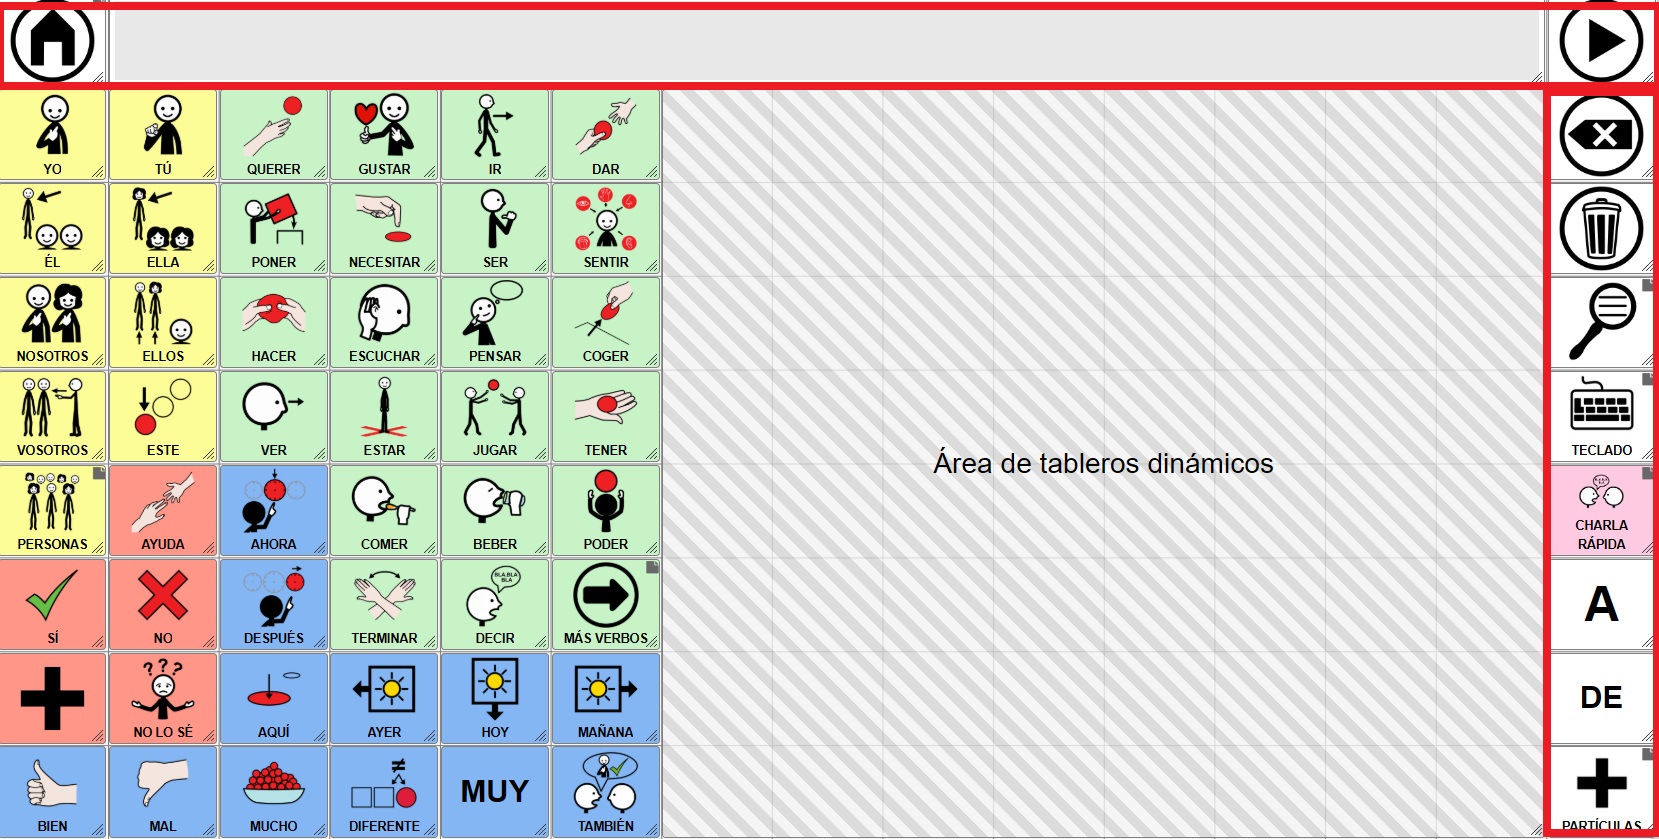
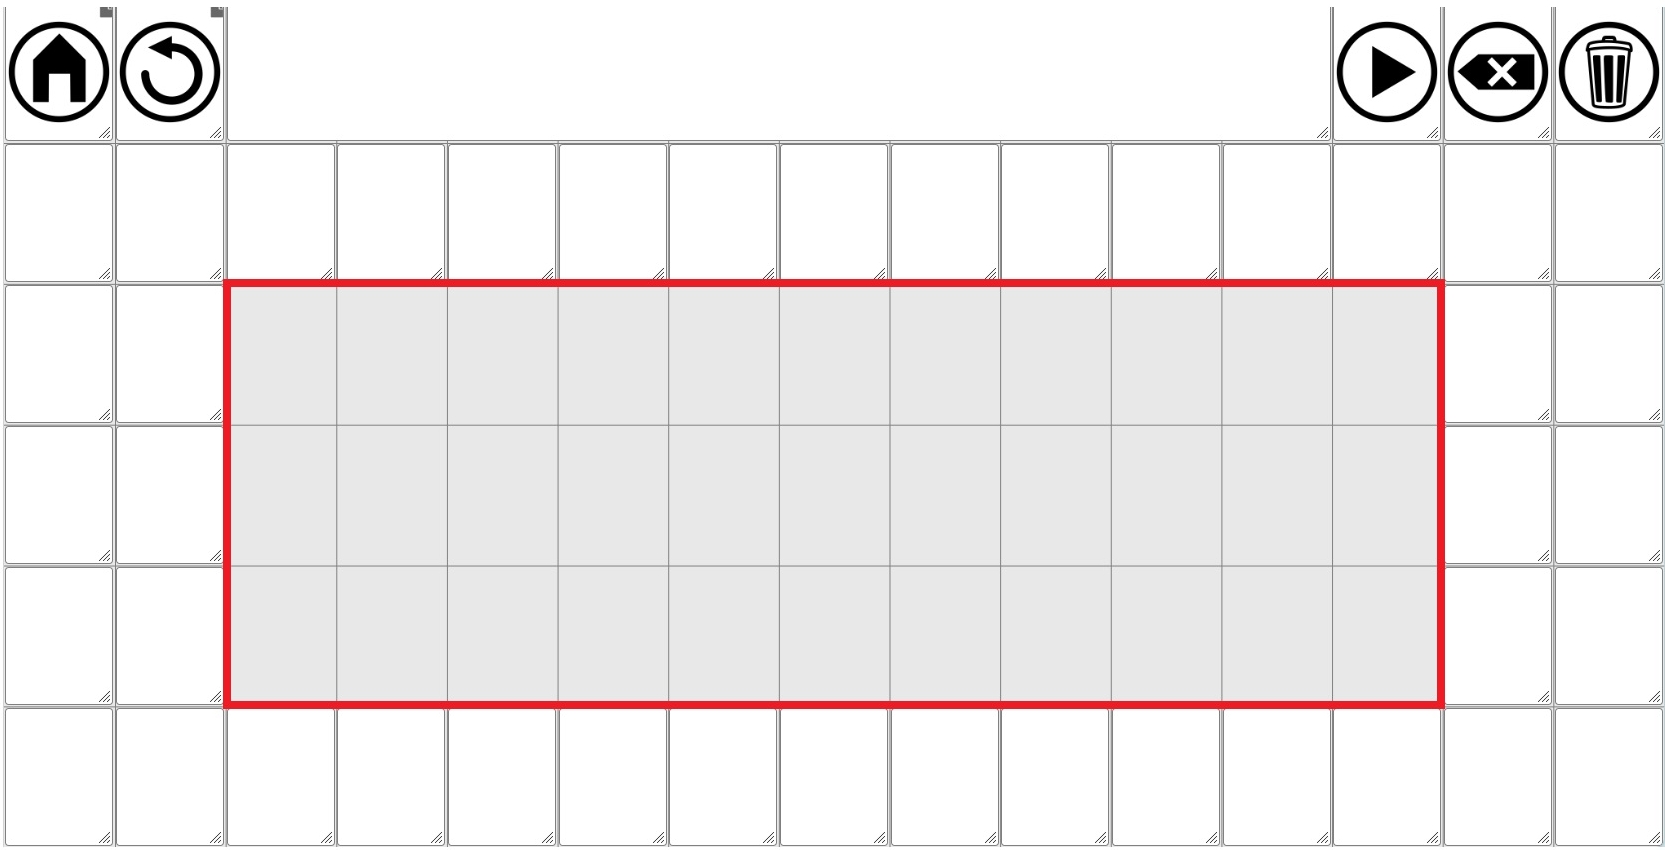
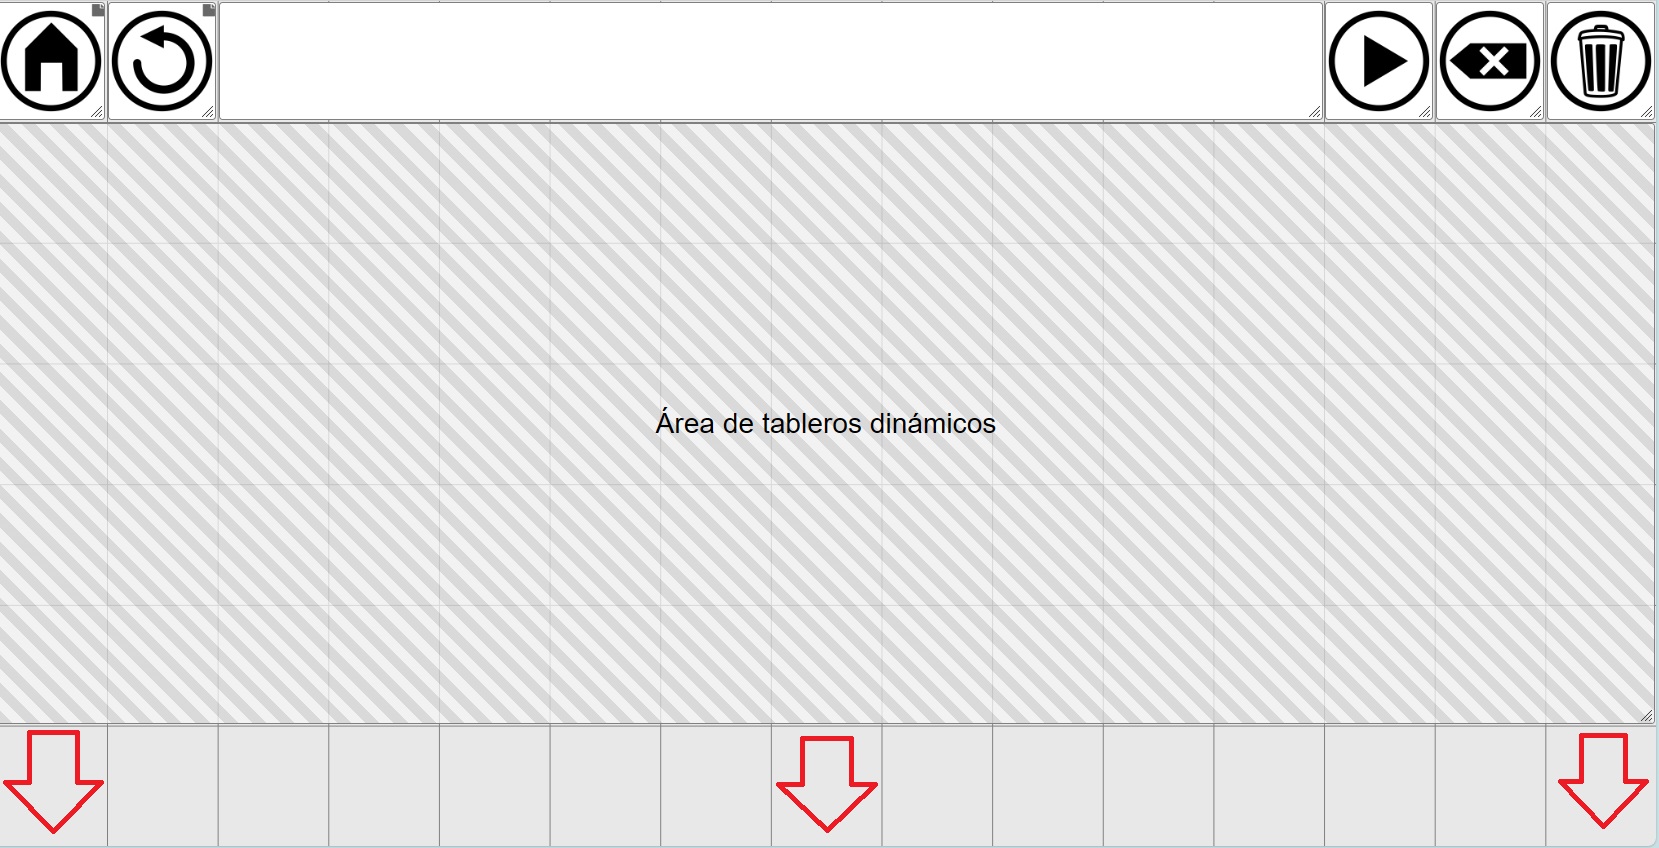
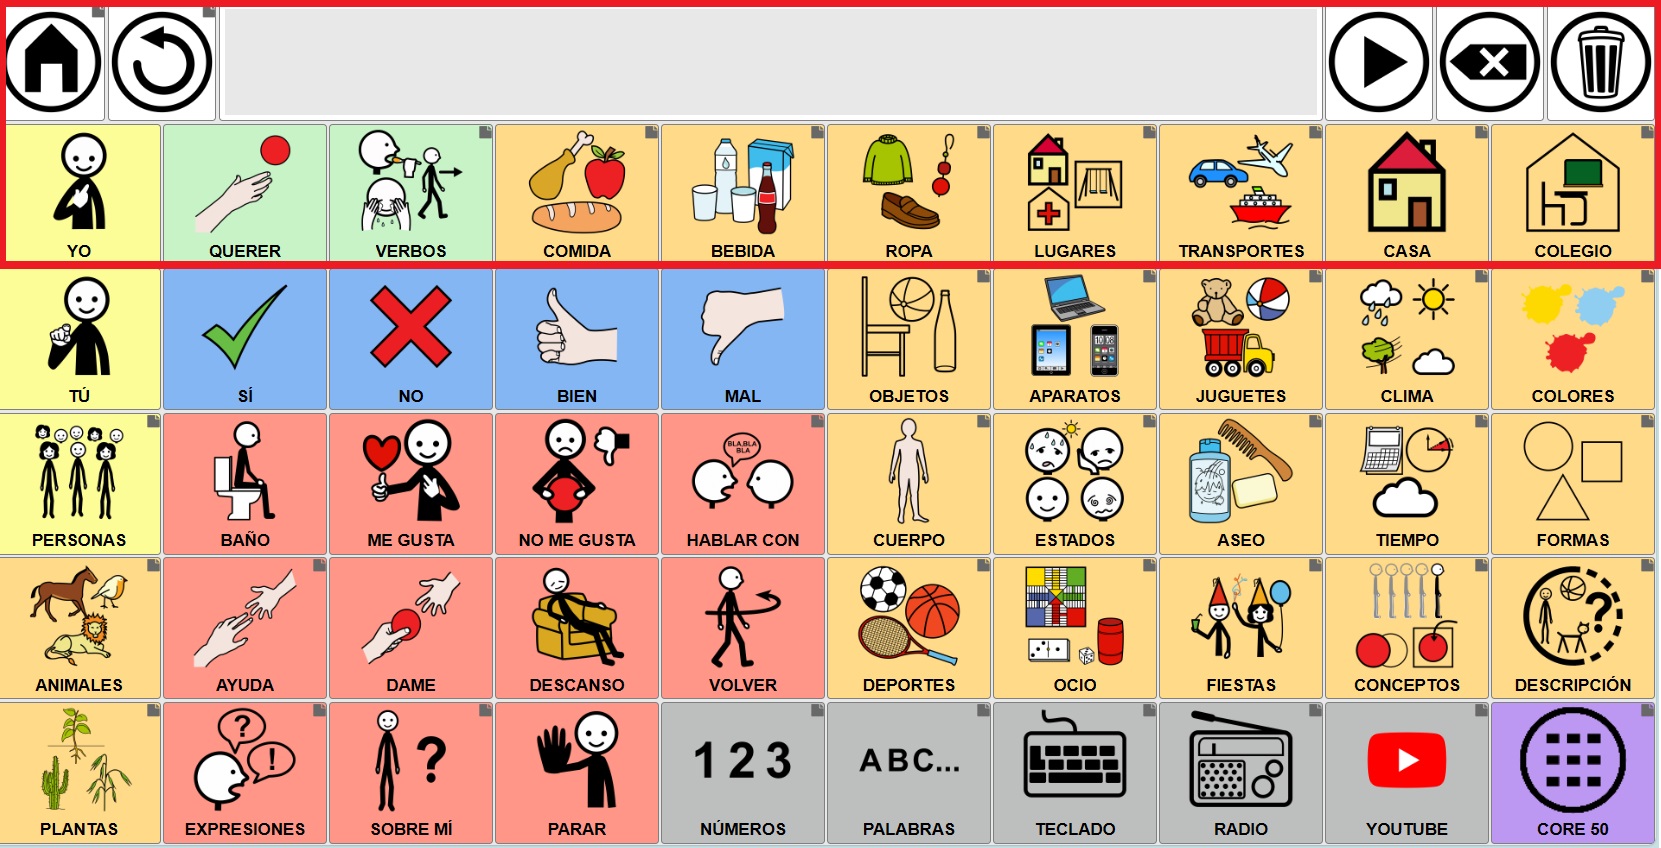
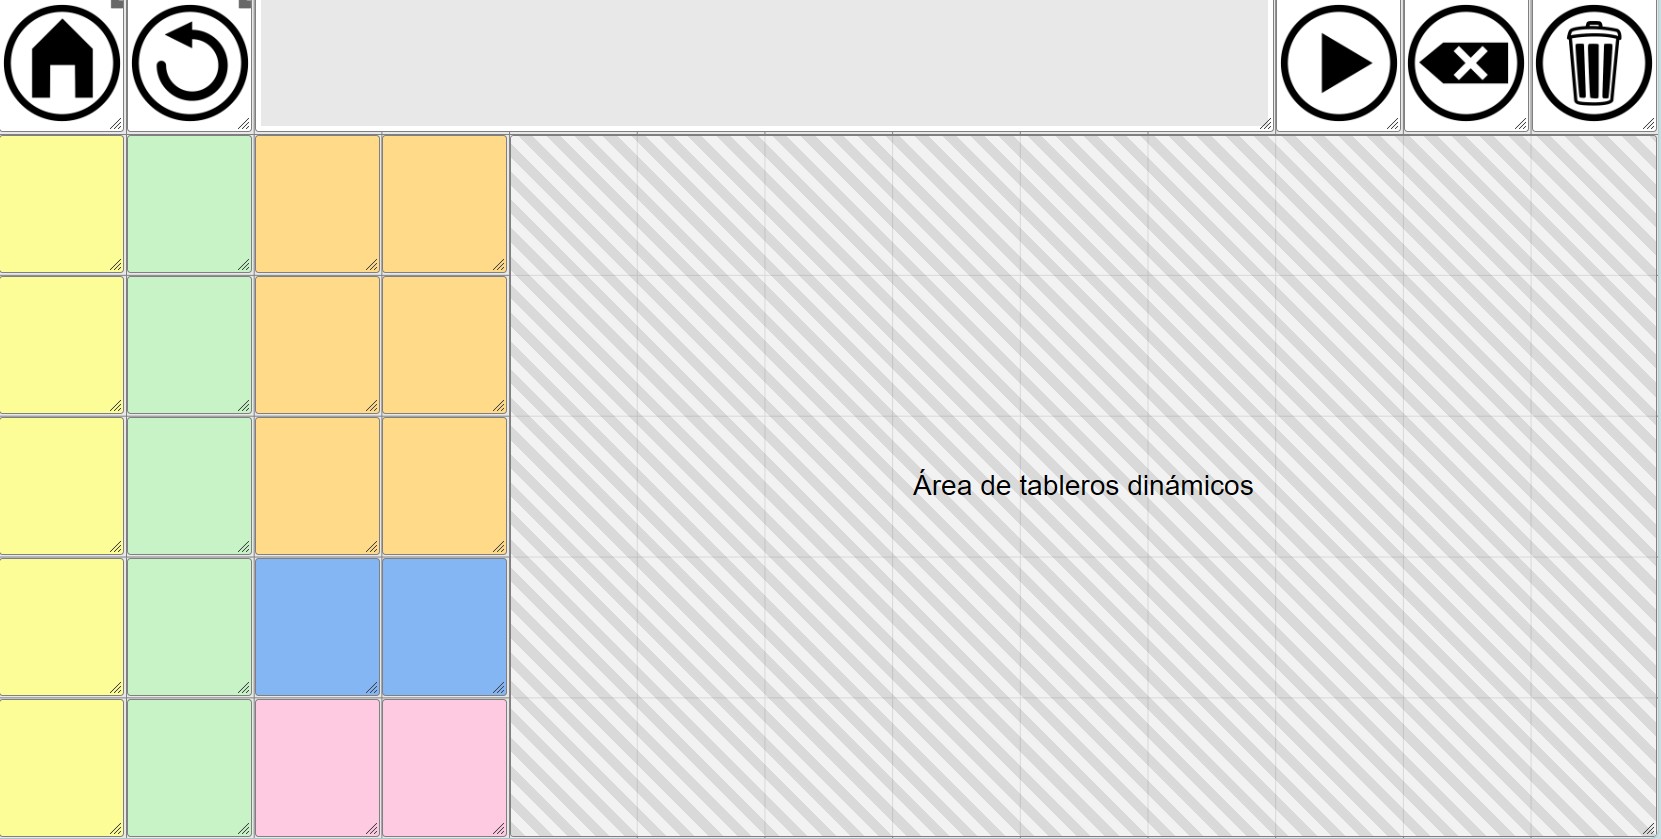
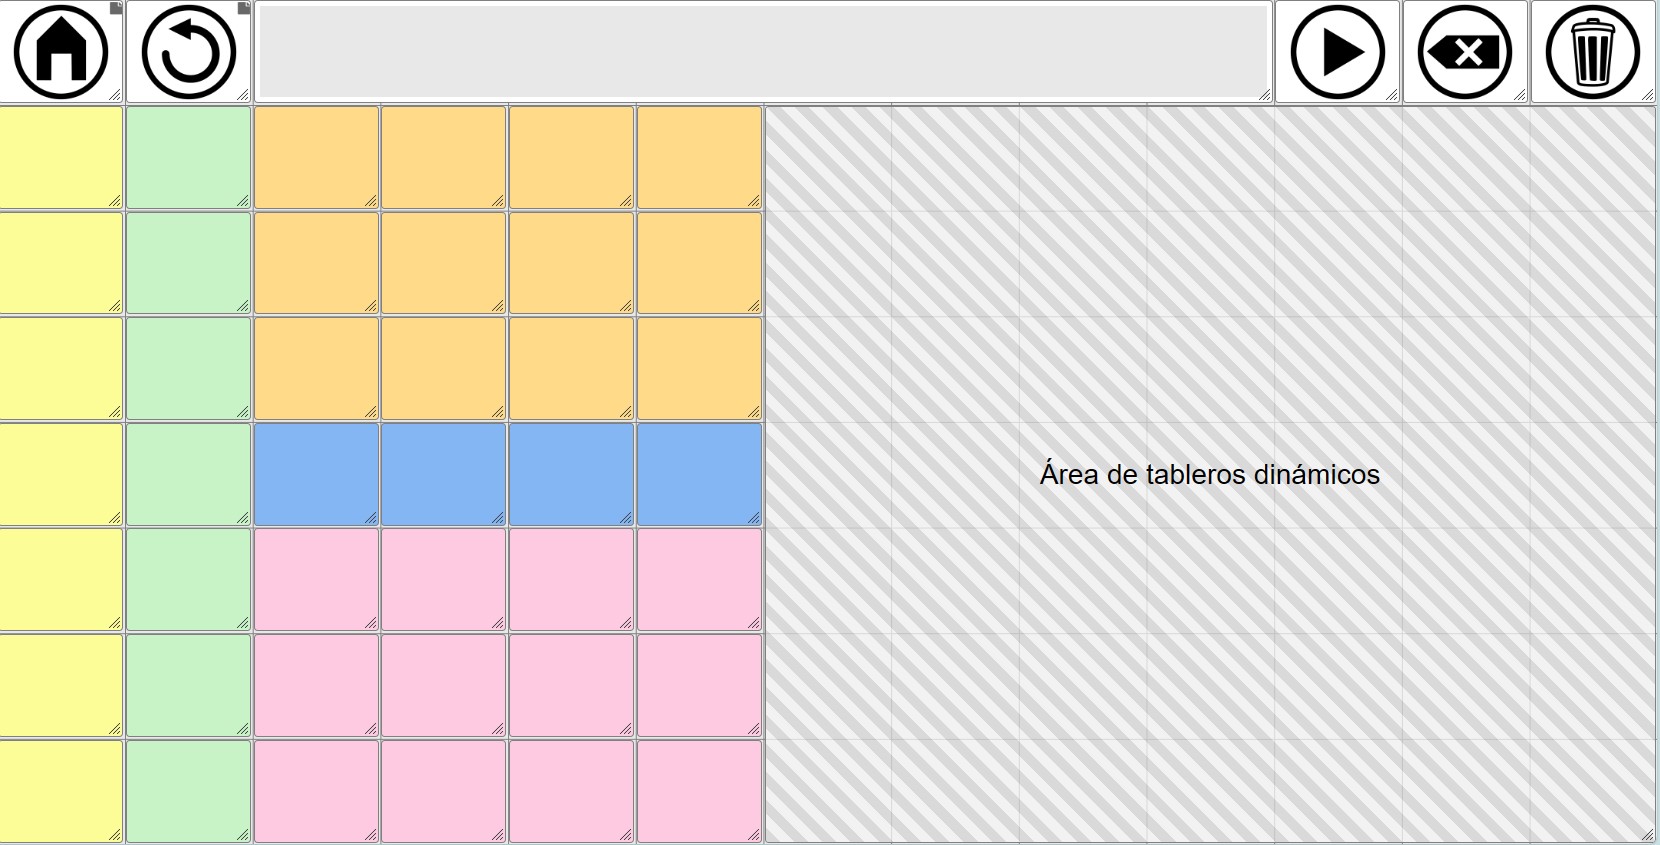
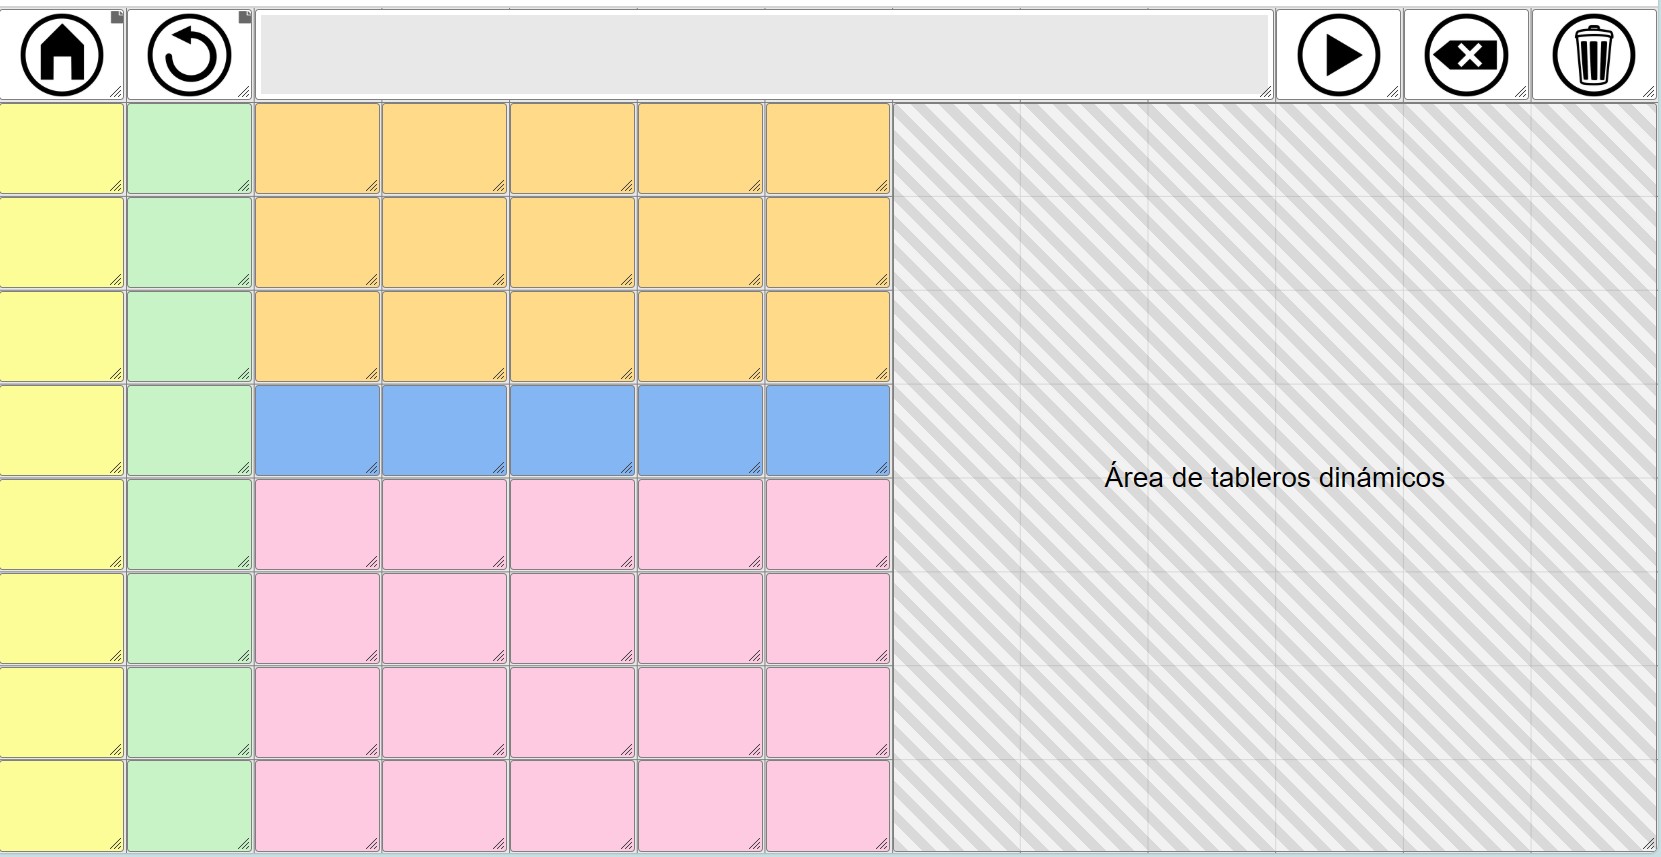
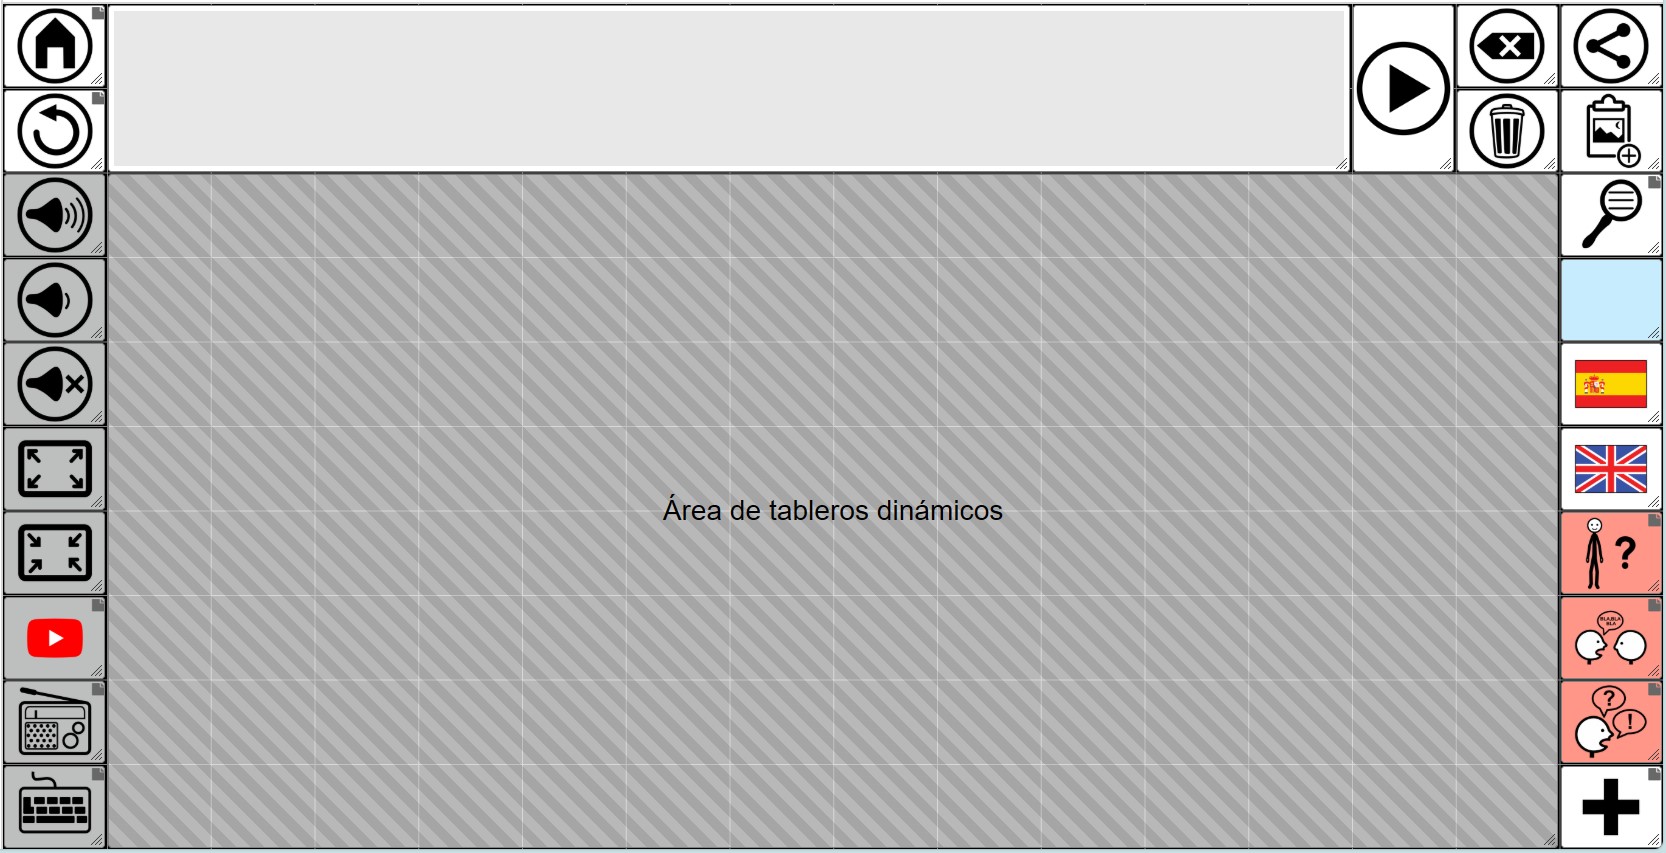
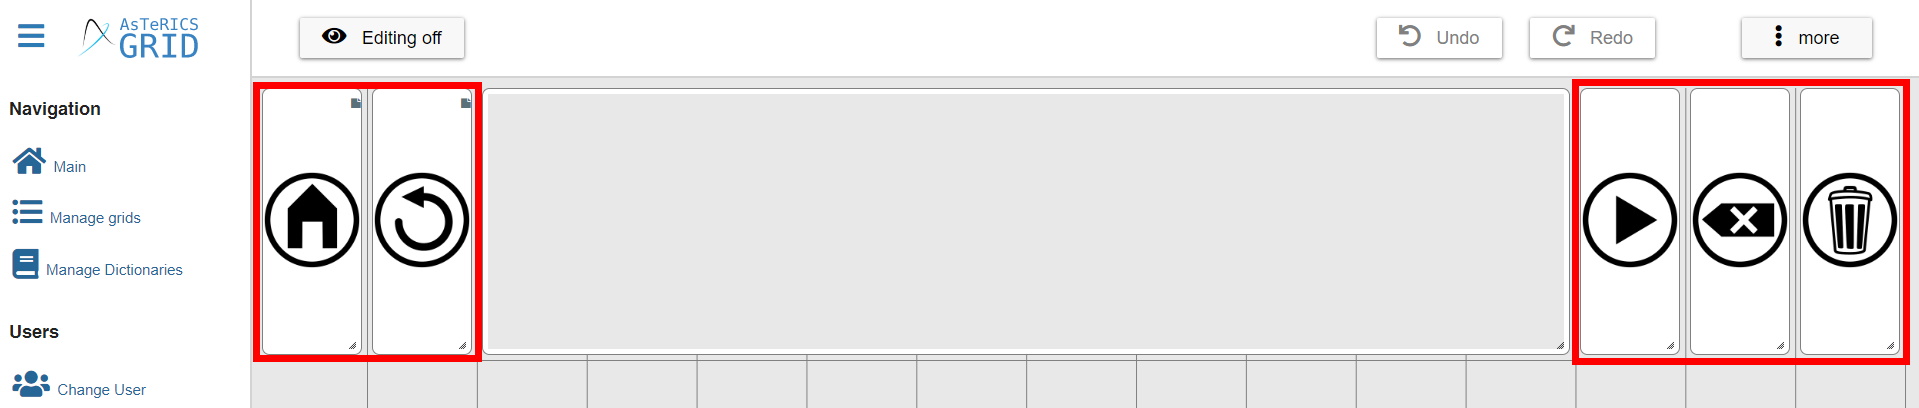
The default global grid is shown below. This board, with 6 rows and 15 columns, places the accumulated phrase and various action buttons (read phrase, delete, start, etc.) in the first row, and a dynamic board area occupies the remaining rows. We will now explain what this dynamic placeholder is, how to create it, and how to manage it.
If, when creating a user account in Asterics, we start from a communicator model like this (ARASAAC Global Grid Core Communicator)…
…when editing the global grid we will see that the Dynamic grids placeholder only occupies the right side of the communicator.
Finally, if we have a communicator created before January 2026, when the Dynamic Grid Area was introduced, or if we delete this area, we can have a global grid without this area, as shown in this screenshot. Next, we’ll see how to add the Dynamic Grid placeholder.
DYNAMIC GRID PLACEHOLDER
In contrast to the Global Grid, which, as we have mentioned, is a static grid, always visible, and whose content is displayed in the same place, we have the dynamic grids, which are all those that we create in Manage Grids.
These dynamic grids start from an home grid that we have defined and change in the communicator as we navigate through the different linked cells.
In this way, we could define the Dynamic Grid placeholder as a “window” that we create within the global grid with the dimensions we want and within which the home grid and the rest of the grids we navigate through will be displayed/loaded.
Starting from the global grid with core vocabulary on the left that we saw earlier, we can modify it by moving some of the action buttons to the last column, expanding the accumulated phrase, and placing some of the cells that were previously in the seventh column also in the last column.
By disabling global grid editing, we see how the Dynamic Grid placeholder that we had defined loads the Home grid.
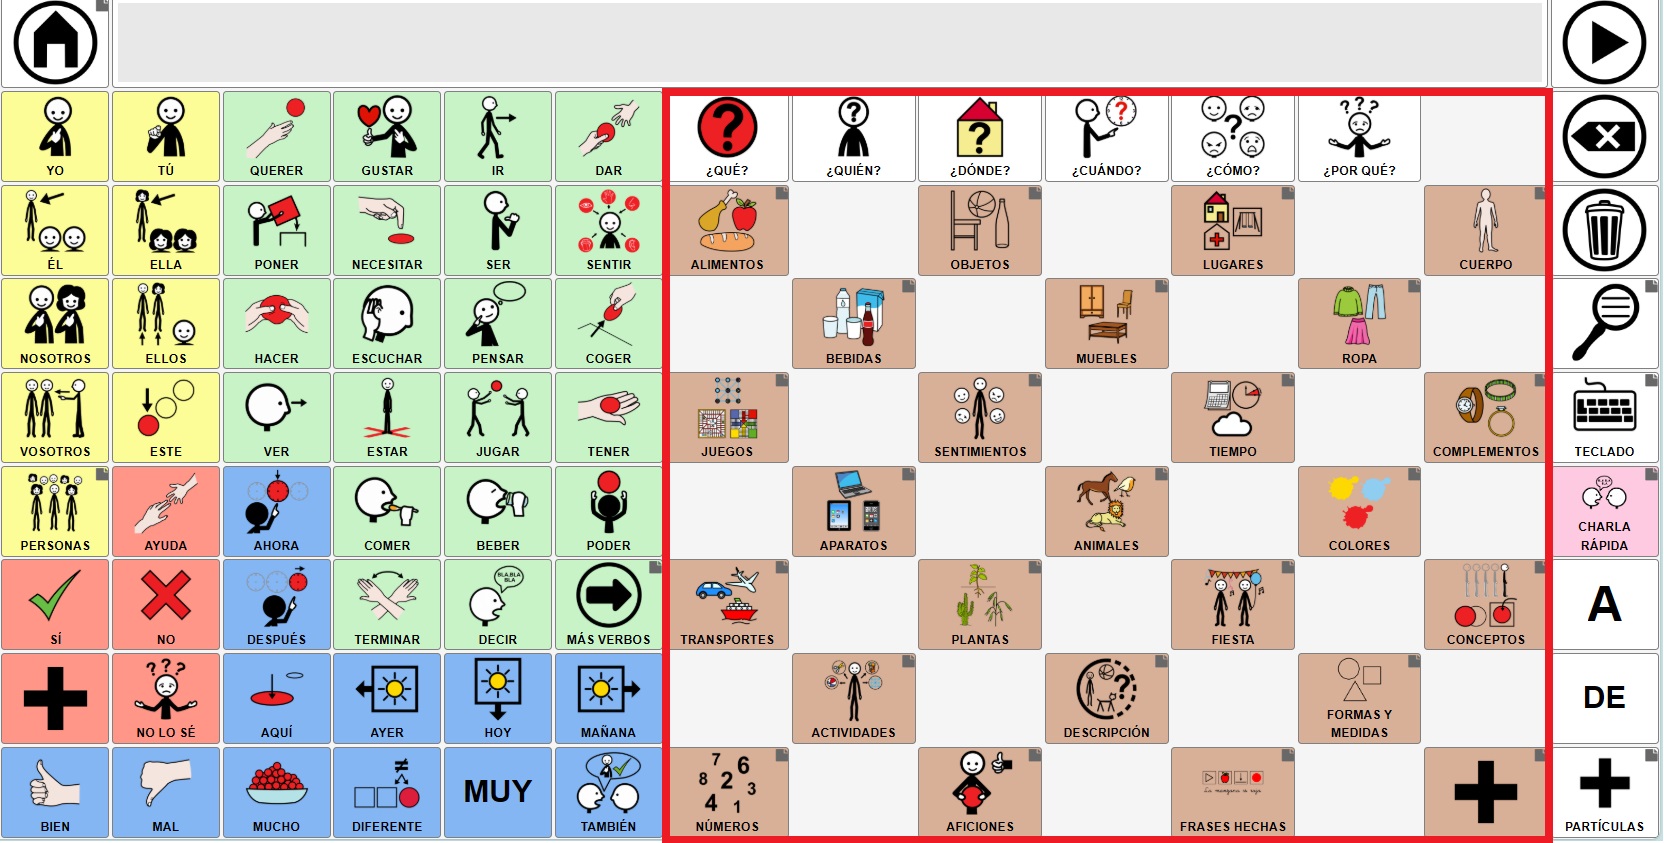
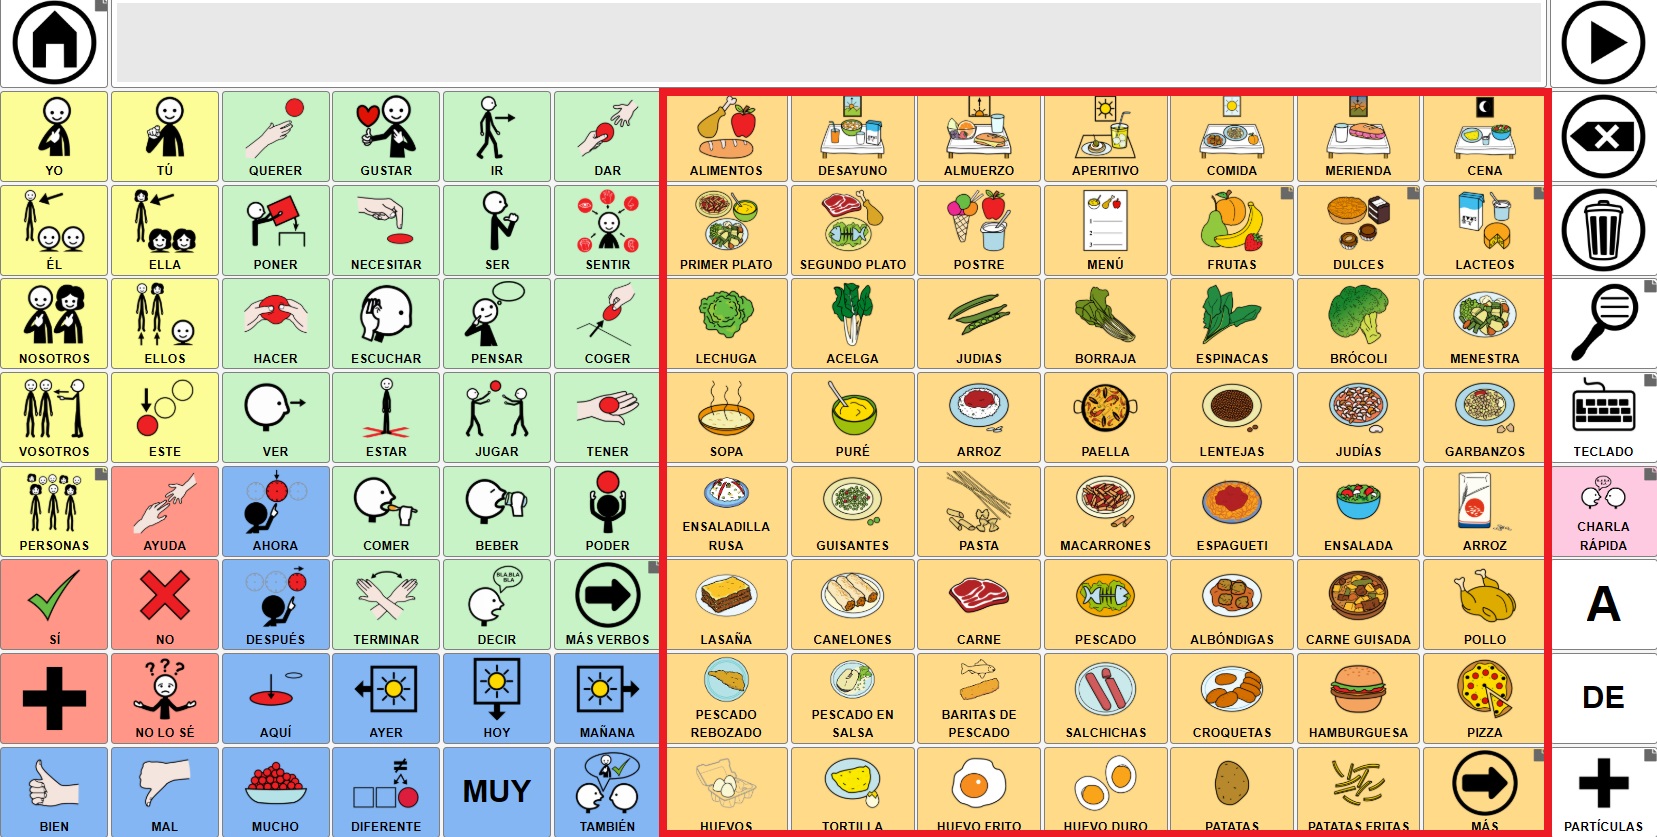
If we click on any of the categories such as “Food”, the grid loads in the same area without modifying the rest.
CREATE THE DYNAMIC GRID PLACEHOLDER
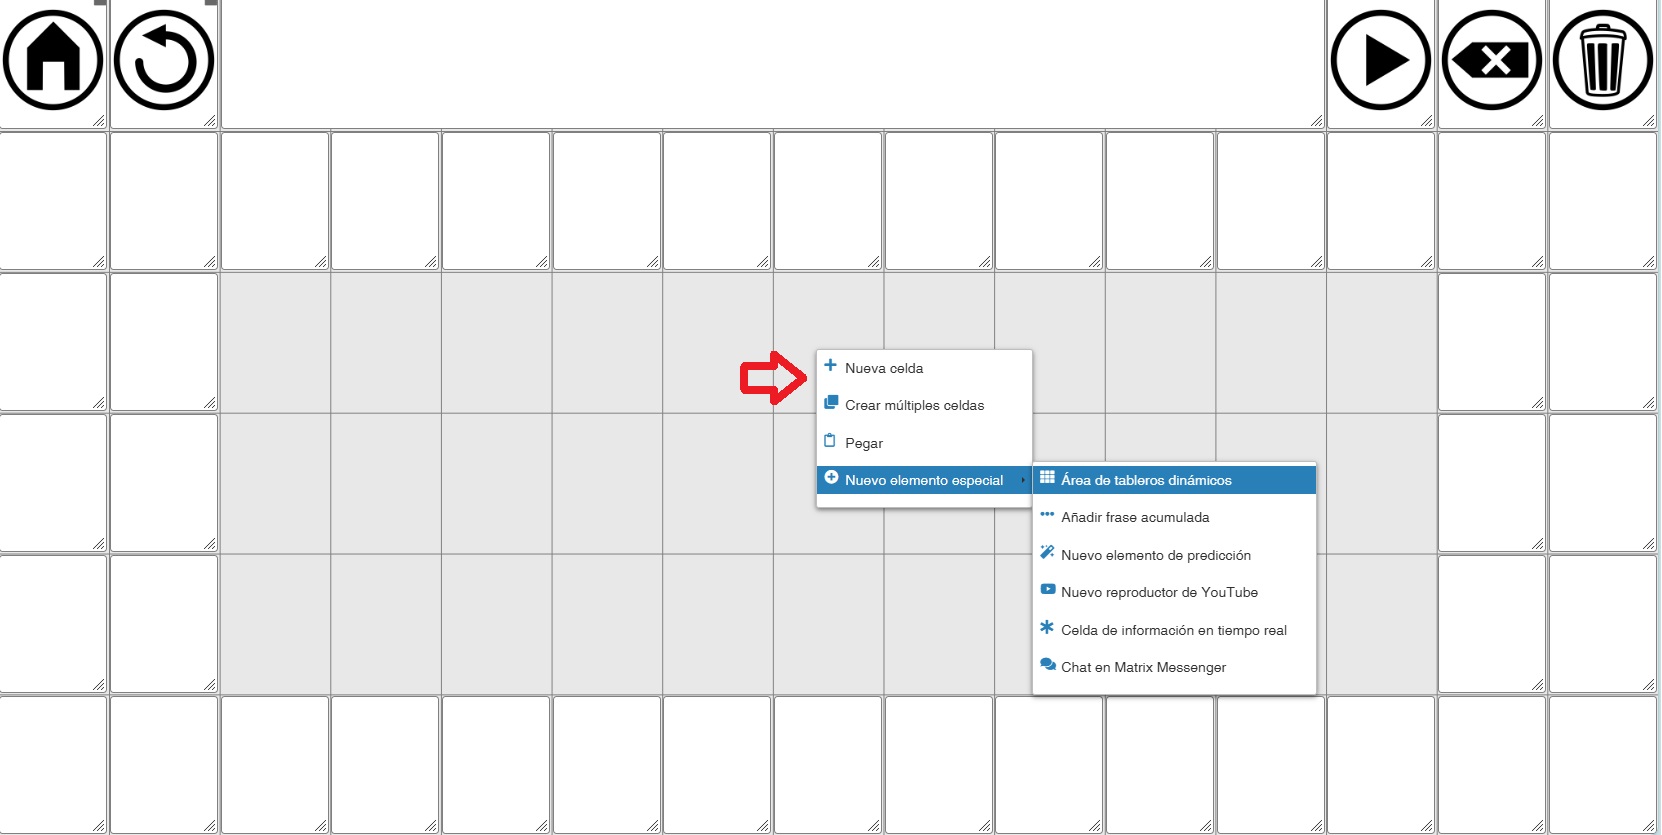
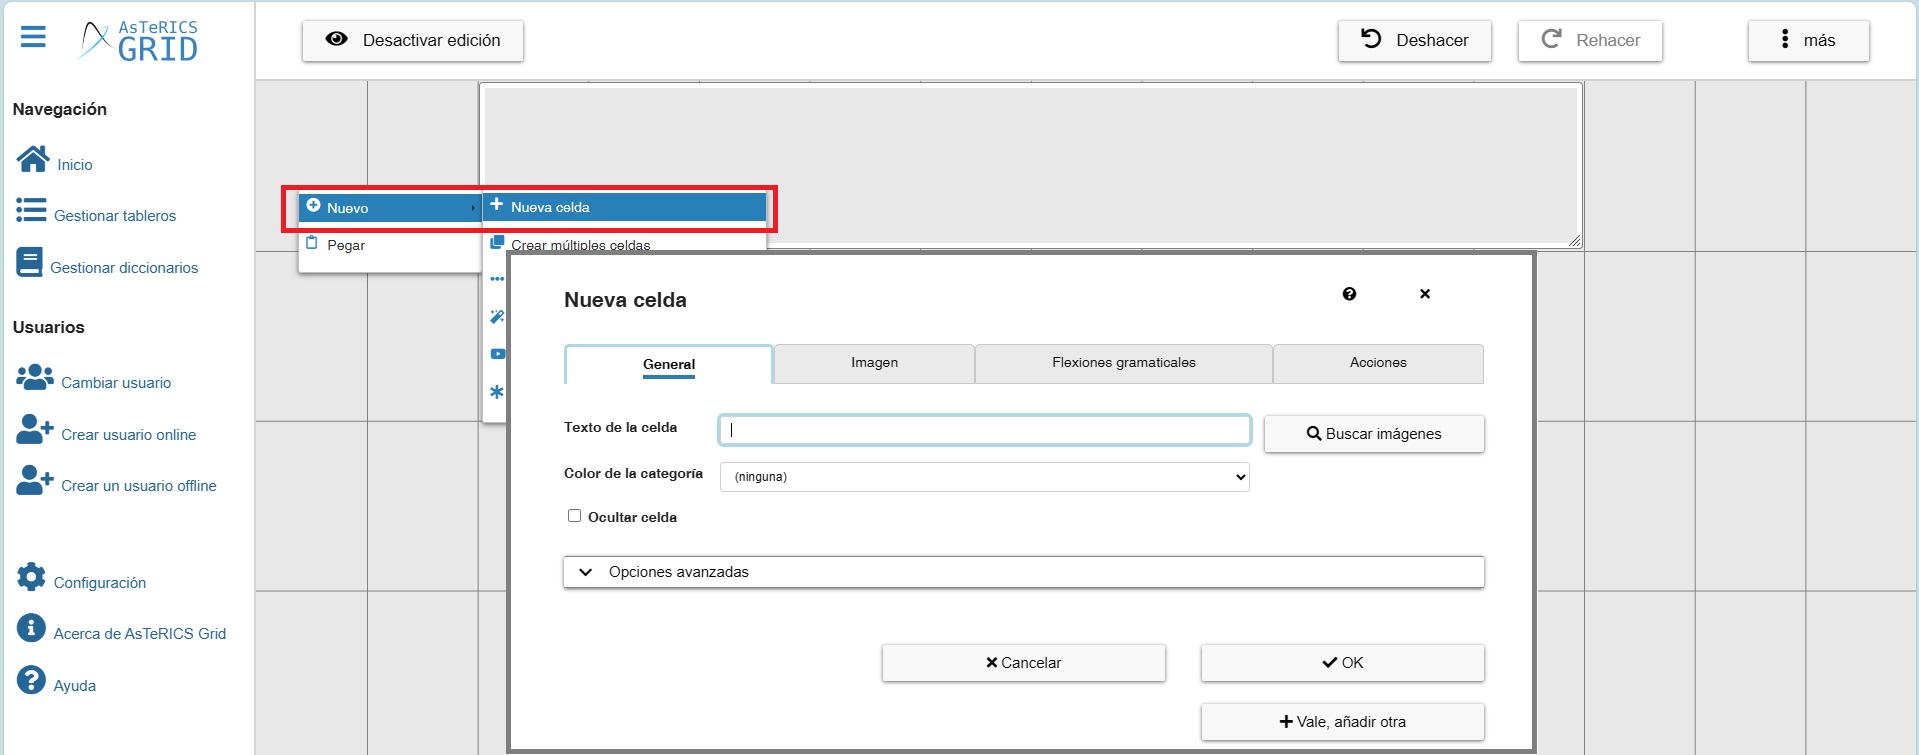
To create the dynamic grid area, right-click on the cell where you want to place the area. In the options, choose New Special Element -> Dynamic Grid placeholder.
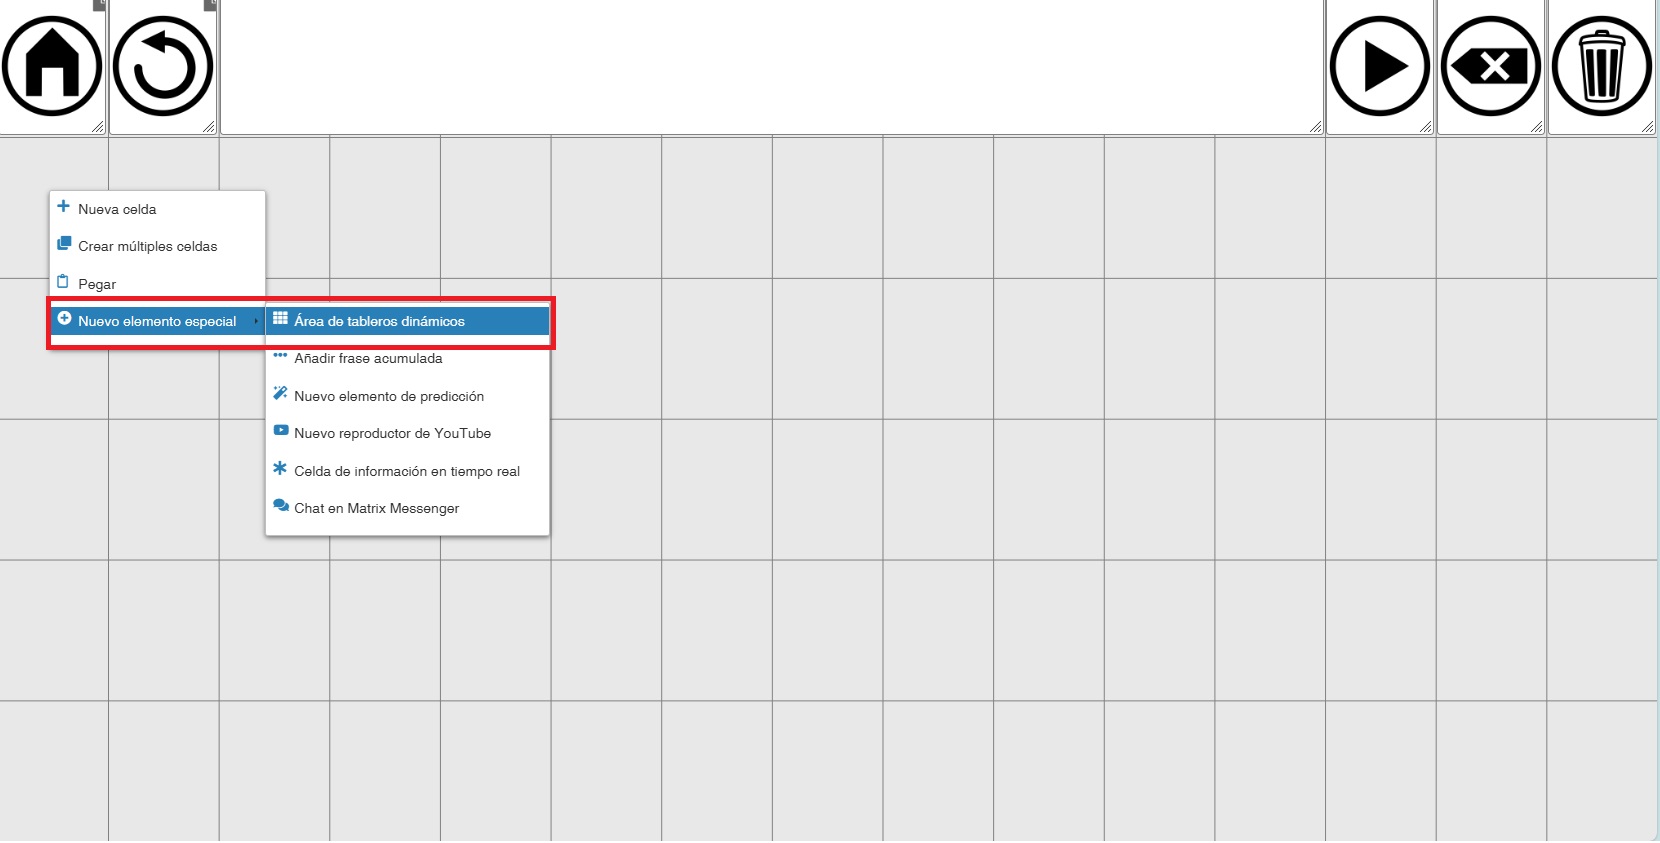
(IMPORTANT) The placeholder will always be rectangular and will always be created starting from the cell where we clicked, to the right and down, occupying the available empty cells.
To illustrate, we added blank cells to the previous model and left an empty area in the center of 3 rows x 11 columns.
We right-click on the cell marked with the arrow.
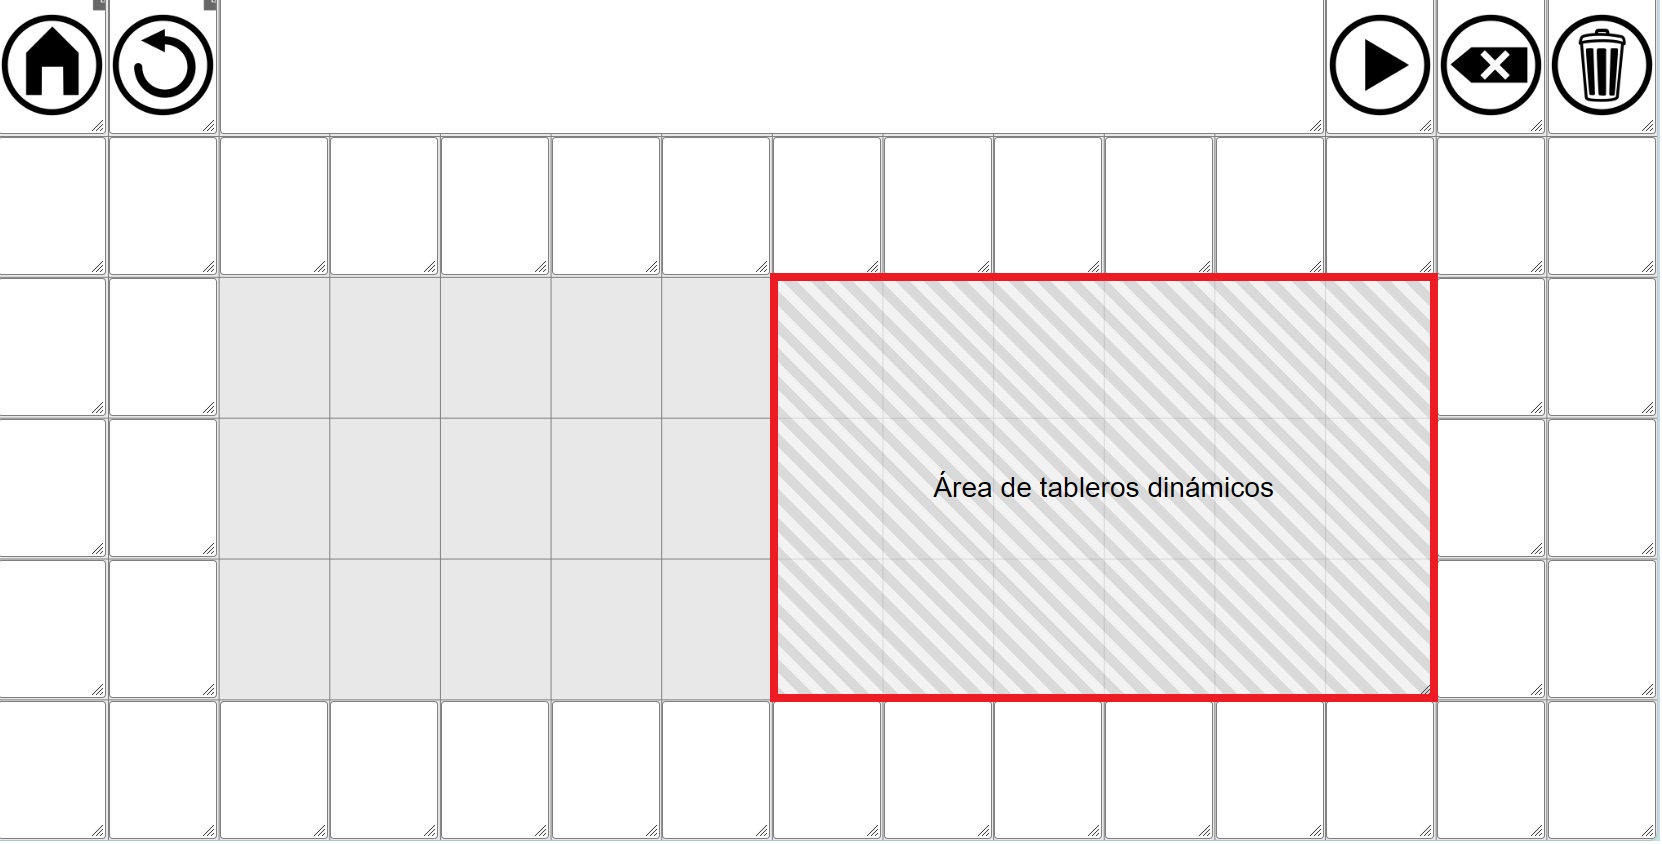
The result is that the placeholder is created from that cell to the right and downwards, occupying the space that was left empty.
 The Dynamic grid placeholder, like other cells or areas such as the YouTube area, can be resized. To do this, click on the bottom right corner and drag while holding down the left mouse button until you reach the desired size.
To move it to another location, click anywhere in the placeholder and, without releasing the button, move it to another empty area of the grid.
DESIGN OF THE GLOBAL GRID AND THE DYNAMIC GRID PLACEHOLDER
The flexibility offered by the Dynamic grid placeholder when designing our communication tool requires us to carefully consider how we want to organize it. This is crucial because decisions such as the size (number of rows and columns) of both the home grid and the individual boards (the dynamic boards) will depend on this initial planning.
Broadly speaking, we can consider three types of organization of the global grid and the communicator:
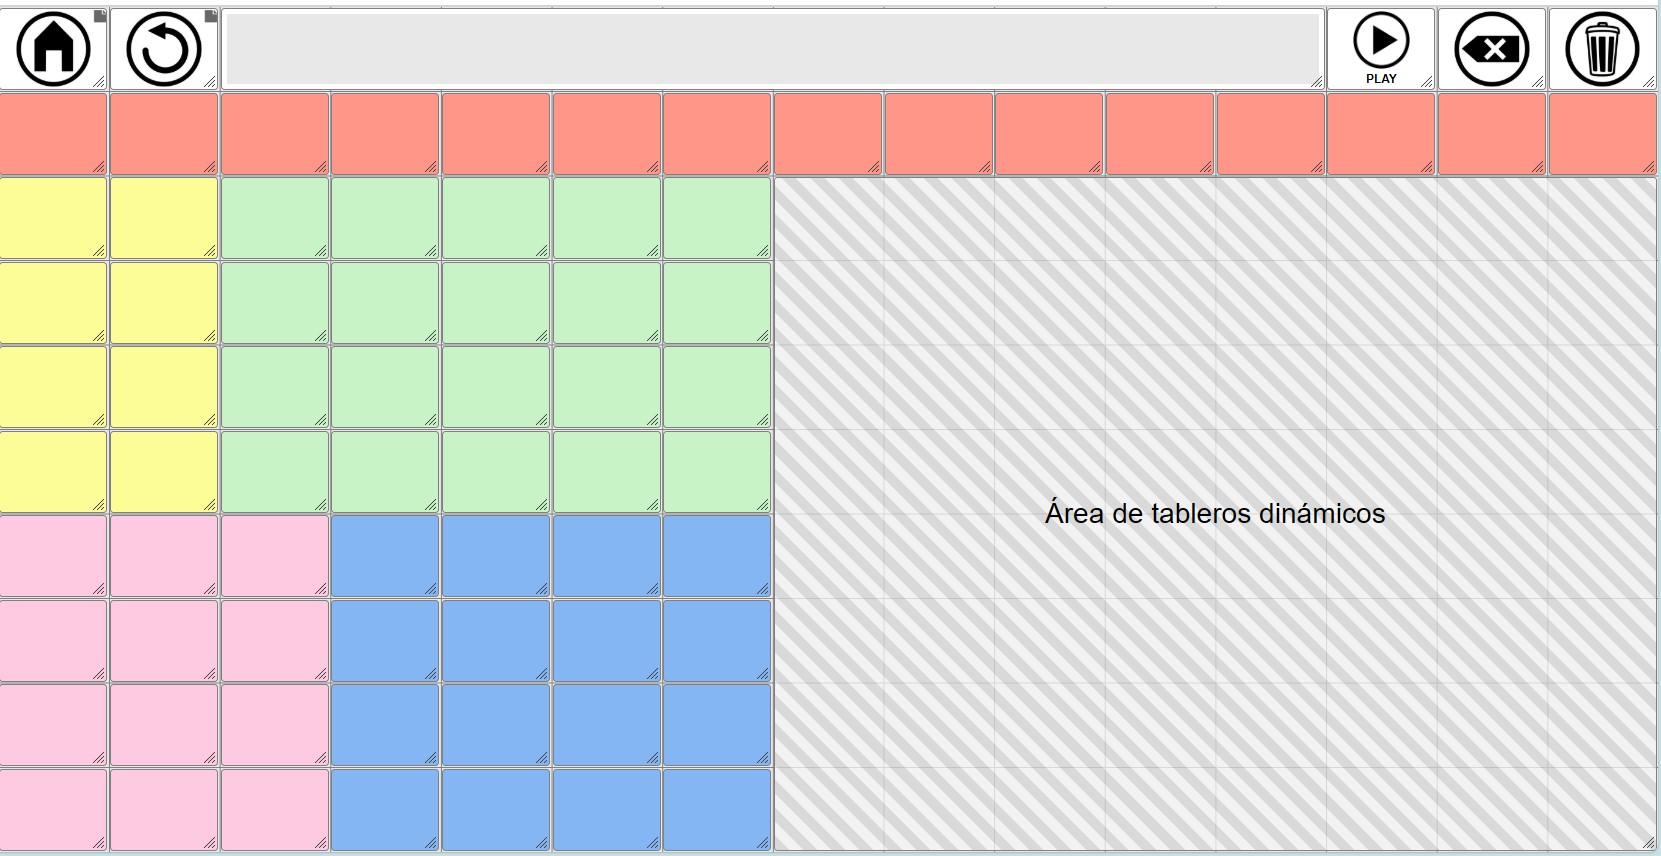
1- GLOBAL GRID: FIRST ROW WITH ACCUMULATED PHRASE AND CONTROL BUTTONS + DYNAMIC GRID PLACEHOLDER
This is the most basic organization, the one we’ve already seen in some screenshots. This is also the default global grid layout that loads when we click on Reset Default Global Grid within Manage Grids.
In this model, as we can see, the first row is occupied by the accumulated phrase and the various communicator control buttons (home, back, read phrase, delete last word, and delete phrase). The next five rows are occupied by the dynamic grid placeholder, which is created by default and fills all the empty space.
In this model, as in the others we’ll see below, the key is knowing the number of rows and columns that the dynamic grid placeholder occupies. In this one, by default, it’s 5 rows x 15 columns.
If we want our dynamic grids to have the same size (width/height) when loaded in this area as, for example, the home, back buttons, etc., the boards we create will have to be 5 rows x 15 columns.
Based on this default design, if we want our dynamic grids to have 6 rows, we will add one more row to the global grid…
…and expand the dynamic grid placeholder.
Just as we’ve added another row, we can add more columns or reduce the number of columns or rows. The most important thing is that the dynamic grid placeholder has the dimensions (rows and columns) that we want the grids to have when they load in that area.
(TRICK) If we reduce columns, we will also have to reduce the space occupied by the accumulated phrase so that the grid is reduced to the columns we have defined.
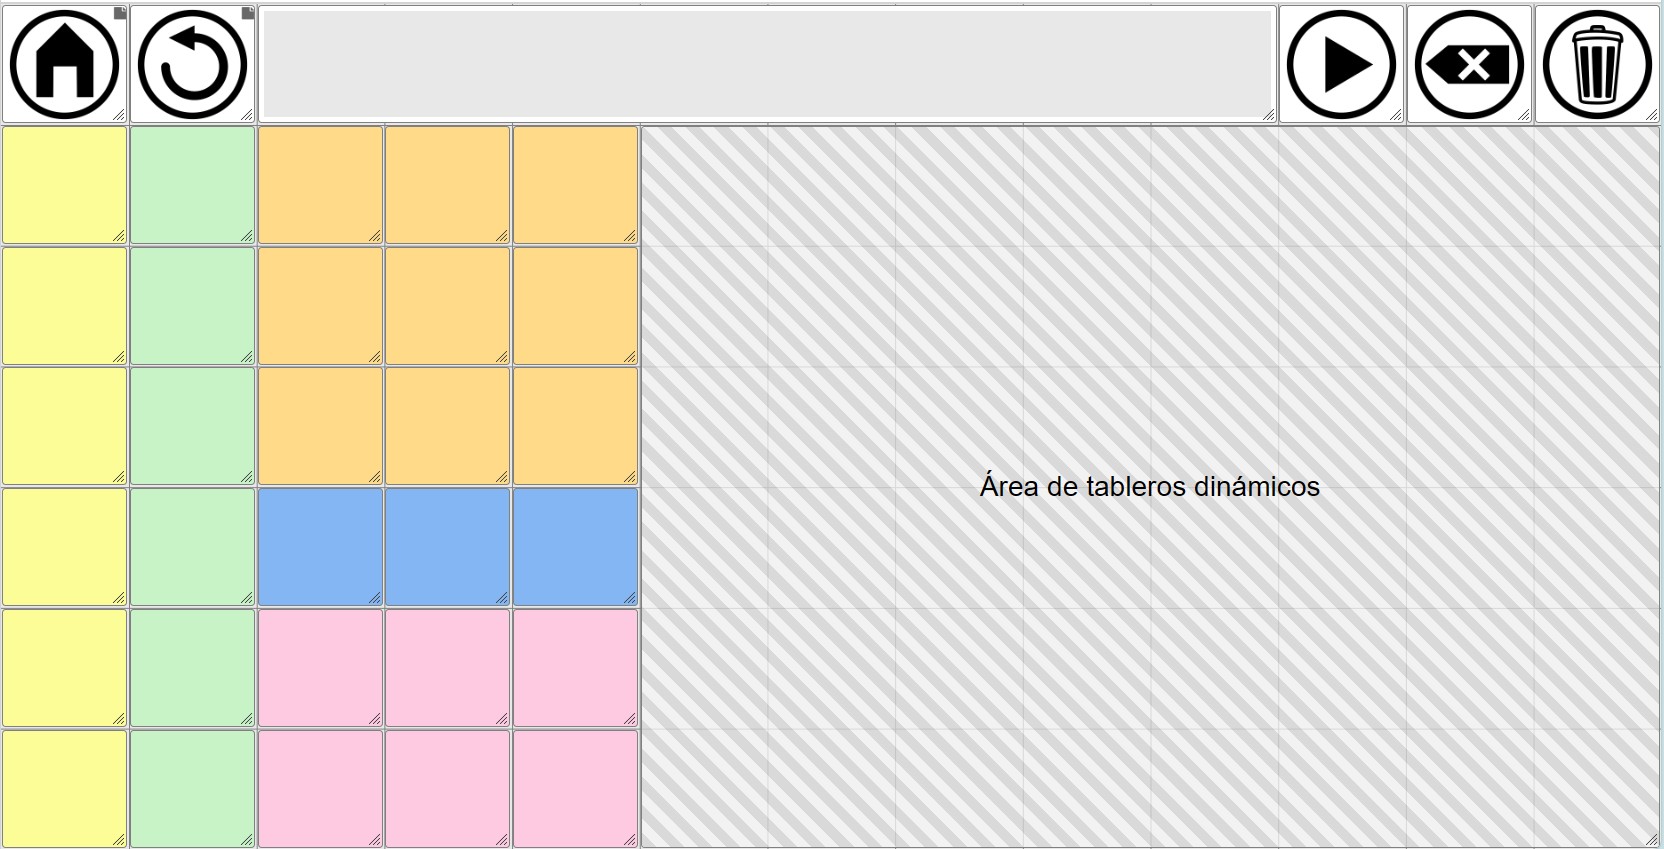
If we don’t mind that the cells in the dynamic grids are a different size than the buttons on the global grid, we could create grids with different dimensions. In the example below, we see that the size of the cells in the first row doesn’t match those in the second row, which are already part of the initial dynamic grid.
2- GLOBAL GRID: FIRST ROW WITH ACCUMULATED PHRASE AND CONTROL BUTTONS + CORE VOCABULARY
In these models, unlike the previous one, we will use not only the first row of the global grid but also some of the rows and columns below it to have core vocabulary that will be permanently displayed in the communicator and define a dynamic grid placeholder on which the rest of the grids will be loaded.
Here, as in the previous model, it is very important that we do a prior planning exercise to design our communicator and define how many rows and columns we need for the core vocabulary and how many for the dynamic grid placeholder.
The design possibilities here are numerous. We’ve included screenshots of some possible layouts for the global grid with the dynamic grid placeholder inserted. When designing both the global grid and the dynamic grids, it’s important to pay attention to the row and column dimensions we’ve provided.
As we mentioned in the previous model, in order for the cells of the dynamic grids to have the same dimensions as the cells we create in the global grid, the dynamic grids will have to have the same number of rows and columns as the dynamic grid placeholder.
Core vocabulary (6x5) - Dynamic grids (6x8)
Core vocabulary (5x4) - Dynamic grids (5x9)
Core vocabulary (7x6) - Dynamic grids (7x7)
Core vocabulary (8x7) - Dynamic grids (8x6)
Core vocabulary (8x7) + Second row + Dynamic grids (8x8)
Core vocabulary (8x7) + Last row + Dynamic grids (8x8)

Podéis descargar copias de seguridad de estos modelos de comunicador en blanco desde esta página del manual.
Sobre estos posibles modelos, como hemos comentado, las posibilidades de diseño son múltiples.
Lo más importante es hacer un diseño previo en el que plasmemos las dimensiones de nuestro tablero global, estableciendo el número de filas y columnas totales que tiene que tener para dar cabida a la primera fila, al vocabulario nuclear y al área de tableros dinámicos.
Las dimensiones (filas y columnas) de este área de tableros dinámicos deberá ser la que tengan los tableros dinámicos que creemos, si queremos mantener un aspecto idéntico para todas las celdas.
Si no nos importa que el tamaño de las celdas de los tableros dinámicos sea igual a las del tablero global, podremos crear tableros dinámicos con las filas y columnas que deseemos. El sistema siempre adaptará el tablero para mostrarlo dentro del área que hayamos definido en el Tablero Global aunque ello suponga hacer las celdas más grandes o pequeñas.
3- TABLERO GLOBAL: PRIMERA FILA CON FRASE ACUMULADA + BOTONES DE CONTROL EN LAS COLUMNAS LATERALES
Este tercer modelo puede ser un complemento al primer y segundo modelo. En él vamos a situar botones de control del comunicador y otro tipo de celdas en la primera y última columna del mismo, además de ampliar el área de frase acumulada a dos filas.
Como podéis ver en la primera columna se han situado los botones de navegación (home y atrás), los botones para controlar el volumen del dispositivo (subir, bajar y silenciar), los botones para poder entrar y salir de pantalla completa desde el propio navegador y los botones que dan acceso a los tableros de Youtube, Radio y al teclado.
En la penúltima y antepenúltima columna se sitúan el botón Play para leer la frase y los botones para borrar la última palabra y borrar la frase completa.
Ya en la última columna hemos dispuesto de arriba hacia abajo los botones para compartir la frase como imagen en RRSS o aplicaciones como Whatsapp, el botón para copiar la frase como imagen al portapapeles y el botón para buscar palabras en el comunicador. A continuación se ha añadido una celda de información en tiempo real (azul) que muestra la hora actual. Debajo se sitúan dos botones para cambiar el idioma entre Español e Inglés ya que en este caso de ejemplo suponemos que es un comunicador bilingüe y por último en se sitúan botones para dar acceso a tableros con vocabulario sobre mi, para hablar con otra persona, frases hechas o más vocabulario.
Por su puesto, es solo un ejemplo hipotético que nos sirve para mostrar algunos de los posibles botones o celdas que podríamos situar en esas columnas laterales.
En el centro se sitúa el área de tableros dinámicos con unas dimensiones en este caso de 8 filas x 14 columnas.
En este modelo no hemos dispuesto vocabulario nuclear pero, fácilmente podríamos modificarlo y añadirlo.

En caso de añadir vocabulario tendríamos que reducir el área de tableros dinámicos y ajustar igualmente el tamaño de los tableros dinámicos para que coincidieran con las nuevas dimensiones (filas y columnas).
Por supuesto, sobre estos modelos básicos podríamos hacer las combinaciones que deseemos. Como os hemos comentado, la flexibilidad es máxima permitiendo adaptarse a distintos diseños y necesidades.
FRASE ACUMULADA
Vamos a añadir la celda para la frase acumulada, donde se van añadiendo los pictogramas y los textos para su posterior lectura con la voz sintetizada.
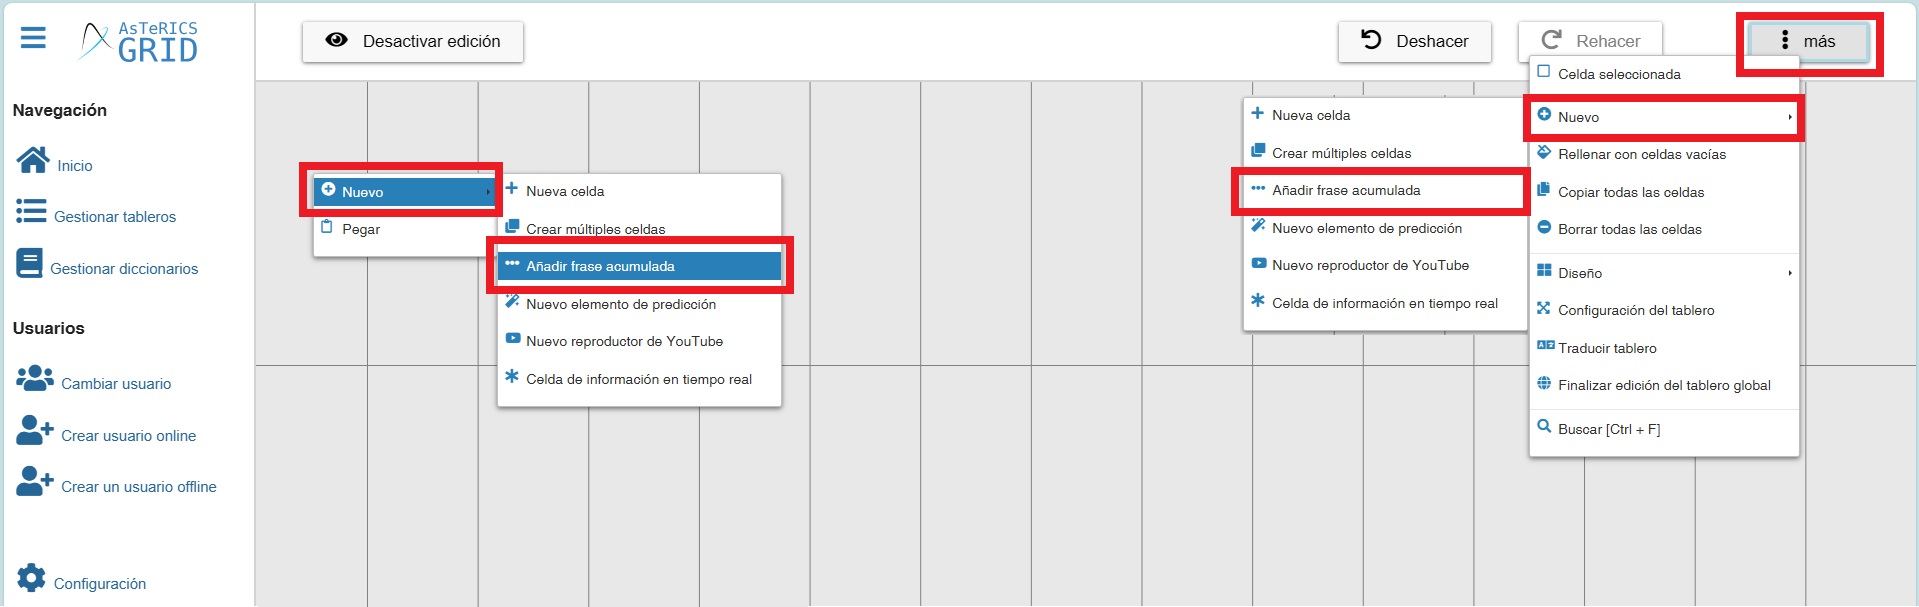
Para ello, podemos pulsar con el botón derecho del ratón sobre una de las celdas y aparecerá el menú, donde deberemos seleccionar Nuevo y Añadir frase acumulada. También podéis añadirla utilizando el botón Más situado en la parte superior derecha del tablero como os mostramos en este montaje.
Una vez seleccionada esta opción, aparece la celda de la frase acumulada que podemos estirar para hacerla más grande y moverla a donde nos interese. Os recomendamos que los elementos que coloquéis en el tablero global estén situados en la primera línea de celdas.
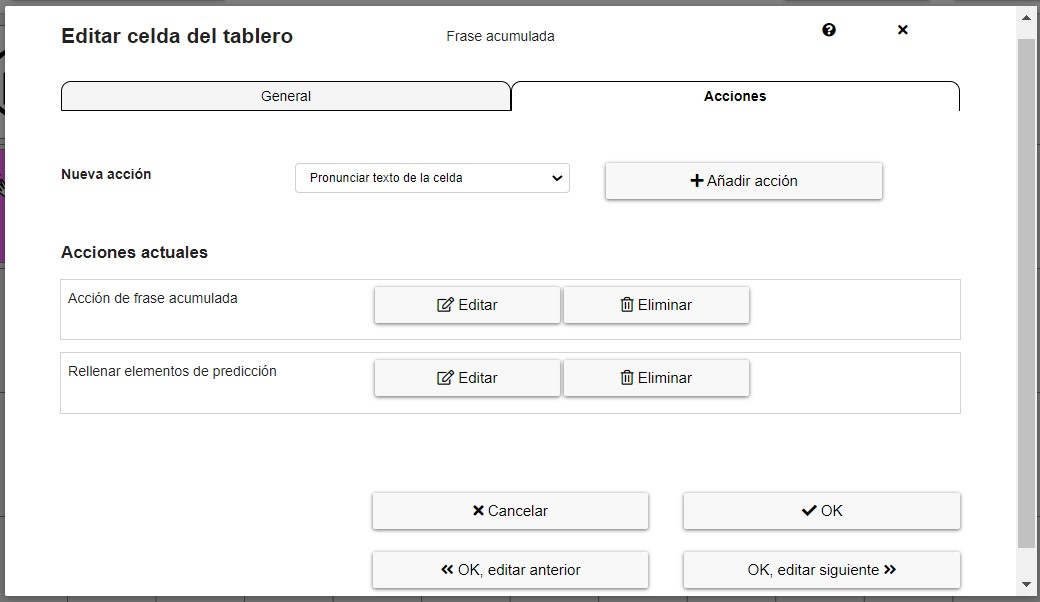
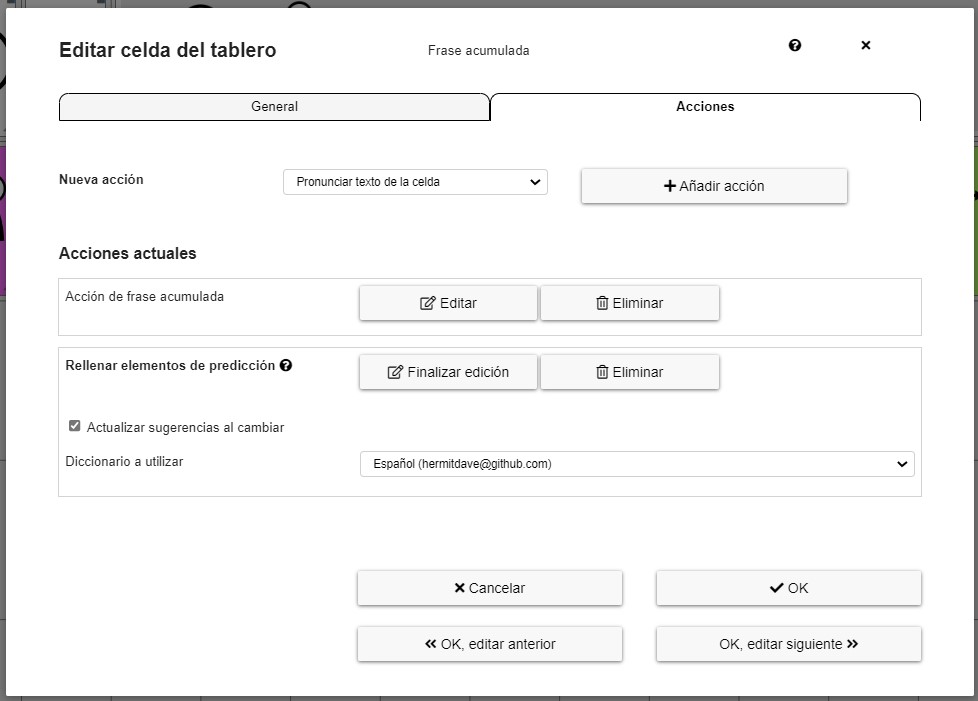
Para Editar la frase acumulada, pulsamos en el botón derecho del ratón sobre y ella y podemos Configurar la frase acumulada. Como podemos observar tenemos dos pestañas: General y Acciones.

Os recomendamos que utilicéis la configuración que viene por defecto, pero podéis realizar pruebas para familiarizaros con esta ventana.
De todas formas explicamos brevemente las distintas opciones.
En la pestaña General podemos establecer:
- Modo de acumulación: podemos Acumular todos los elementos conjuntamente (pictogramas y textos escritos en el tablero del teclado alfanumérico) o sólo Acumular Textos (para personas que utilizan exclusivamente el teclado alfanumérico). Os recomendamos que utilicéis el modo Automático de forma habitual. En cualquiera de los casos, la voz sintetizada leerá los pictogramas y los textos.
- Altura de las imágenes acumuladas: indica el porcentaje que podemos seleccionar para que las imágenes se ajusten al tamaño de la frase acumulada.
- Ajuste del tamaño de la letra de los textos: (recomendado entre 1-2).
- Mostrar texto de las imágenes acumuladas: permite seleccionar si queremos que aparezca el texto que hemos introducido en las celdas de las imágenes y pictogramas o que no aparezcan. Os recomendamos la primera opción. En alguna ocasión sucede que el texto es más grande que el pictograma y aparece entrecortado. Podemos utilizar la opción anterior, para ajustar el tamaño de la letra.
- Mostrar el texto de la celda completo debajo de las imágenes: permite seleccionar si queremos que el texto se vea completo debajo de las imágenes o se corte y añadan unos puntos suspensivos si este supera los 8 caracteres. Por defecto, esta opción está desactivada para maximizar el número de imágenes que se muestran en el espacio visible de la frase acumulada, pero puede ser interesante activarla si, por ejemplo, queremos que el usuario lea la frase compuesta en la frase acumulada.
- Usar la barra de desplazamiento horizontal si los elementos no caben: si el usuario/a está acumulando más elementos de los que caben en la frase acumulada, aparecerá una barra de desplazamiento en la parte inferior. En el caso de que esta opción no esté activa, los elementos se dispondrán en varias líneas.
En la pestaña de Acciones, podemos establecer cualquier tipo de acción del menú que se ejecutarán cuando pulsemos en el recuadro de la frase acumulada.
En este caso, es interesante tener activadas las que podéis visualizar en la siguiente captura: Acción de frase acumulada y Rellenar elementos de predicción.
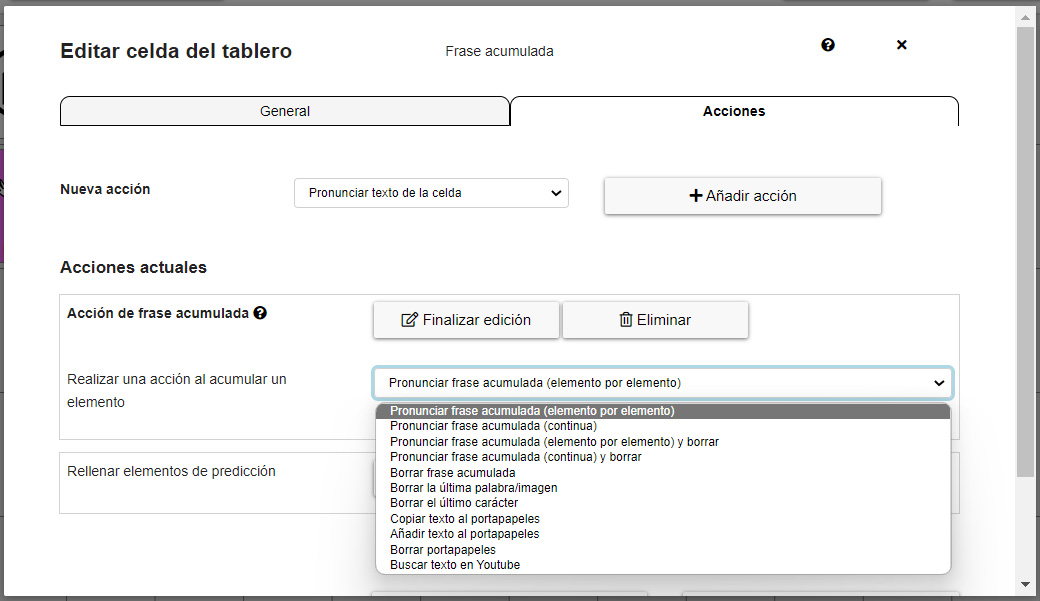
En el caso de Acción de frase acumulada, os recomendamos utilizar cualquiera de las cuatro primeras acciones:
- Pronunciar la frase acumulada (elemento por elemento): la voz sintetizada va pronunciando elemento por elemento toda la frase, resaltando los pictogramas y textos con un cuadro verde de fondo.
- Pronunciar la frase acumulada (continua): la voz sintetizada pronuncia toda la frase de forma continua, sin pausas.
- Pronunciar la frase acumulada (elemento por elemento) y borrar: la voz sintetizada va pronunciando elemento por elemento toda la frase, resaltando los pictogramas y textos con un cuadro verde de fondo. Una vez locutada la frase, se borrará automáticamente.
- Pronunciar la frase acumulada (continua) y borrar: la voz sintetizada pronuncia toda la frase de forma continua, sin pausas. Una vez locutada la frase, se borrará automáticamente.
Estas acciones fnncionan de forma totalmente independiente a las acciones que hayamos establecido para el botón Play. Por ejemplo, podemos locutar la frase elemento por elemento al pulsar en el recuadro de la frase acumulada y podemos locutar la frase de forma continua al pulsar en el botón Play.
En el caso de la acción Rellenar elementos de predicción, nos aparecerán sugerencias de palabras conforme vayamos escribiendo en nuestro teclado alfanumérico, tal como explicamos en el tutorial 11 – Acciones – Creación de un teclado alfanumérico con elementos de predicción.
Podemos configurar esta acción de forma general desde este apartado, aunque deberemos haber elegido un diccionario con anterioridad, tal como explicamos en el tutorial mencionado.
Cumulative phrase Action Cells
Now, let’s add the cells with different actions of the collect element (cumulative sentence). This is an example. In your case, you can distribute the elements in the order that is most appropriate for your user.
To enter the action cells for the cumulative phrase, first create a New cell by right-clicking on it or from the upper right button More.
As usual, the cell editing window is shown. As they are action cells, we can leave the Text unfilled.
Before entering the image, we must select the Action we are going to enter for our cumulative phrase (collect element).
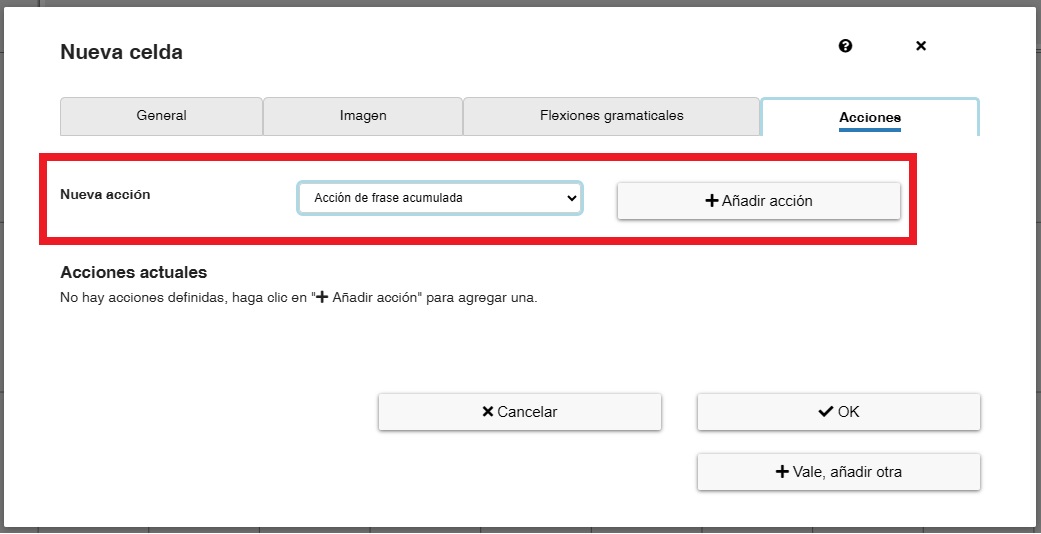
In this window, select Collect element action and click on Add action. As we can see, there are several actions, although it is not necessary to enter all of them, but only those that the user will actually use.
In the following example, we are going to enter the cell that is going to perform the action of Speak collect element content action that will be performed by the synthesised voice when we click on this cell.

As we can see, there are four options when it comes to pronouncing the cumulative sentence:
- Speak collect element content (separately – element by element): the synthesised voice speaks the whole sentence element by element, highlighting the pictograms and texts with a green background box.
- Speak collect element content (continuously): the synthesised voice speaks the whole sentence continuously, without pauses.
- Speak collect element content (separately – element by element) and clear afterwards: the synthesised voice pronounces the whole sentence element by element, highlighting the pictograms and texts with a green background box. Once the phrase has been spoken, it will be automatically deleted.
- Speak collect element content (continuously) and clear afterwards: the synthesised voice speaks the whole sentence continuously, without pauses. Once the phrase has been spoken, it will be automatically deleted.
In the Image tab, in ARASAAC we can find a collection of action buttons, which you can use in this case. To view them and assign them to the cell, just go to the Image section and type the word button in the Image search field. For the action of read the sentence, we have selected the Play button.
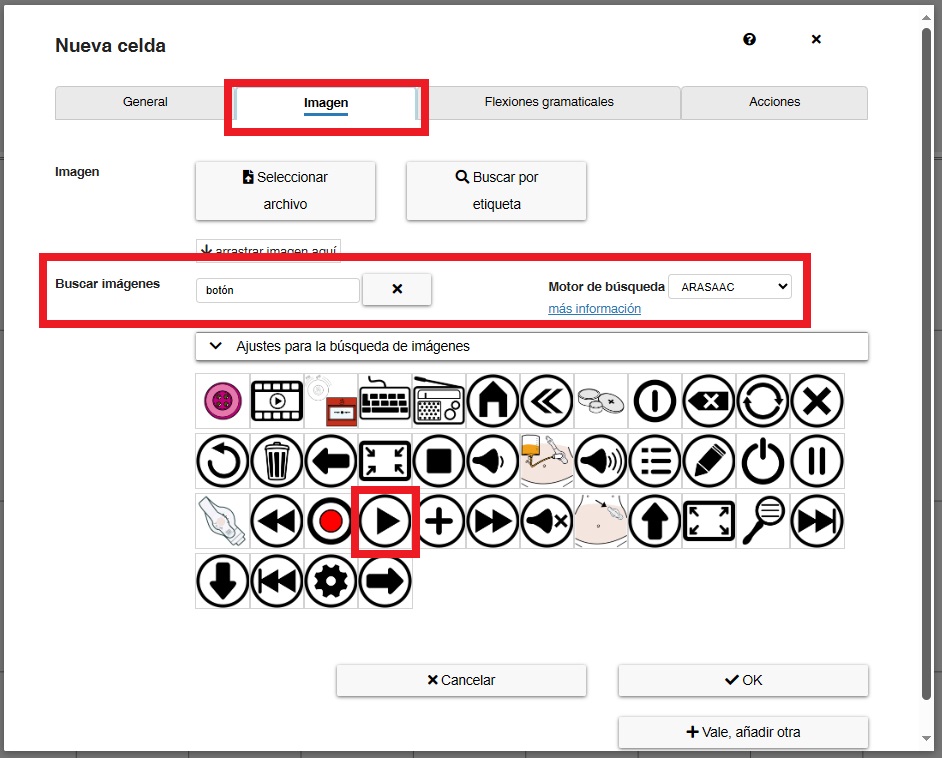
Click on OK and we have our first cumulative phrase action cell.

Now you can continue to insert the most frequent cells that the user will use, such as Delete last word/image or Clear collect element. The process is the same as the one used to pronounce the phrase. We choose the icon and associate it with the corresponding action.
We recommend that you edit the default cells to understand how each one works.


