


 This work is licensed under a Creative Commons Attribution-NonComercial-ShareAlike 4.0 International license.
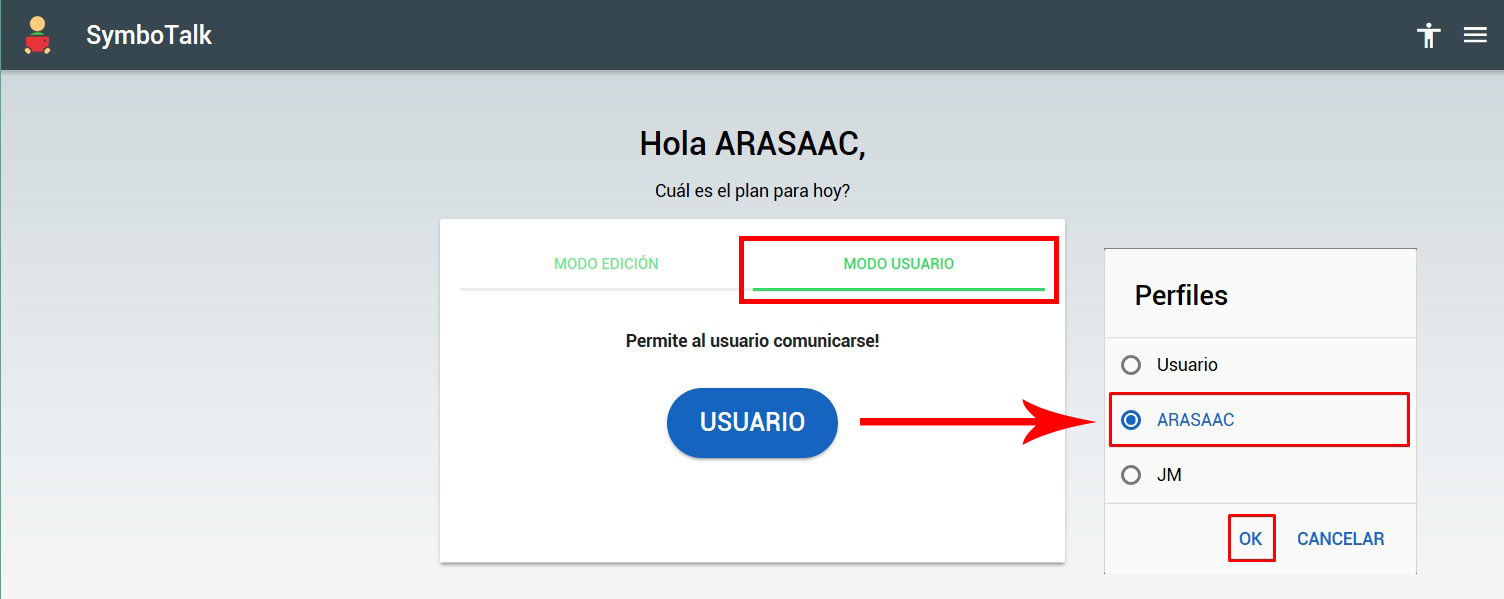
USER MODE
We access user mode from the main window of SymboTalk by clicking on the “User Mode” tab. When clicking on “User” if we only have one Profile created, the system will show the board that has been defined as main (we will see how to configure it next).
If we have created more than one profile, a list will be displayed in which we must select the one we want to view and press OK. As we will see in the next chapter of configurations if we activate the Automatic Blocking of the user mode when leaving the application, the system will remember the last profile with which we have worked and when starting again the application will start with it without having to select it in the list.
ADD A NEW PROFILE
Once we have created and linked the boards we need, we can associate these to a profile. The concept of profile is broad and can refer to being associated with a user or can be associated with a certain event, situation, time of day, etc.
If, as professionals, we work with several users, we can associate each profile with a specific user. In this way, with a single SymboTalk account we can manage several communicators for several users with the advantage of being able to reuse boards that may be common to several of them but also having the possibility of having personalized boards. As we will see at the end of the chapter, we can also share a specific user with another registered SymboTalk user (such as a user’s family).
If we only manage one user, the profiles can be used to manage specific situations (tantrum), times of day (morning or afternoon), events (excursion, birthday), etc.
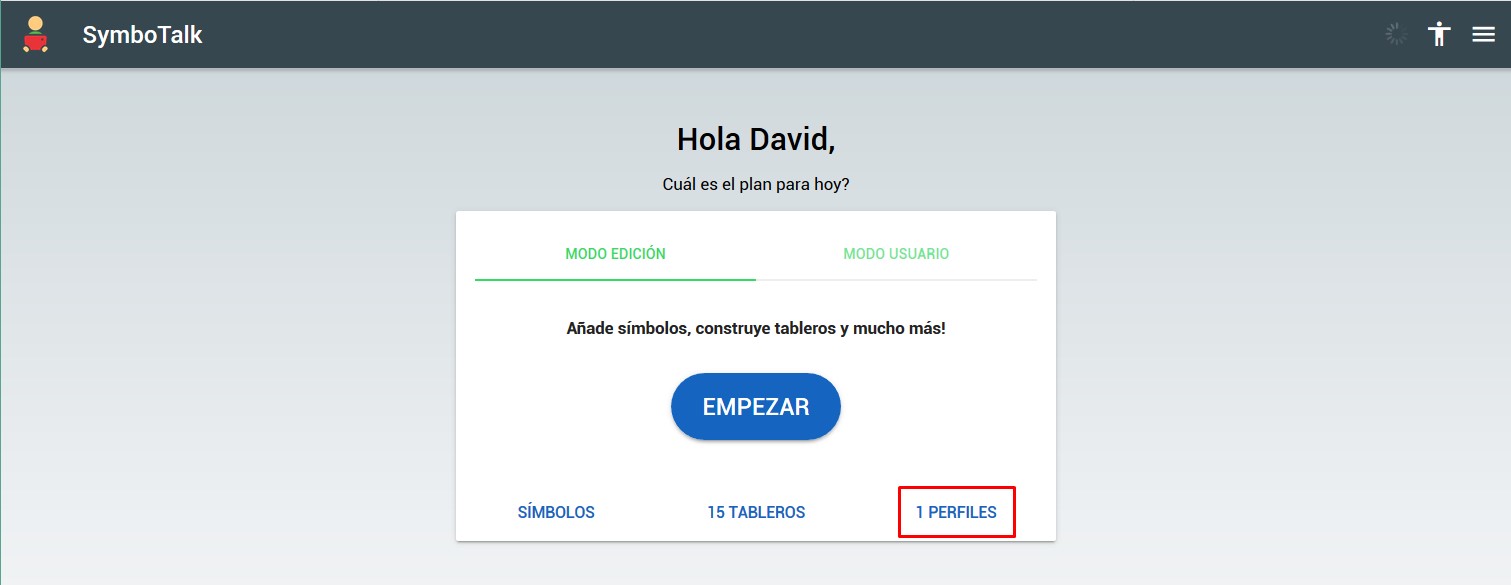
To create a new profile from the main window, click on “PROFILES” and then on the “+” sign that appears in the upper right corner.

In the “ADD PROFILE” window we create our profile by configuring the different parameters:
- We can customize the profile image by clicking on the pen that appears in the upper left corner. We can use an image already saved or use the camera of our PC or device to take a photo.
- We give a name to the profile.
- We establish your gender (male or female).
- Select the Main Board. This is the most important parameter because it defines which board will be launched when selecting the profile.
- Click on “SAVE” to create the profile.
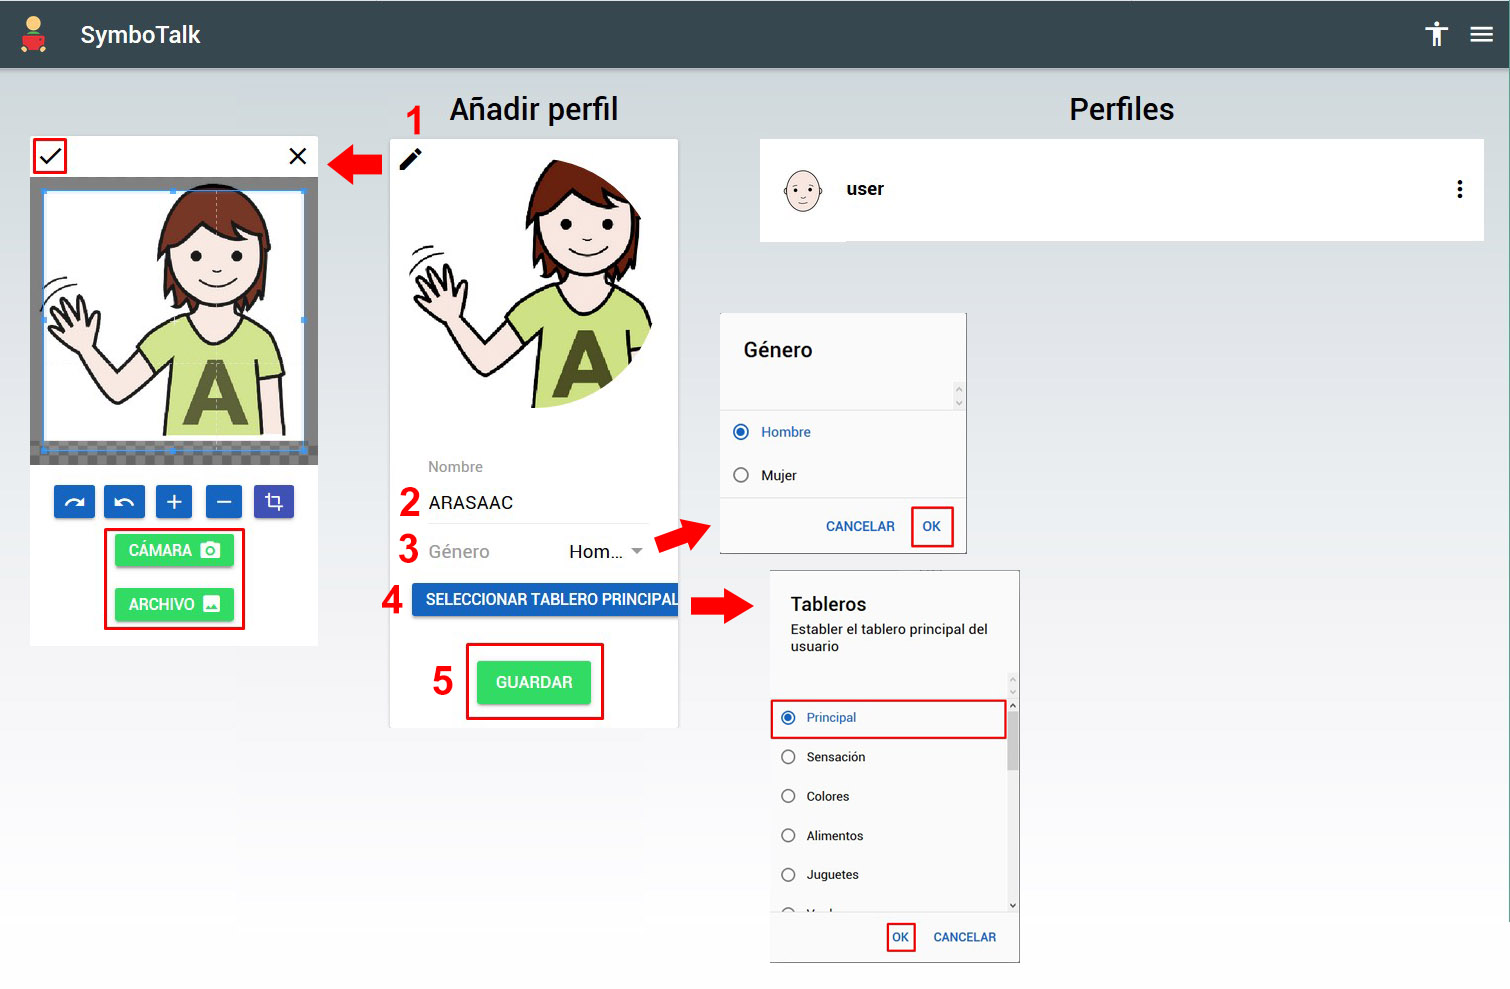
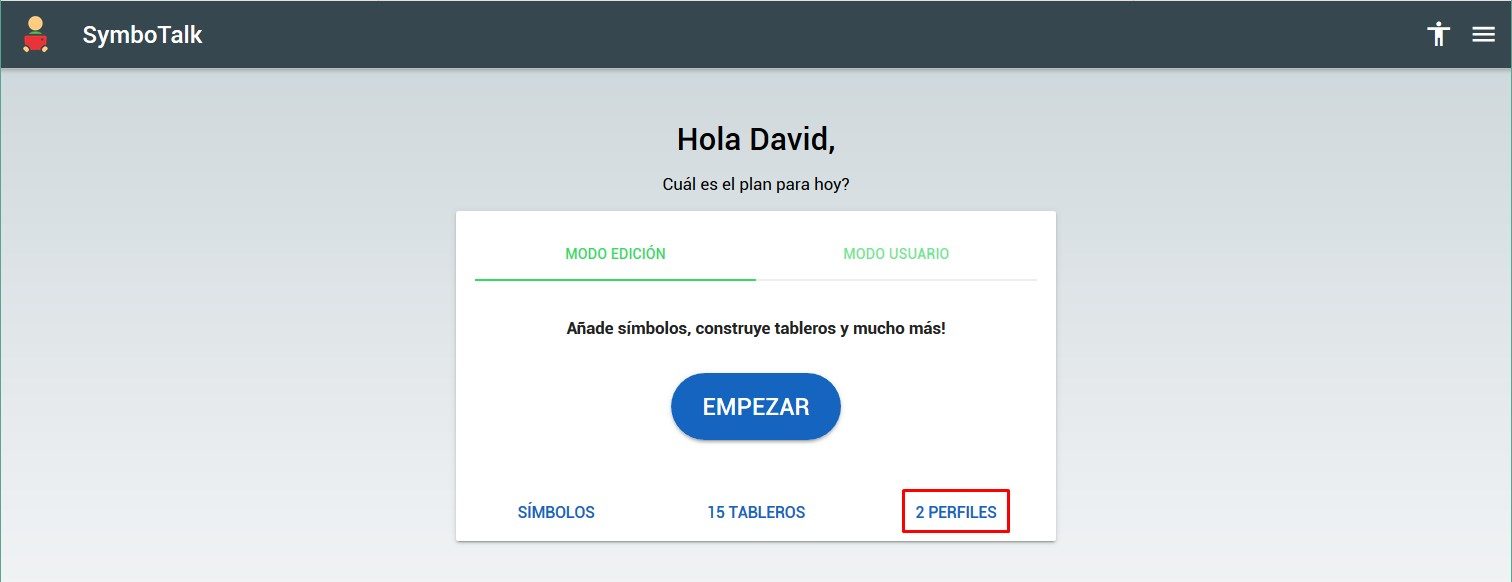
Once we press “SAVE” we return to the main window where one more profile will appear in the number of profiles.
ADVANCED PROFILE OPTIONS
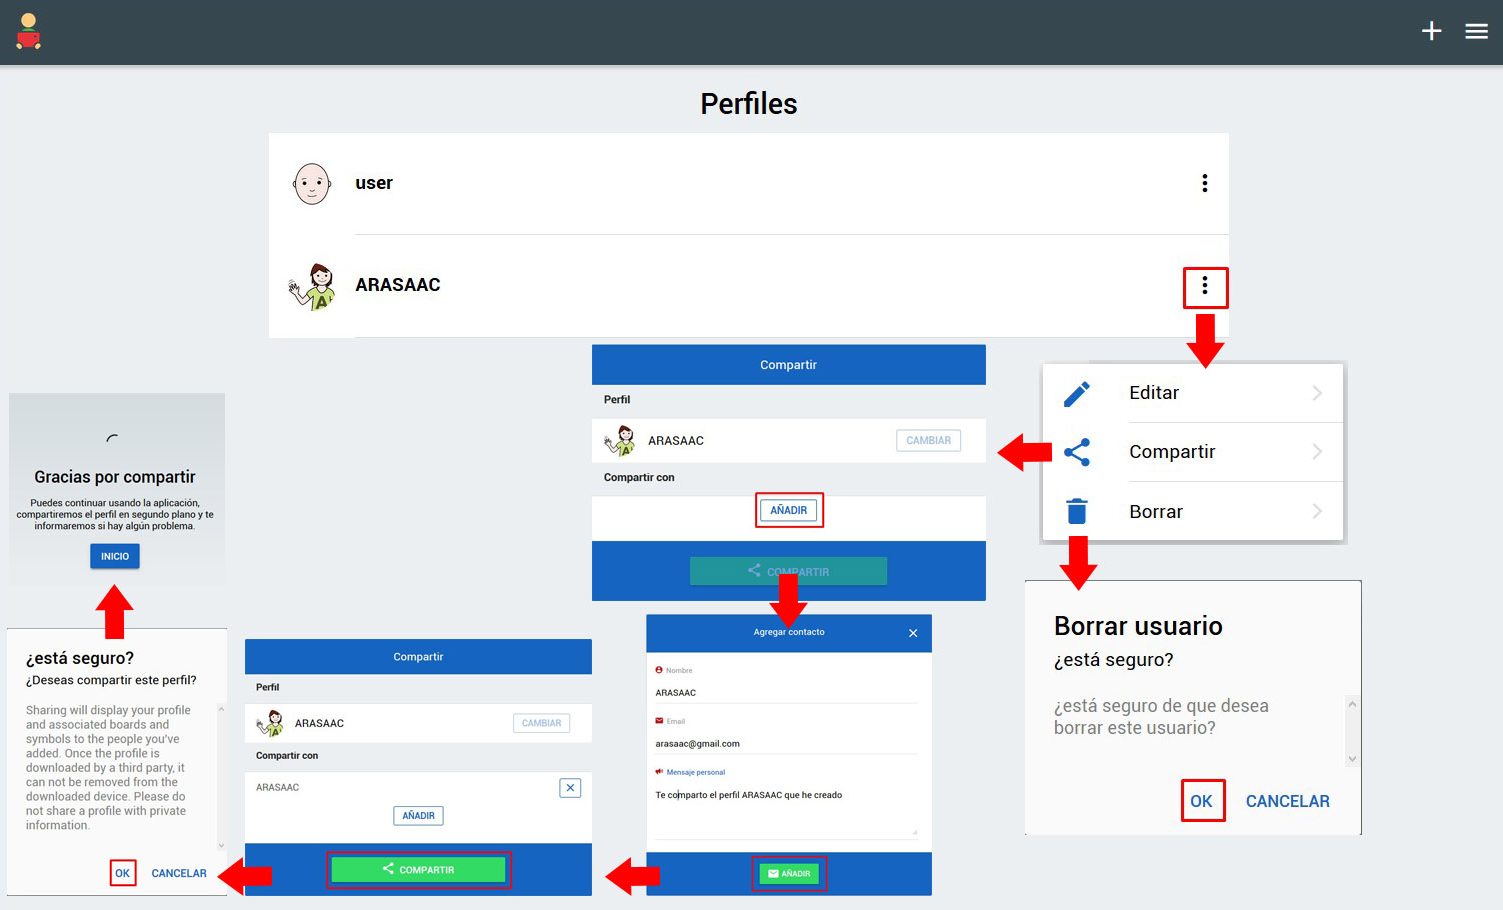
On any of the profiles that we have created, if we click on the three points that appear to the right of the name of the profile, we will access the contextual menu.
This menu offers us 3 options:
- Edit: if we click on Edit we will access the window with the profile data that we have seen previously when creating it, being able to modify the name, gender, image or main board.
- Delete: clicking on Delete will ask us for confirmation before deleting it. The deletion of a profile does not affect the boards that we have created and that we had associated with that profile through the Main Board. Only the profile will be deleted.
- Share: This option, as we anticipated at the beginning of this chapter, allows you to share a profile with another registered SymboTalk user (for example, with your family). When sharing a profile, both the profile and the associated boards and pictograms will be added and downloaded to the recipient’s device. This option is only available if the sharer and the recipient have signed up for the cloud sync service (currently $1/month) and have it activated.
SHARE A PROFILE
The procedure to SHARE a profile is as follows:
- Once we click on “Share” in the desired profile we will access a window in which we must add the user with whom we want to share the profile.
- Click on “Add“.
- In the window that shows us, we fill in the recipient’s data (name, email and personal message) and click on the “Add” button. It is important that the email matches the one the recipient used to sign up for SymboTalk.
- Once we have added the user or users with whom we want to share the profile, click on the “Share” button.
- The system shows us a warning message indicating that by sharing the profile, the recipient will be able to see the profile and all the boards and pictograms associated with it and that, once the recipient has downloaded the shared profile to their device (and all associated resources) can no longer be removed from that device.
- Clicking on OK completes the process of sharing the profile.
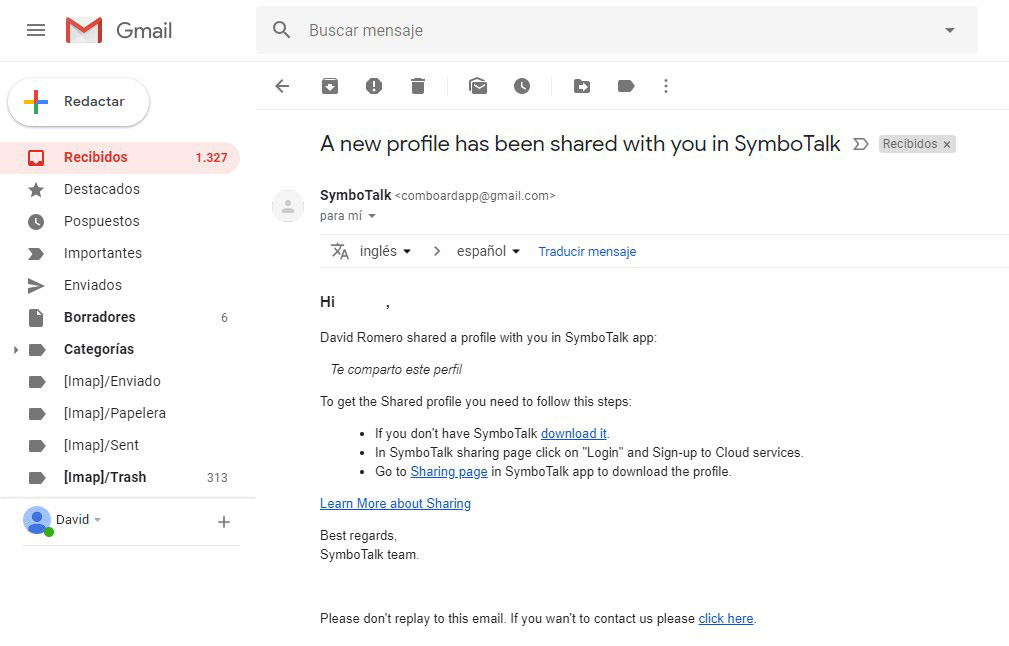
The person we’ve shared the profile with will receive an email similar to this one notifying them that a profile has been shared with them and what steps they need to take to view it.
If when clicking on “Share” in a profile we receive this warning message, it is because we do not have the “synchronize” option activated in the “Synchronization settings” of SymboTalk (as already mentioned, it is a paid service).
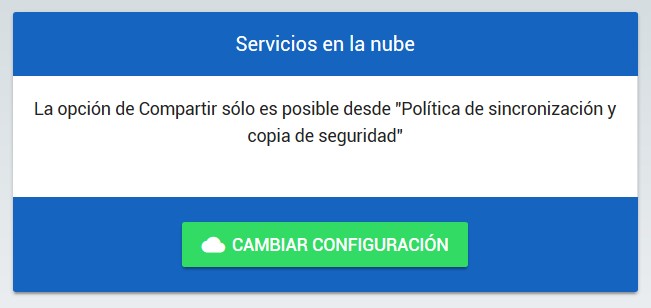
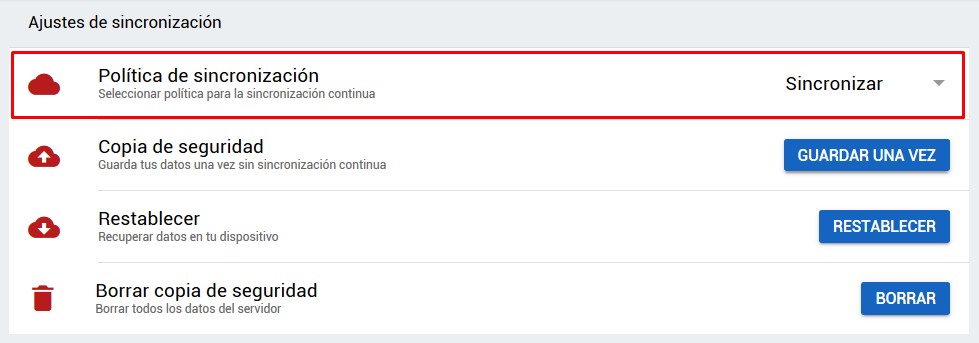
By clicking on “Change settings” we access the “Synchronization settings” window and change “Synchronization Policy” to “Synchronize”.
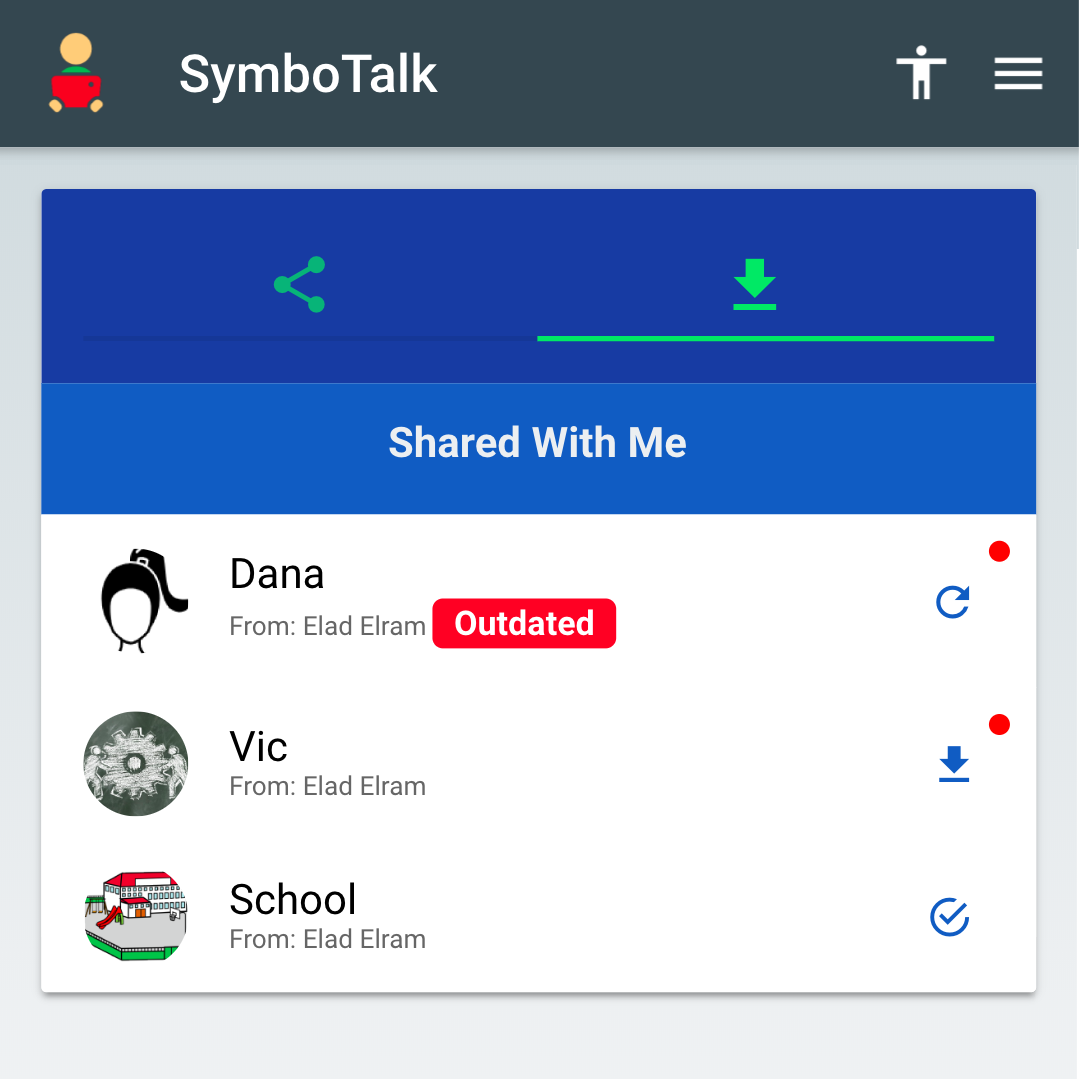
Once we have shared a profile from the SymboTalk menu in the “Sharing” option we can see the profiles that we are sharing and those that are sharing with me.
In the event that they are sharing a profile with me, we can download the profile for the first time (VIC Profile) or download again a profile that has been updated by the owner (Dana Profile). In both cases it will warn me with a red dot on the icon of the action to be carried out.
In the case of the profiles that I am sharing, as the owner, I can stop sharing them at any time although, as we already mentioned, if the recipient has already downloaded it, it will not be deleted from their device, although they will stop receiving updates from it.


