 Este obra está bajo una licencia de Creative Commons Reconocimiento-NoComercial-CompartirIgual 4.0 Internacional.
To finish this tutorial on the basic operation of SymboTalk we are going to comment on the most important aspects of the communicator configuration not commented on in previous chapters.
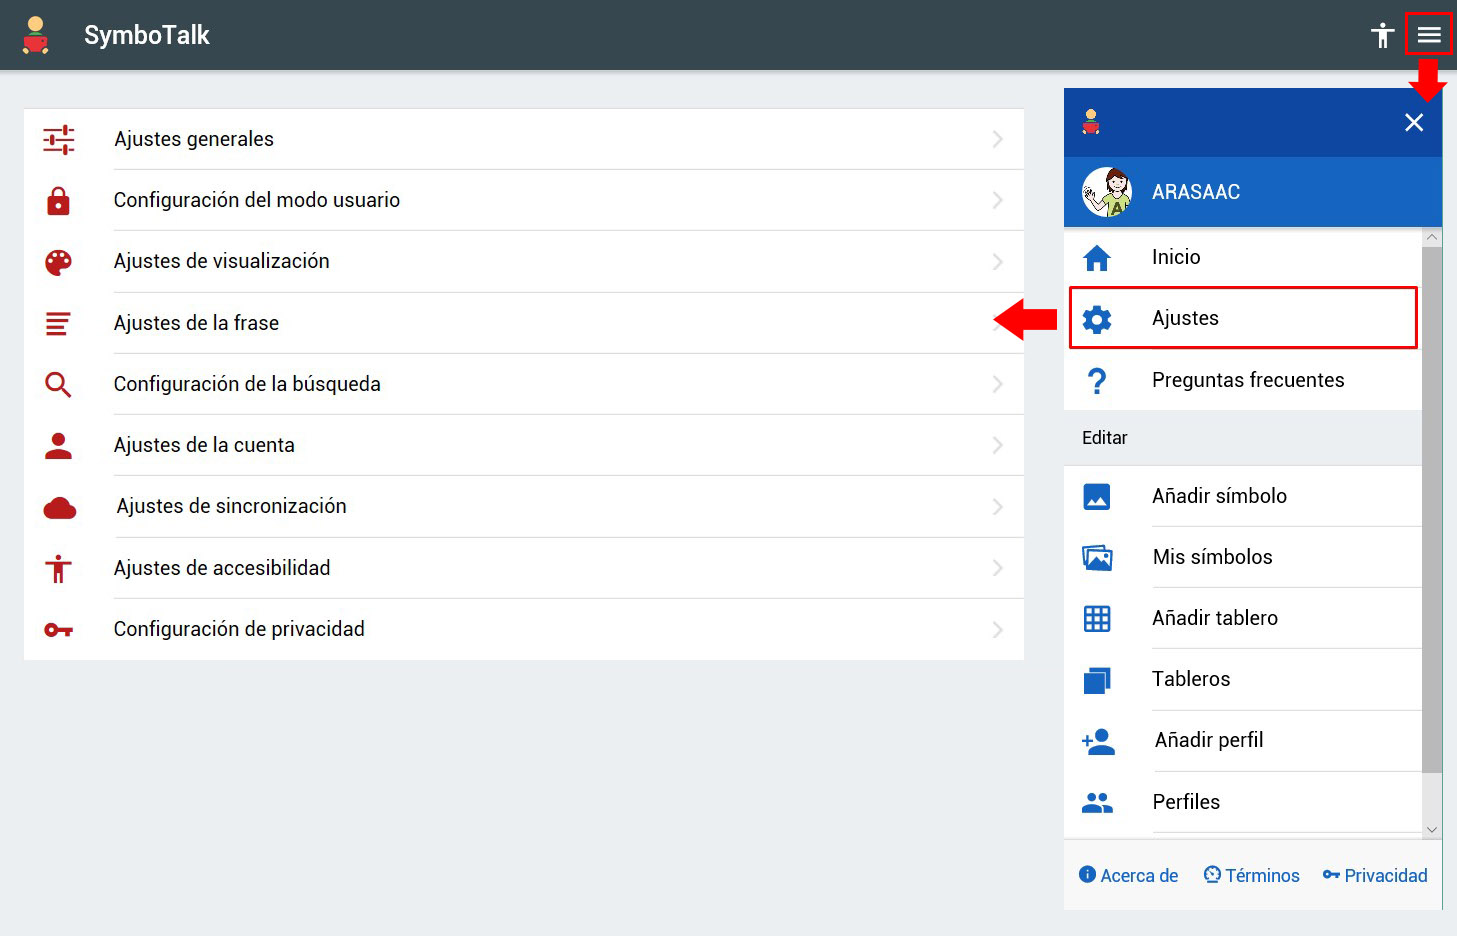
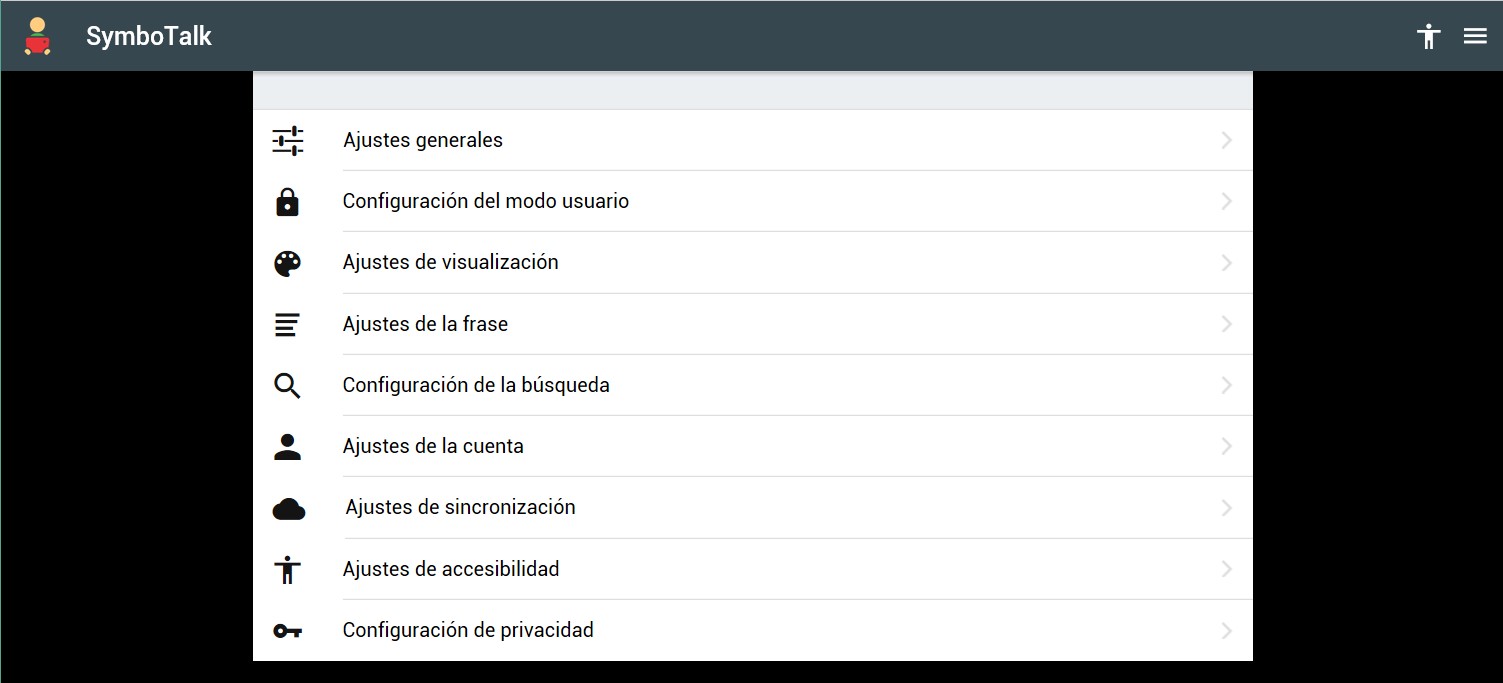
To access the SymboTalk configuration, from the main page we will click on the three lines that we have in the upper right corner, which will show us the application menu. From there, click on “Settings”.
GENERALE SETTINGS
This section was already explained in Chapter 3: First configurations
USER MODE SETTINGS
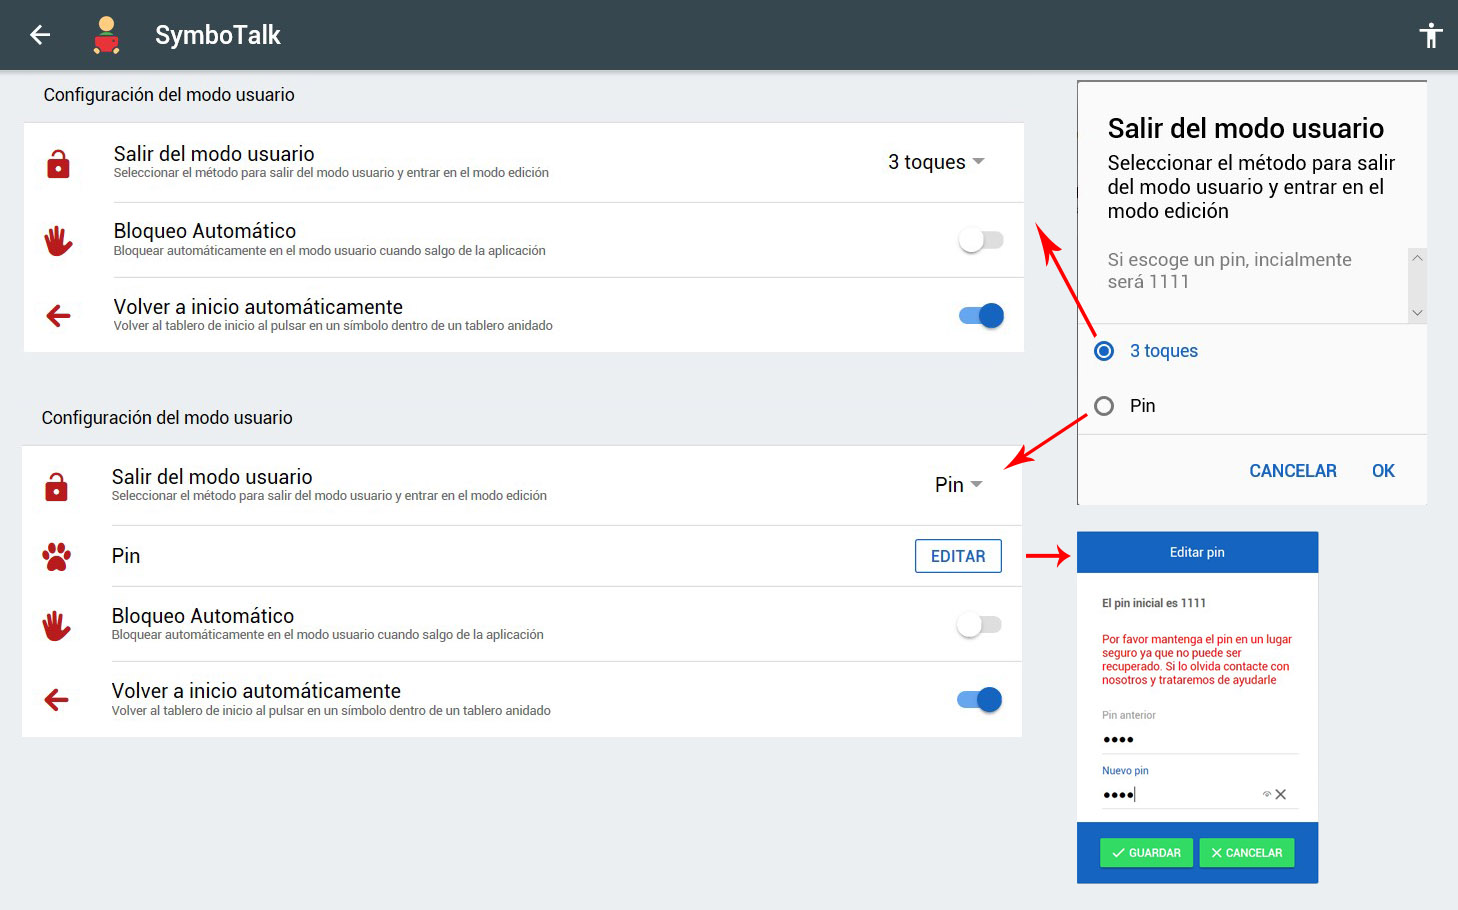
From this section we configure the different options of the user mode.
- Exit user mode: when the communicator is in user mode, it is locked by default, so that the user cannot modify it. To unlock it we have two ways: 3 touches (on the lock that indicates that it is locked) or by setting a PIN (4 digits). 3-touch mode is configured by default. If we change to PIN mode, a new option will appear in the menu that will allow us to change it (the default PIN is 1111).
- Automatic blocking: this option guarantees that if we activate it every time we exit the application, it is always in blocked user mode.
- Automatically return to home: this option, if enabled, causes the system to return to the board that has been set as main when the user selects a pictogram that is part of a linked board (that is, comes from another) and it is not present. linked.
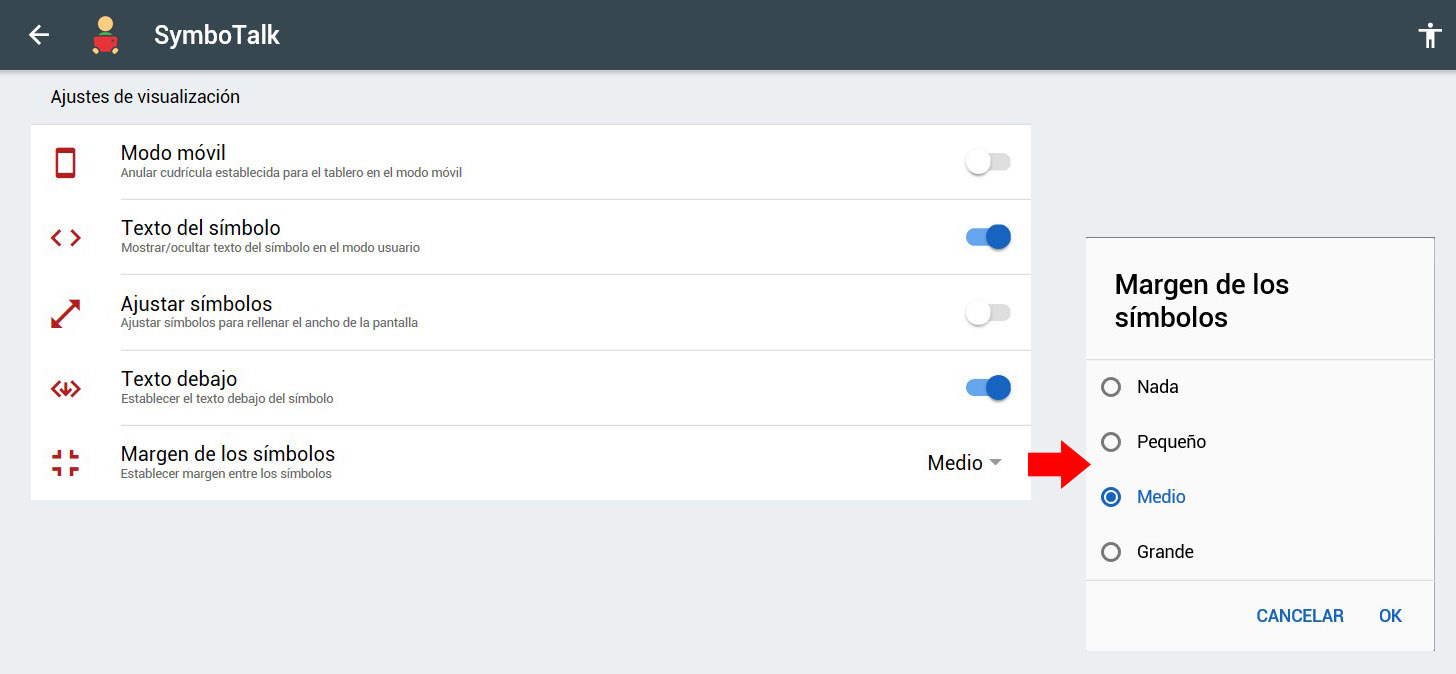
DISPLAY SETTINGS
These settings allow us to improve the visual experience of the APP on different devices and configure what is related to the text of the pictograms:
- Mobile mode: if we activate this option, the cell configuration that we would have established when creating the dashboard stops being applied and the cells are distributed according to the size of the device screen and other parameters such as the margin of the symbols. This option is suitable for devices whose screens have a low resolution and do not allow the established cell configuration (especially when it is with many cells) to be functional (the cells will appear very small or with the cells distorted).
- Symbol text: if activated, each symbol will be accompanied by the text that has been defined for it. If we deactivate it, the text will not be displayed, although it will continue to be associated with the pictogram for the purposes of the accumulated phrase or voice synthesis.
- Adjust symbols: if we activate this option, the square display of the cell (1:1 ratio) is no longer prioritized, but rather they will be adjusted to the resolution of the screen, increasing its width or height. Even though the cell is not square, the pictogram will still be centered inside the cell and keep its square appearance.
- Text below: If we activate this option (and the Symbol text option is activated) the text that accompanies the pictogram will be shown below the pictogram. If it is deactivated, it will be displayed above the pictogram.
- Symbol margin: this option allows you to establish a separation of greater or lesser magnitude between the cells that also adjusts to the user’s motor skills. The greater the separation, we make sure that the click is not made by mistake on an adjoining cell. By clicking on the drop-down menu we can choose between leaving no margin (Nothing) or a small, medium or large margin.
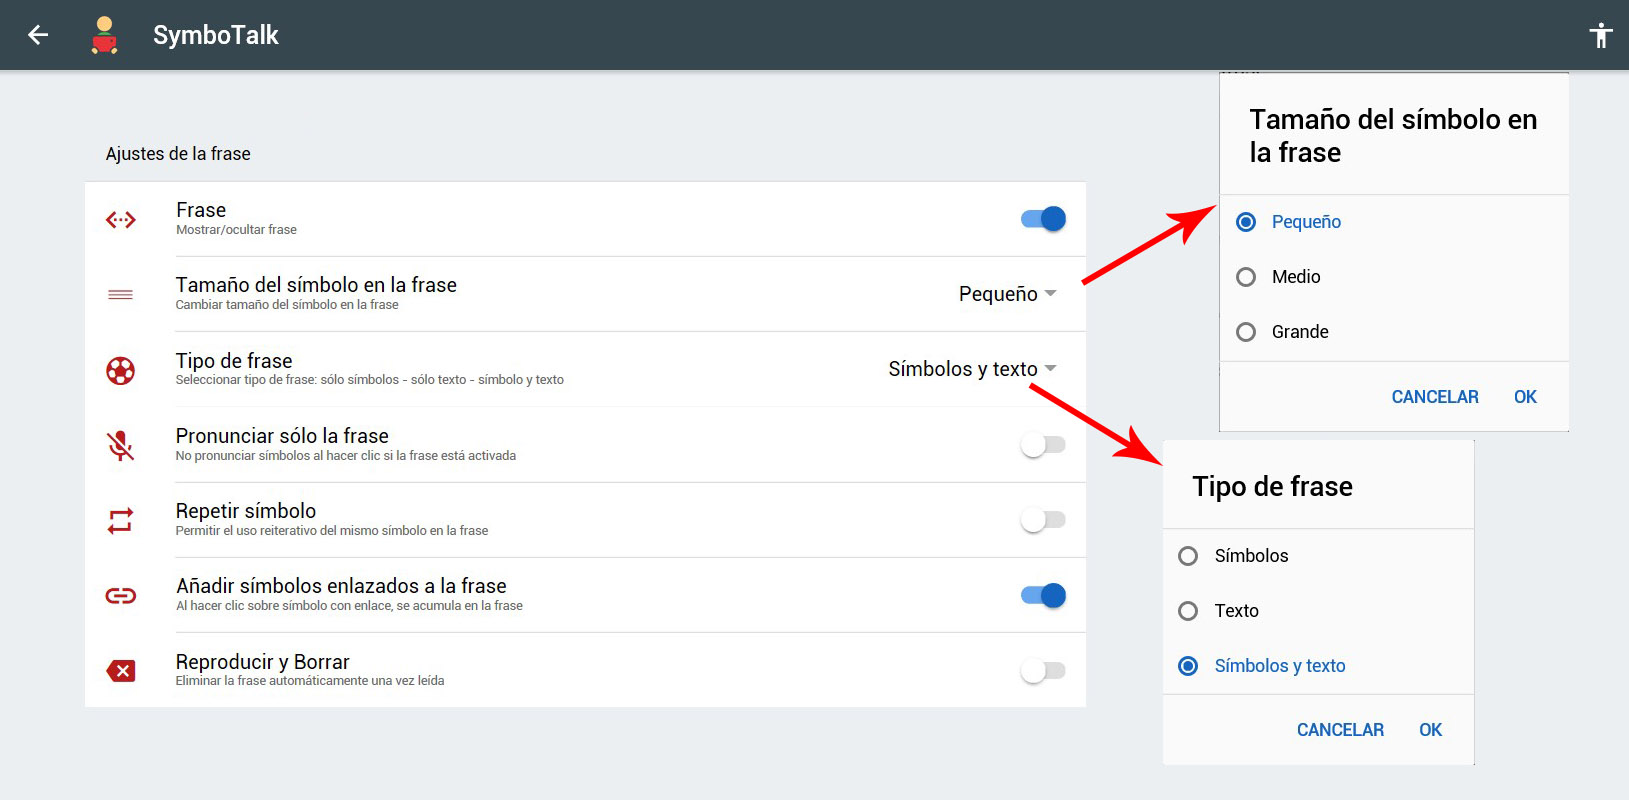
PHRASE SETTINGS
This window allows you to configure the accumulated phrase (pictograms that accumulate in the upper part of the communicator as they are selected by the user). Las opciones que tenemos disponibles son:
- Phrase: This option is enabled by default. If we deactivate it, the accumulated phrase is hidden and SymboTalk becomes a communicator by direct selection since the pictograms do not accumulate forming a phrase and are spoken as they are selected. If we deactivate the “Phrase” option, the rest of the options are hidden.
- Phrase Symbol Size: Allows you to adjust the size of the glyphs in the accumulated phrase. We will adjust this size according to the screen resolution and the length of the sentences that the user usually builds.
- Type of phrase: we will define if in the phrase we want to show only text, only symbols or both.
- Pronounce only the phrase: If we activate this option, only the phrase will be spoken when clicking on the “Play” button located at the beginning of the accumulated phrase. If we deactivate it, the symbols will also be announced as we select them (in addition to playing the accumulated phrase).
- Repeat symbol: this option prevents, in cases where the user has motor control difficulties, that the same pictogram accumulates several times in the sentence when it is pressed inadvertently. To allow the accumulation of the same pictogram several times in the accumulated phrase, we must activate this option.
- Add symbols linked to the phrase: if we activate this option, the pictograms that are linked will be added to the phrase with the text that they have defined. If we deactivate it, the pictograms will only act as links to other boards, not accumulating in the phrase.
- Play and Delete: by activating this option, each time the accumulated phrase is read (by pressing the Play button) the phrase will be automatically deleted without the need to click on the trash can.
SEARCH CONFIGURATION
This section was already explained in Chapter 3: First configurations
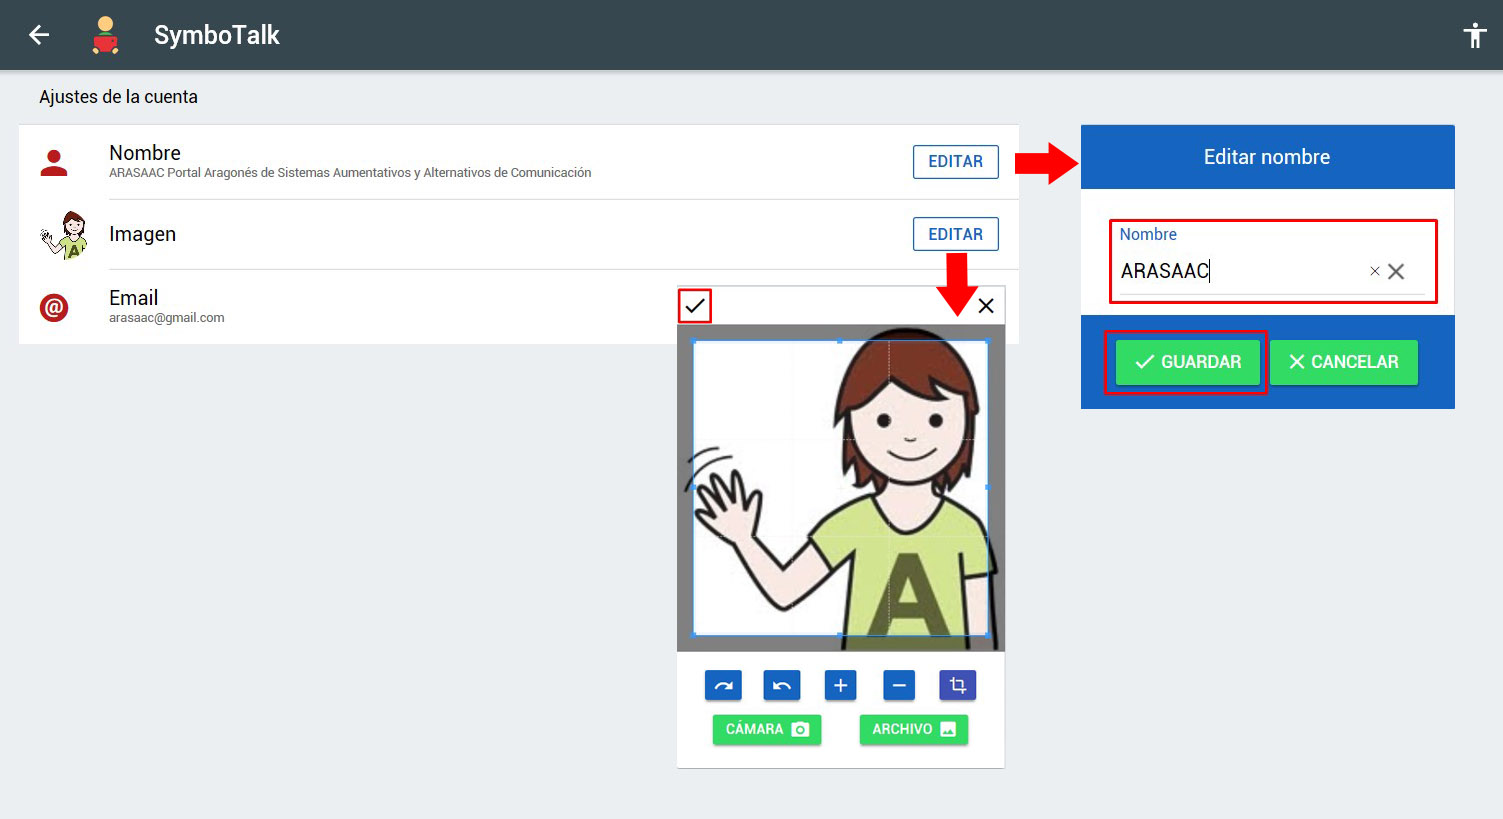
ACCOUNT SETTINGS
From this section we can modify the “Name” and “Image” associated with the account when we registered in SymboTalk. In both cases we will click on “Edit” to be able to modify them. The email cannot be modified.
SYNCHRONIZATION SETTINGS
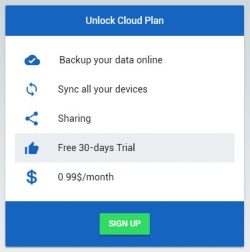
As we mentioned in the previous chapter (Profile Management)when talking about the option to share these, synchronization / backup in the cloud is a paid service that, currently, we can enjoy for free for 30 days just for registering and that, subsequently, has a cost of less than € 1 per month (€ 0.99).
Registration can be done with total peace of mind since no information about the payment method is requested, only the name, email and password. Only if we are interested, after the 30-day trial, we will be informed of how to pay for the subscription.

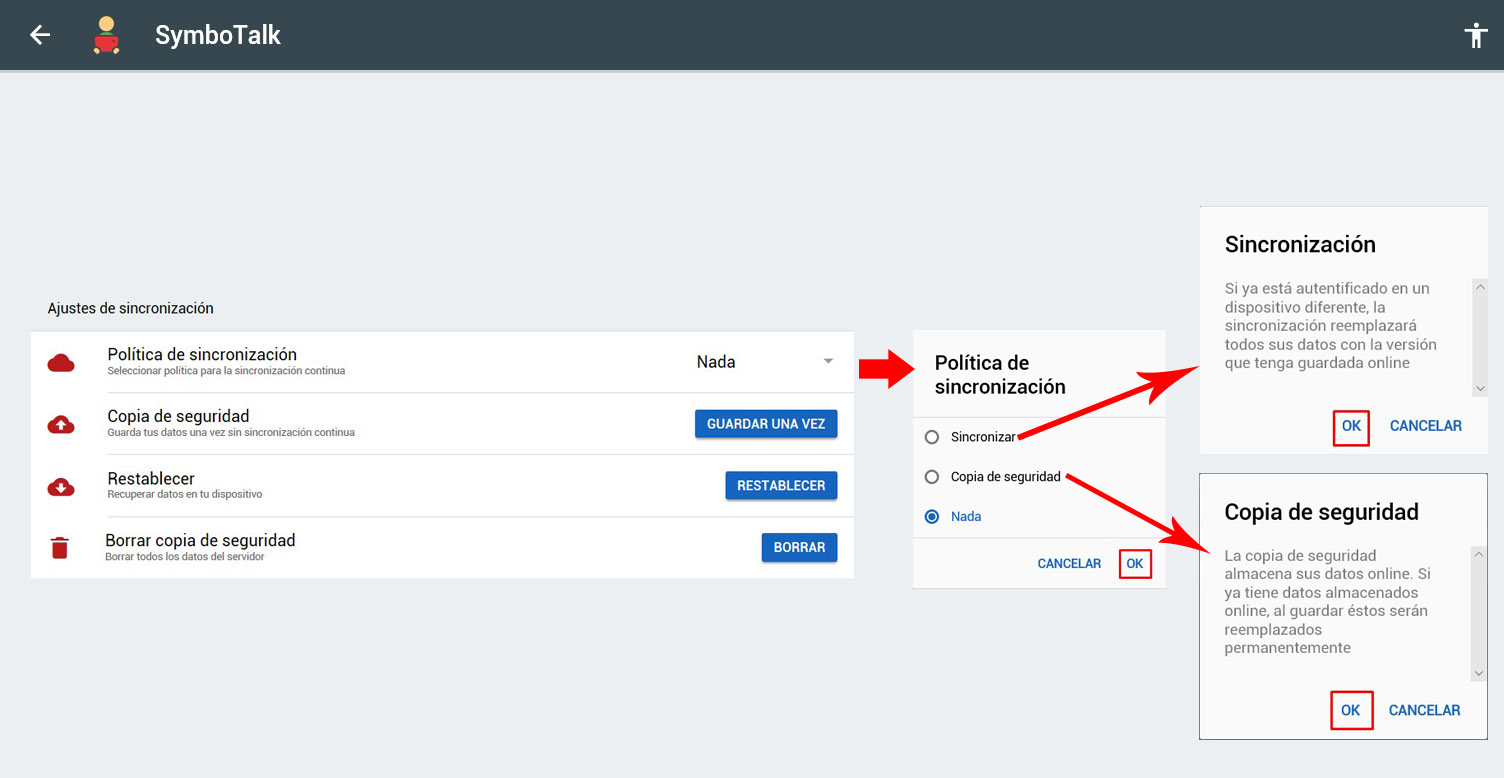
Once we are registered in Symbolalck, when accessing the synchronization settings we see different options.
The first of them, and most important, is theSynchronization Policy that offers us 3 options:
- Synchronization: The “synchronization” option, when selected, automatically saves in the cloud, from that moment on, any modifications that we make in the boards or profiles in the device in which we are working and will automatically synchronize them in all the devices in which we work. that we are authenticated with our SymboTalk account when we use them again. In this way, we always ensure that we work with the same version of the dashboards and profiles on all the devices we work with. As we mentioned in the previous chapter (Profile Management), in order to share a profile with another SymboTalk user (who is also registered and has synchronization activated), the synchronization policy must be set to “Synchronization” mode. When activating it, the system notifies us that any copy that we had in the cloud will be replaced by the automatic copies that it will make from that moment on.
- Backup: this option also automatically saves a backup copy in the cloud of any changes that we make on the device, but it will not automatically synchronize it with other devices. In fact, it is a recommended option when we only work with one device and what we want is to make sure that the changes are saved automatically. If we are going to work with several devices, it is recommended to activate the backup, only on that “working” device and on the rest of the devices select the “None” option (so that the copies are not saved) to be able to manually recover the backup. copy of the work team with the reset button that we will explain later. When activating this option, the system warns us that any copy that we had stored in the cloud will be replaced by those that we make from that moment on.
- Nothing: we will select this option when we want to make backup copies manually using the buttons that we find below in the menu.
Regardless of the option we have chosen, we can always make a backup manually. To do this, we will click on“Save once”in the“Backup”option. Pressing it will overwrite any copy that we had stored in the cloud, so we must operate with caution and be clear that the current version with which we are working on the device is the one we want to save.
If we want to recover the Backup currently stored in the cloud, we will click on “Restore“. This option will replace the profiles and boards that we have on the device with the copy stored in the cloud.
Finally, if we want to delete the backup stored in the cloud, we will click on “Delete“. After having deleted it, we can make a new manual copy or activate the synchronization, making sure that we start from a “clean” copy.
ACCESSIBILITY SETTINGS
 Within the accessibility settings we have three options:
- Accessibility: Turning this on/off will show or hide the “Accessibility” button (person with arms outstretched) displayed in the top right corner. This button gives us direct access to the two accessibility options offered by the program (text size and high contrast).
- Font size: In order to improve accessibility for people with vision problems or increase the font size in the case of screens with high resolution, we can select between medium or large font size since the small size is established by default.
- High contrast: Another accessibility option for cases of vision problems is high contrast. In this case, when activated, the background will turn black and the icons will be displayed in black and white.
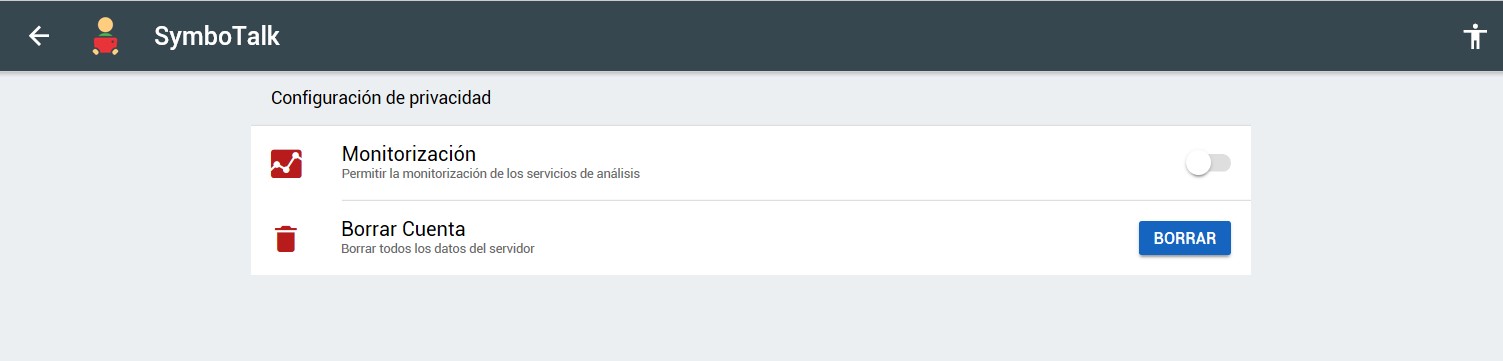
PRIVACY SETTINGS
To finish the Privacy configuration, it offers us two options:
- Monitoring: when activated, anonymous data on the use of the application is sent to the developer, which after analysis helps to improve it.
- Delete account: If we do not wish to continue using SymboTalk, we can unsubscribe and delete the SymboTalk account by clicking on this option. Doing so will also delete all data stored on the server.