


Asterics Dynamic Communicator
22 – Input options
INTRODUCTION
People with functional diversity, who require the use of a communicator like Asterics Grid to communicate, may need different access methods to the device on which they use the communicator. These access methods should adapt to the person’s diverse abilities, so that the use of the communicator is as functional as possible.
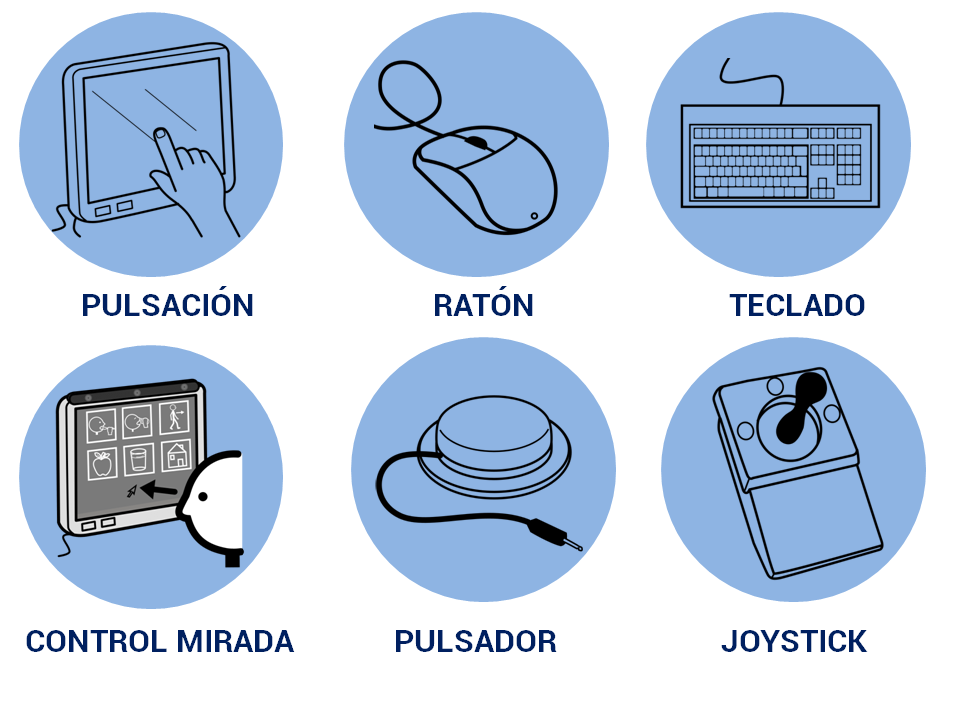
Among the most used access methods, we could highlight: direct access by tapping the screen, using the mouse or keyboard, control by eye tracking, or scanning using switch(es) or keyboard.
Asterics Grid considers and facilitates the use of all of them with a high degree of personalization, thanks to the different configuration options it offers.
INPUT OPTIONS
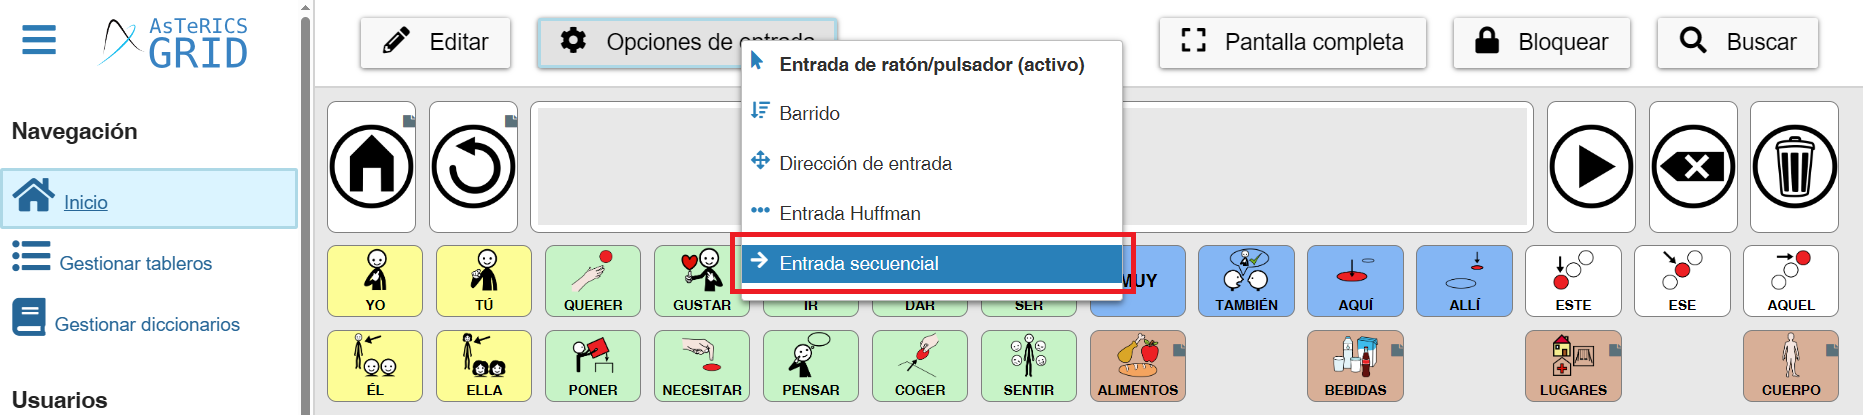
Access to the different input options, which we will explain in Asterics Grid, is done from the Home window, where the communicator is displayed in user mode.
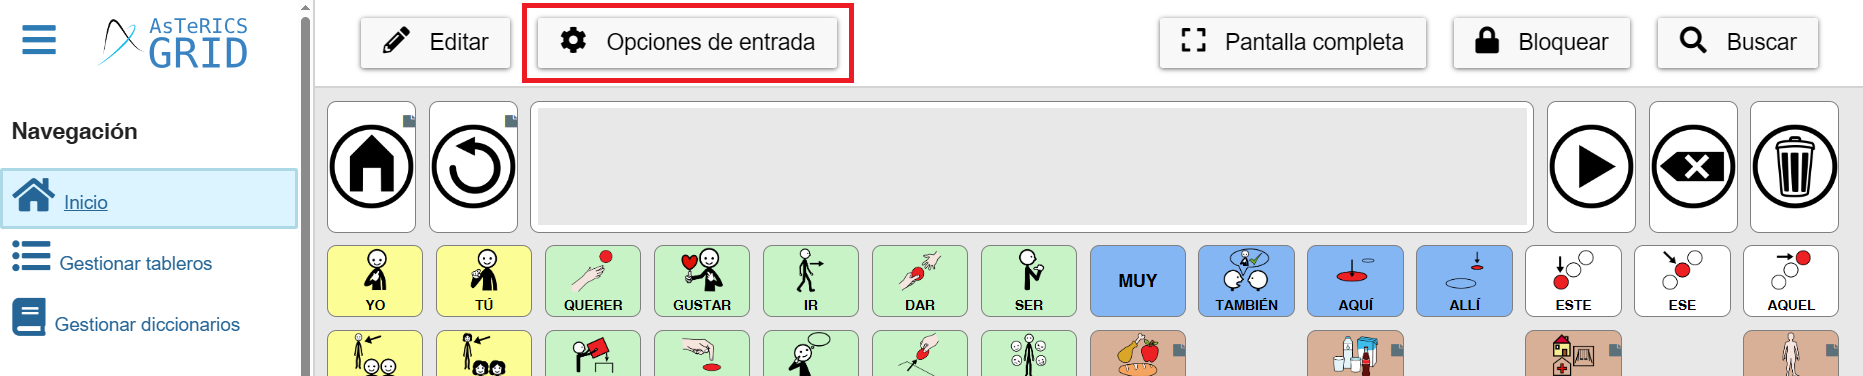
Once we click on Input Options, the different available options will be displayed: Mouse/Switch Input, Scanning, Input Direction, Huffman Input, and Sequential Input.

EYE TRACKING
In these cases, it is necessary to have an eye tracking device installed and configured before using Asterics Grid.
The person will interact with Asterics Grid by directing their gaze towards the element they want to communicate. The selection of the content (for example, a word) is done by holding the pointer over it for a certain time, or by winking or blinking.
To configure Asterics Grid, we must go to the ‘Mouse/Switch Input’ option, which is usually active by default.

Once we have accessed the configuration, we will activate the “Overlay” and establish the overlay time, that is, the time needed to fix the gaze on a cell for the system to consider it selected.

In addition, we can hide the cursor if it turns out to be a distractor, leaving only the green illuminated box as a reference to the cell that is being looked at at that moment.
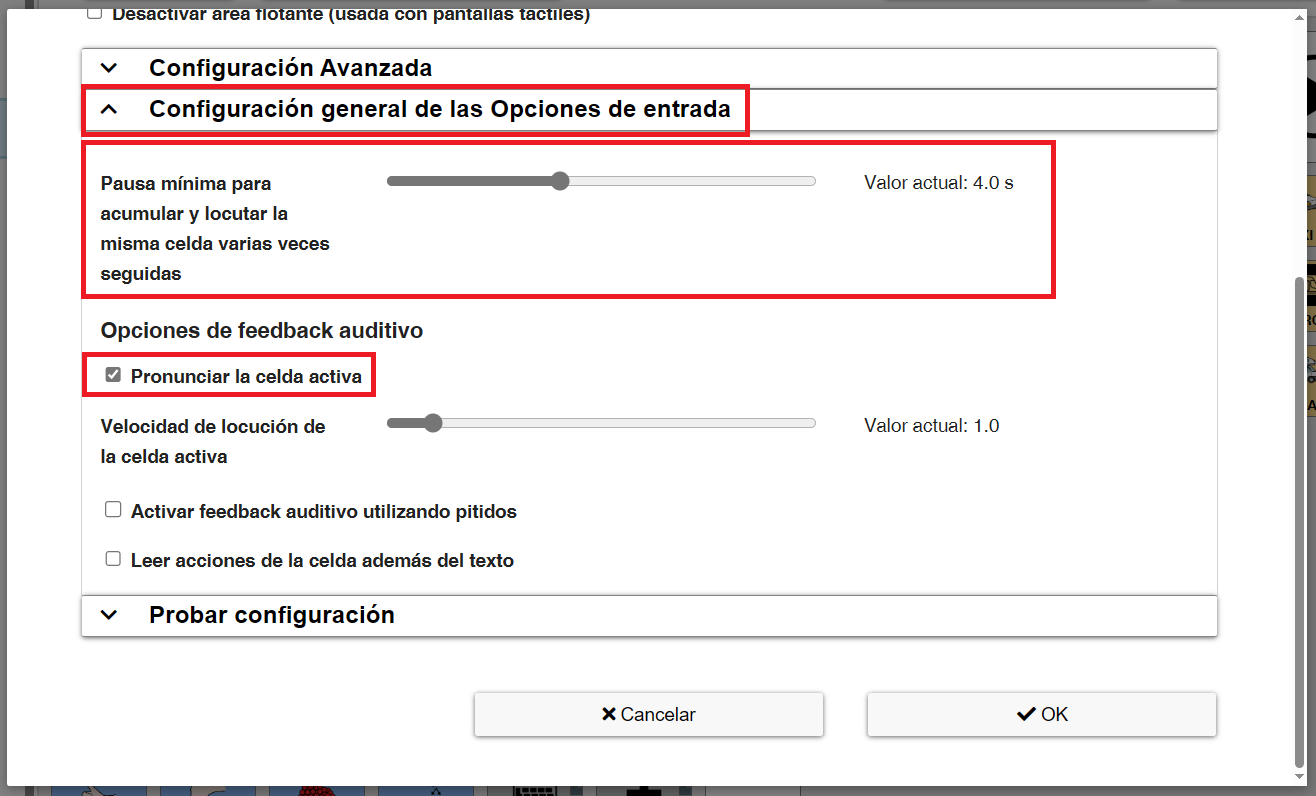
As additional options that may be interesting to configure within the “General Input Options Configuration” tab, there would be:
- Minimum pause for collecting and speaking the same cell several times in a row: this sets a delay so that the same cell is not selected until after the selected time. The time we set is determined by the person’s eye control.
- (Optional) Pronounce the active cell: if this option is activated, when the cells are scanned with the gaze (they light up in green), the text they have established will be pronounced.
- (Optional) Enable acoustic feedback using beeping sounds: in this case, if this option is activated, a beep shall sound each time a cell is scanned with the eye.
- (Optional) Read cell actions in addition to text: when activating this option, the action assigned to the cell will be spoken in addition to the text.
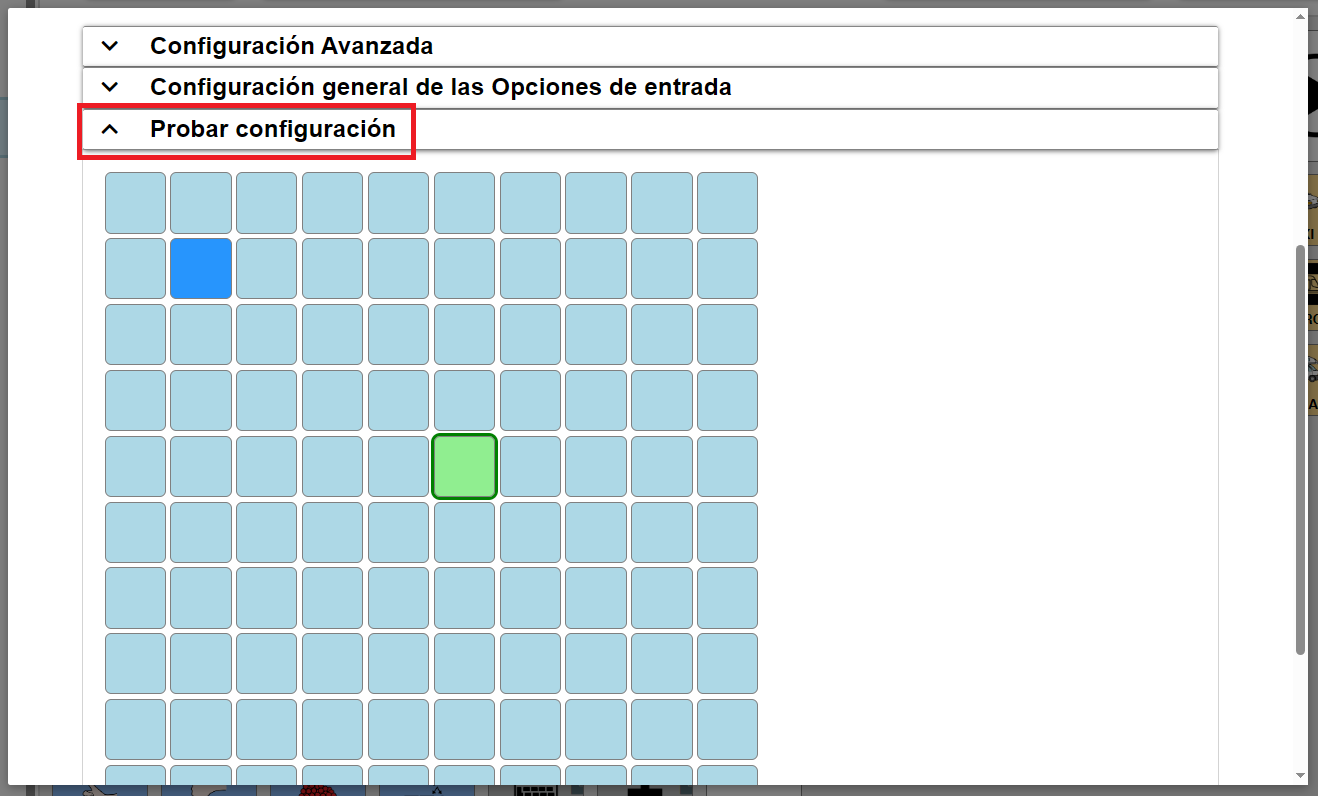
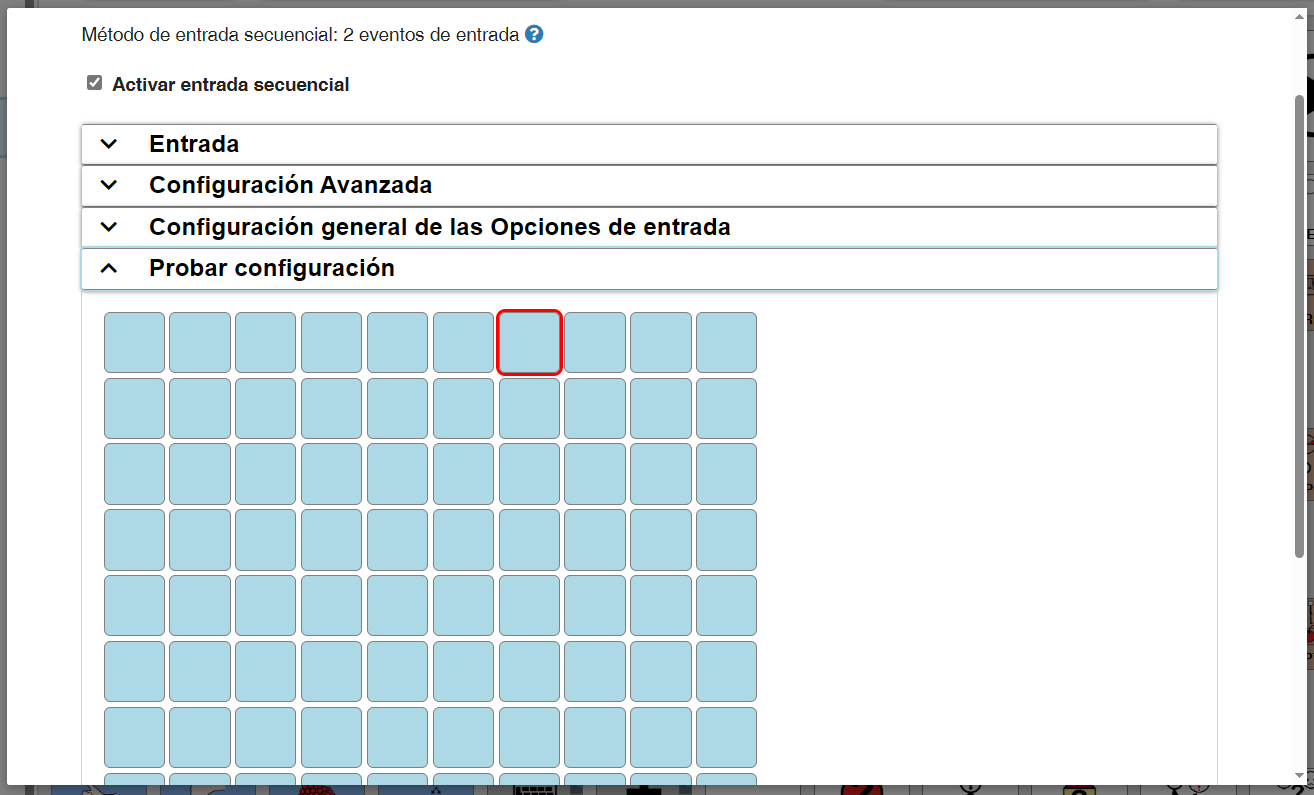
As we will see in the other input options, we always have a “Test configuration” tab that will allow us to quickly check the changes in the configuration and how they work without leaving the configuration window.
SCANNING

The scanning is the sequential presentation of the elements on the screen. In general, the person has to narrow down the options presented to him/her until he/she arrives at the element to be selected. For selection, the person uses a push switch .
There are switches of different sizes, thicknesses, and types of action (for example, pressure, pull, blow), and they are located in the most appropriate support, considering the part of the body with which the person activates the switch.
The person needs to activate the switch through a functional, controlled, and voluntary movement of a part of the body, such as a finger, hand, foot, head, eyebrows, etc., or perform an action, such as blowing, stretching, biting, etc.
Most switches have a minijack connection, so it is necessary to have a device that connects it to the computer or tablet through the USB port.

This device can be an adapted/modified mouse to which a minijack connector is added to the left button, or a controller that allows connecting one or more switches and that, later, is connected via USB to the device.
Once we have the switch, Asterics Grid offers different scanning options that we will detail.”
SCAN CELL-BY-CELL
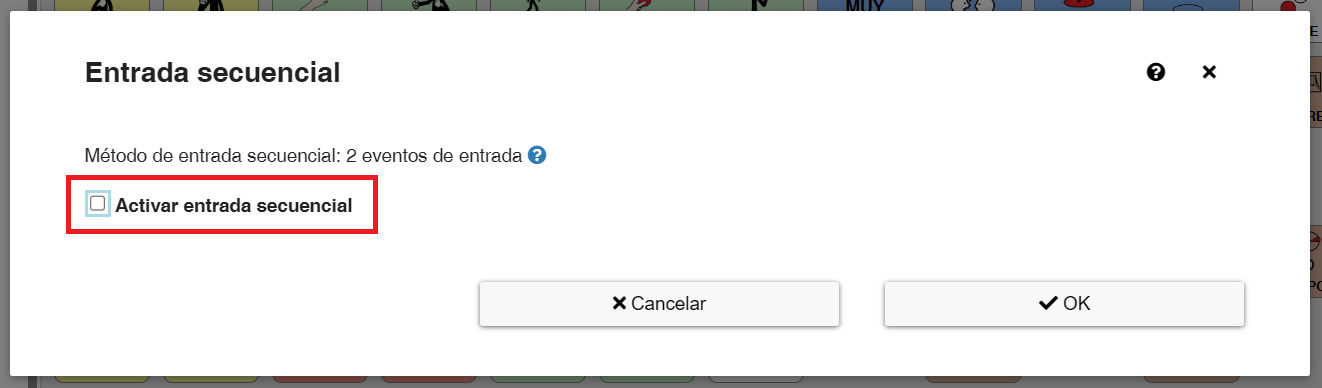
In Asterics Grid, the cell-by-cell sweep is configured from Sequential Input.
Once we access the configuration window, we activate this option.
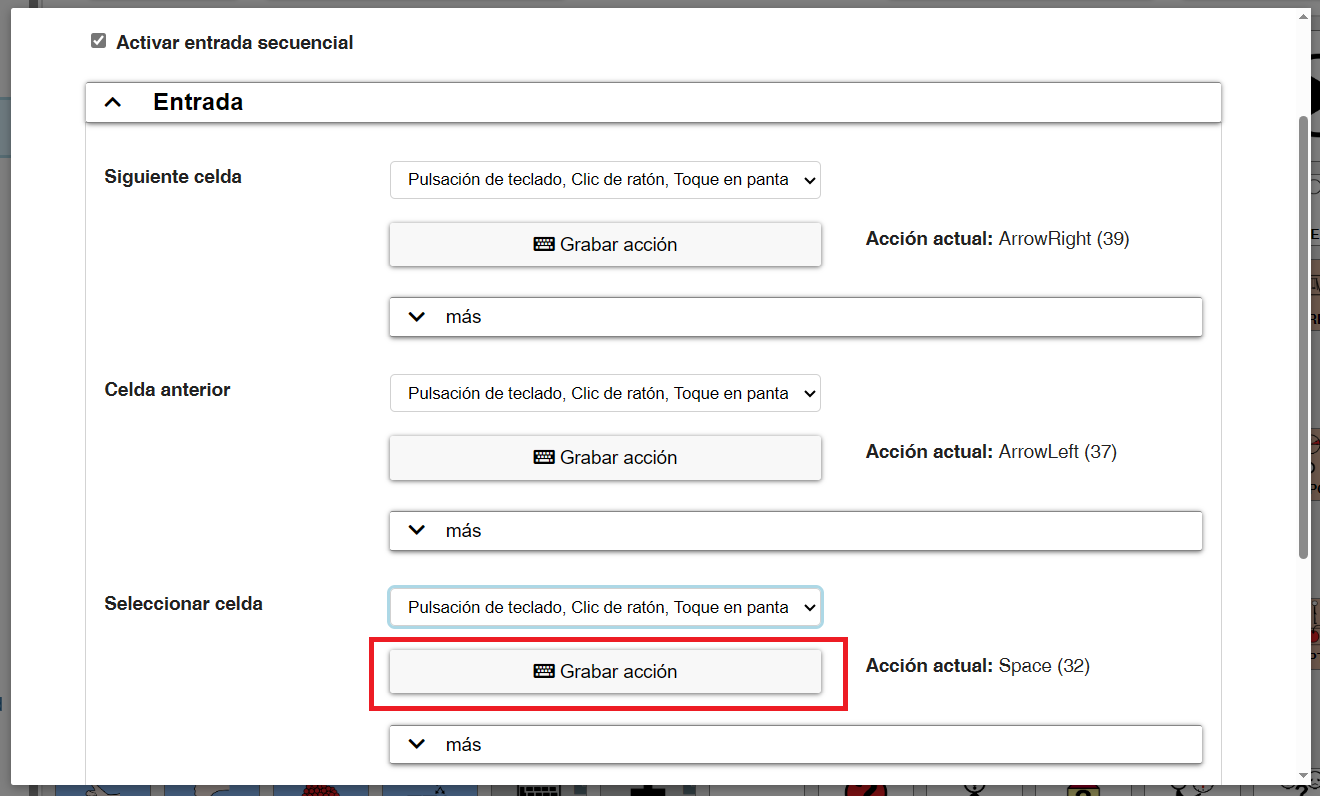
Once the sequential input is activated, the first section to configure is ‘Input‘. As we can see, Asterics Grid is prepared to be able to control the sequential input with up to 3 actions (next cell, previous cell, and select cell). Each of these actions can be assigned a keyboard, mouse or screen action that will trigger it.
1 SWITCH
If we have a single switch, which will act as the left click of the mouse, we must define only the Select cell action.

To do this, we must select the action that we are going to record from the drop-down menu from among the options it offers::
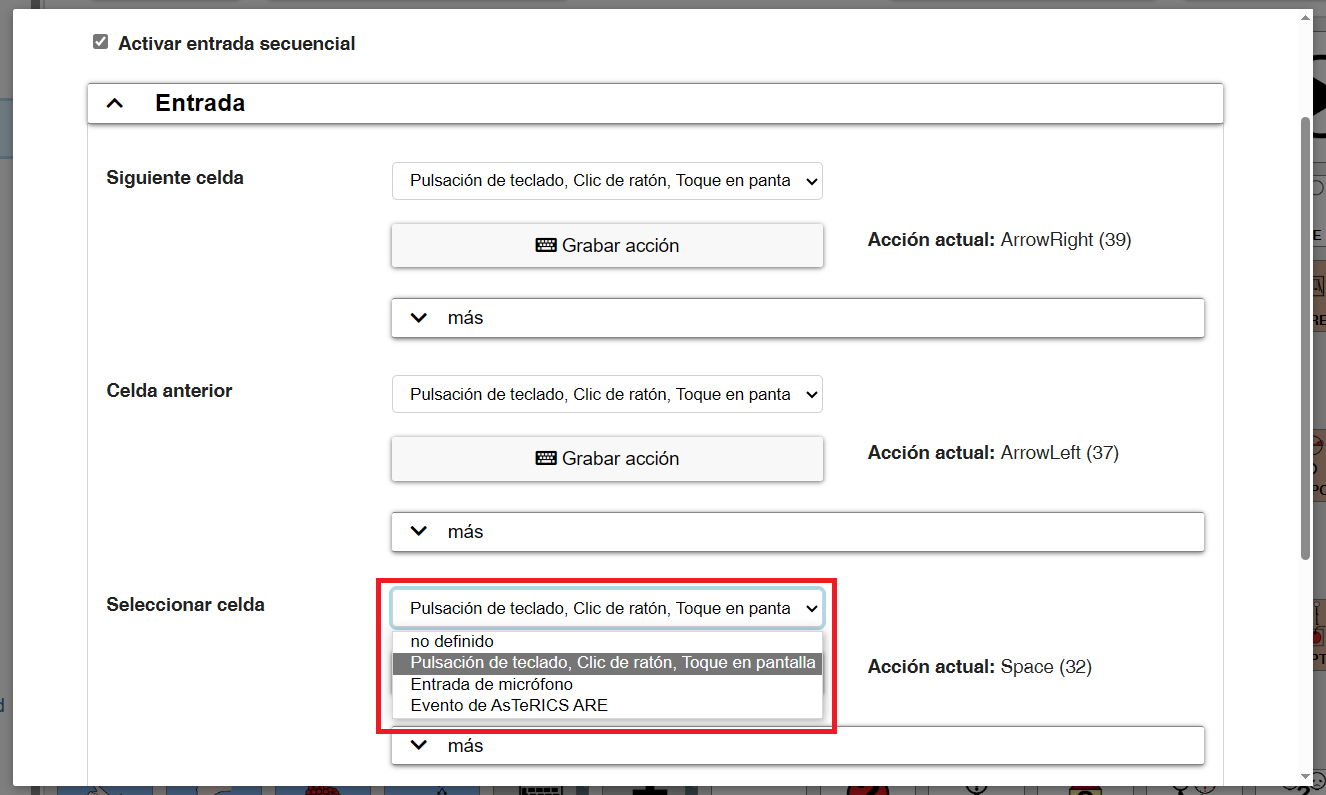
- Keypress, mouse click or screen touch: this option is the default selection and will be used in most cases. This action will allow you to define a key, a mouse click or a touch on the screen (for touch screens or tablets) as a trigger for the action.
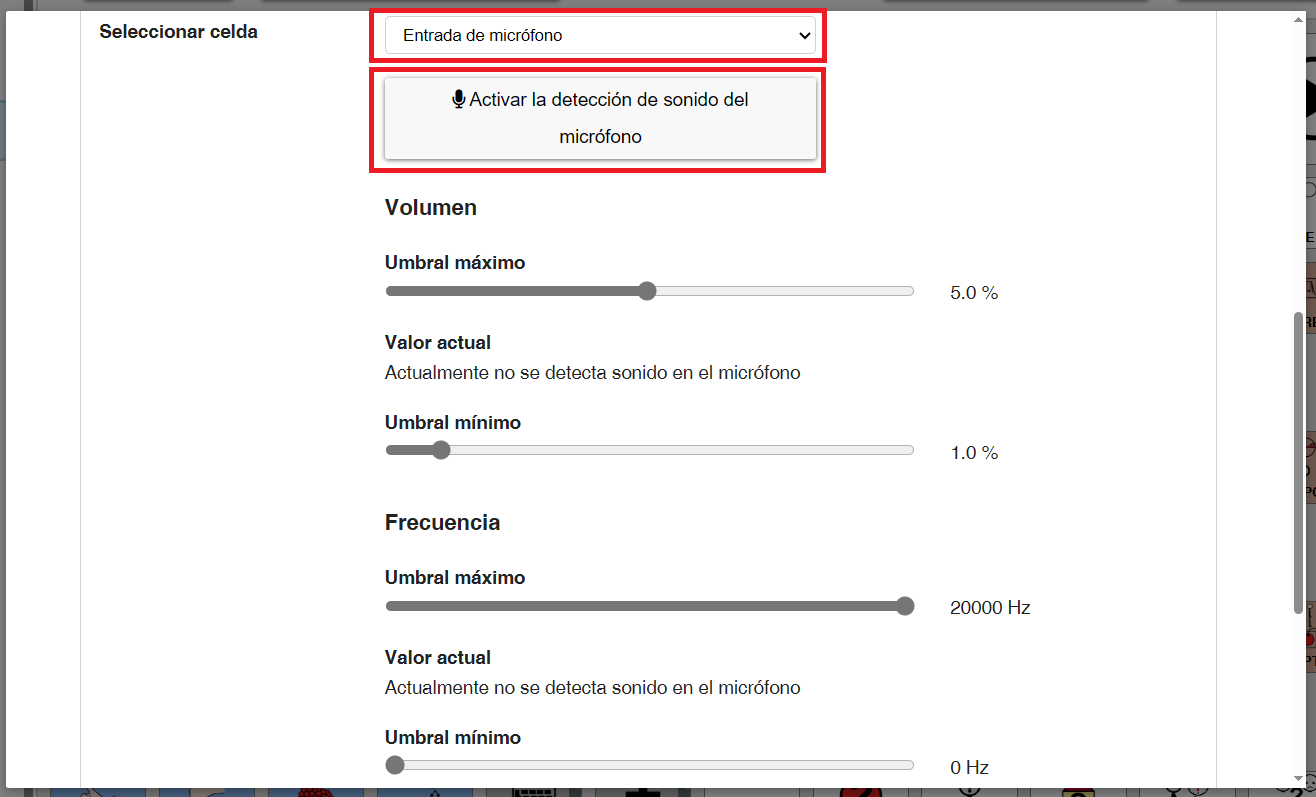
- Microphone input: in this case, it will be a sound emitted by the user (it does not have to be a word) that triggers the action. Once this action is selected, we will click on ‘Activate microphone sound detection’ and adjust the volume and frequency parameters according to the sound emitted by the user and we want to activate the action.
- Asterics ARE event: this option works in conjunction with the FABI device, which is distributed by the Asterics Foundation.
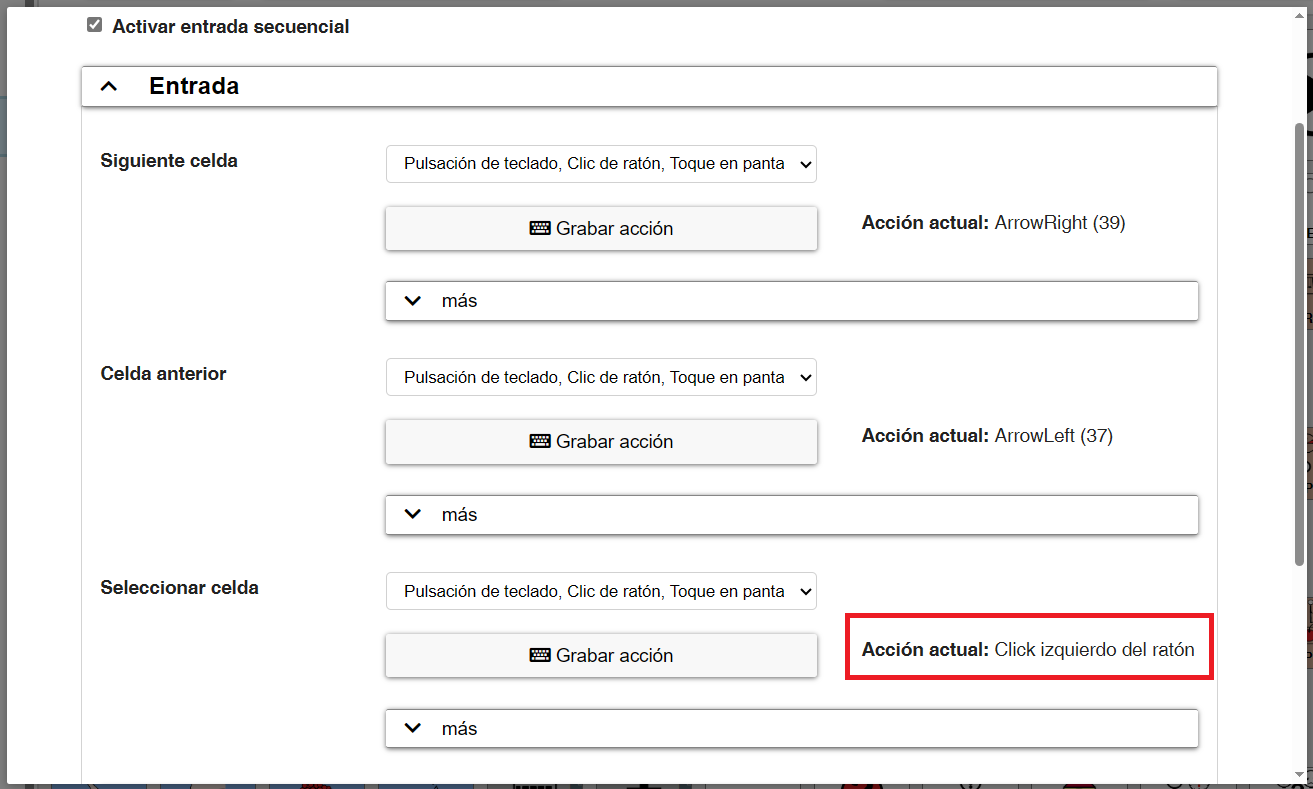
In our case, since it is a switch that acts as the left click of the mouse, we will select the predefined option of Keyboard press, mouse click, Screen touch. Next, we will click on Record Action.
Click on the switch and under Current Action you should see Left Mouse Click.
2 SWTICHES OR KEYBOARD
If we want to manage the cell-by-cell scanning with two switches (2 events) or with a keyboard (2 or more events), we will have to define Next cell or Previous cell following the same procedure that we have explained previously to select cell (select the type of action and record action).

ADVANCED CONFIGURATION
Once the input method that will control the Sequential Input (cell-by-cell scanning) is defined, we will configure the options that interest us in Advanced Configuration.
If we manage the sequential input with a single switch, we must activate the Automatic scanning (timed) option and adjust the scanning time to the user’s capabilities.

If the sequential input is managed with two switches (2 events) or through the keyboard (3 events), it is not necessary to activate the automatic scanning. We should only assess whether or not to deactivate (it is activated by default) the option to Go to the initial position (first cell) after selecting an element (cell).
INPUT OPTIONS – GENERAL CONFIGURATION
As additional options that may be interesting to configure within the “General Input Options Configuration” tab, are:
- Minimum pause for collecting and speaking the same cell several times in a row: this sets a delay so that the same cell is not selected until after the selected time. The time we set will depend on the control the person has.
- (Optional) Pronounce the active cell: if this option is activated, when the cells are scanned (they light up in red), the text they have established will be pronounced.
- (Optional) Enable acoustic feedback using beeping sounds: in this case, if this option is activated, a beep will sound each time you change elements.
- (Optional) Read cell actions in addition to text: when activating this option, the action assigned to the cell will be spoken in addition to the text.

TEST CONFIGURATION
As in the other input options, we always have a tab called ‘Test configuration’, which allows us to quickly check the changes in the configuration and how they work, all without leaving the configuration window.
GROUP SCANNING
In addition to the cell-by-cell scanning that we have just explained in the Sequential Input, Asterics Grid offers the possibility of performing binary or grouped scanning by rows or columns.
When we use a communicator with multiple cells on each board, this scanning mode facilitates and speeds up the selection of elements. The person can reduce the options presented, grouped by rows or columns, until reaching the desired element more quickly.
INPUT
Unlike the Sequential Input, where there were three possible events to control, in the case of the scanning there are only two possible events/actions.
- Select cell: this action allows the user to select the chosen element.
- Next scan group: this action allows the user to navigate through the scan groups into which the board is divided, selecting the next row, column, or binary group (depending on the established configuration).
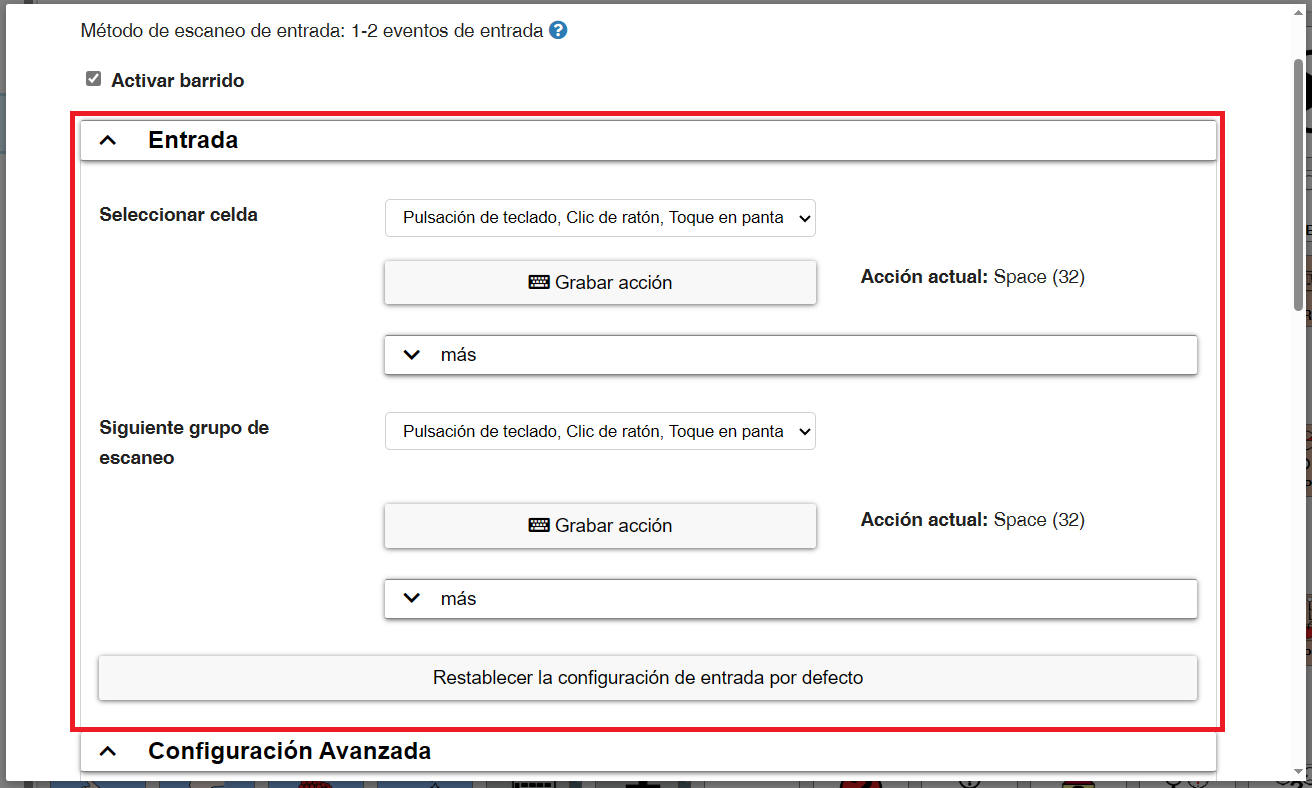
If the user only handles one switch, we will define the ‘Select cell’ action. If we have 2 switches or control the scanning by keyboard, we can define both actions.
To define one or both actions, following the same process explained for sequential input, we first select the type of action from among the 3 possible:
- Keyboard press, mouse click, or screen touch: this option is selected by default and the one we will use in most cases. This action allows us to define a key, a mouse click, or a touch on the screen (for touch screens or tablets) as a trigger for the action.
- Microphone input: In this case, it will be a sound emitted by the user (not necessarily a word) that will trigger the action. Once this option is selected, we will click on ‘Activate microphone sound detection‘ and adjust the volume and frequency parameters according to the sound emitted by the user and we want to activate the action.
- Asterics ARE event: this option works in conjunction with the FABI device, which is distributed by the Asterics Foundation.
Next, we will click on Record Action and activate the switch/es or the key/s that we are going to use so that they are recorded. If it is a switch, we should see Left mouse click, as we mentioned before in the sequential input.
ADVANCED CONFIGURATION
Within the advanced configuration is where we will define the type of scanning that we want to use, choosing between the 3 possible:
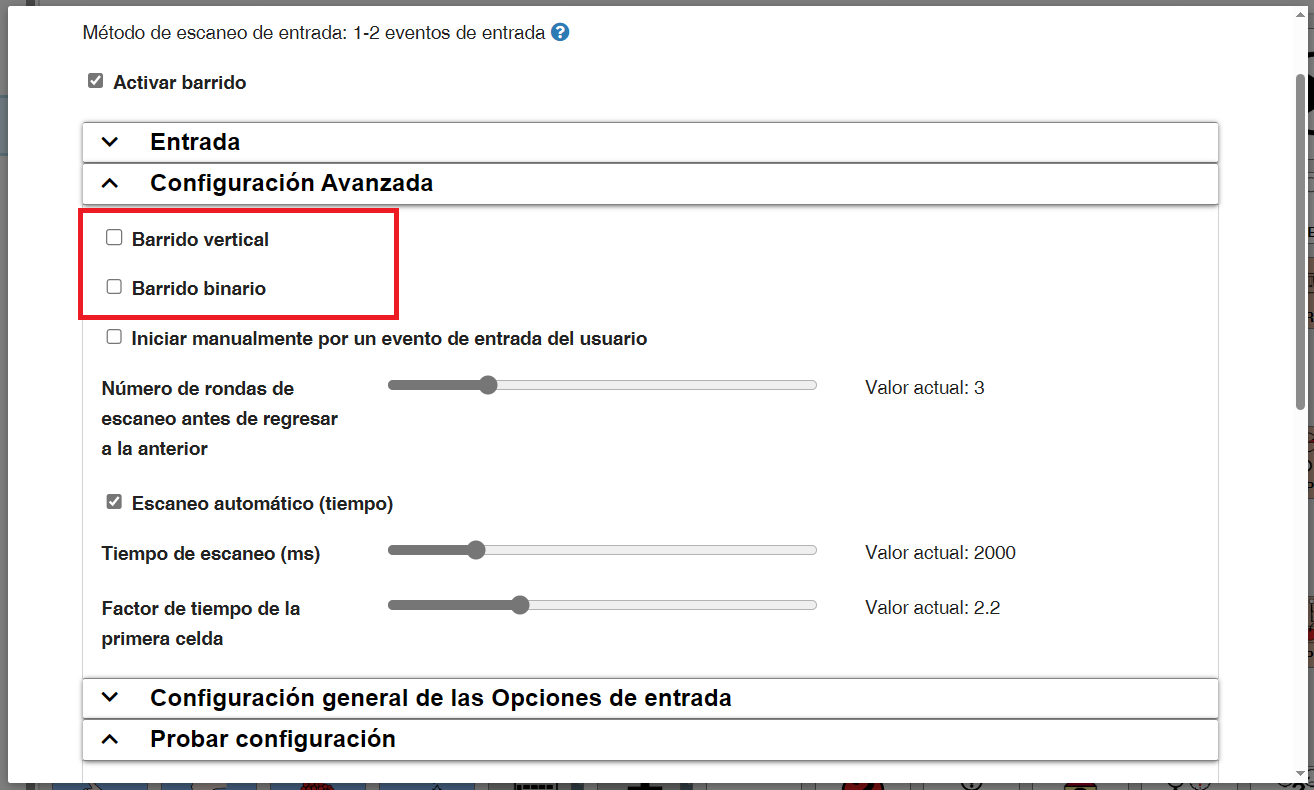
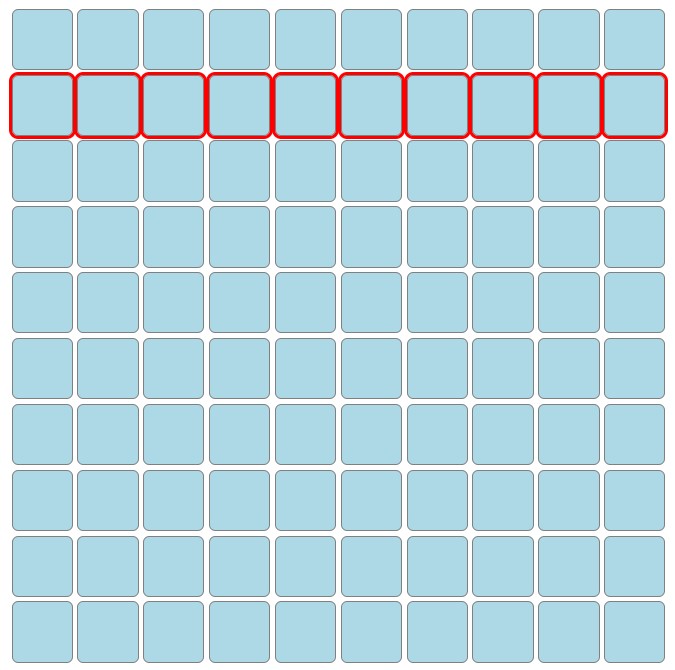
- Scanning by rows: This is the type of scanning that is established by default and, therefore, the one that will be used if none of the other two is defined. Once the row is selected, the scanning sequentially goes from left to right through all the cells of the same until the user selects one of them. At that moment, it returns to scanning by rows.
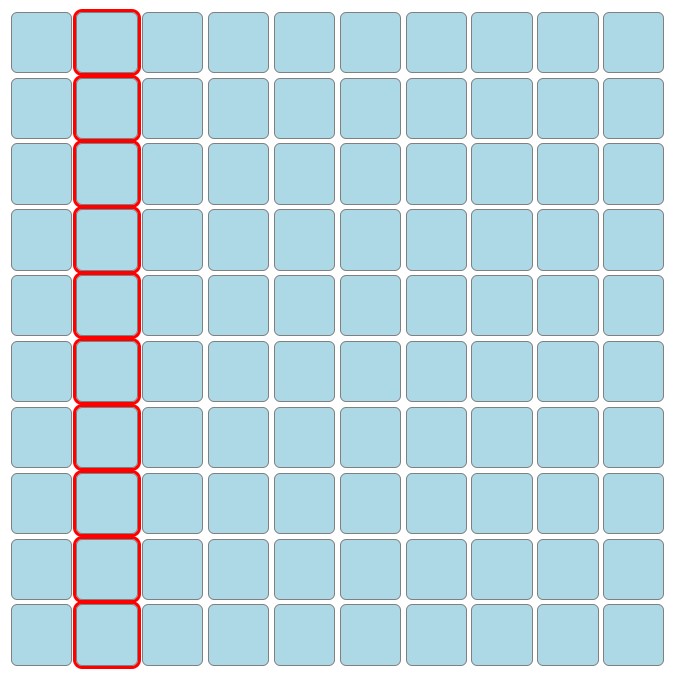
- Scanning by columns (vertical): in this case, the scanning will be done by columns. Once the column is selected, the scanning sequentially goes from top to bottom through all the cells of the same until the user selects one of them. At that moment, it returns to scanning by columns.
- Group (binary) scan: this is a scan with more steps than the row or column scan. The board is initially divided into two groups. Once one of the groups is selected, they are divided again into two new groups within it, and so on (depending on the size of the board) until reaching a scanning by row and, finally, selecting the desired element.

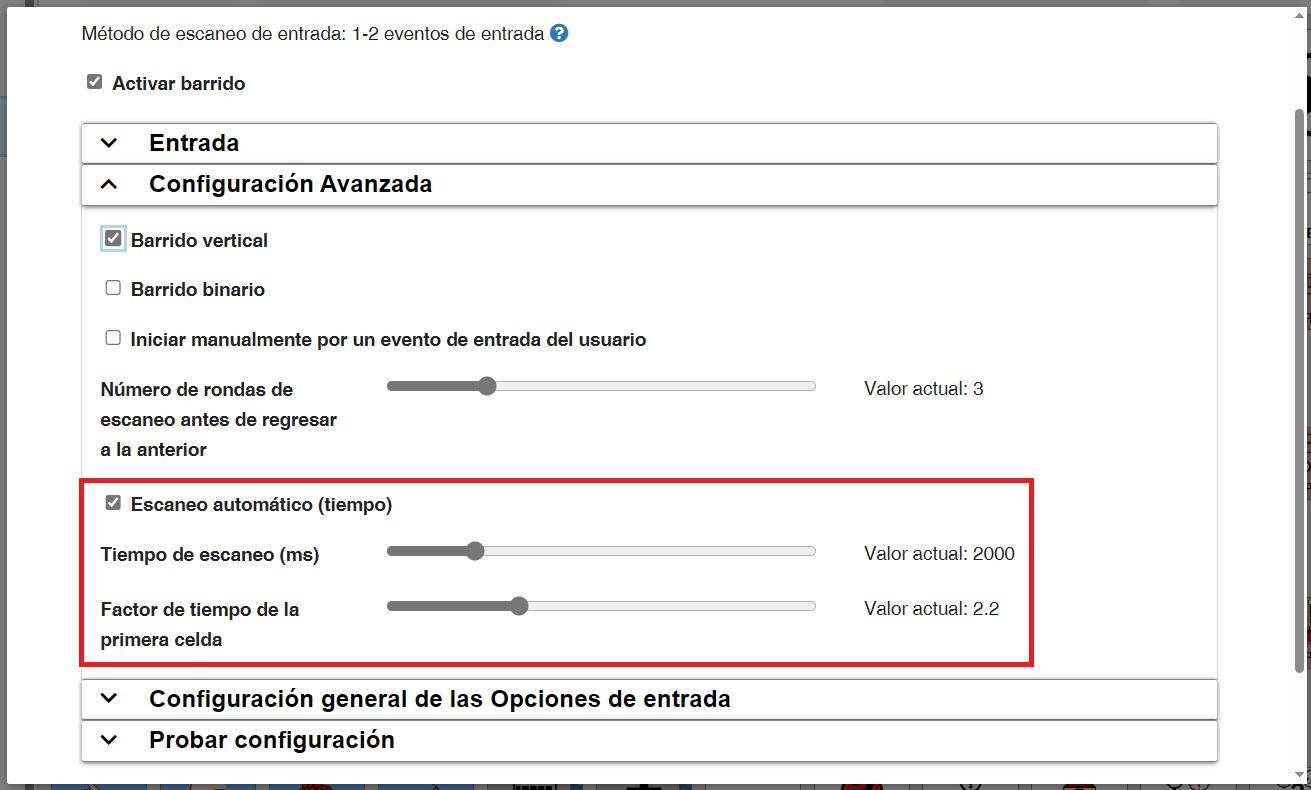
In addition to the type of scanning, the other essential option that we must configure is the automatic scanning (time). As we mentioned for the sequential input, if the scanning is managed with a single action (select cell) whether by switch, mouse, touch on the screen, etc. we must activate and configure the automatic scanning. In case of managing the scanning with the two actions (select cell and next scan group), we must deactivate the automatic scanning.
INPUT OPTIONS – GENERAL CONFIGURATION
As additional options that could be interesting to configure within the “General Input Options Configuration” tab, are:
- Minimum pause to accumulate and speak the same cell several times in a row: This sets a delay so that the same cell is not selected until the selected time has elapsed. The time we set will depend on the control the person has.
- (Optional) Pronounce the active cell: if this option is activated, when the cells are scanned (which light up in red), the text they have established will be pronounced.
- (Optional) Enable acoustic feedback using beeping sounds: in this case, if this option is activated, a beep will sound each time you change elements.
- (Optional) Read cell actions in addition to text: when activating this option, the action assigned to the cell will be spoken in addition to the text.

TEST CONFIGURATION
As in the other input options, we always have a “Test configuration” tab that allows us to quickly check the changes in the configuration and how they work, without leaving the configuration window.
HUFFMAN INPUT
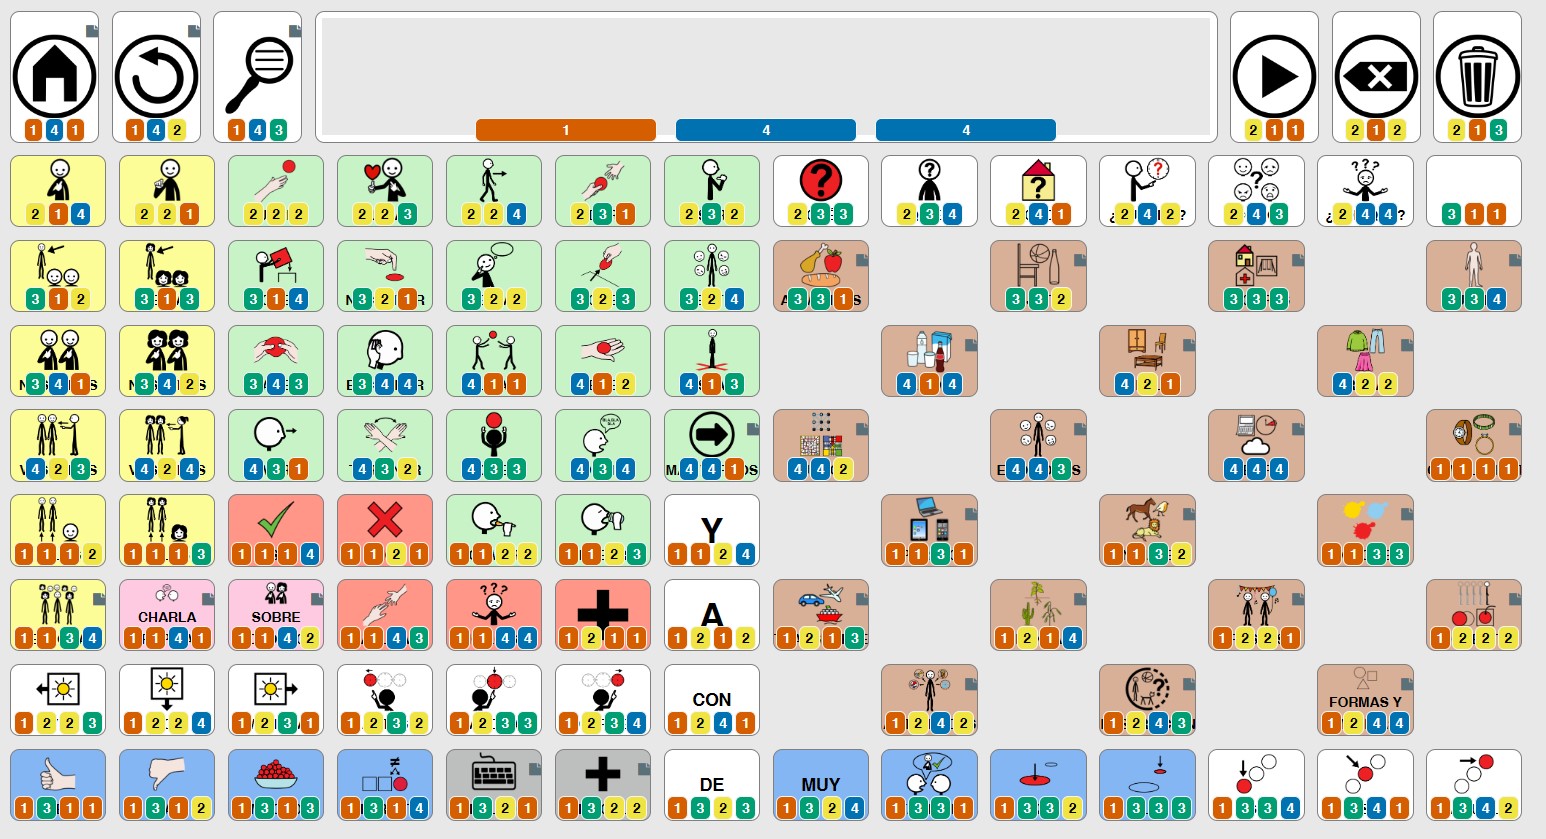
Huffman input is a numeric keypad access method. When activated, it assigns each cell a unique numerical combination (from 1 to 5 digits) according to the number of cells on the board. In addition, each number that makes up the unique numerical combination for each cell can be identified with a color.
The cells are selected by writing the assigned numerical combination
The configuration of this input method is divided into two sections.
- Input: Here you define the numeric keys for each of the possible 5 digits (by default the keys 1 to 4 are assigned).

- Advanced settings: the most important parameters are:
- Show numbers: show or hide the numbers generated for each element. If we deactivate it, we must have the color activated to correctly identify the combination of numbers to enter to activate a cell.
- Show colors: decide whether or not to use the color codes established for each number as an additional visual aid to identify the digits that make up each combination of numbers.
- Cell color: if activated, it will color the entire cell with the color corresponding to the first digit that makes up the numerical combination that identifies the cell. If activated, it will replace the cell colors that we were using for the cells (such as the Fitzgerald Key).
- Colors (1 to 4): we can assign personalized colors to each number or use the colors established by default if we click on “Reset colors”.

- Test configuration: as in the other input options, we always have a “Test configuration” tab, which allows us to quickly check the changes in the configuration and how they work without leaving the configuration window.
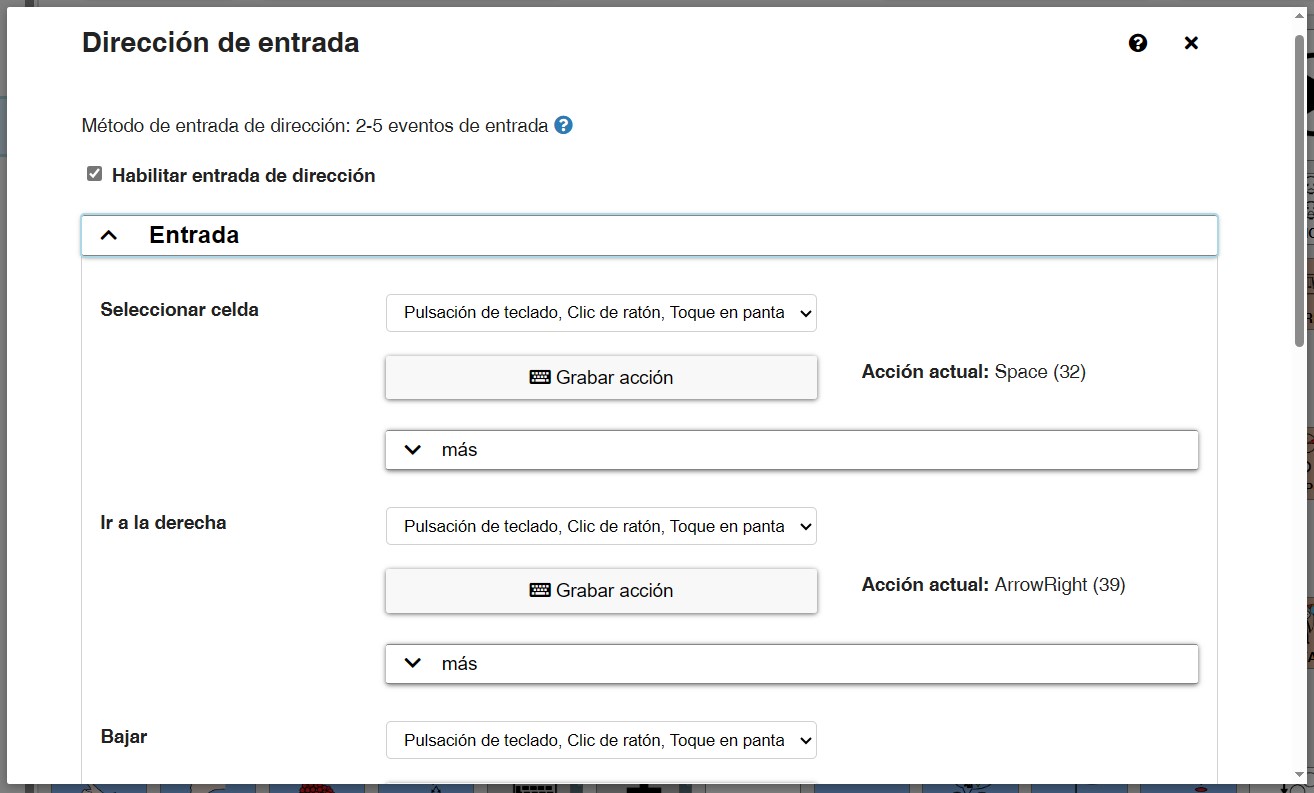
DIRECTION INPUT
This access method is very similar to others explained previously, such as sequential input. The main difference is that the control of the input is carried out using a joystick or the direction keys on the keyboard, along with an additional key or button to select.
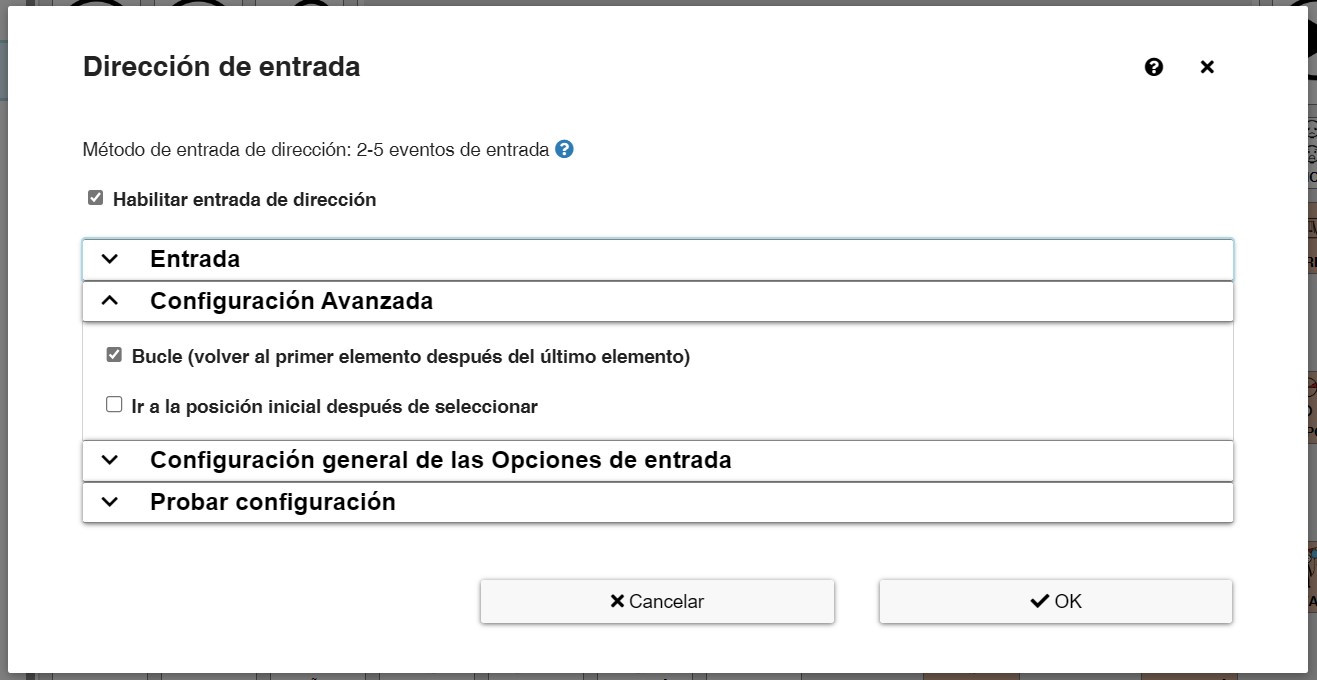
In the Advanced Configuration section, the Loop option is
activated by default and allows that when reaching the last cell of a row or column, it returns to the initial one of that row or column (depending on whether we are moving vertically or horizontally).
Optionally, you can activate the option so that when selecting a cell, it returns to the first cell of the board.
In the General Input Options Configuration section, we find options that have already been mentioned in other access methods..


