 Este obra está bajo una licencia de Creative Commons Reconocimiento-NoComercial-CompartirIgual 4.0 Internacional.
Video tutorial
Tutorial
The term emoticon comes from the English emoticon (smiley),which derives from the words emotion,which means emotion, and icon,which means icon, symbol or graphic representation. As you know, we use them very often in our instant messaging services and everyone is familiar with them.
Picto Selector also incorporates theEmoticons library among its pictograms since they have a Creative Commons license, which allows their use in this application.

To use the emoticons in our pictogram sheet, click on the Emoticons icon in the pictogram gallery and a new pop-up window appears from which we are going to enter them.
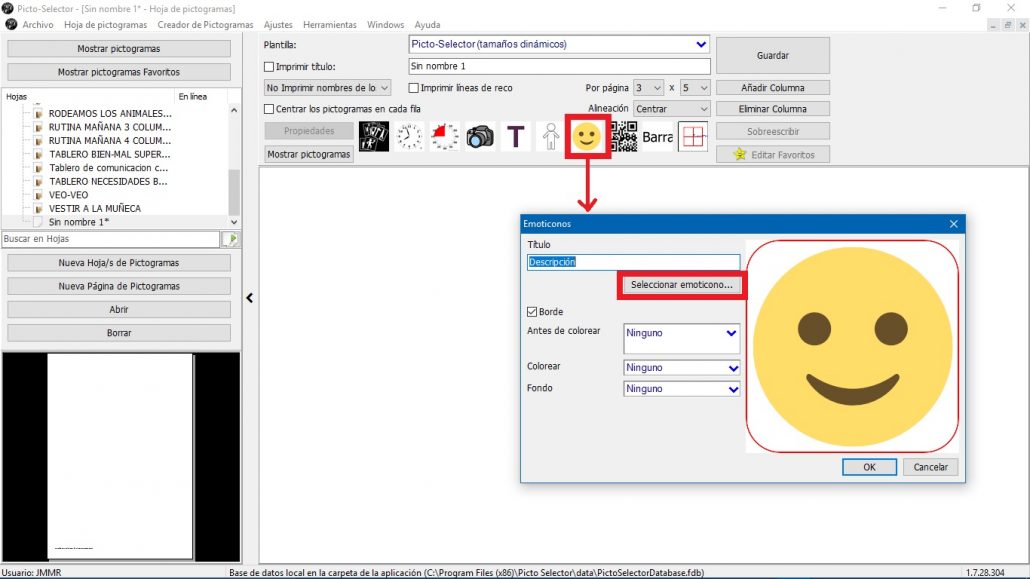
The handling of this window is very simple and we only have to use the Select emoticons button … so that a new window appears in which we will find all the emoticons sorted by categories.
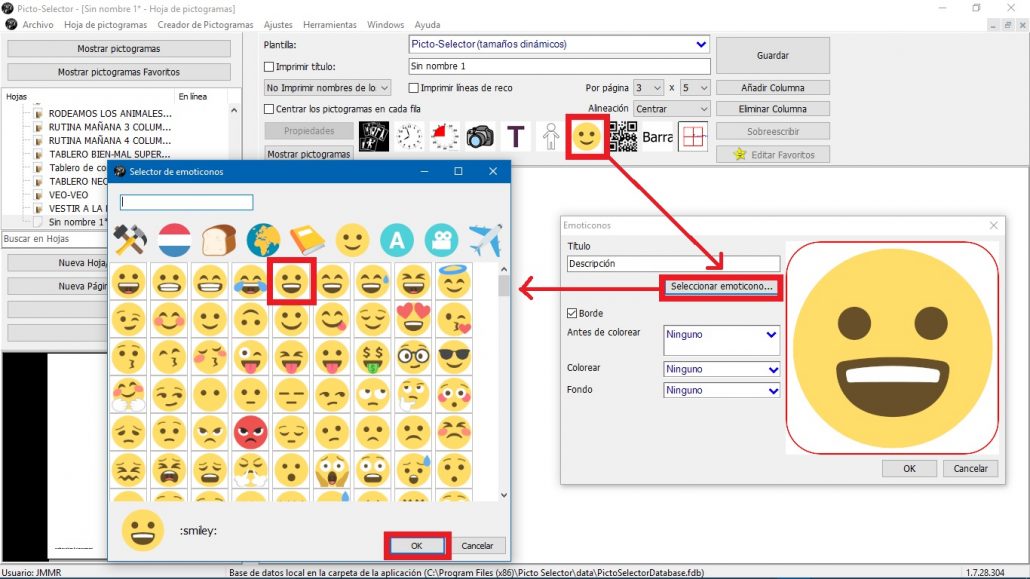
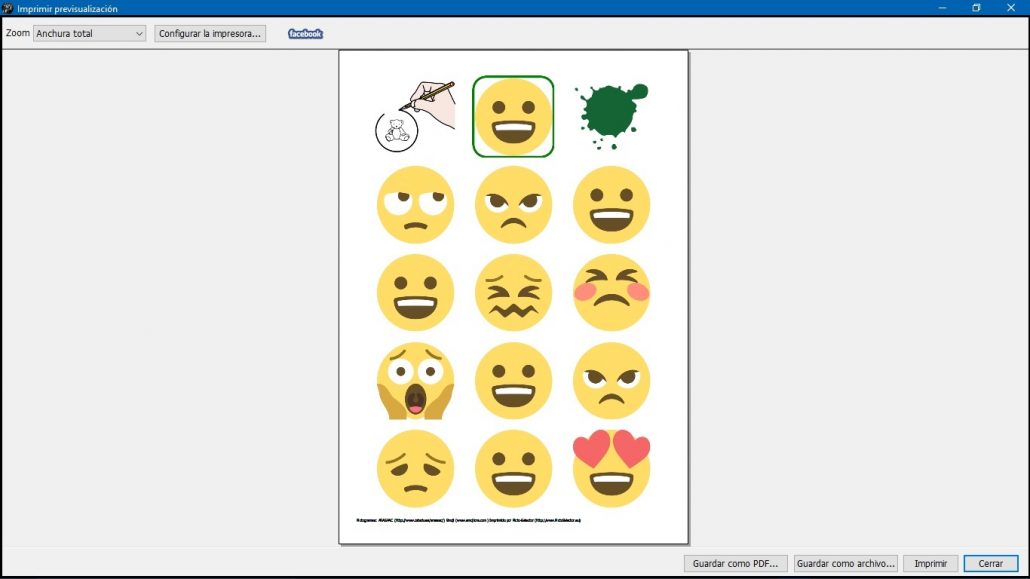
We are browsing through these categories and selecting the emoticons that we are going to use. In our case, we have prepared an activity that consists of “Circle the smiling face in green“.
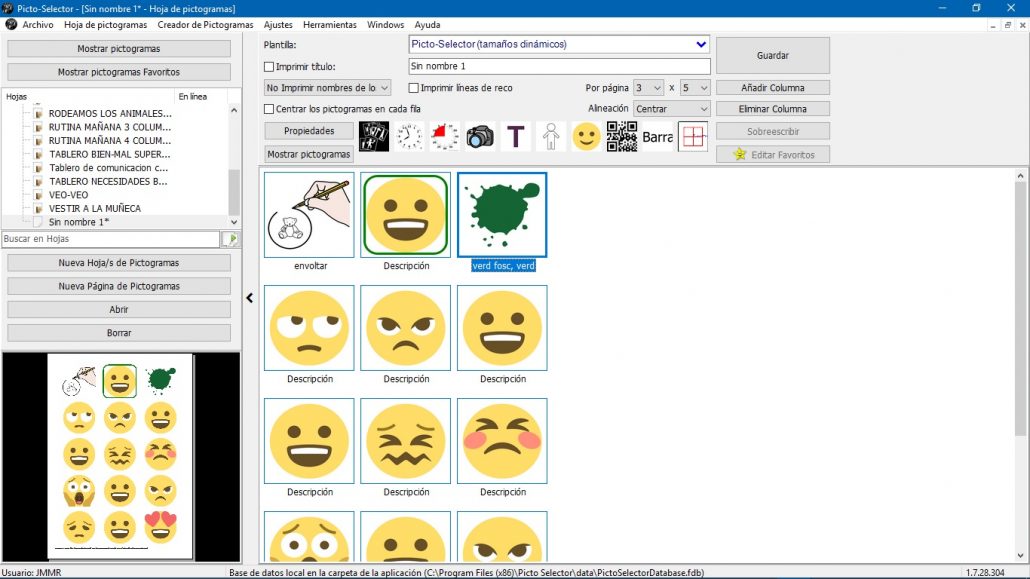
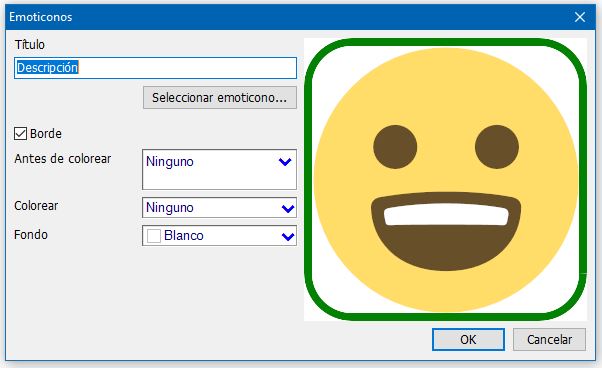
The emoticons have the same format possibilities as the rest of the pictograms. We can change the format from the Emoticon window, using the options that we have already discussed in other pictograms: Border, Before coloring, Coloring and background. We recommend that you do some testing to familiarize yourself with these options.
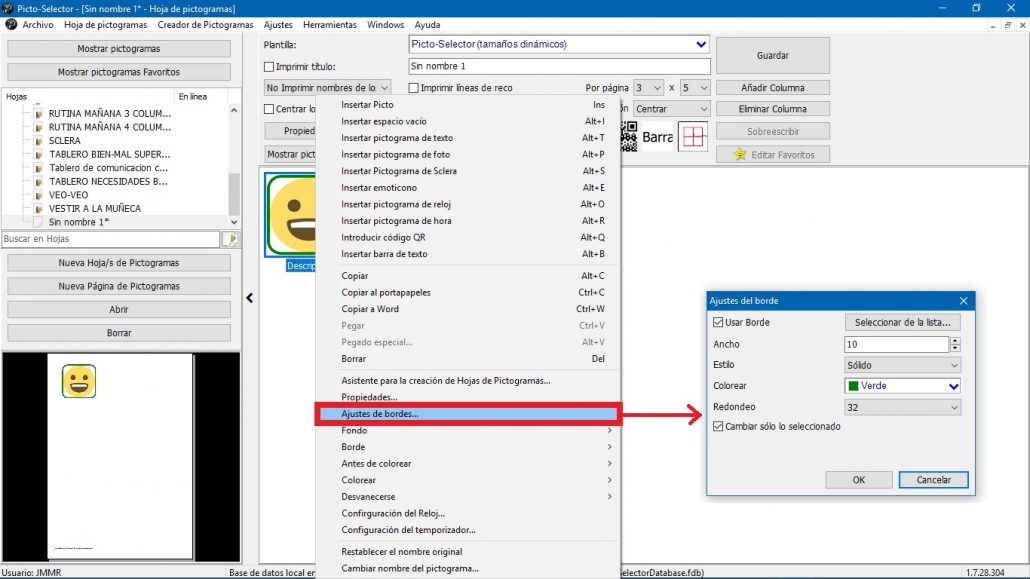
You can also use the Border Settings, using the context menu, to finish giving the desired look to our emoticon. In our example, we have adjusted the border of the pictogram-model of the activity with the settings of the image below.
Let’s see the end result. To do this we go to the File menu and select the Print option to preview the result and perform one of the actions: Save as PDF file,Save as graphic file or Print.
