


 This work is licensed under a Creative Commons Attribution-NonComercial-ShareAlike 4.0 International license.
Video tutorial
Tutorial
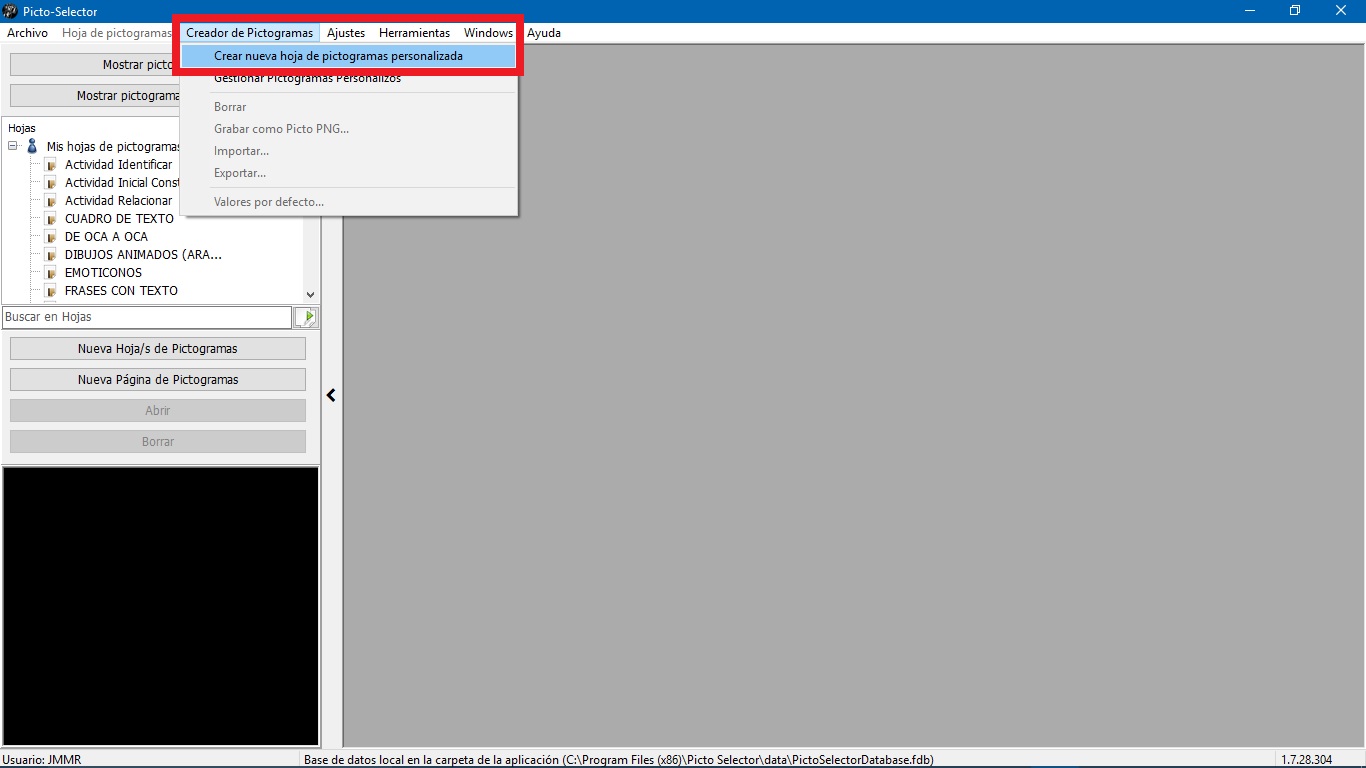
Picto Selector is an application that collects great “jewels” among its functionalities, options and resources. Undoubtedly, one of them is the Pictogram Maker. This is a fantastic tool to combine different pictograms and compose a personalized pictogram adapted to the needs of any person. To access this tool, we go to the menu bar and select Glyph Creator and, within this menu, select Create new custom pictograns sheet.
As you can see, when performing this action, the usual interface of Picto Selector changes and it becomes a “virtual table” where we are going to combine different elements to create our personalized pictogram.
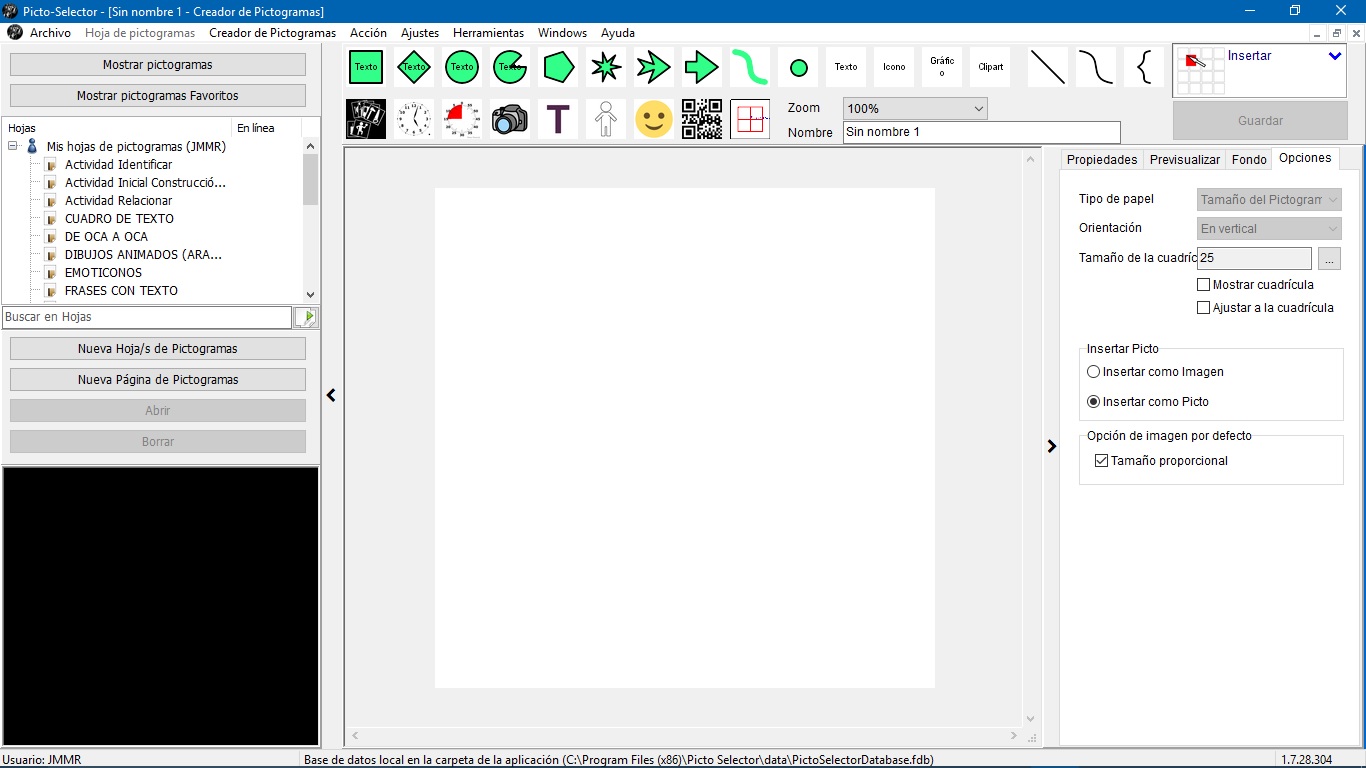
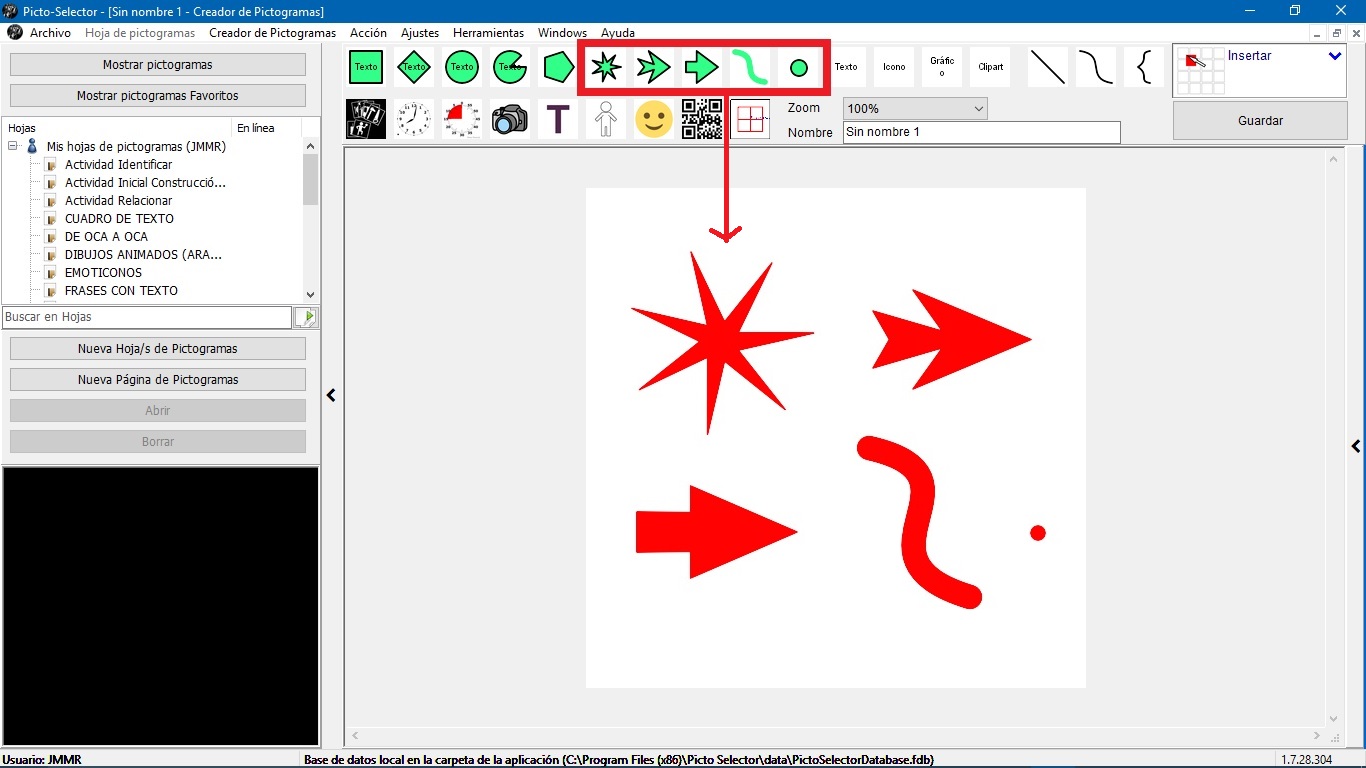
Let’s focus our attention on the toolbar that appears at the top and that includes all the types of pictograms that we have already discussed in the different chapters of this tutorial and adds new tools: text boxes, arrows, geometric shapes, cliparts and various types of lines to make graphics and schemes.

DESCRIPTION OF THE PICTOGRAM CREATOR TOOLS
We are going to explain individually each of the tools that appear in this toolbar of the Pictogram Creator. At the end of the tutorial, we will create a concrete and simple example, made with some of them, to include it in our pictogram sheet.
1. Text boxes
Text boxes allow us to enter text inside various geometric shapes. To activate this functionality, we select any of the four shapes and in the work area we drag the cursor and drop. When released, the Properties window appears.
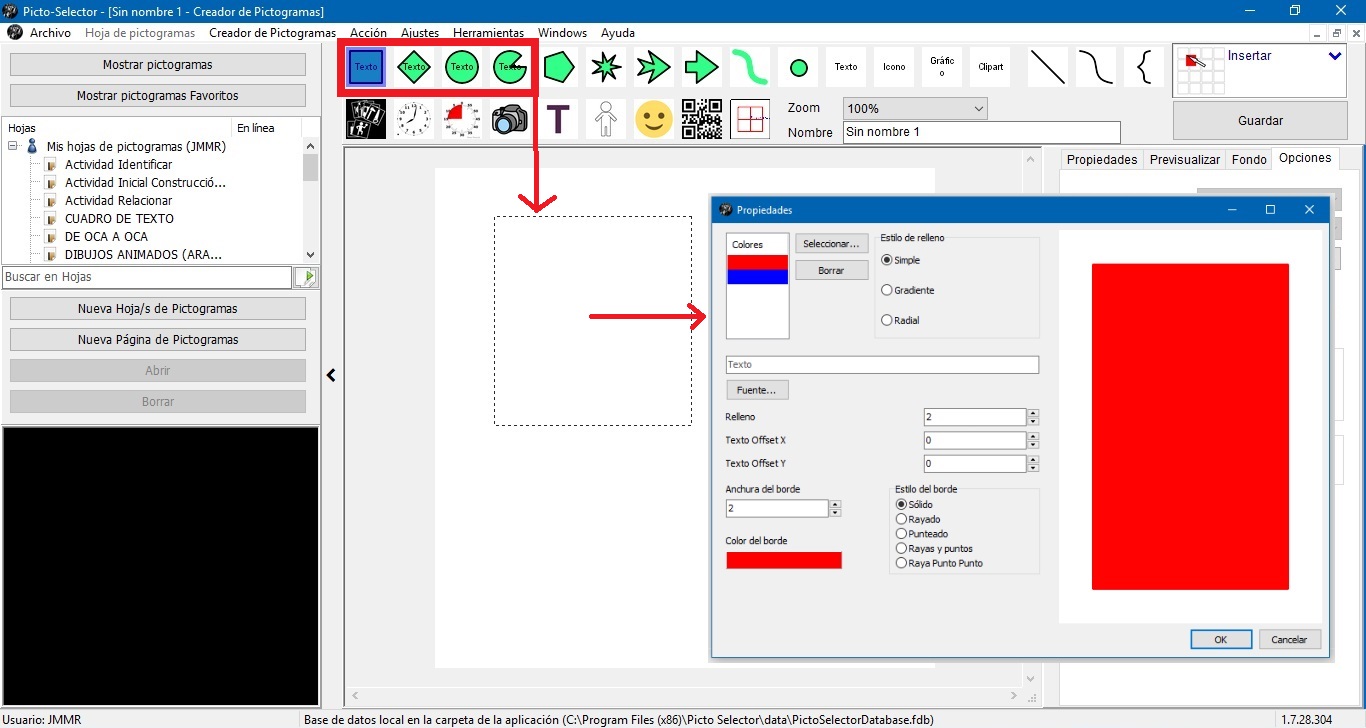
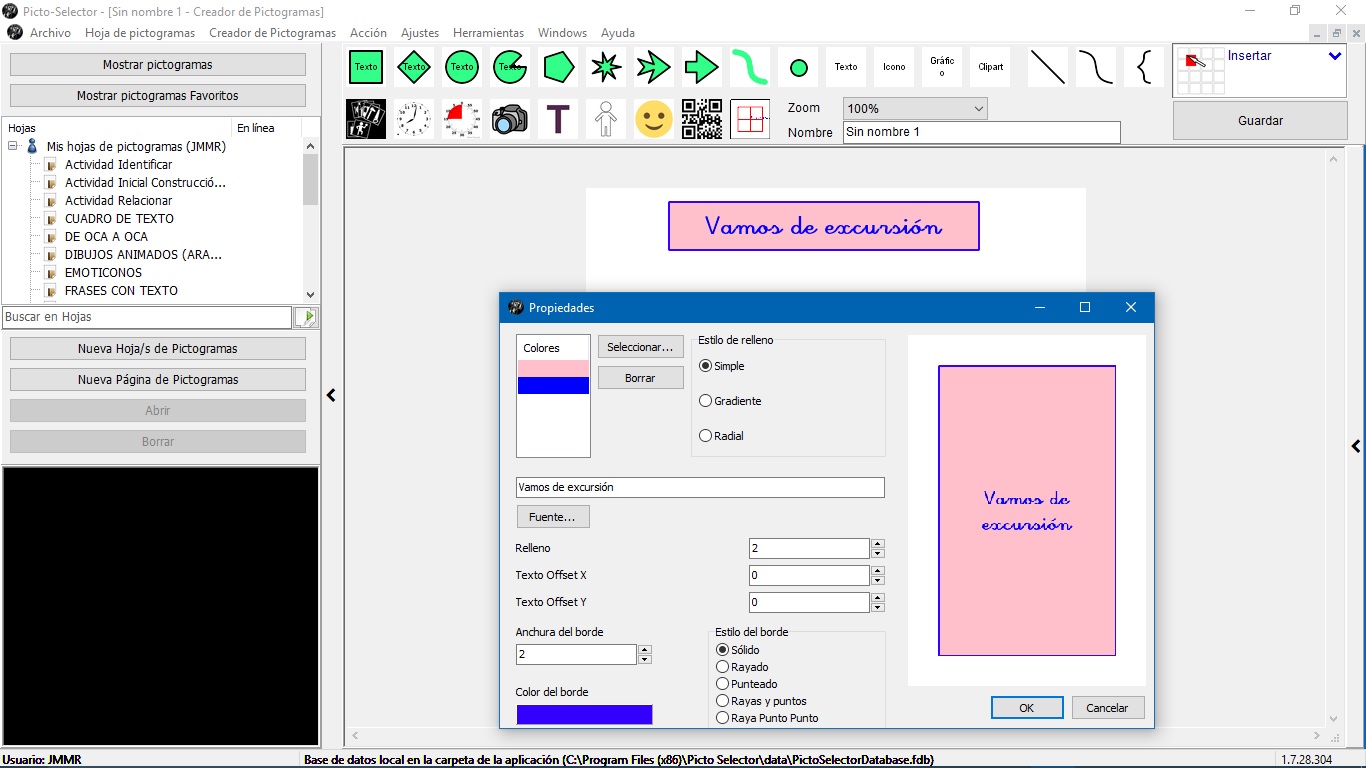
In this Propertieswindow, we can enter our Text and configure the different parameters of our text box: Background Colors, Fill Brightness, FontType, Border Color and Style,etc. We recommend that you make several tests and preview the results in the window on the right. In this way, you will be able to familiarize yourself with the format of these types of elements and configure your final custom box.
2. Geometric figures
The next items on the toolbar arefour geometric figures and a Bezier line. All these elements are configurable. To do this, we drag any of the vertices with the mouse and you will see how the appearance of these shapes changes.
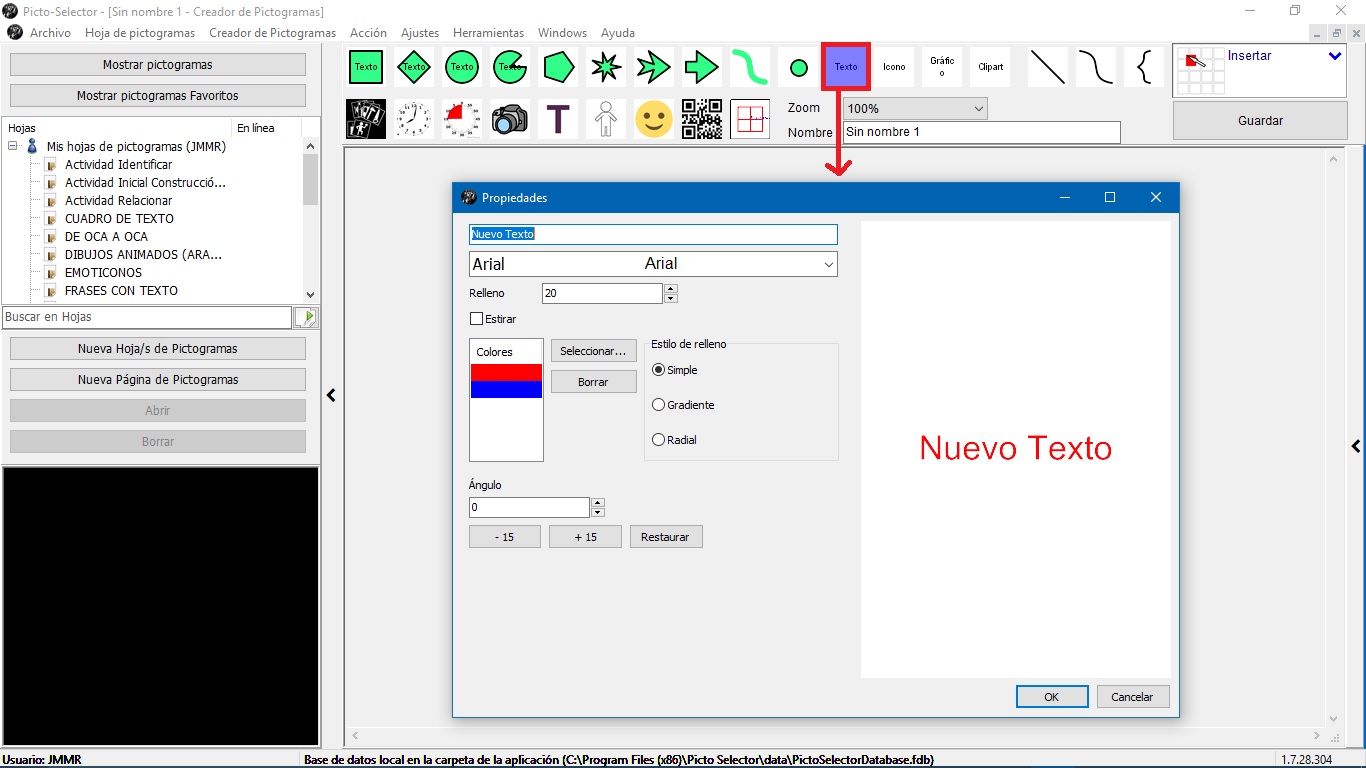
3. Floating text
Next, we are going to insert a Text into our pictogram. To do this, we have a Text icon that allows us to access a pop-up window from which we can enter and configure the text style.
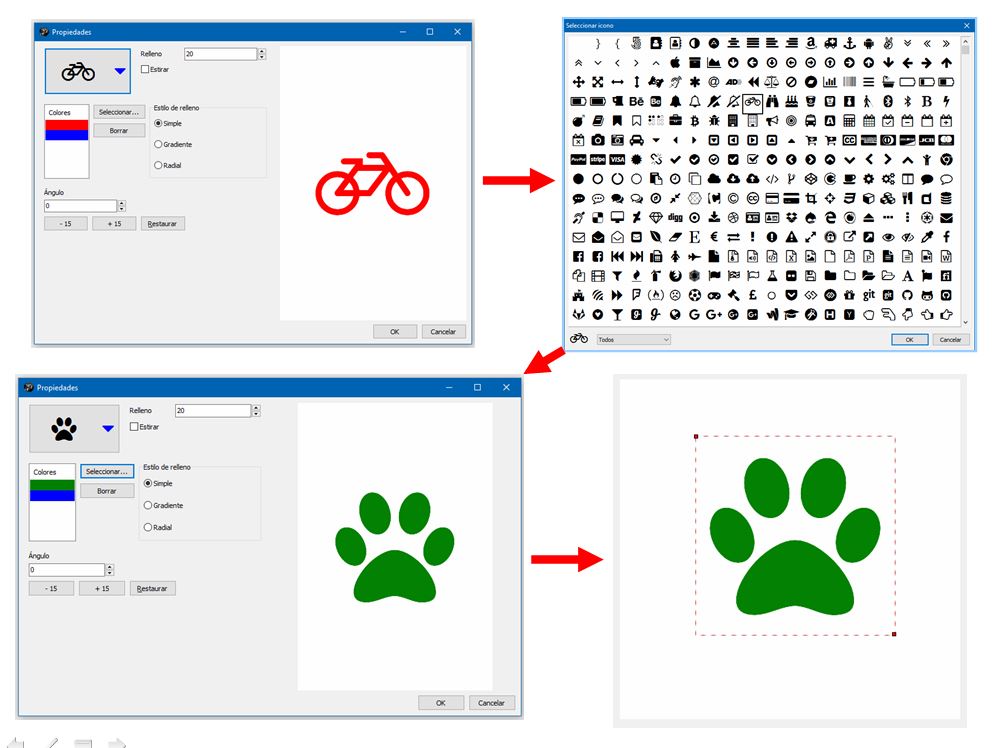
4. Icons
If we click on Icon, we will access a window from which we can select an icon from the database that the application incorporates.

To do this, click on the upper left tab, where the bicycle is, and we will access the entire database from which we can select the desired icon. Once selected, we can configure it with all the available options until we obtain the desired final result.
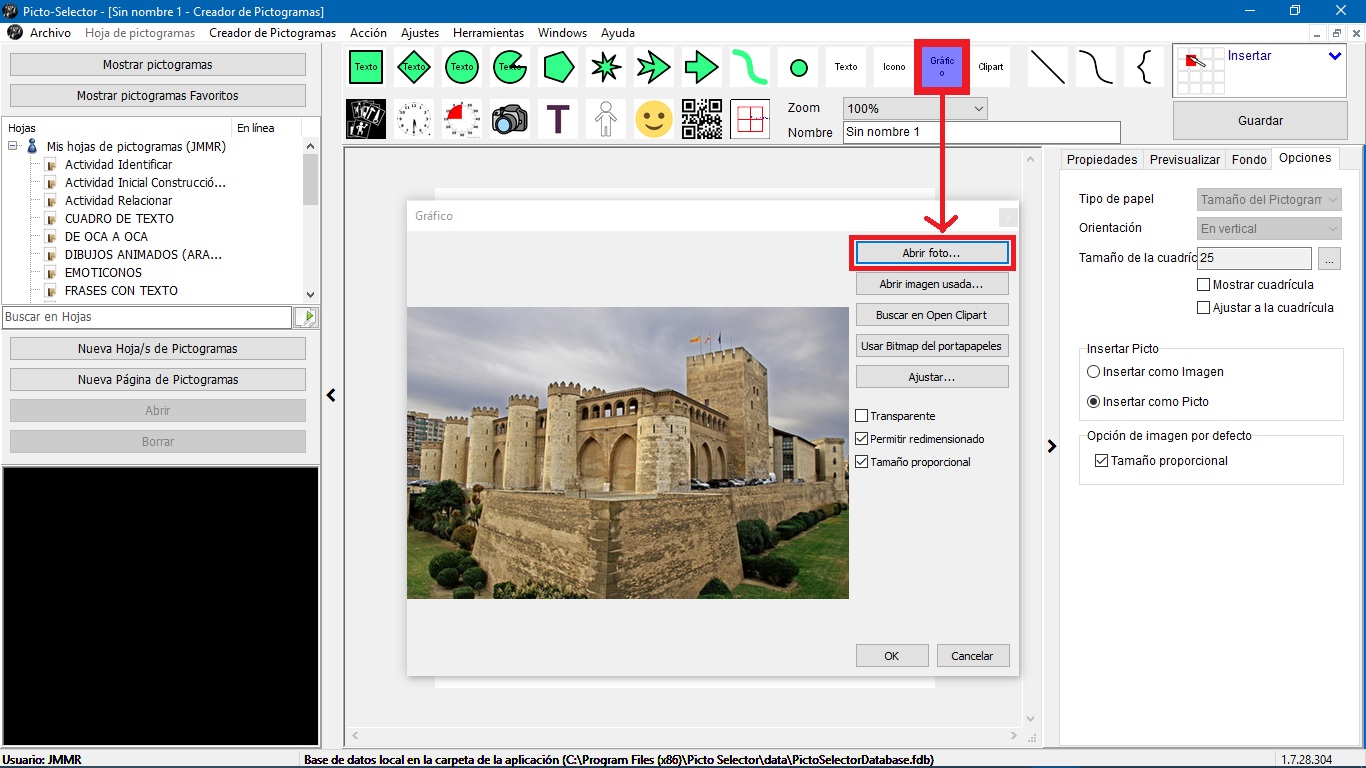
5. Graphic images
The Graphic tool allows you to insert images and photographs from your computer on the screen of the pictogram creator. Once selected, dragging the mouse over the screen will open the file explorer so that we can locate and insert the desired image. We can also use the Open photo… menu to perform this action, if we double-click on the inserted image.
5. Cliparts
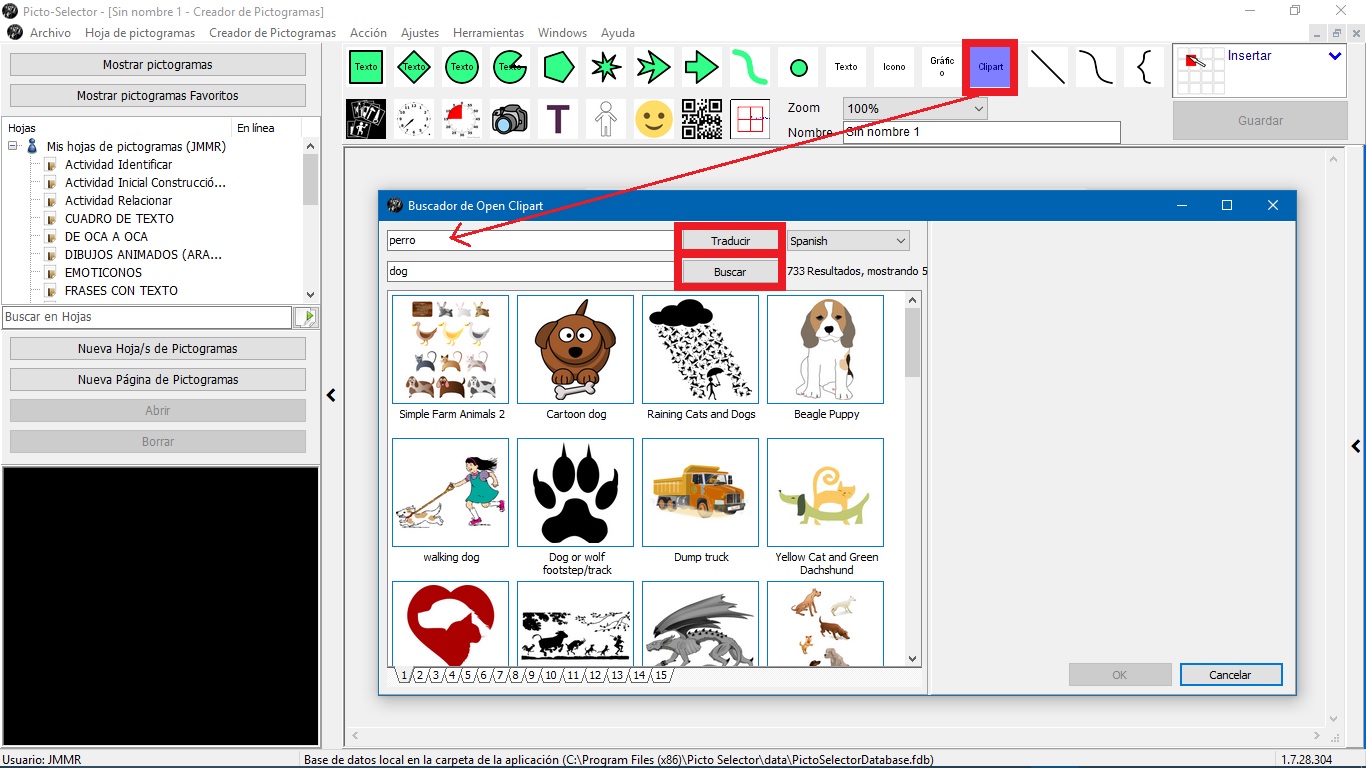
The Clipart tool allows you to insert elaborate and predefined images from OpenClipart, one of the largest repositories of free cliparts on the Internet. To insert a clipart image, we select the tool and drag the mouse on the pictogram creator screen. In the pop-up, we can search directly in English or we can write the text in our language and hit Translate. The translation will appear in the lower window and we will only have to use the Search option. Once the desired image is located, click onOk and we will have it inserted in our creator.
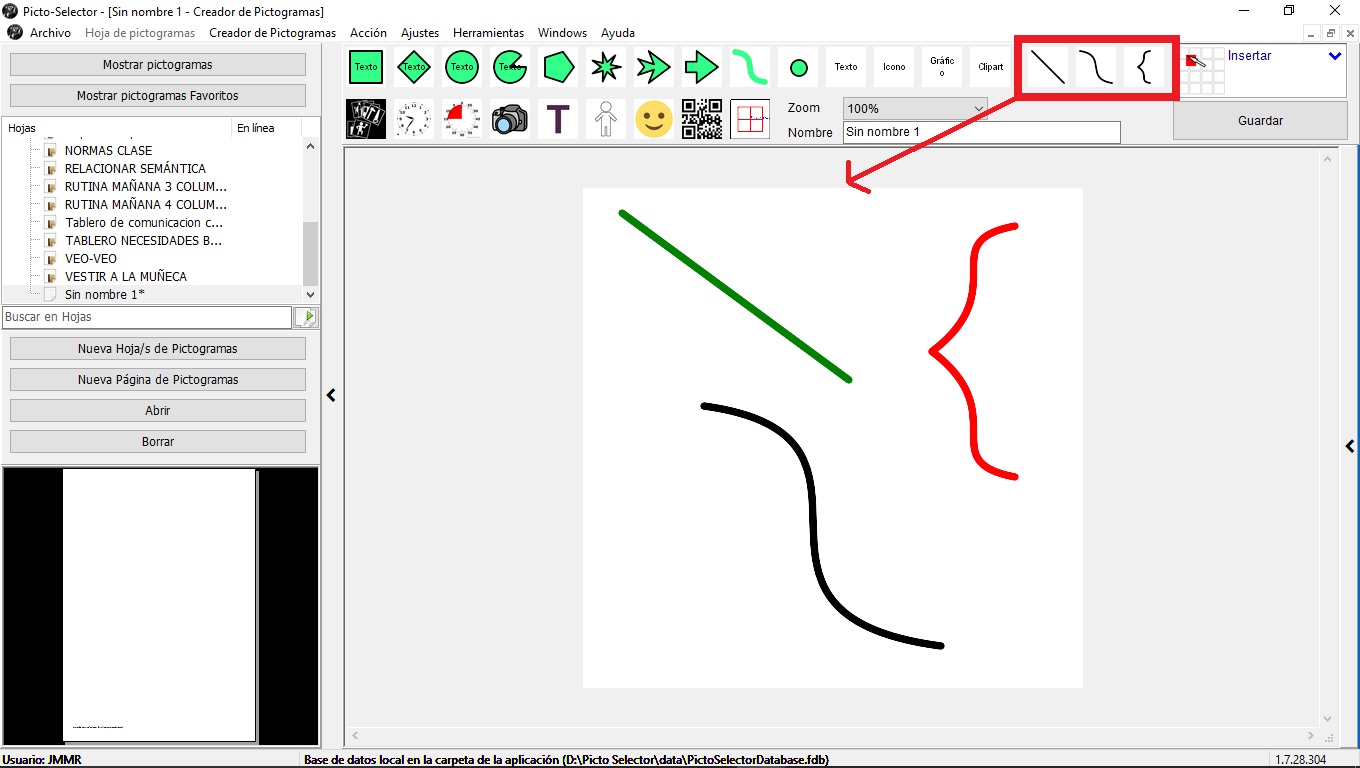
6. Bezier lines
One of the most curious tools that Picto Selector includes that we can use in our custom pictograms are three types of Bézier lines (straight, curved and key). These types of lines have several anchor points that allow you tomanipulate the different types of line and transform the line into a curve. To use any of them, click on the icon and a pop-up window will open in which we can configure all the parameters of our line. These types of lines are very useful for creating concept maps, as we will explain in the next chapter of this tutorial.
7. Picto Selector pictograms and final result.
To finish this tutorial in which we have made a review on all the tools that include the custom Pictogram Creator, we are going to create a personalized pictogram on ” the time and place where we are going to work activities in the area of mathematics“, a pictogram that can be useful in our agenda, schedule or routine.
To do this, we are going to use three ofPicto Selector’s own pictograms, explained in the previous chapters.
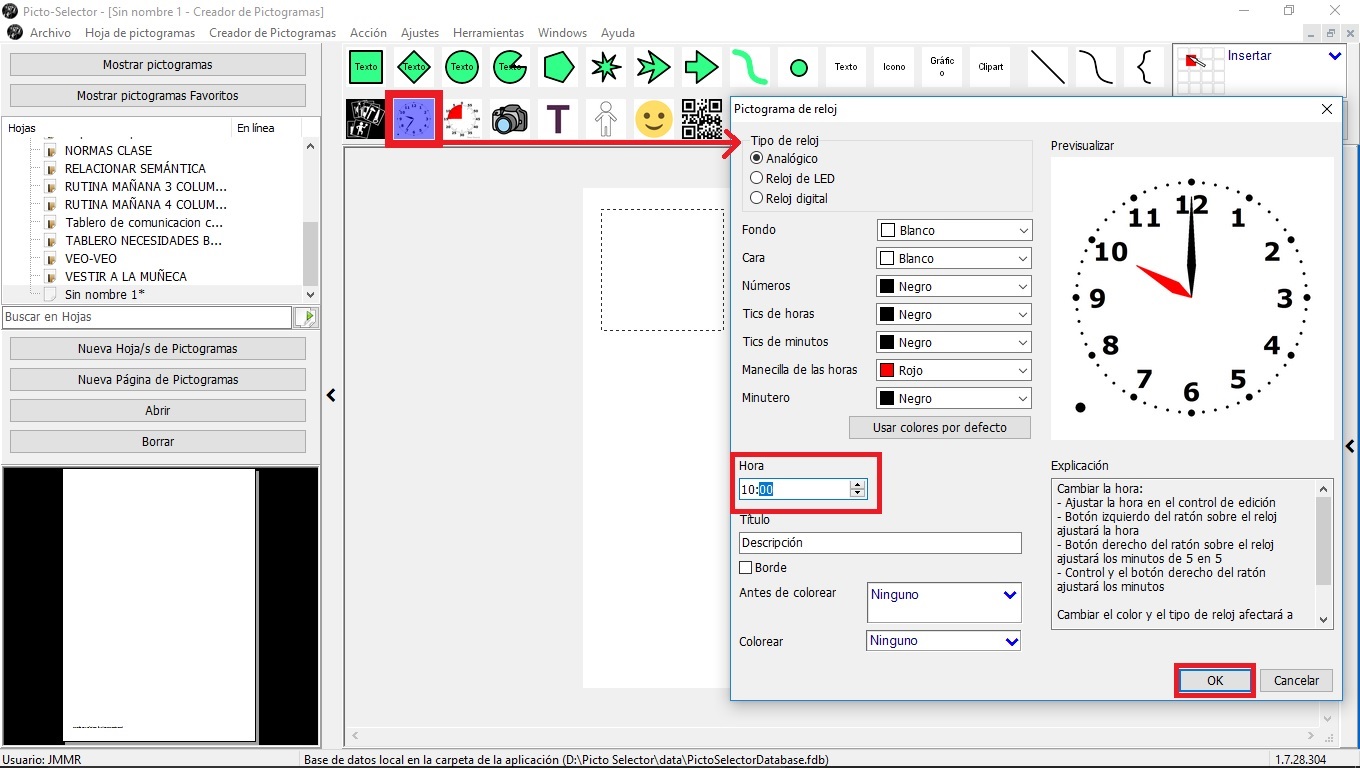
First, we will introduce a clock Pictogram with the start time of the activity, as shown in the image below.
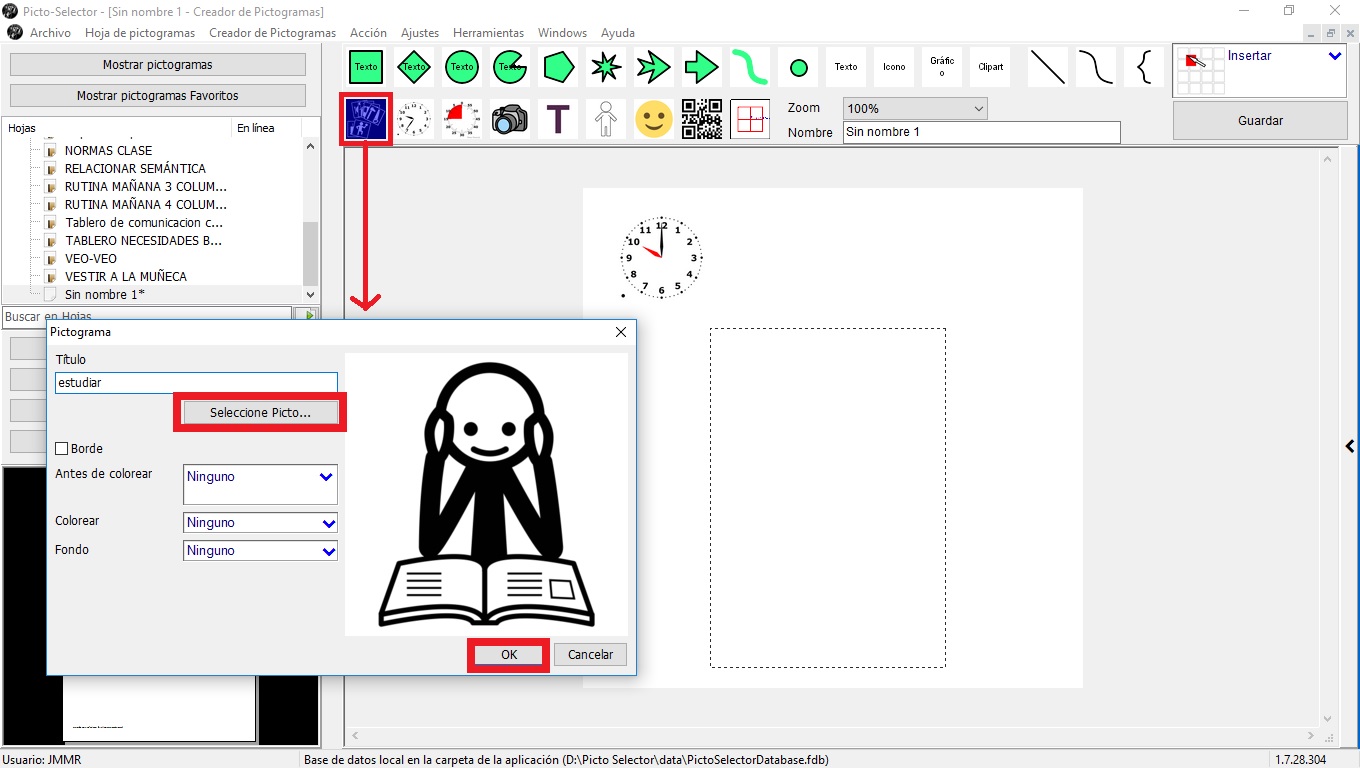
Once the start time has been inserted, we will introduce a Pictogram with the activity that we are going to carry out, in this case, the pictogram of studying.
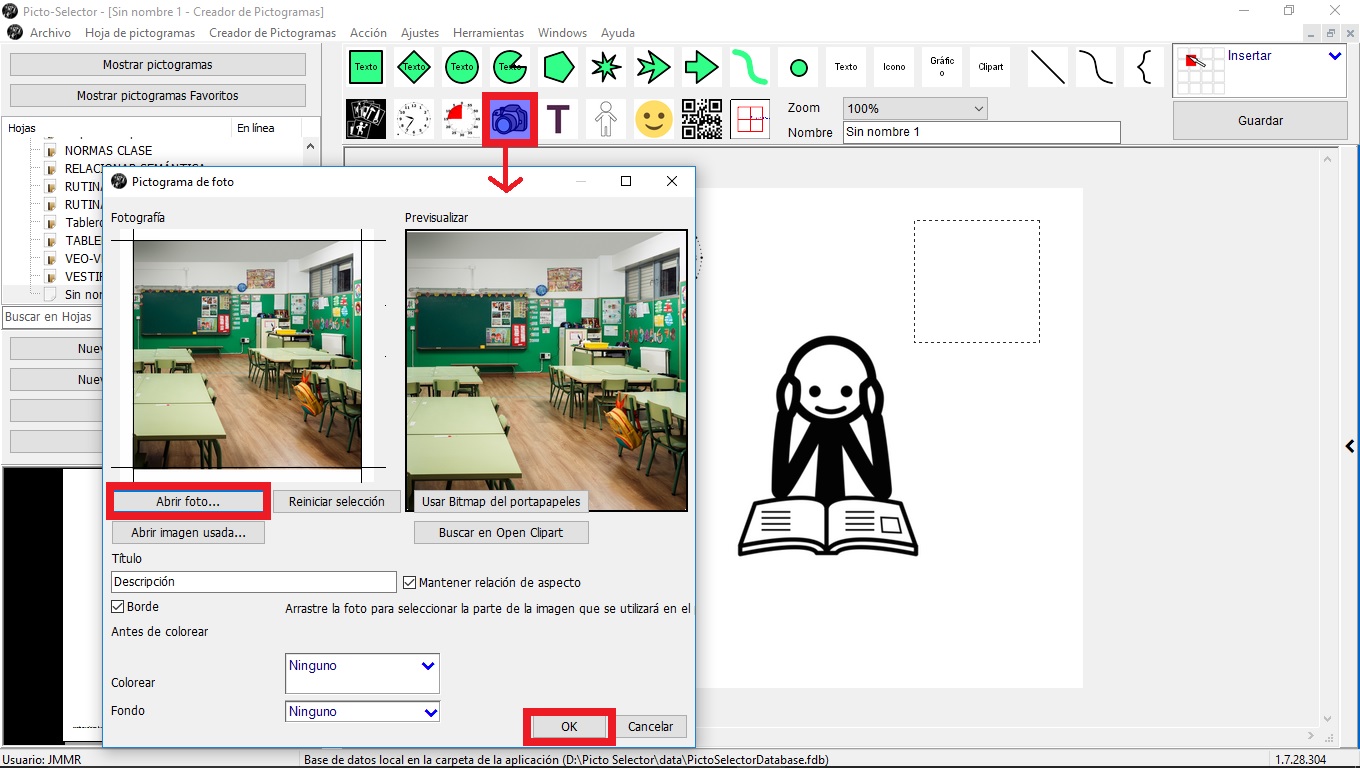
Finally, we will introduce a Photo Pictogram with the image of the classroom where the activity will take place.
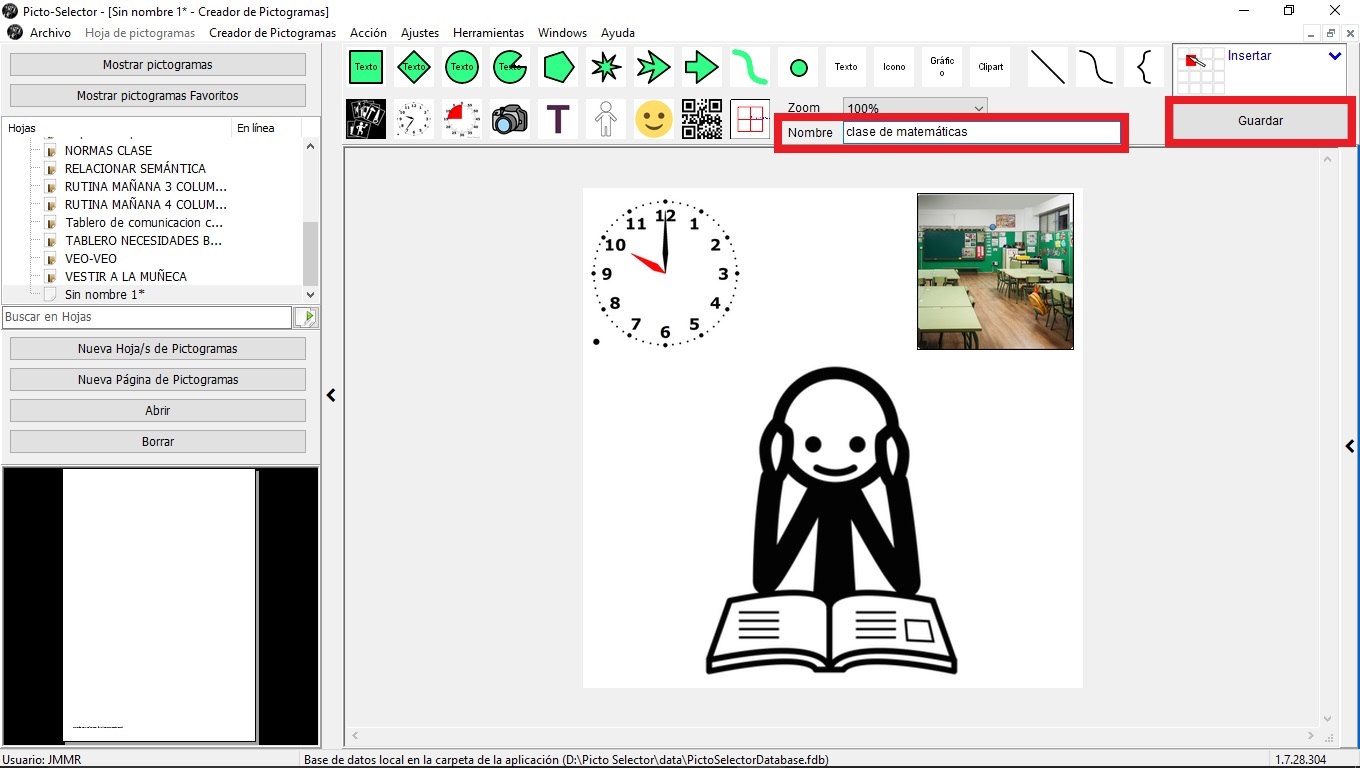
Once all the pictograms have been selected and inserted, we can resize them and place them anywhere in the work window until we obtain the final custom pictogram. In our case, it has been as you can see in the following image. In this image, we have boxed two windows that we must use to include the custom pictogram in the Pictograms List database so that we can use it in our glyph sheets.
On the one hand, we must indicate the Name of the custom pictogram and, then, we will click on the Save button. In our example, we have named it “math class”.
8. Insert custom pictograms in the Pictogram List.
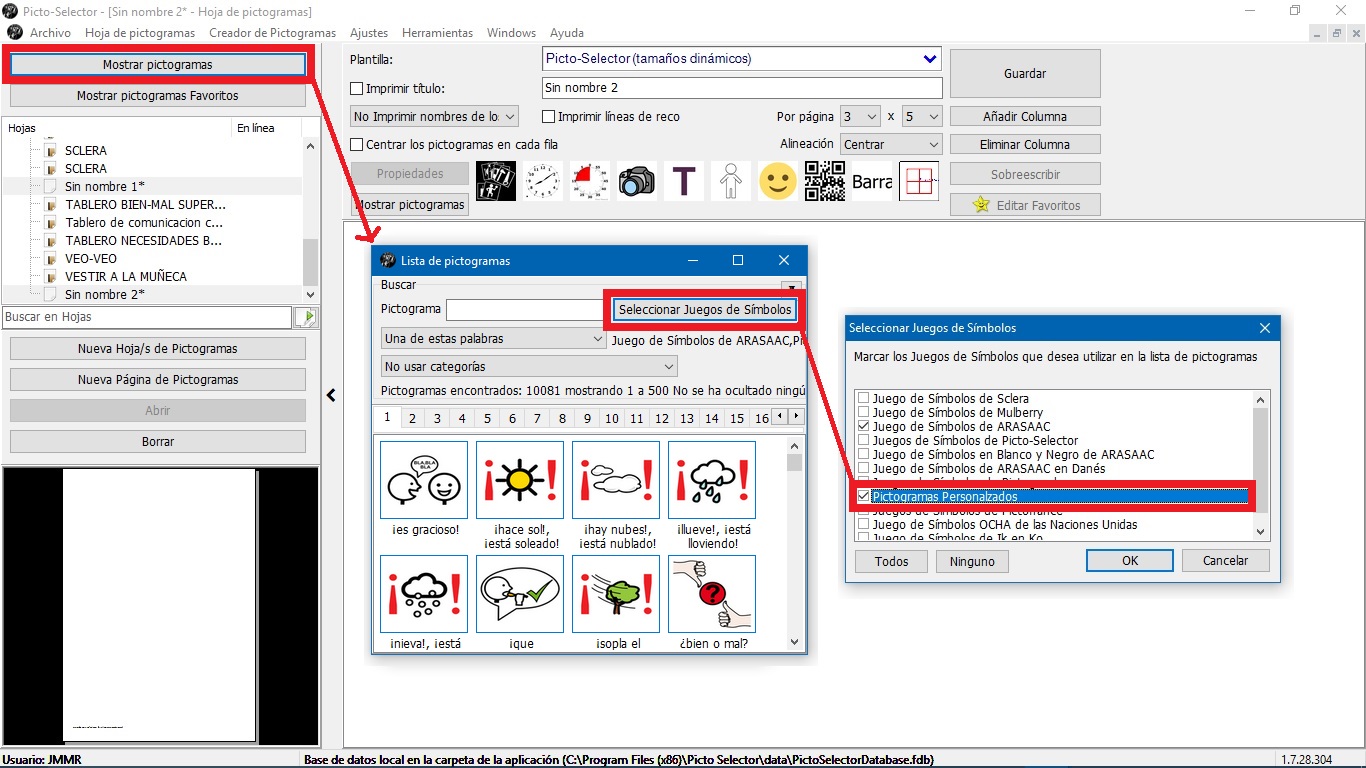
To be able to display this custom pictogram in the List of pictograms,we return to our pictogram sheet, select Show pictograms – > Select Symbol Sets – Activate Custom > Pictograms.
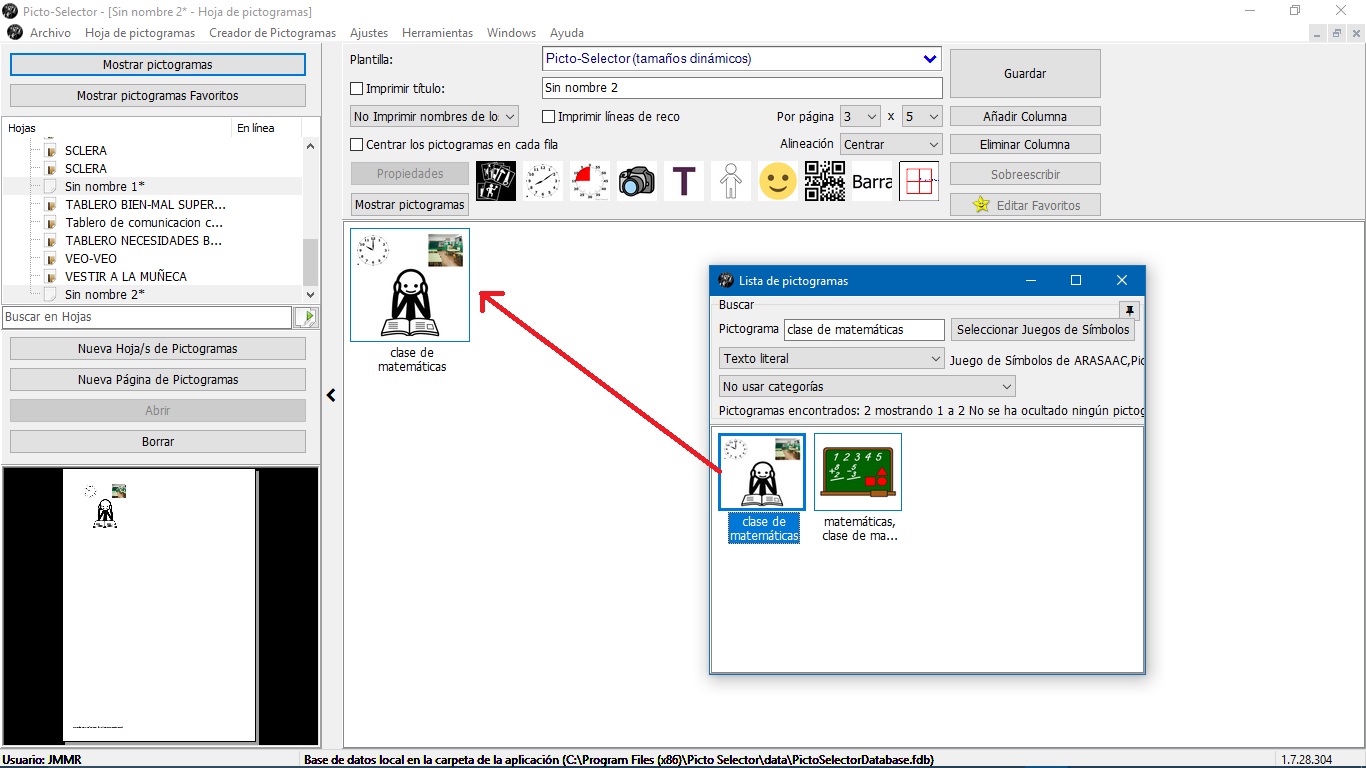
From now on, we can already count on our personalized pictogram to insert it in any sheet of pictograms or copy it to our documents or presentations.
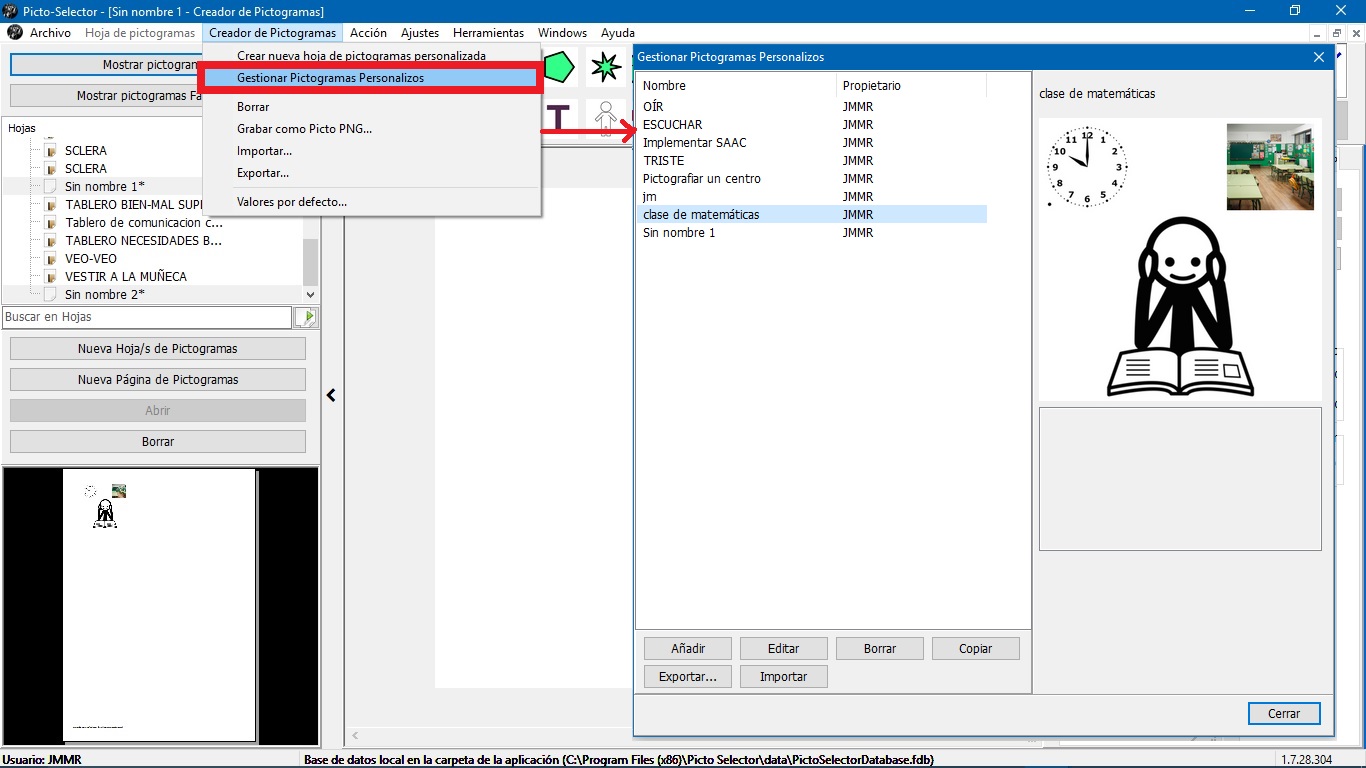
9. Manage custom pictograms.
The Pictogram Makerincludes the Manage Custom Glyphsoption. From this window, among other options, we can Edit or Delete from the List of Pictograms any pictogram that we have created, facilitating the management of them.
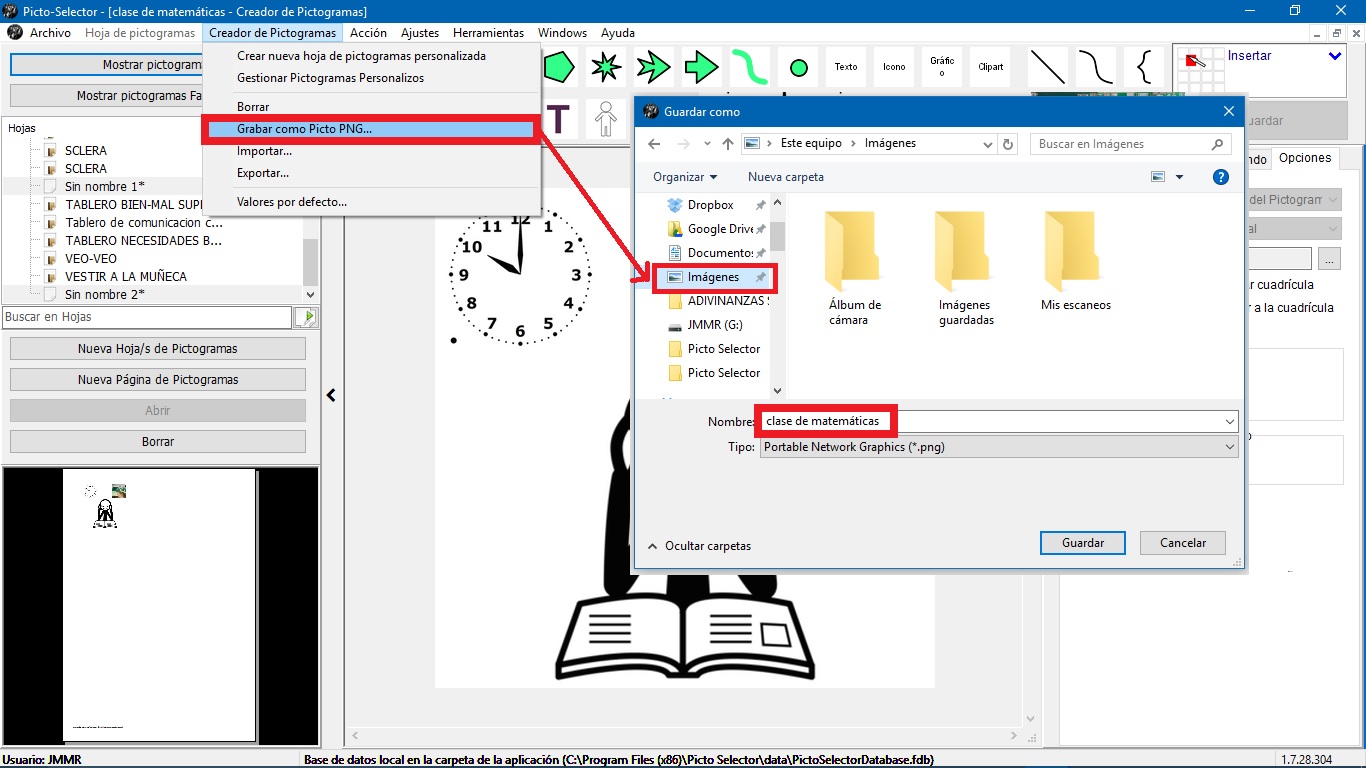
10. Save the custom pictogram as a graphic image.
To finish this chapter, we can only comment that we can save the custom pictogram as a graphic file on our computer. To do this, in the Pictogram Creator window, we will select the Save as Picto PNG option. In this way, our file browser will open and we can select the folder where we want to save this new graphic file.
From now on, we can insert it into our documents and presentations and even use it in a graphics editor to make compositions.
Here we end this chapter on the glyph creator, although we recommend that you explore it in more detail once you have become familiar with the entire graphical environment.


