


![]()
This work is licensed under a Creative Commons Attribution-NonComercial-ShareAlike 4.0 International license.
Video tutorial
Tutorial
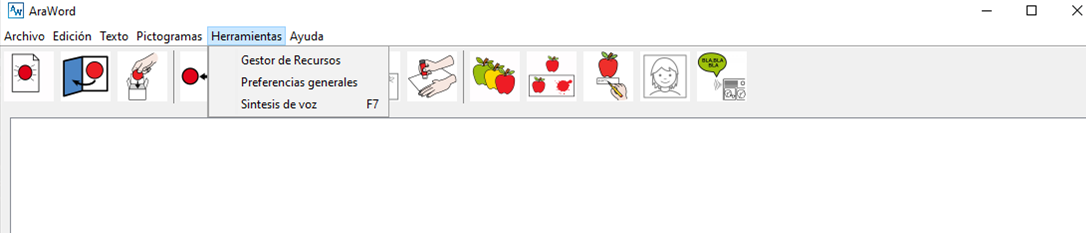
The Tools menu is composed of three sections: Resource Manager, General Preferences and Speech Synthesis.
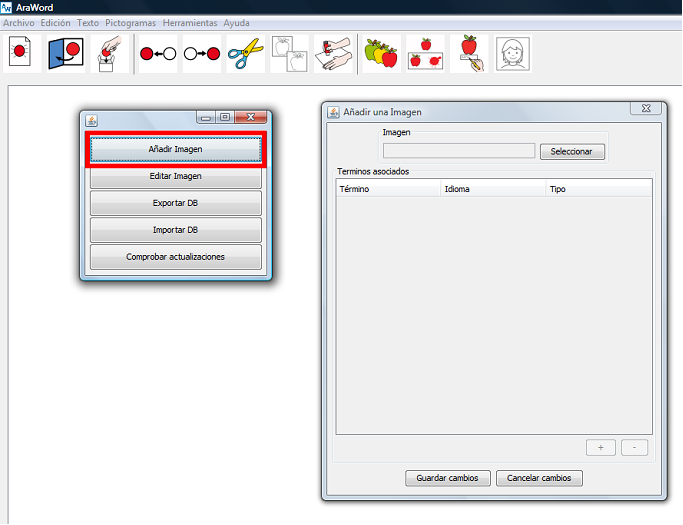
From the Resource Manager,we are going to Add an Image to the AraSuite database to be able to use it in AraWord. To do this, click on Tools -> Resource Manager -> Add Image.
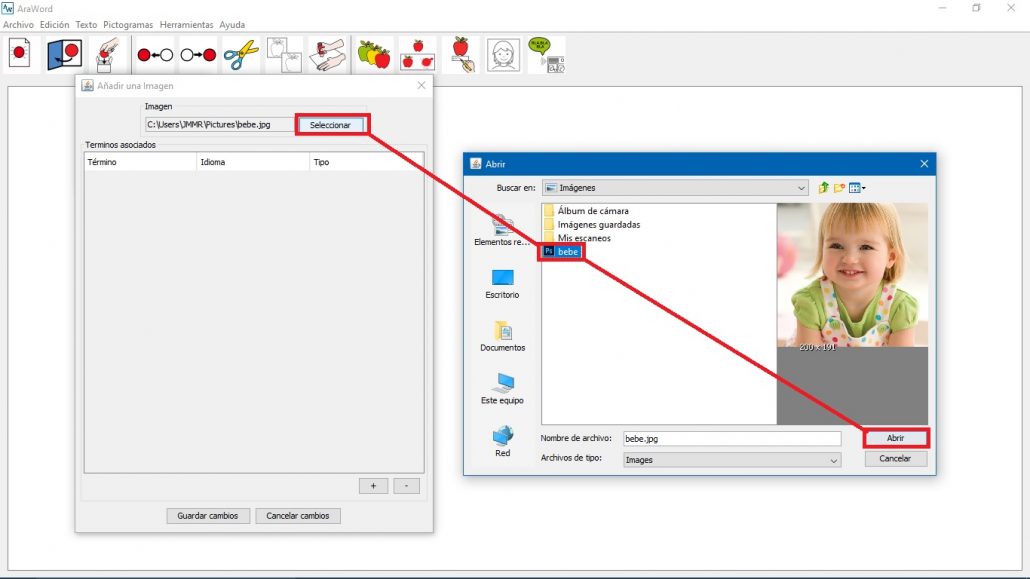
From this window, we give It to Select and look for the image on our computer. This image can be located in any folder. We just have to select it.
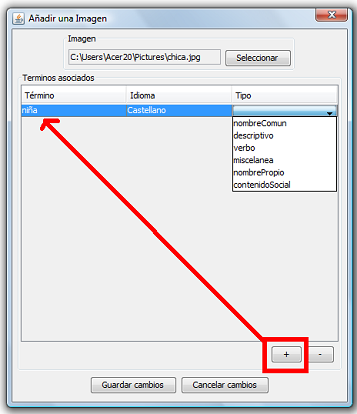
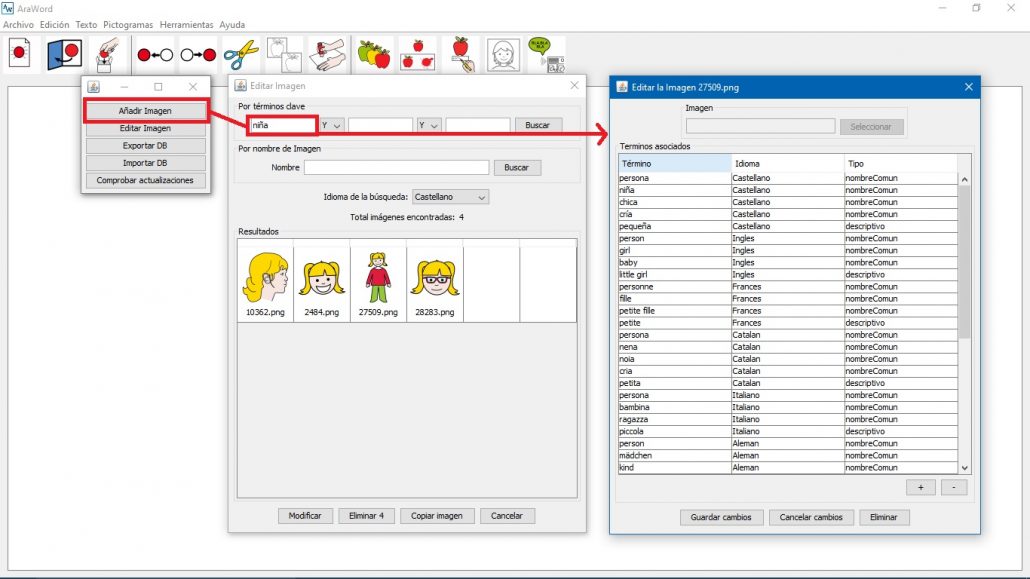
Next, click on the + symbol to add the meaning corresponding to this image. A new line will appear in which we must enter the Term of the meaning,the Language in which we are going to use the image and the Type,which will be the one that defines the color of the frame of the image.
Once the process is done, click on Save changes and we will automatically have our image ready to be used in the processor.
An interesting option is the possibility of adding several meanings for the same pictogram or image at once. For example: girl, Maria,…
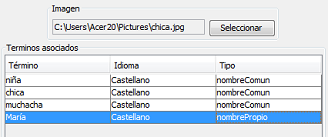
The final result, after saving the changes, will be the one we see below. By writing which

This process is very simple and all the images and their corresponding meanings will be saved in the database. Even if we uninstall and reinstall AraSuite, the database will not be modified and we will not lose the work we have done.
We can search for pictograms or images in the gallery, using the Edit Image menu. This search will allow us to copy them to paste them into a document or presentation, modify their properties or permanently eliminate them from the database.
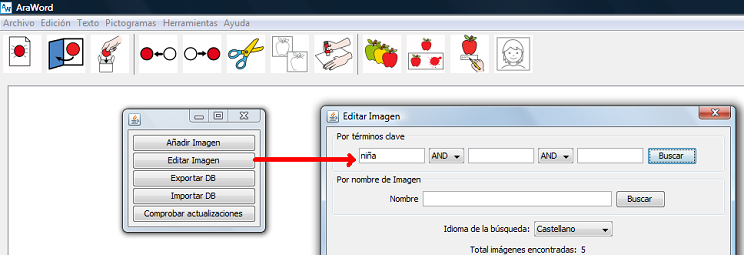
We can perform this search for pictograms or images in two different ways: by key terms or by image name.
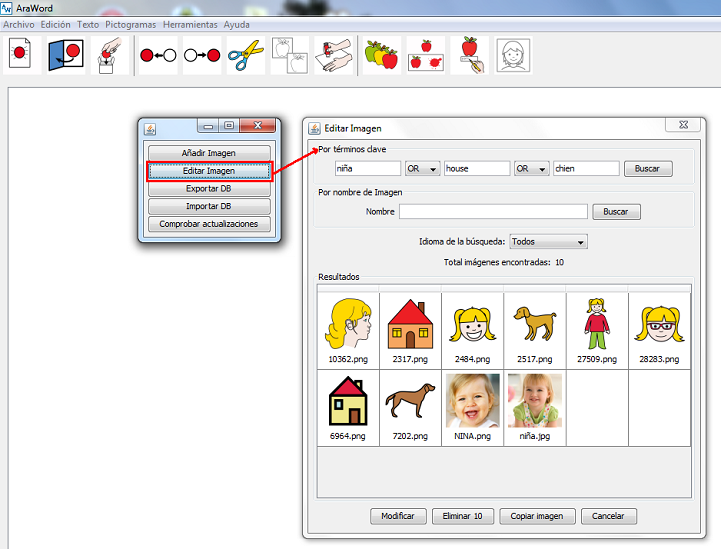
The search by key terms has two drop-down menus where you can search directly by entering the name of the pictogram or choose between the options ‘and’ and ‘or’. If ‘and’ is chosen, the images that belong to all the key terms entered will be displayed as a result. If ‘or’ is chosen, the images that belong to any of the key terms entered will be displayed as a result.
These options can be combined to perform more complex searches. The * symbol can be used to select key terms that begin, end, or contain the entered letter or set of letters.
It is important to remember that when we want to search the pictograms in the database, they must be done by key terms and not by image name. In this way, searches can be made in the different languages available.
Let’s look at an example where we have searched for key terms in three languages.
The search by image name allows us to search for images that we have inserted ourselves into the database.
This search can be done in different ways:
- By exact name of the image:just put the name of the image you want to locate and click on Search.
- By names that begin with a letter or set of letters. In the case that we want all the musical instruments we will search by instrument * and if we want all the images that start with the letter ‘a’ we will search for *.
- By names that end with a letter or set of letters:if we want all the words that end in ‘tor’ we will look for *tor and if we want all the words that end in the letter ‘e’ we will look for *e.
- By names that contain a letter or set of letters:if we want all the words that contain the syllable ‘of’ we will look for *de* and if we want all the words that contain a letter ‘and’ we will look for *y*.
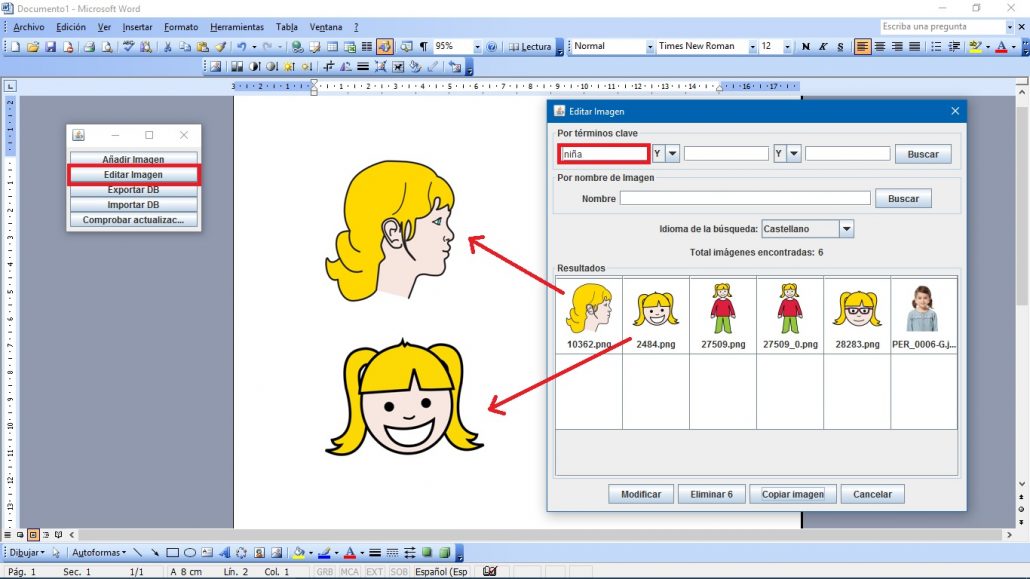
In our case, we have entered the name “girl” and it has returned the following result:
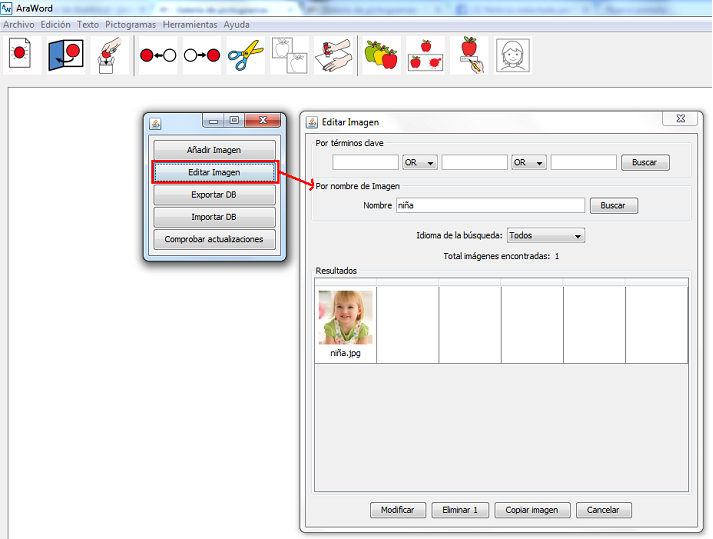
In this case, the image or photograph of the girl that we had previously added appears. As you can see, no pictogram is shown, since the search, as we have indicated, is carried out on the images that we have added.
From now on, we already know the different search systems implemented in AraWord.
In our case, we enter the term “girl” in the search for key terms and it returns all the pictograms and images contained in the database whose key term is “girl”.
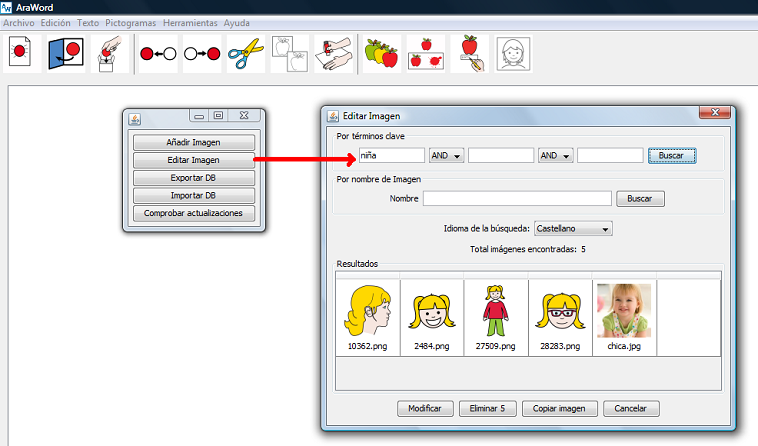
To edit the pictogram or image,select it and click on Modify or double click on it and alist will appear with the meanings, all the languages in which it appears and the type of word.
Now we just have to place ourselves in the meaning that we want to change and modify it.
 In the event that we want to delete the pictograms or the image,we will select it and click on Delete.
A very interesting new option that has been incorporated in this new version is Copy. To use this option, select the pictogram or image, click on Copy and use the paste option in our document or presentation to make it appear.
Apart from AraWord, we can use this option directly, using the Gallery Managerprogram, which we will find in the AraSuite folder of the Windows Startmenu.
In this way, we can open a pop-up window and using the Edit image option and searching for key terms, we can Copy the pictogram or image and paste them into our document or presentation.
Another option, which we will find in the Tools menu, is General Preferences. Here we can modify the initial settings of AraWord,including the Language of the application and the Language of the document. This option allows us that the next times we open the application, the settings selected in this preferences box will be used by default.

Given the ease of use of this application, we recommend that you go testing and testing the different tools and options explained throughout these chapters to observe the changes that occur when we apply them.
In the next chapter, you will be able to see different examples of using AraWord.


