


 This work is licensed under a Creative Commons Attribution-NonComercial-ShareAlike 4.0 International license.
Video tutorial
Tutorial
The best way to explain some of the most interesting functionalities of the contextual menu of the pictograms is through an example of a sheet of pictograms.
In this chapter, we will explain the following:
1. Change the background color of the pictograms.
2. Copy pictograms to our word processor and to our slideshow.
3. Color the pictograms to give the effect of strikethrough.
4. Activate/deactivate the border of the pictograms.
In our case, we are going to create a sheet of pictograms with the “Class Rules“, although you can consider other examples.
To do this we are going to create a sheet of pictograms, but this time we are not going to follow the wizard. Directly, click on the box in the left column New sheet of pictograms and when the wizard appears, we will click on Finish.
You can see that a new sheet called Nameless 1* appears (remember that the asterisk means that we haven’t saved it yet). On the top side, we select Print Title (“Class Rules”) and in the tabs of the Per Page option we select 3 columns x 4 rows, because our sheet consists of a column on each side (correct actions– incorrect actions) and a central column with empty boxes to create a separation zone. In the screenshot below, you can see the order of the process.
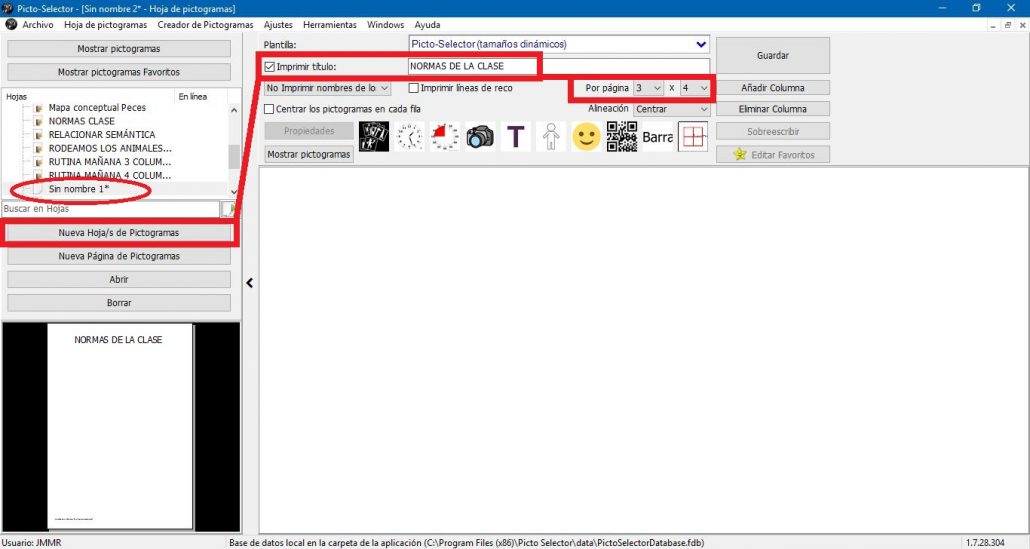
From now on, we open the Show pictograms window and we select the pictograms that will make up our sheet. If you look at the following screenshot, you will see that, since we can not leave any cell blank, we have used the Empty Spaceicon, which is in the row of pictograms of the application.
This type of empty space does not have any properties, nor can it be given any format like the rest of the pictograms. Its only function is to occupy a blank space to give a certain format to our sheet.
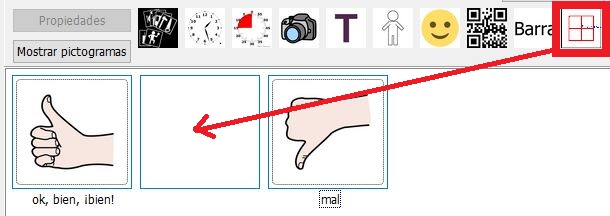
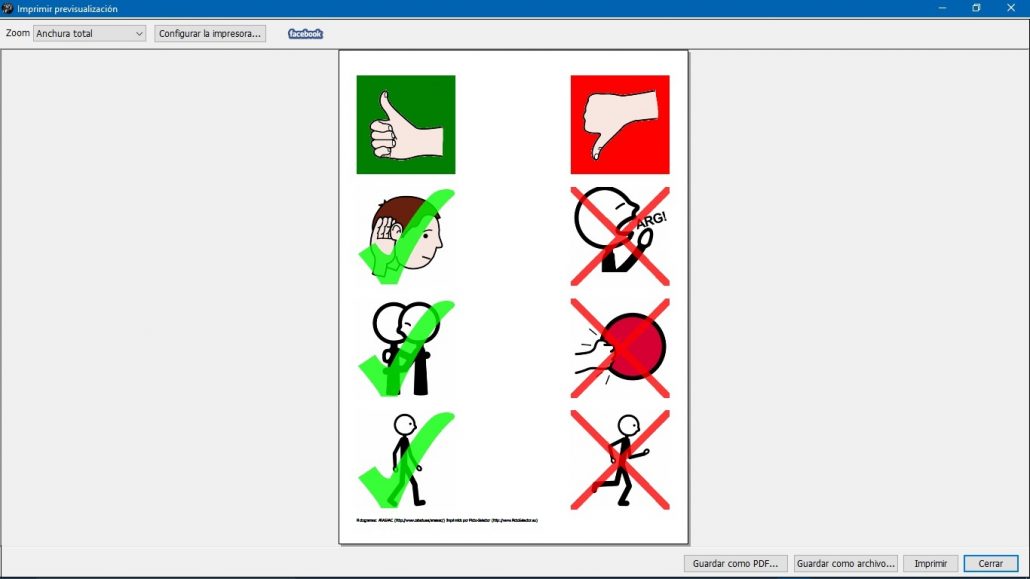
Once our sheet is filled in with the corresponding pictograms, the final result could be this:
Now we are going to give more emphasis to the pictograms of our hoa to highlight the actions reflected in them.
1. Change the background color of the pictograms.
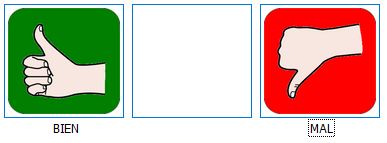
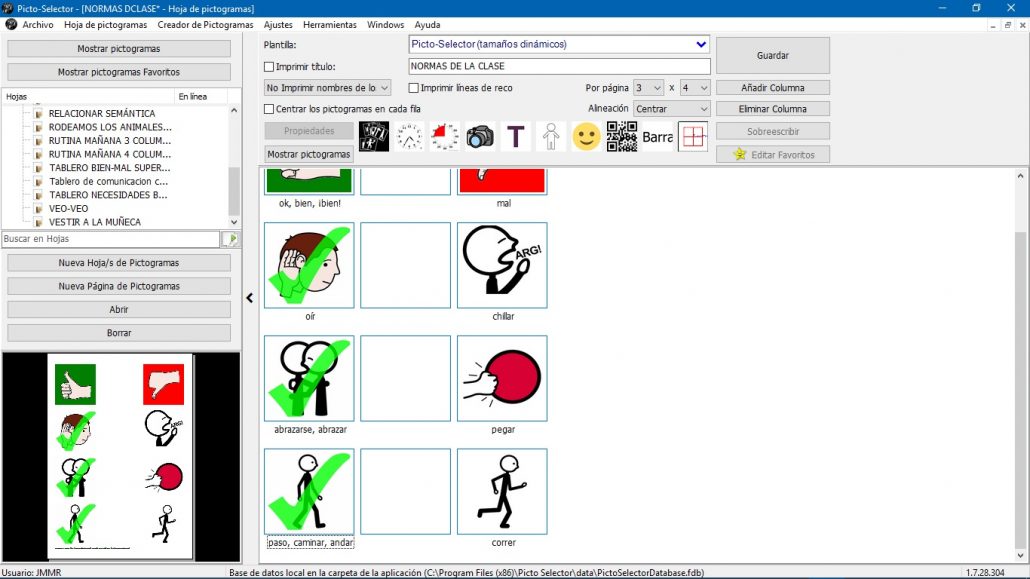
In the case of pictograms that represent the idea of Good and Bad,we want to assign a green background and a red background, respectively. To do this, we place the cursor over each of them and press with the right mouse button so that the context menu appears with the options that we can make. In the following image, we see all the possibilities offered by this context menu.
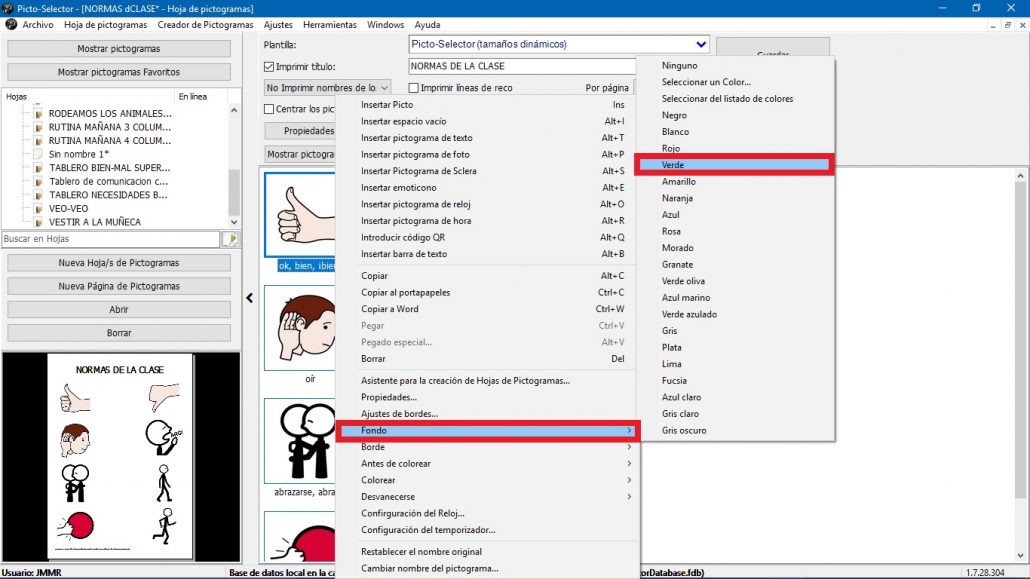
Once the context menu of the Goodpictogram is opened, we select the Background option and, within it, the Greencolor. Next, we repeat the same action with the badpictogram, but assigning the color Red. In the image below, we have the final effect of this option on both pictograms.
2. Copy pictograms to our word processor or to our slideshow
Taking advantage of the change we have in our pictogram, we are going to see two other very interesting functionalities of the context menu: Copy to Word and Copy to clipboard.
To do this, we open a new document in Word in the background. We go to our pictogram sheet and stand on top of the Bien pictogram. We press the right mouse button so that the context menu appears and choose the option Copy to Word,If we return to our document in Word, we will see that our pictogram appears with the format that we had given it in Picto Selector.

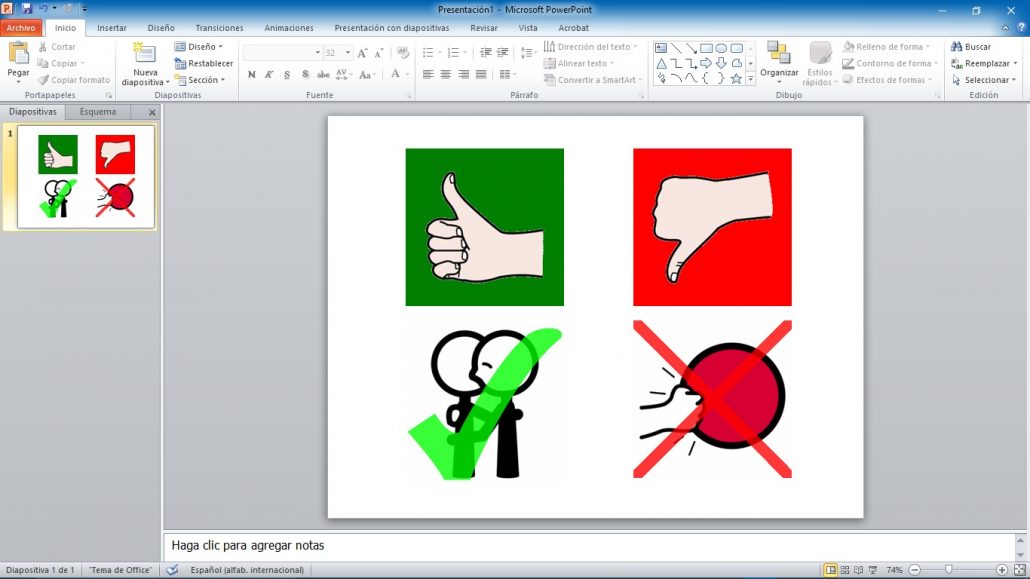
Here you have the final result, after copying the two pictograms, Good and Bad, to Word. Now, we can resize them to our liking to give the final touch.

We can use the Copy to clipboard option to copy the selected glyph to our word processor or slideshow. In this case, we do not need to have the word processor open to be able to execute it, since the image is copied to the clipboard.
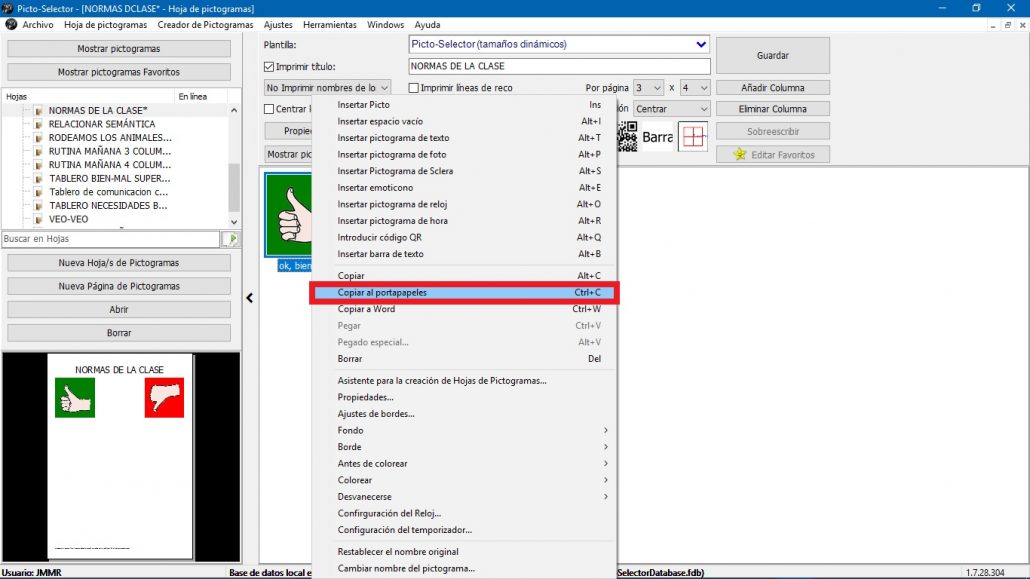
This option is very interesting to copy our pictograms in any slide presentation, as you can see in the image below.
3. Color the pictograms to give the effect of strikethrough.
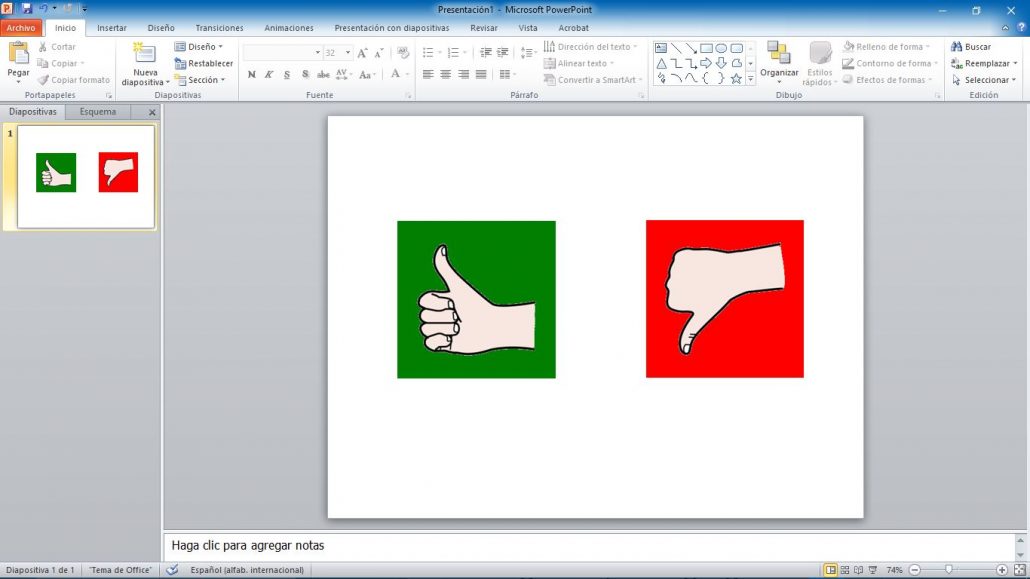
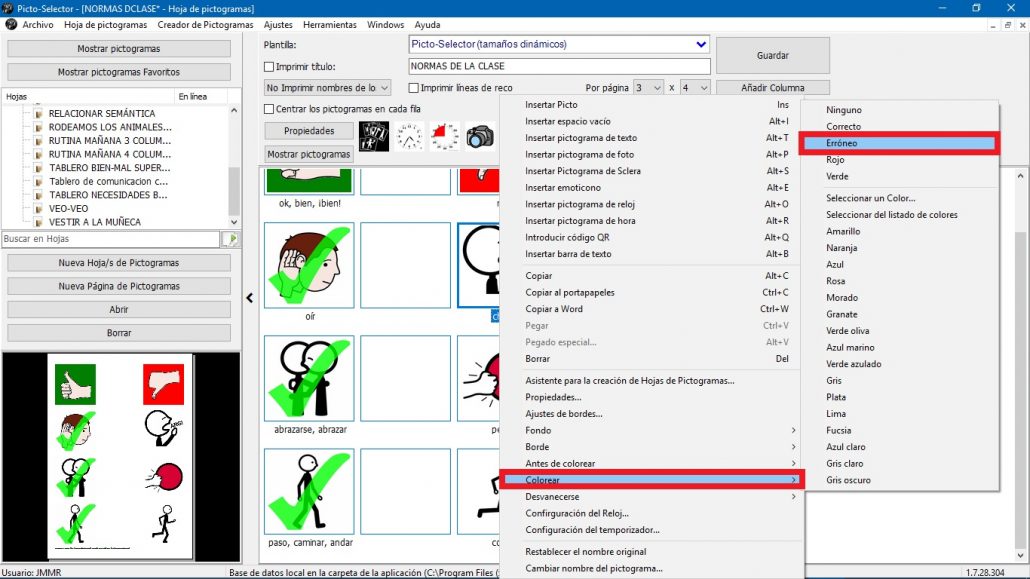
Next, we will see another of the options of the context menu of the pictograms that will be very useful to highlight the positive or negative meaning of some pictograms. This is Coloring, which we already explained in a previous chapter, but here we are going to do it from this context menu.
To do this, we place ourselves on top of any of the pictograms that show us a correct action, for example, Listen. Click the right mouse button and within the context menu, select Color and, within the options, Correct.
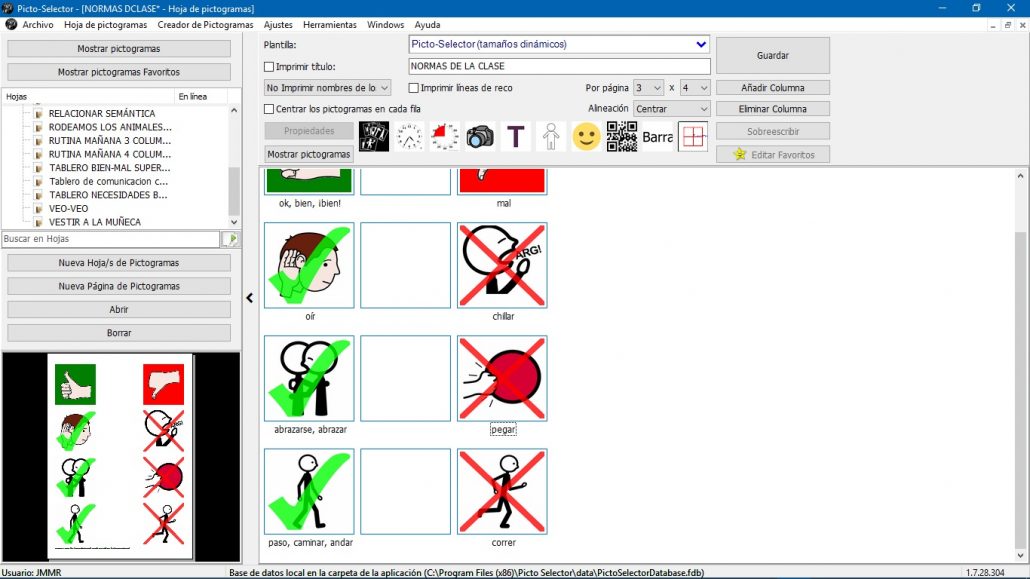
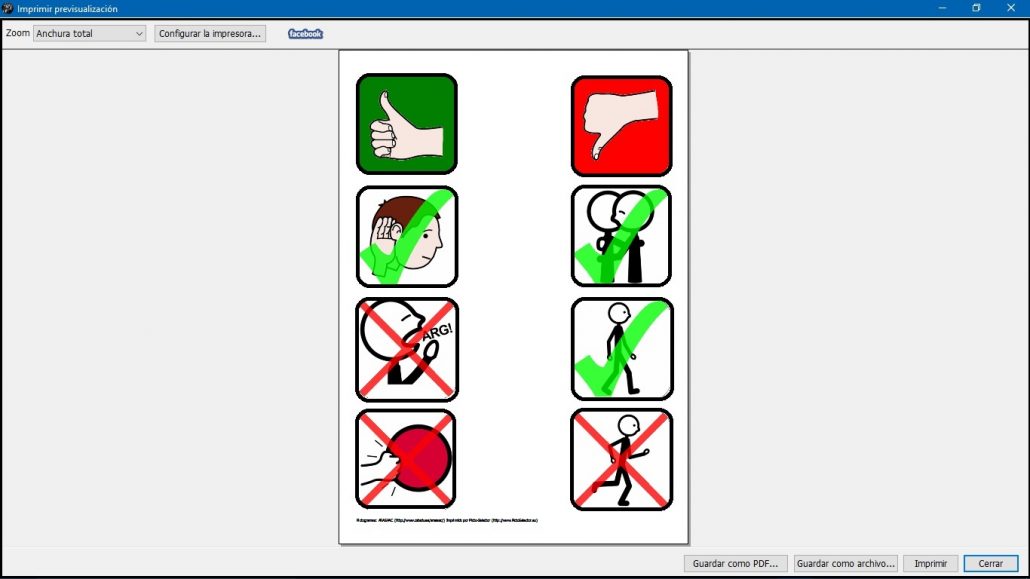
The effect that we are going to achieve is the appearance of a transparent green stick on top of the pictogram, which highlights the idea that it is a correct action. We perform the action on all the pictograms that represent correct actions and this is the result.
Now we are going to place the mouse cursor over the pictograms that represent incorrect actions. Click on the right button and select Color and, within the options, Erroneous.
In this case, the effect that we are going to achieve is the appearance of a red blade on top of the pictogram,highlighting the idea that it is an action that is not appropriate.
As we have already mentioned, if we use the context menu on any of these new pictograms and select the option of Copy to Word or Copy to clipboard,we will have these pictograms in our text document or in our slideshow, as we show you in the following screenshot.
We only have to go to the Filemenu, select Print and we can preview our pictogram sheet and select the option to make: save as a PDF document, as a graphic file or Print.
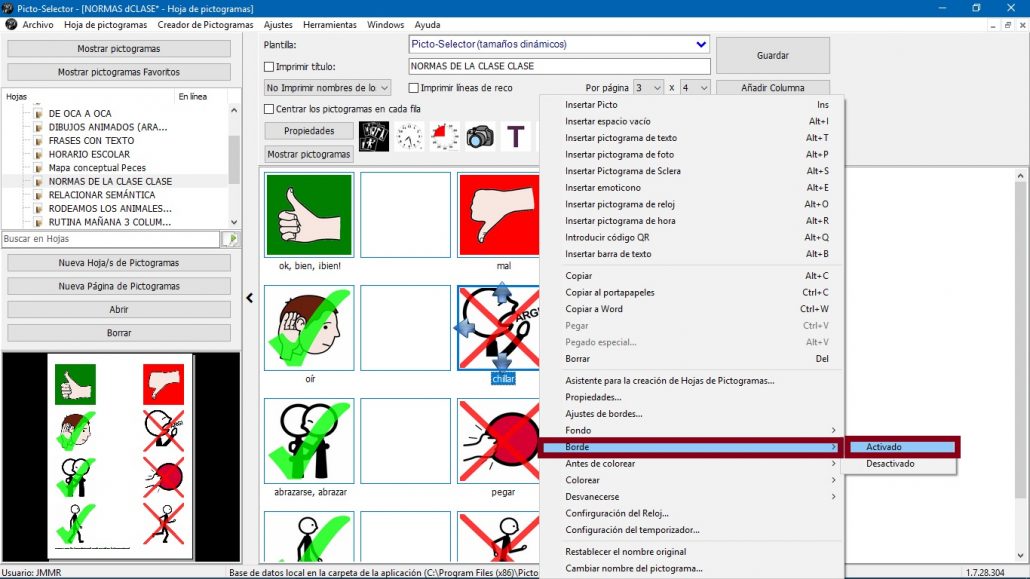
4. Activate/deactivate border of the pictograms.
On some occasions, we may be interested in having some or all of the pictograms on our sheet have aBorder. Although we have already explained how to activate the border by double clicking on the glyphs and selecting this option, the context menu of the glyphs also allows us to Activate or Deactivate the border.
As in the previous functionalities, we place ourselves on top of a pictogram and press the right mouse button. In the context menu that appears we select Border and choose between Activated or Deactivated.
We can perform this action on each of the pictograms or we can select them all by dragging the mouse over them. The final effect will be the one shown in the following image.
We also have another very interesting option in the context menu and that allows us more functionalities to configure the edge. This is Border Settings.
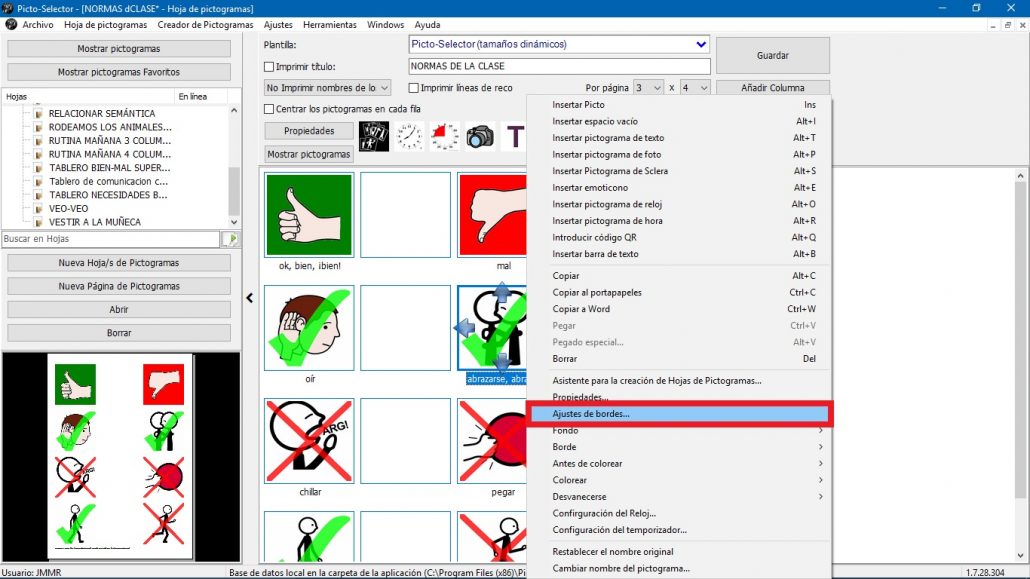
When selecting this option, a pop-up window appears from which we can Use Border and configure the Width, Style, Color and Degree of Rounding of the selected pictograms.
If we deactivate the Change only the selected option, the changes will be applied to all the pictograms.

Once all the modifications have been made, we go to the File menu and select Print. Now we can preview the final state of our work and select the option to perform: save as a PDF document,as a graphic file or Print.
As we have already emphasized, all these functionalities will be very useful for us in the creation of adapted materials with different contents and activities.


