 This work is licensed under a Creative Commons Attribution-NonComercial-ShareAlike 4.0 International license.
Video tutorial
Tutorial
We continue in this chapter with another type of pictogram that will allow us to insert images and photographs from the computer. This is the Photo Pictogram.
The photo pictogram is represented by a photo camera and when we click on the icon, a pop-up window appears in which the first action we have to perform is Open Photo…
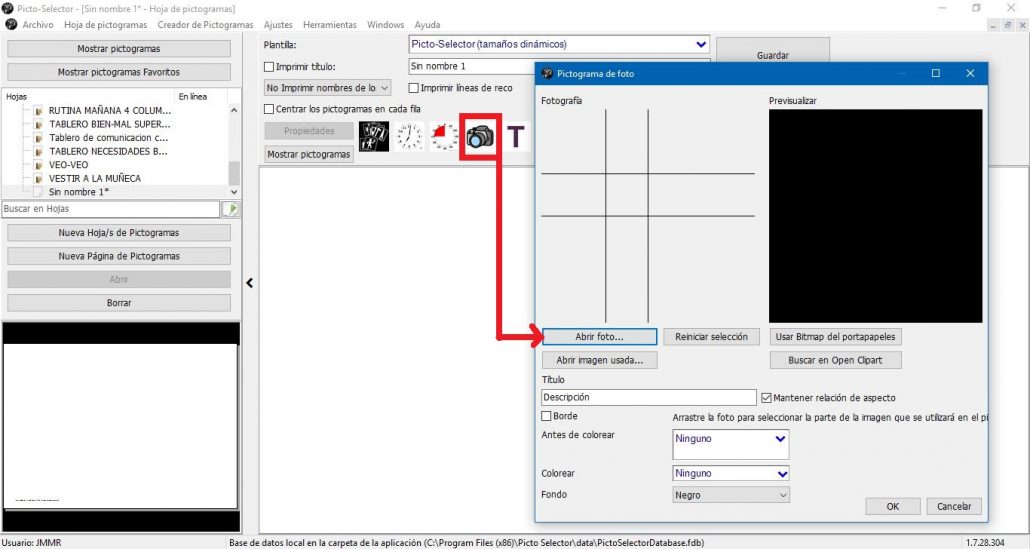
Once the option is selected, the window of our Windows explorer appears, in which we must locate our image and photograph on the computer, select it and open it, as it appears on the following screen.

Next, we can insert it directly into our pictogram sheet,by pressing the Okbutton.
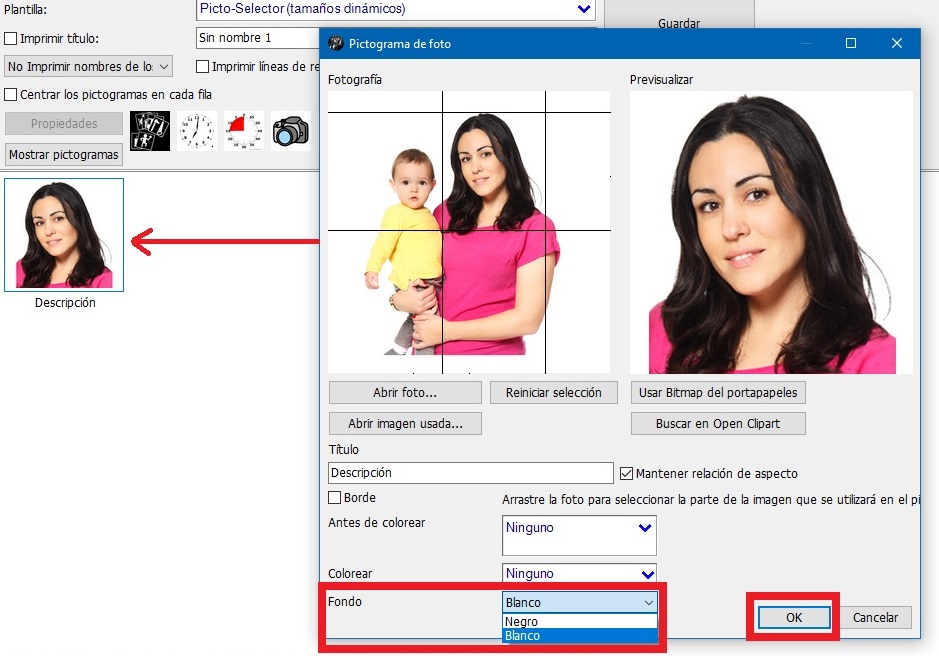
In our case, we want only the mother’s face to appear, since we are going to use it as a reference. Picto Selector allows us to crop the image of our photograph until we obtain the desired image. To do this, we place the cursor on any of the black lines that frame the image on the left side and begin tomove each of them towards the interior of the image,until we manage to frame the mother’s face. In the image on the right side, we can preview the changes.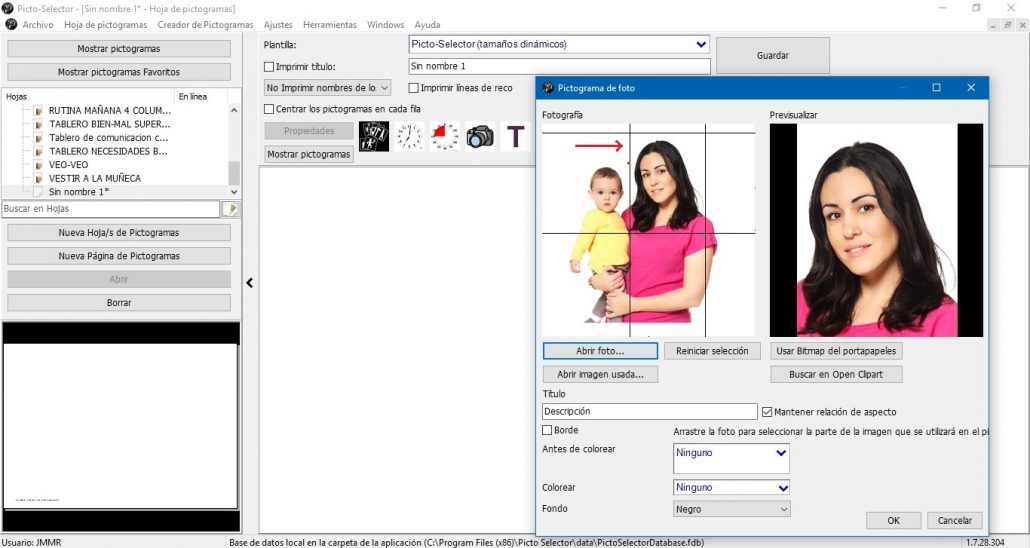
Since our image of the mother is not a perfect square, we notice that there are some black borders on both sides of the image. We can solve this detail, if in the Backgroundoption, we select the color White. In the image below, you can preview on the right side how the image will appear on our pictogram sheet. It only remains to click on the Ok button and we already have our image inserted in the sheet.
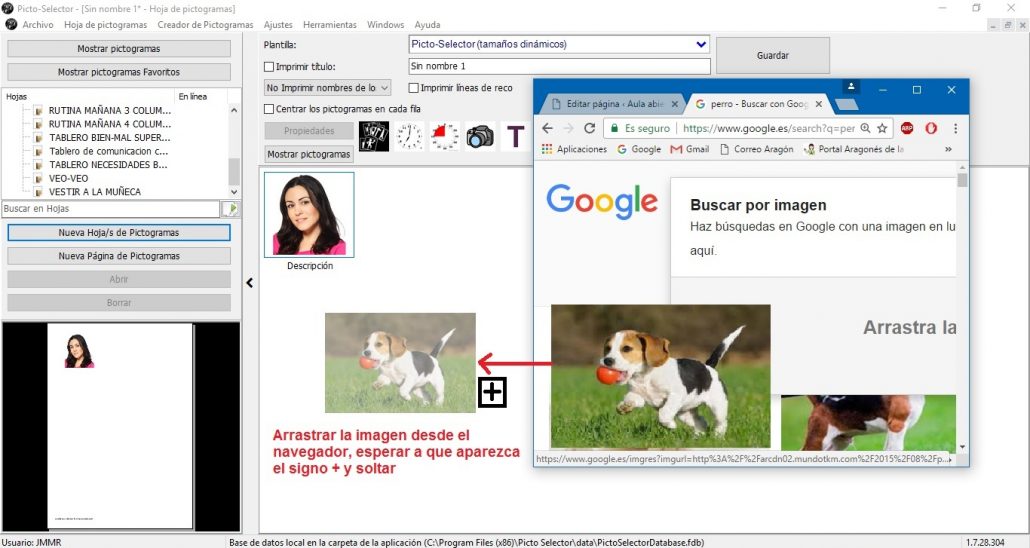
One of the great implementations that Picto Selector incorporates is the option toinsert images and photographs in our pictogram sheet directly from our browser.
To do this, you restore the browser page to a size where we can view our glyph sheet below. We look for the desired photograph in the browser and drag it with the mouse to our pictogram sheet. We wait a few seconds for a box with the + symbol to appear and, at that moment, we drop the image and it is automatically inserted into the sheet.
As it is not a perfect square image and we also want to crop it to center the image of the dog, we double-click on it and the photo pictogram editing window will open. Now we follow the instructions that we have given you above to achieve the desired effect.
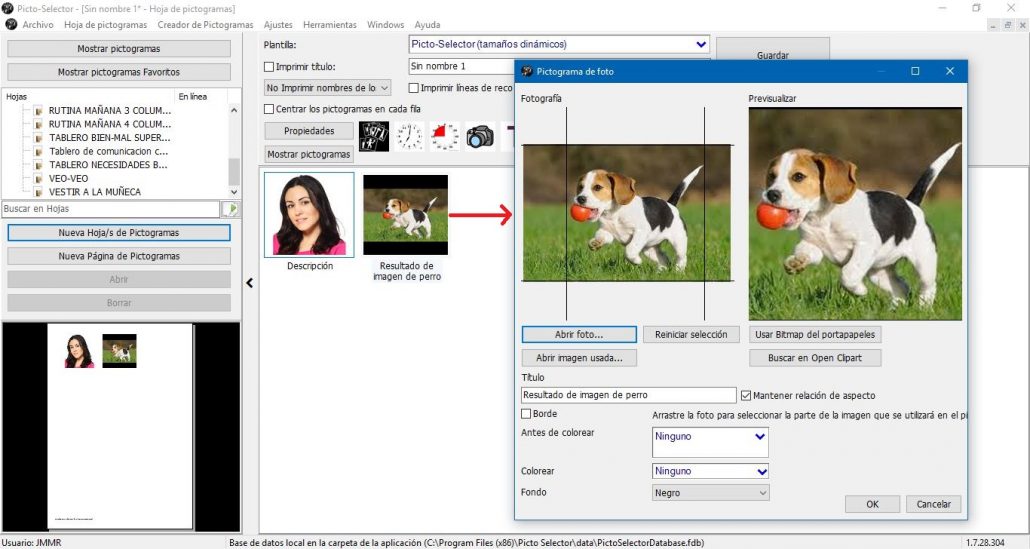
Once the image of the dog has been edited and the effect we want has been achieved, we only have to click on ok and insert it into our sheet of pictograms.
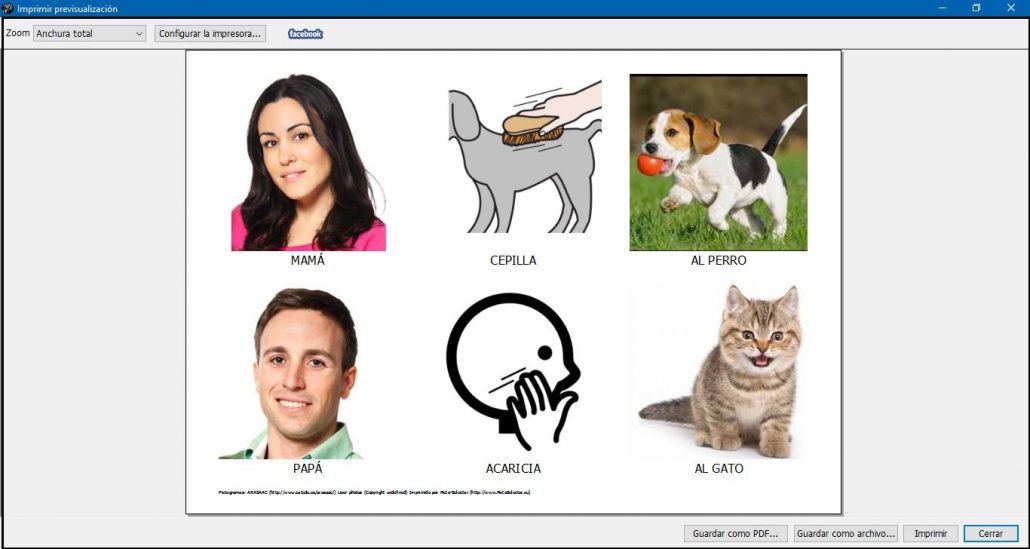
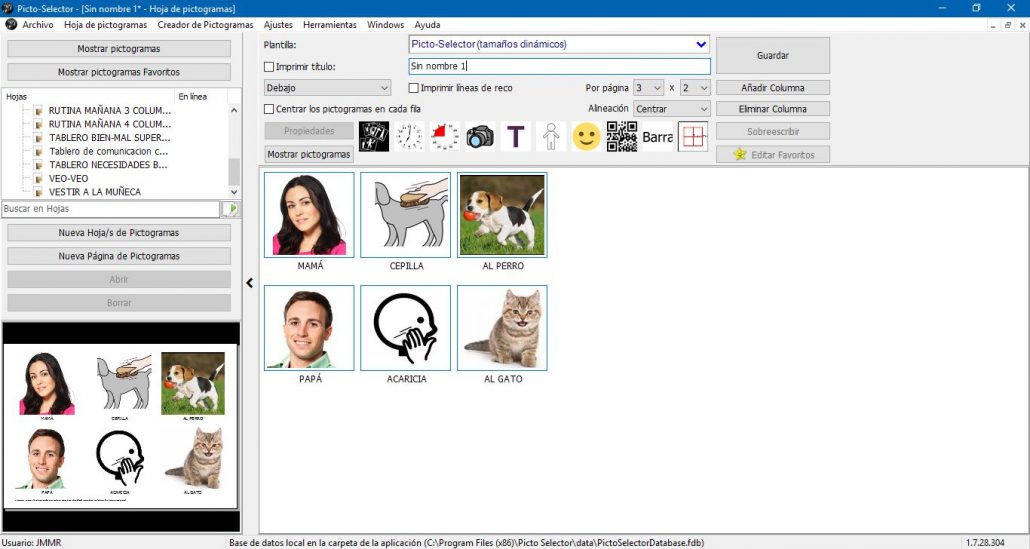
Taking advantage of the photo pictograms combined with the ARASAAC pictograms, we have developed an exercise to work on the correct construction of sentences.
Let’s see the end result. To do this we go to the File menu and select the Print option to preview the result and perform one of the actions: Save as PDF file,Save as graphic file or Print.