AsTeRICS Grid Dynamic Communicator
9 – Actions – Navigate to other grid
The next action we are going to learn how to use is the Navigate to other grid action, a fundamental action when we are going to create grids organised with Nuclear Vocabulary by categories, as many of their cells will be linked to other grids.
In our example communicator, we show you how useful it is. Our user wants to drink water and forms the phrase I+WANT. The verb DRINK is located inside the ACTIONS cell (category), so, when clicking on this cell, a new linked grid appears where are showed all the most common actions for our user. Only remains to click on the DRINK symbol cell, which will be added to the accumulated phrase.
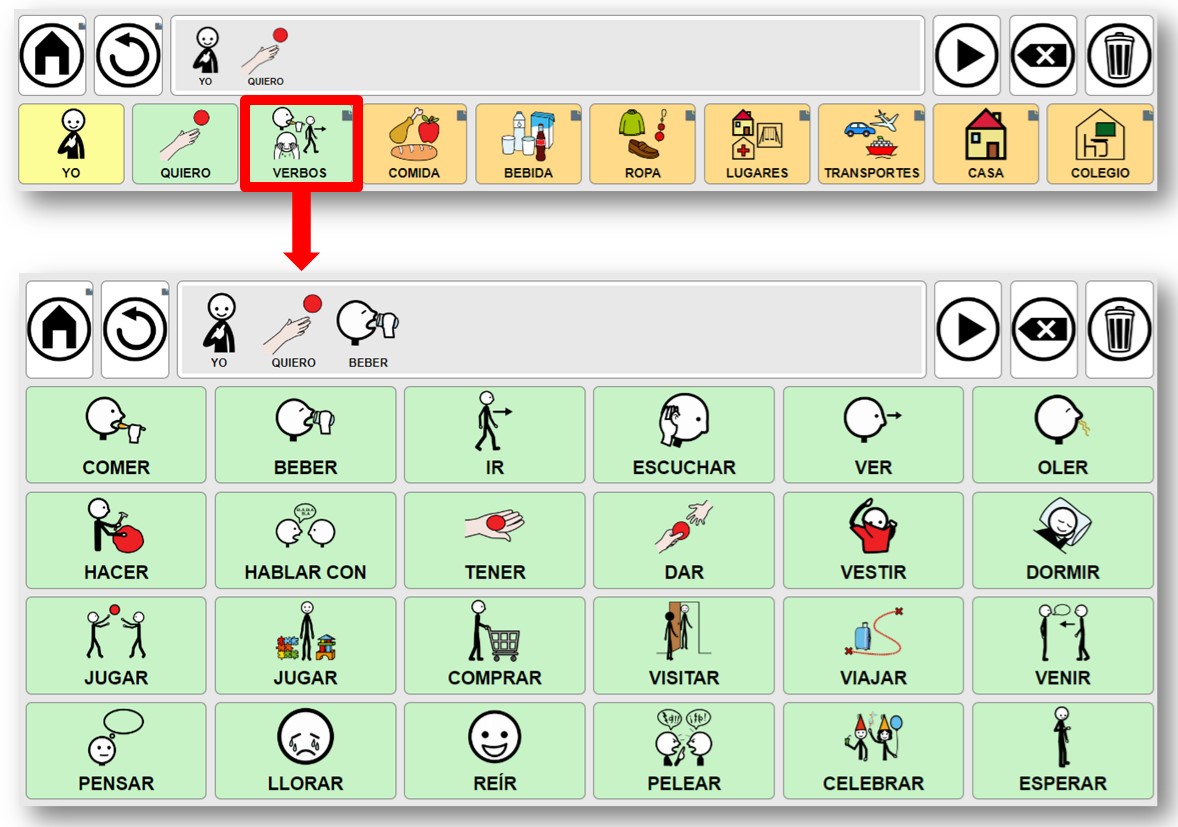
If we want to add a drink, we click on the Home cell to go back and select the DRINKS cell (category). In the new linked grid, the most common drinks will appear for the user, who will only have to choose the one he/she wants.
If you look closely at the grid, in all cells that have a linked grid, a small square is added to the upper right side of the cell.

In AsTeRICS Grid, we can link boards in two different ways.
1- On the one hand, edit the home grid and go to the cell you want to link to a grid. When you right-click the mouse, the option Set navigation appears.
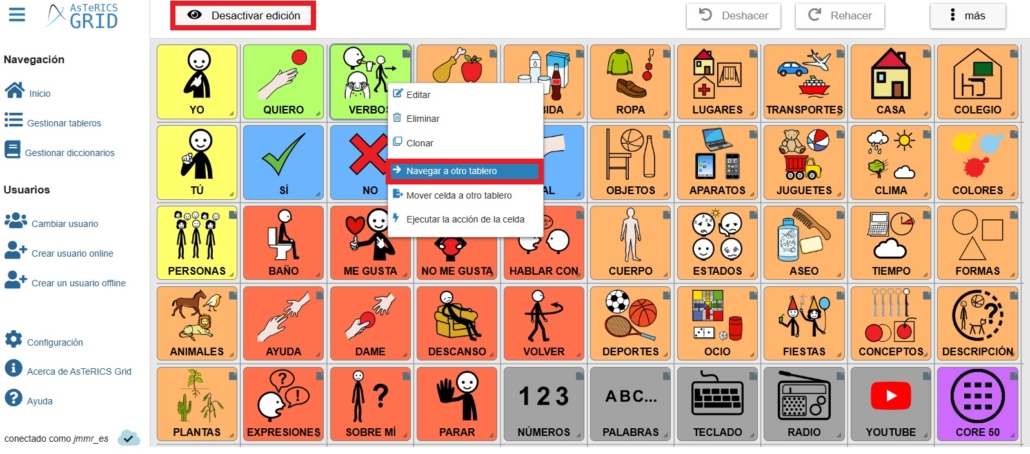
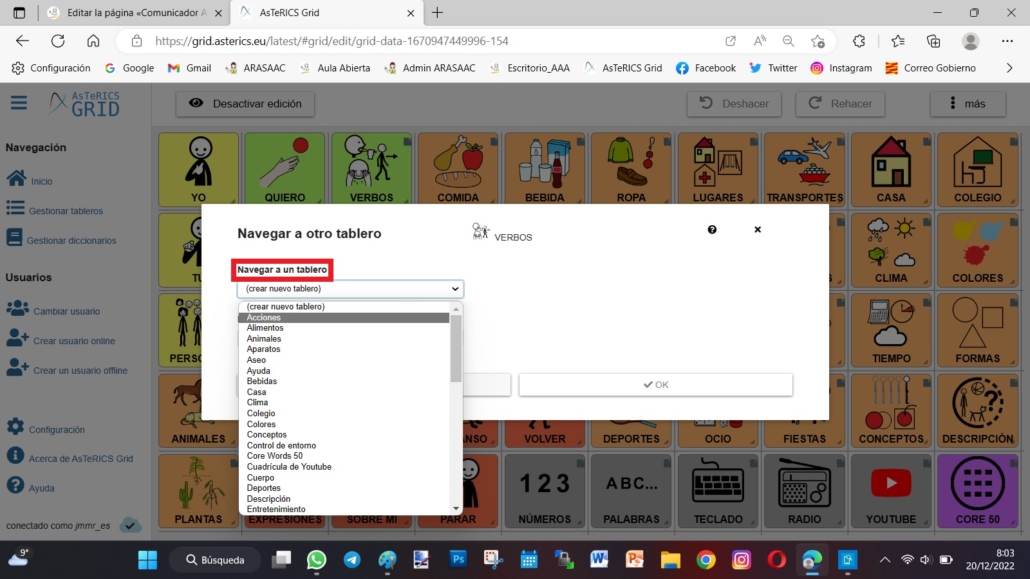
Selecting this option opens a pop-up window in which we can choose between Navigate to grid or Create new grid.
In case we want to navigate to an already created grid, we can select it by clicking directly on the tab. From now on, when we click on this cell, we will be redirected to the linked grid.
The other option we can use from this window is to Create a new grid and link it automatically.
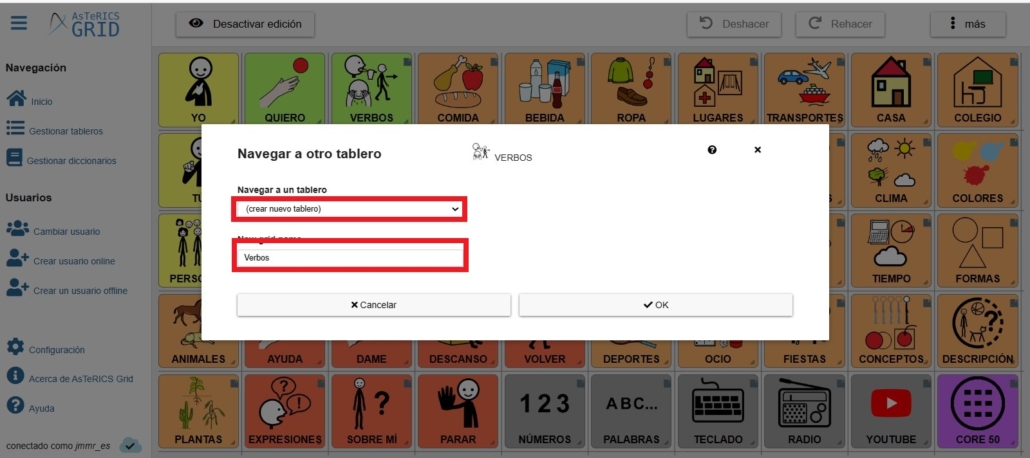
To do so, we select the option Create new grid and in the lower window, we assign the Name of the new grid.
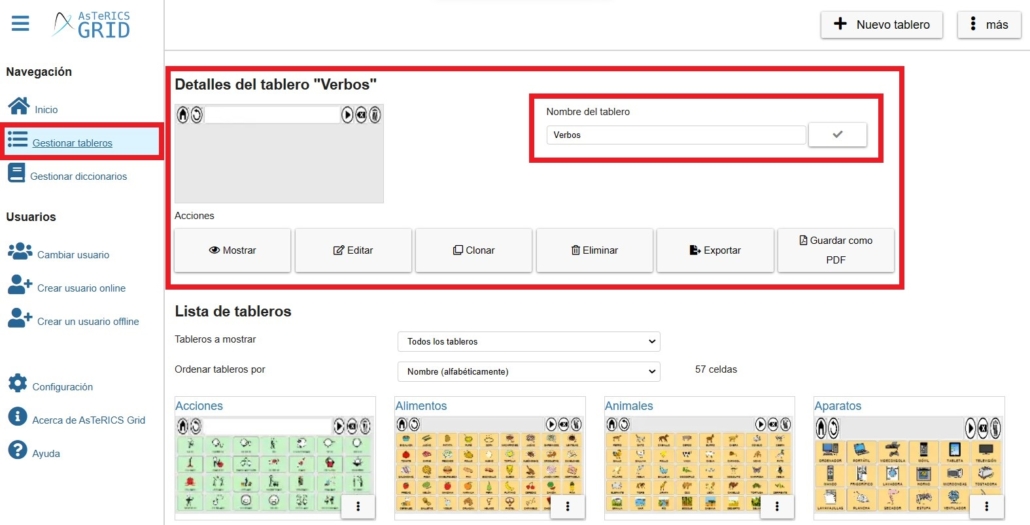
Now we go to the Manage grids section and look for the new grid. We change the name if necessary and we can now edit it to complete it with the pictograms that will make up this linked grid.
2- Another way of linking grids can be found in the pop-up window that appears when you right-click on the cell edition.
If you choose this option, we need to have previously created the grids. To do so, go to the Manage Grids section in the side navigation menu and select the New Grid option.
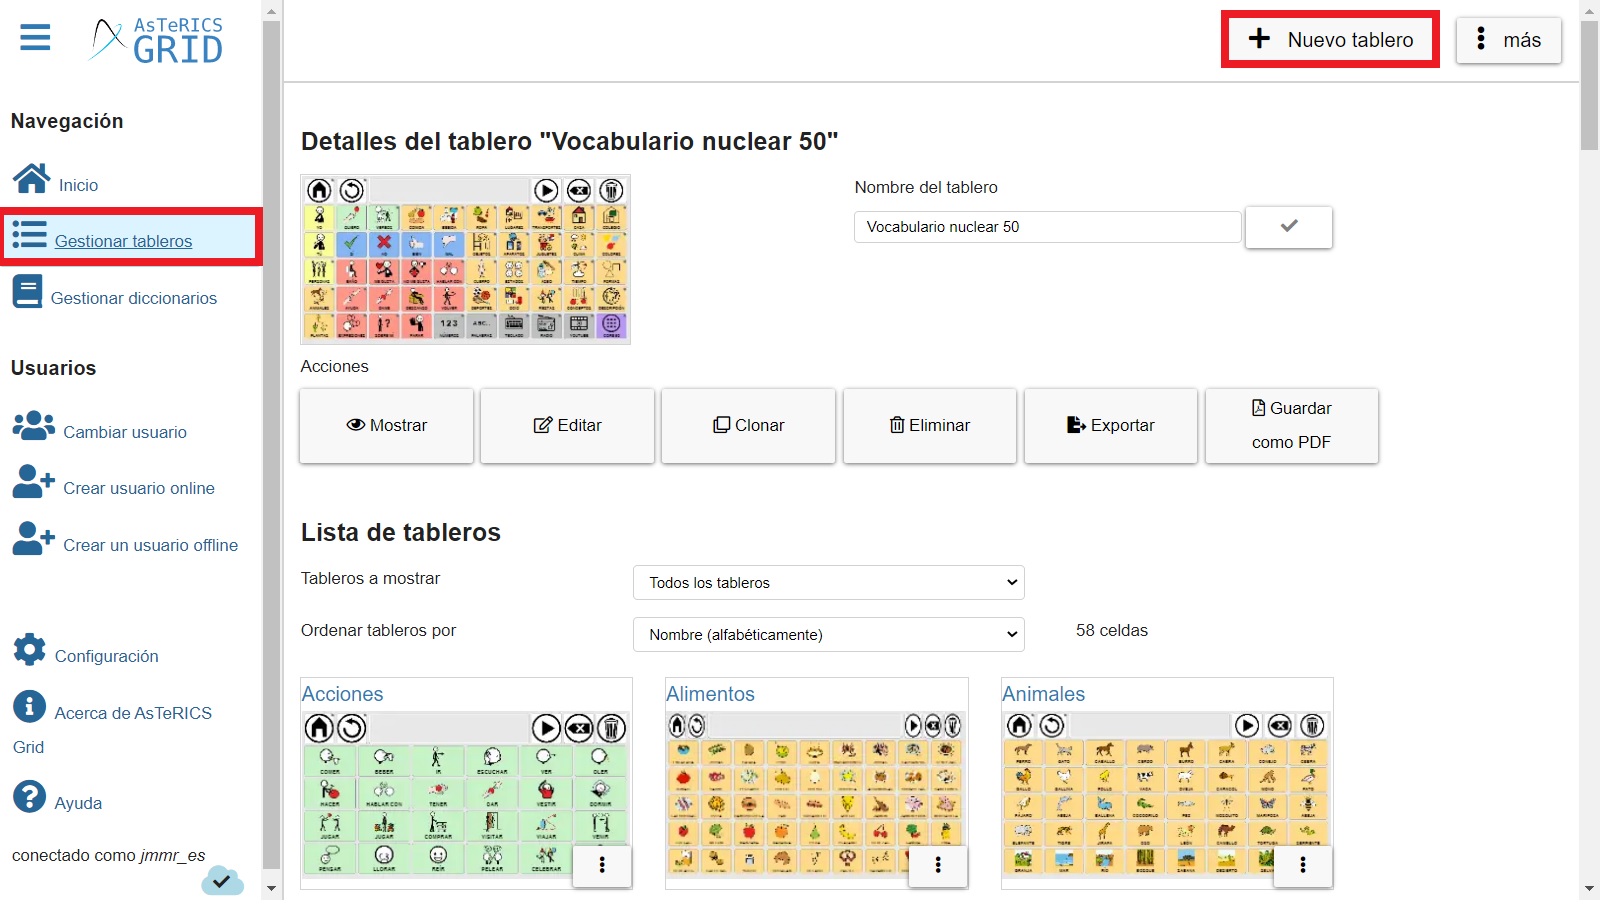
In this section, we can view and manage all the grids we have created. Although we will explain how this section works in a tutorial, we will highlight two important options.
Once we have created the grid to be linked, we edit the cell. 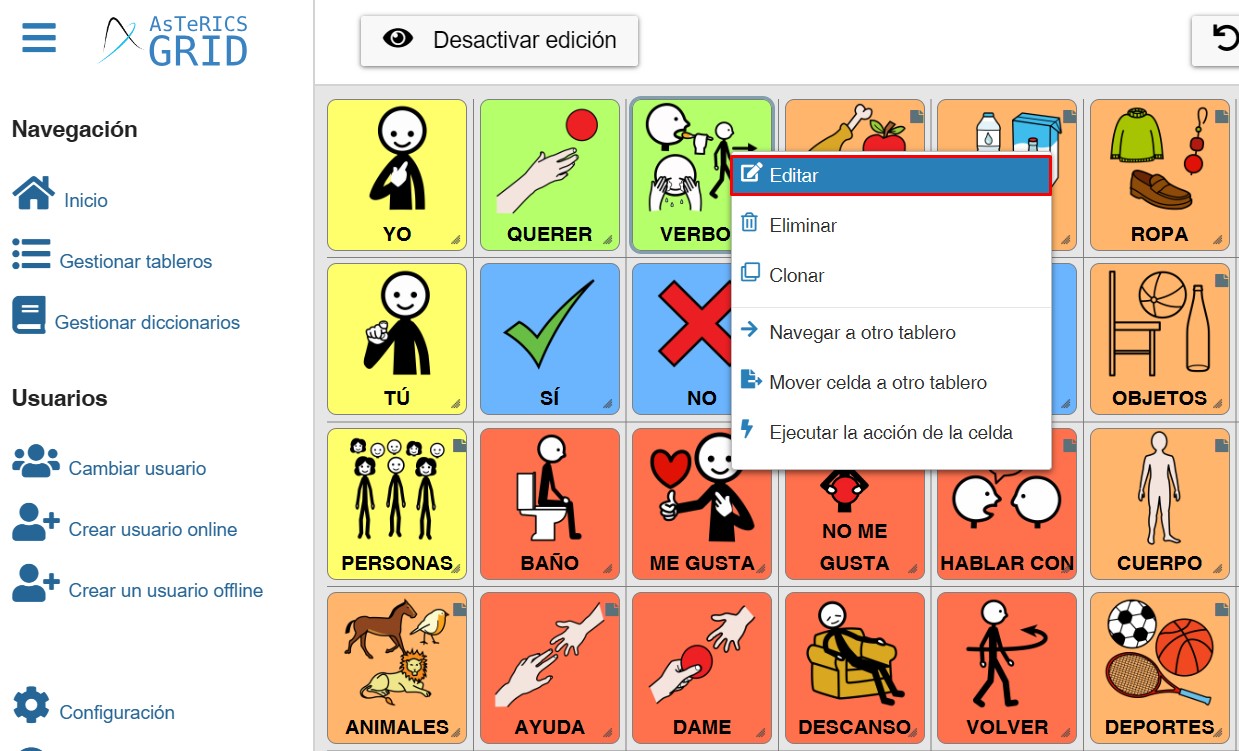
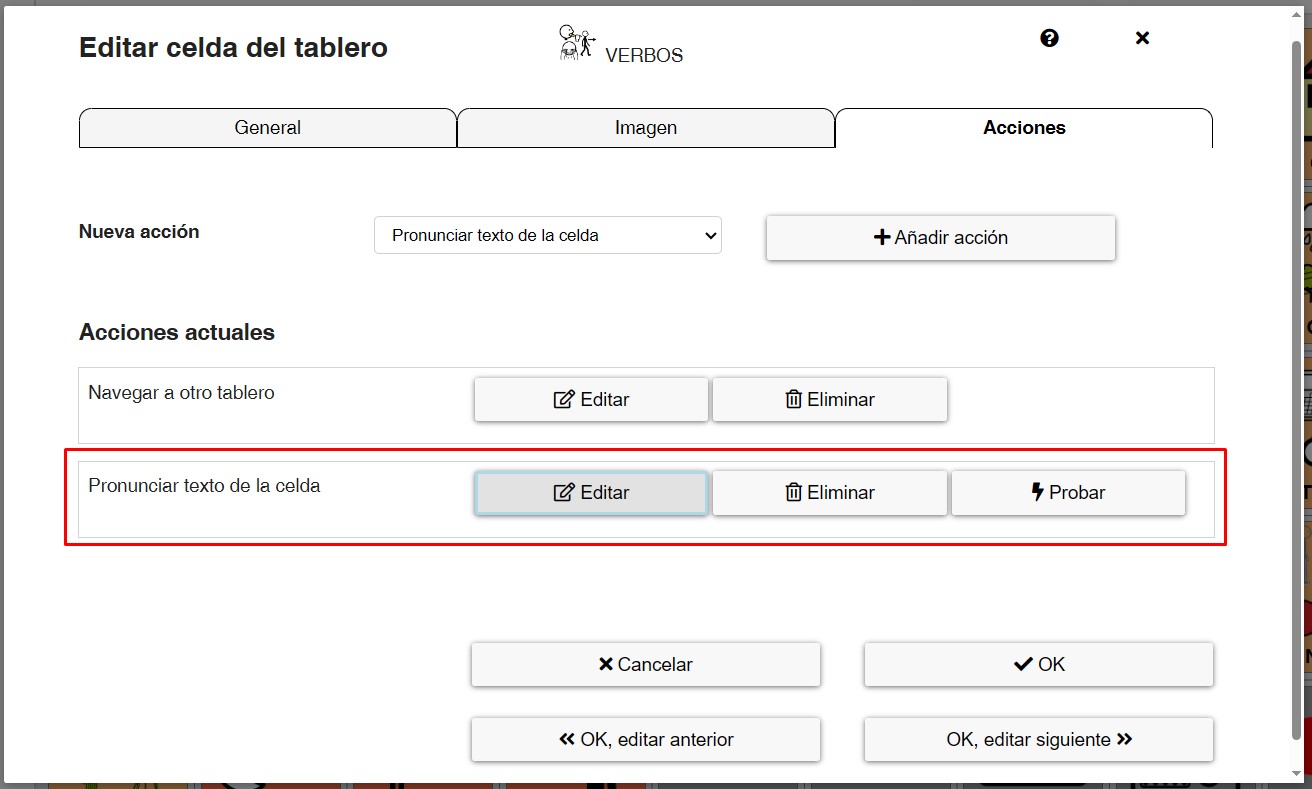
In this pop-up window, we go to the Actions tab, select Navigate to other grid and click on +Add action.
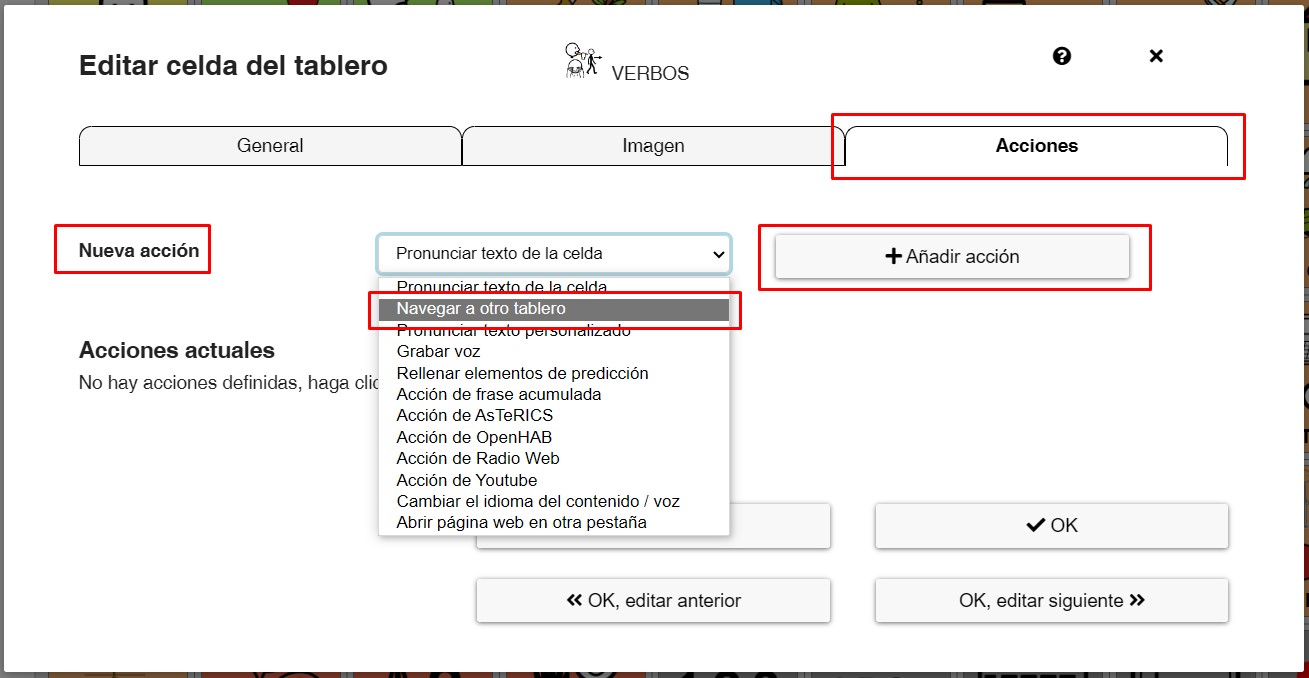
A new menu appears at the bottom of the window.
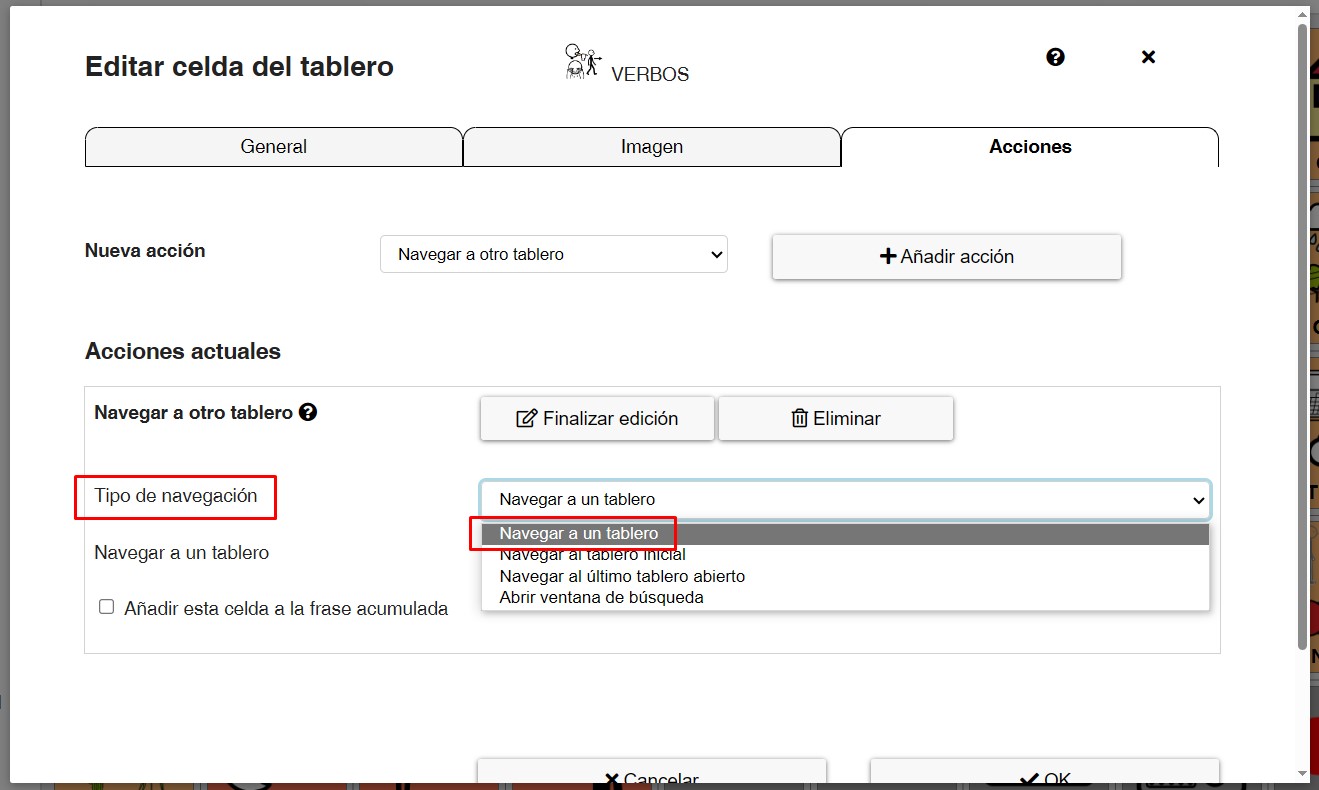
In this window, we find the Navigation Type menu in which 4 options are offered:
- Navigate to grid: this is the option we will use when we want to navigate to a grid already created.
- Navigate to home grid: this option will allow you to navigate to the grid that you have defined in Manage Grids as Home Grid.

- Navigate to last opened grid: this option allows you to go back one step in the navigation of the communicator by returning to the previous grid. This is the default action assigned to it, the back button found on the global grid by default.
- Open search dialog: this option allows us to open a window for search elements in which typing the word, or part of it, will show us all the grids that contain it and will allow us to navigate to them either in a guided way from home grid or in a direct way. This functionality is explained in a specific chapter of the manual.
In our case we will select option 1, Navigate to a grid. Then, in the Navigate to a grid menu, all the grids we have created are displayed. We select the grid we want to link when we click on our cell.
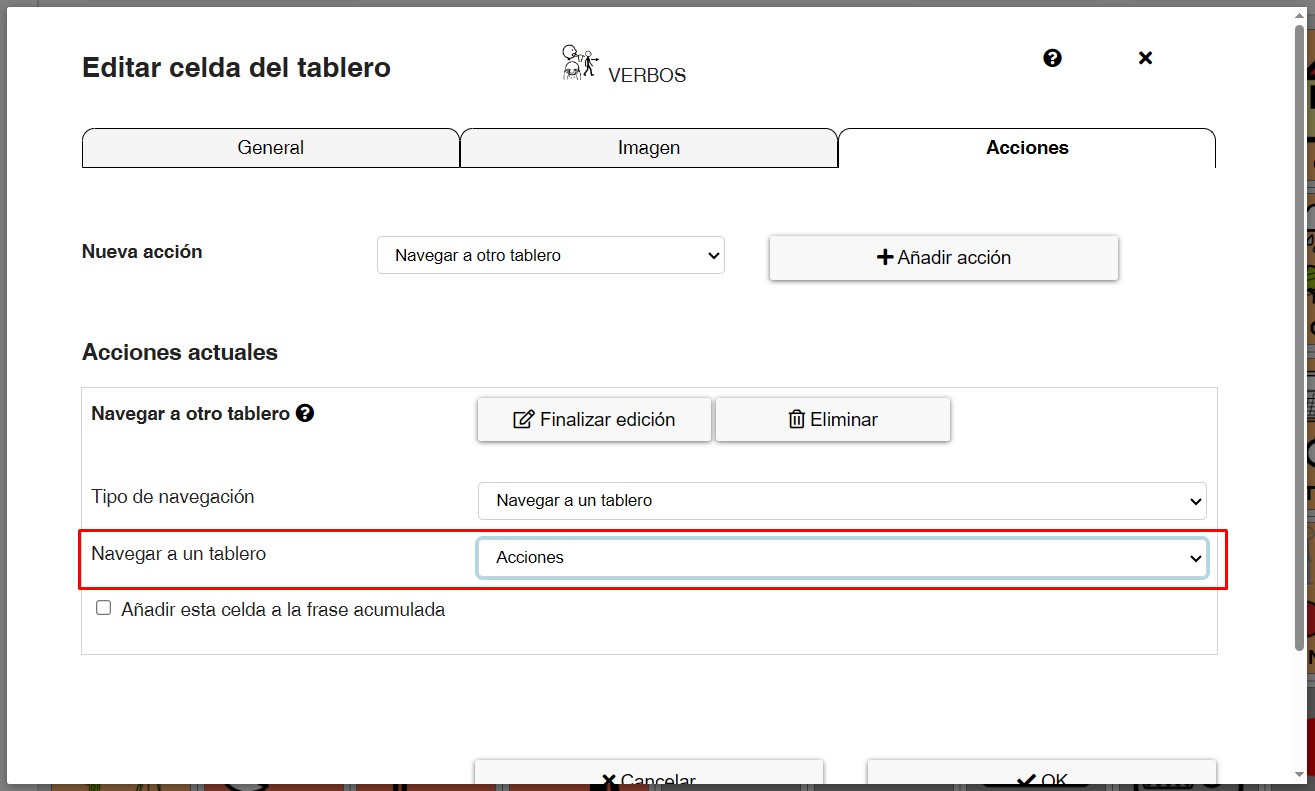
We can also activate the option of Add this element to collection elements in case it is necessary for this cell to appear in the accumulated phrase.
Remember that different actions can be accumulated in the same cell. We can, for example, keep the option to Speak Label. Thus, when we click on this cell in visualization mode, it will speak the cell text and navigate to the linked grid.