


AsTeRICS Grid Dynamic Communicator
19 – Main menu – Settings
In the Main Menu, we find the Communicator Settings section. Activating this section reveals five tabs: General, Language, Appearance, Input Options, and Add-ons.
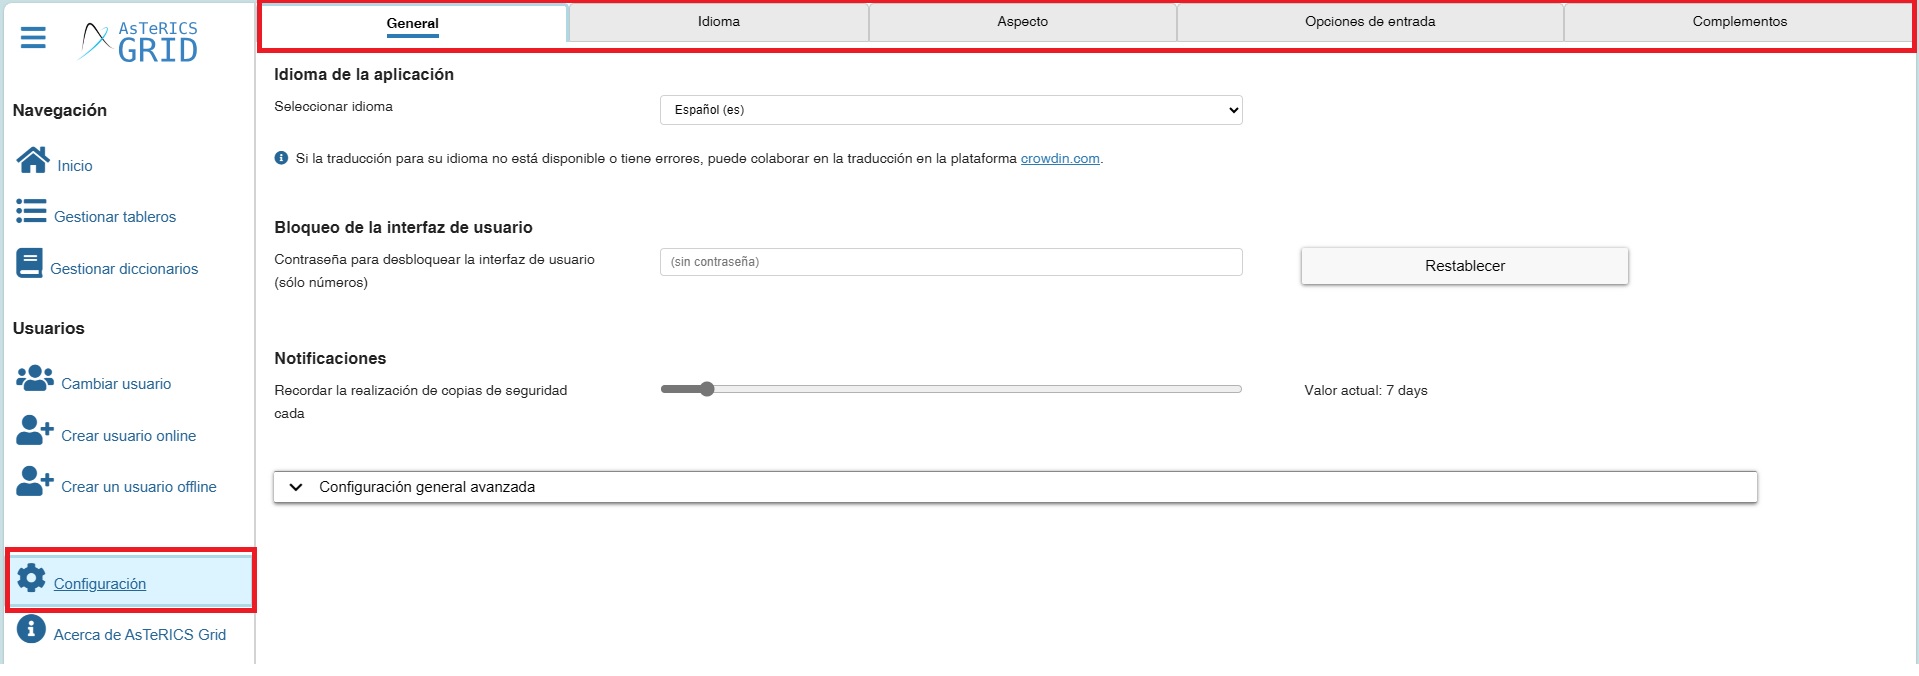
General
The aspects defined here apply to all users of the device, whether offline or online.
On one hand, we find the application language.
The application automatically detects the language of the browser you’re using, so it will display the application menus in your language if a translation exists. This language applies only to the application’s menus and administration options, and is independent of the content/communication interface language, which we’ll discuss later.
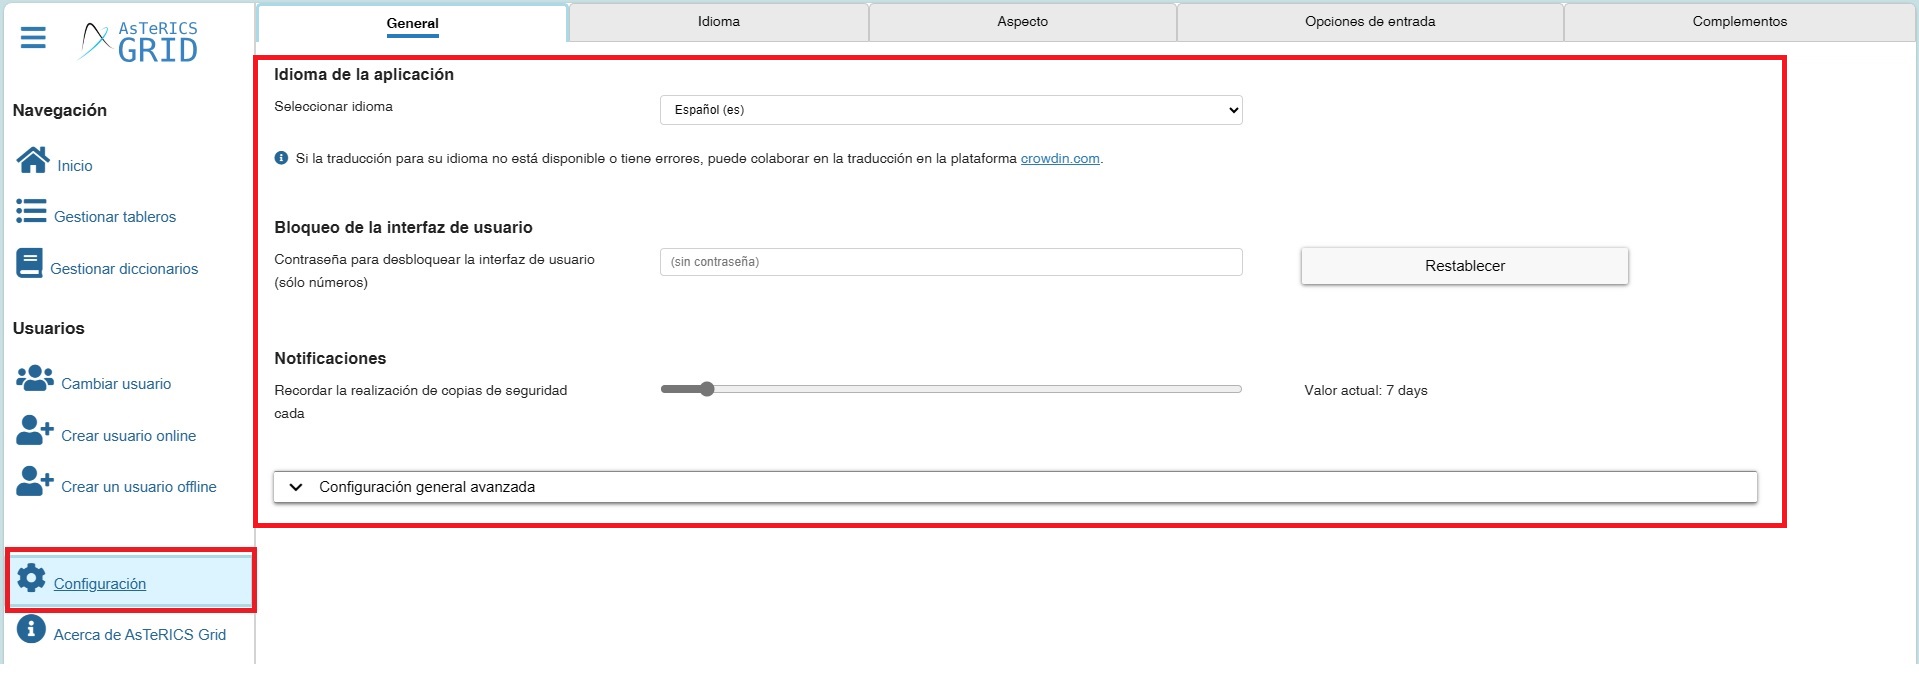
The User Interface Lock option allows you to set a password to unlock the user interface (numbers only). For more detailed information about this feature and to learn about an additional type of native lock (at the operating system level), we recommend you read this other article in the manual.
The Notifications section allows us to activate/deactivate and configure an alert to create backups.
Given the importance of maintaining backups, we can set a reminder at any desired time interval. If we don’t want to receive notifications, we can disable them by setting the value to 0 in the selector bar.

Finally, in Advanced settings options, we can Sync browsing status and lock/full screen for online users. 
If we have State Synchronization enabled on two devices and, on one of them, we put the communicator in full screen running mode, automatically, on the other device where we are connected with the same account, the communicator will go into full screen mode.
The same applies to the screen lock. If in one of the devices, in which we are connected with an account, we put the communicator in visualization mode and lock it, automatically, all the devices connected with that user and that have the Synchronize status option enabled will be locked. Once locked, each device will be individually unlocked using the system we have defined (numeric or by 7 taps if we have not set any numeric code).
(TRICK 1) If we want that the user have the communicator locked and in full screen mode while we work on the configuration of the user’s communicator from another device, we will not check the synchronize status option. In this way, on the user’s device, we will activate the lock and the full screen (in that order) and on our device we will have it unlocked to be able to continue working on its configuration.
(TRICK 2) If we have set a numeric unlock code and we forget it, we can unlock it by pressing any number very quickly (without delay) a few times. In any case, as well as the user name and password we recommend to have them written down (saved).
If we want to define the navigation status (full screen and/or lock) on each device separately, we will disable the synchronize status option.
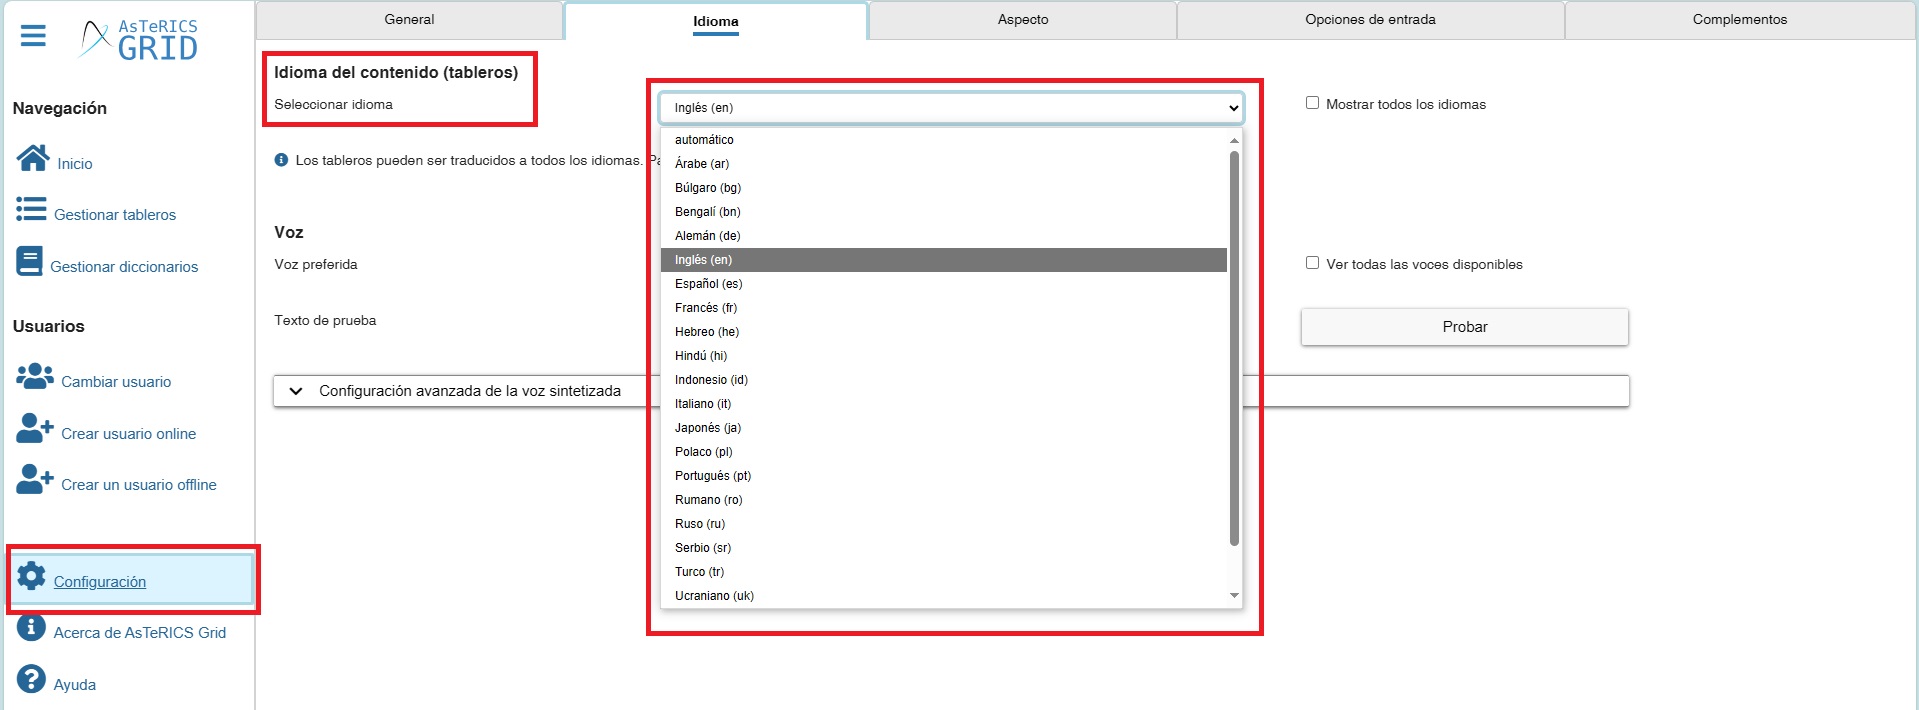
Language
The Language tab allows us to configure the language of the communicator’s content. If one, several, or all of a communicator’s boards are translated into more than one language, as explained in the tutorial AsTeRICS Grid Communicator – 14 – Actions – Change Content Language – ARASAAC Open Classroom in the language menu, a list of languages will appear, and we can manually select one to make it the default language. However, it’s most common to have the default option enabled. Automátic
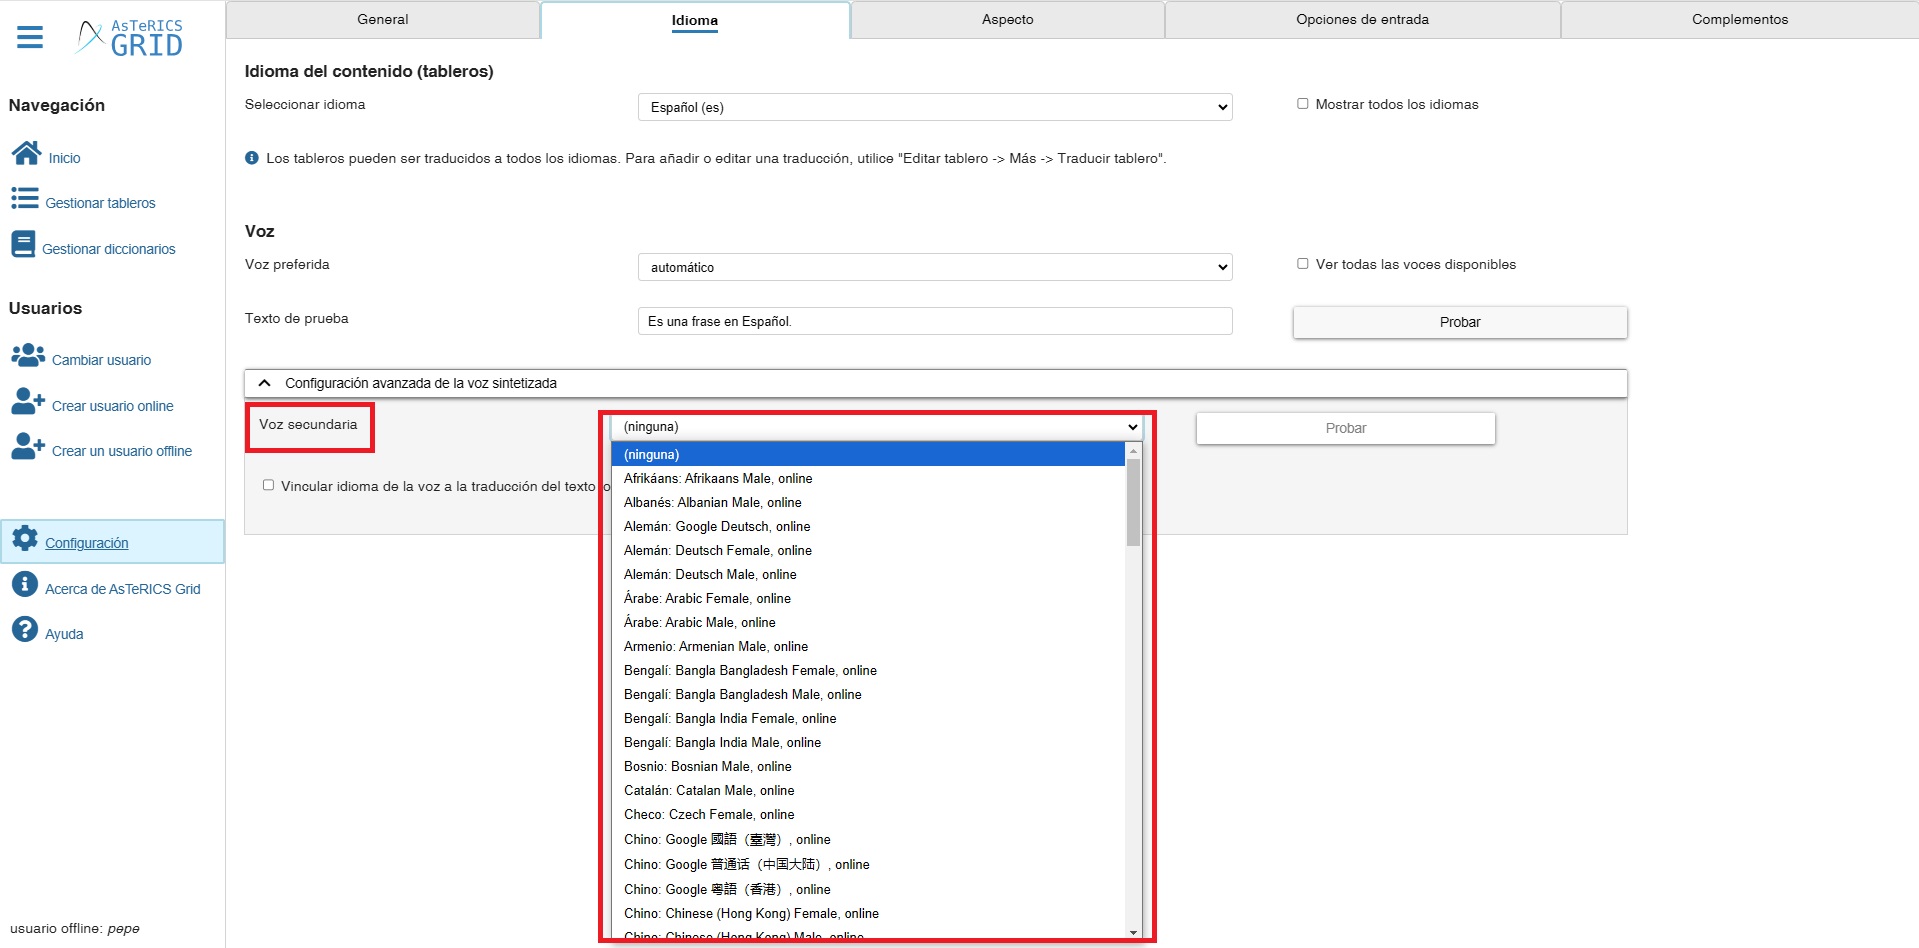
The Voice refers to the synthesized voice which reads the content of the accumulated phrase. By default, all voices corresponding to the language of the selected content are automatically activated, although we can activate the “See all available voices” option,idioma del contenido seleccionado, aunque podemos activar la opción Ver todas las voces disponibles and the voices available in the system and browser will be displayed in all languages. Before selecting the voice, we can test it by having it read a sentence to see if it is suitable for the user who will be using the communication device.Probar a que lea una frase para ver si se adecúa al usuario/a que va a utilizar el comunicador.
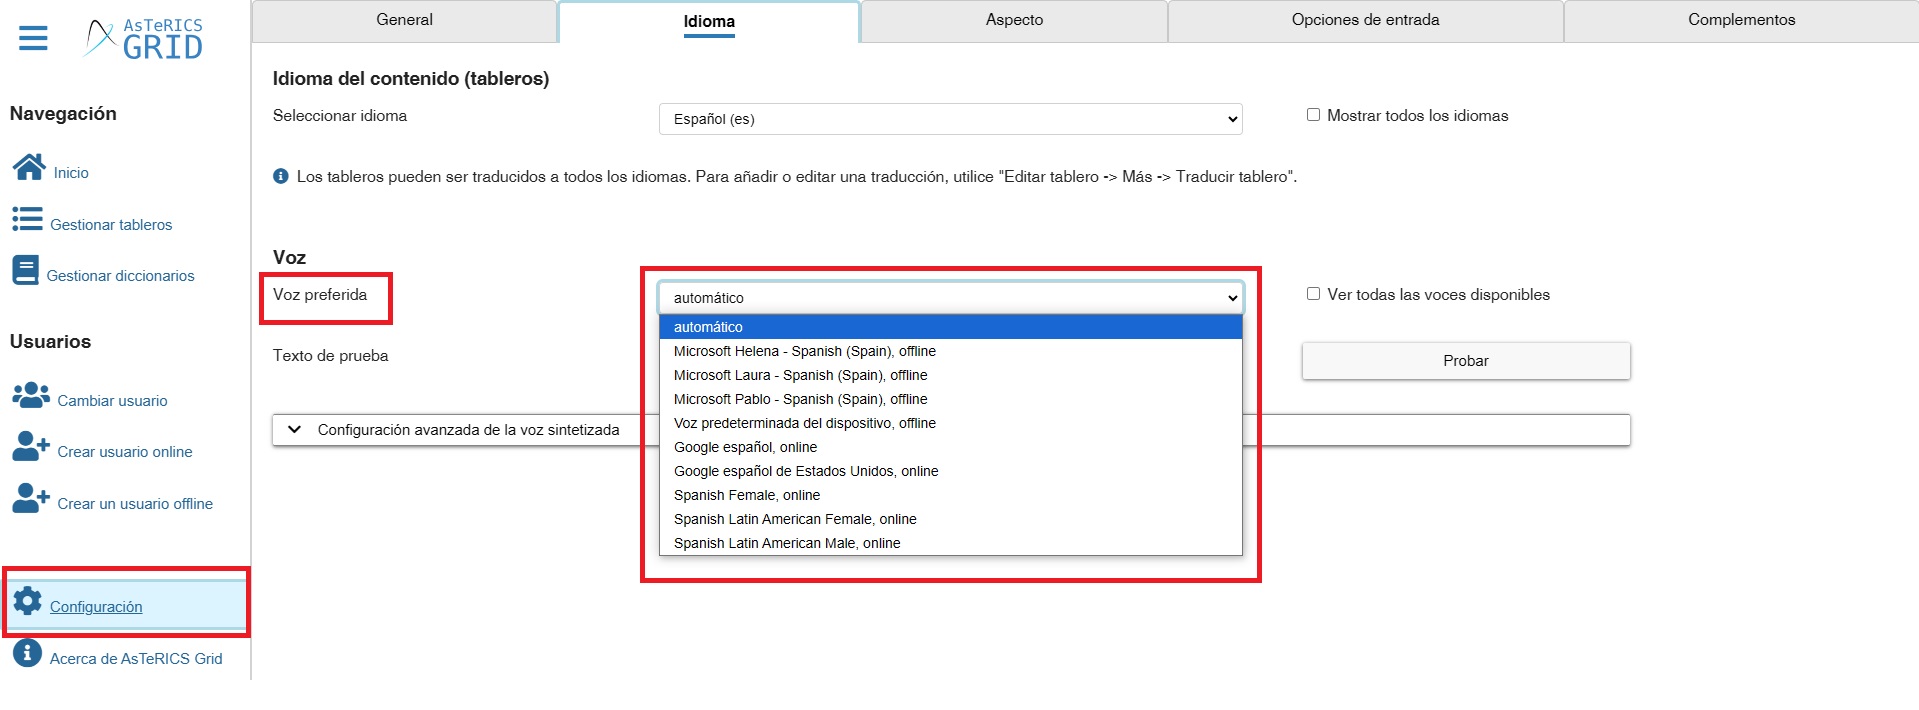
(TIP) It is very important to read the section of the manual that clarifies the issue of synthesized voices and the need to have a text-to-speech engine installed on Android and iOS mobile devices to avoid the problems caused by the use of online voices.
In the Advanced Secondary Voice settings, you can have a second voice (shadow voice) that can be selected in any of the languages into which the boards are translated. This second voice will be emitted a few seconds after the cell is selected, in the chosen language.
Appearance
From the Appearance tab, you can modify many parameters related to the formatting of text, cells and board to fully customize the communicator and adjust it to the user’s skills and characteristics.
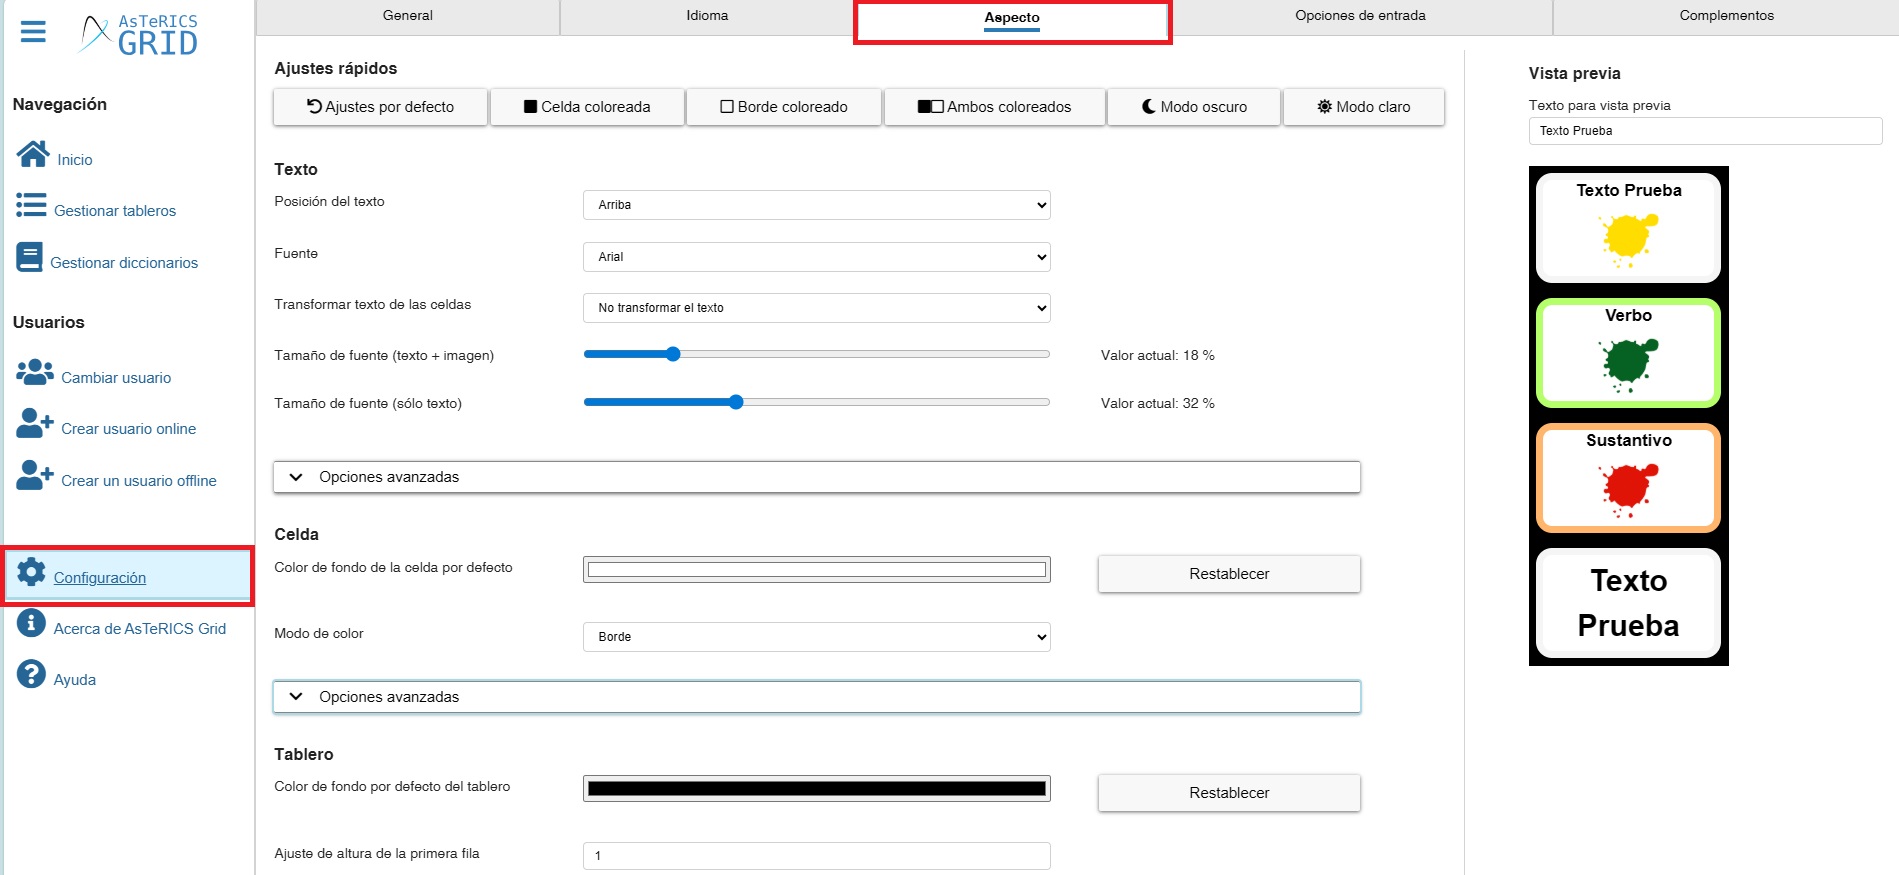
Before detailing the 3 sections into which these appearance adjustments are divided, it is important to highlight how there is a Preview feature where we can see “on the fly” the changes we make to the parameters.
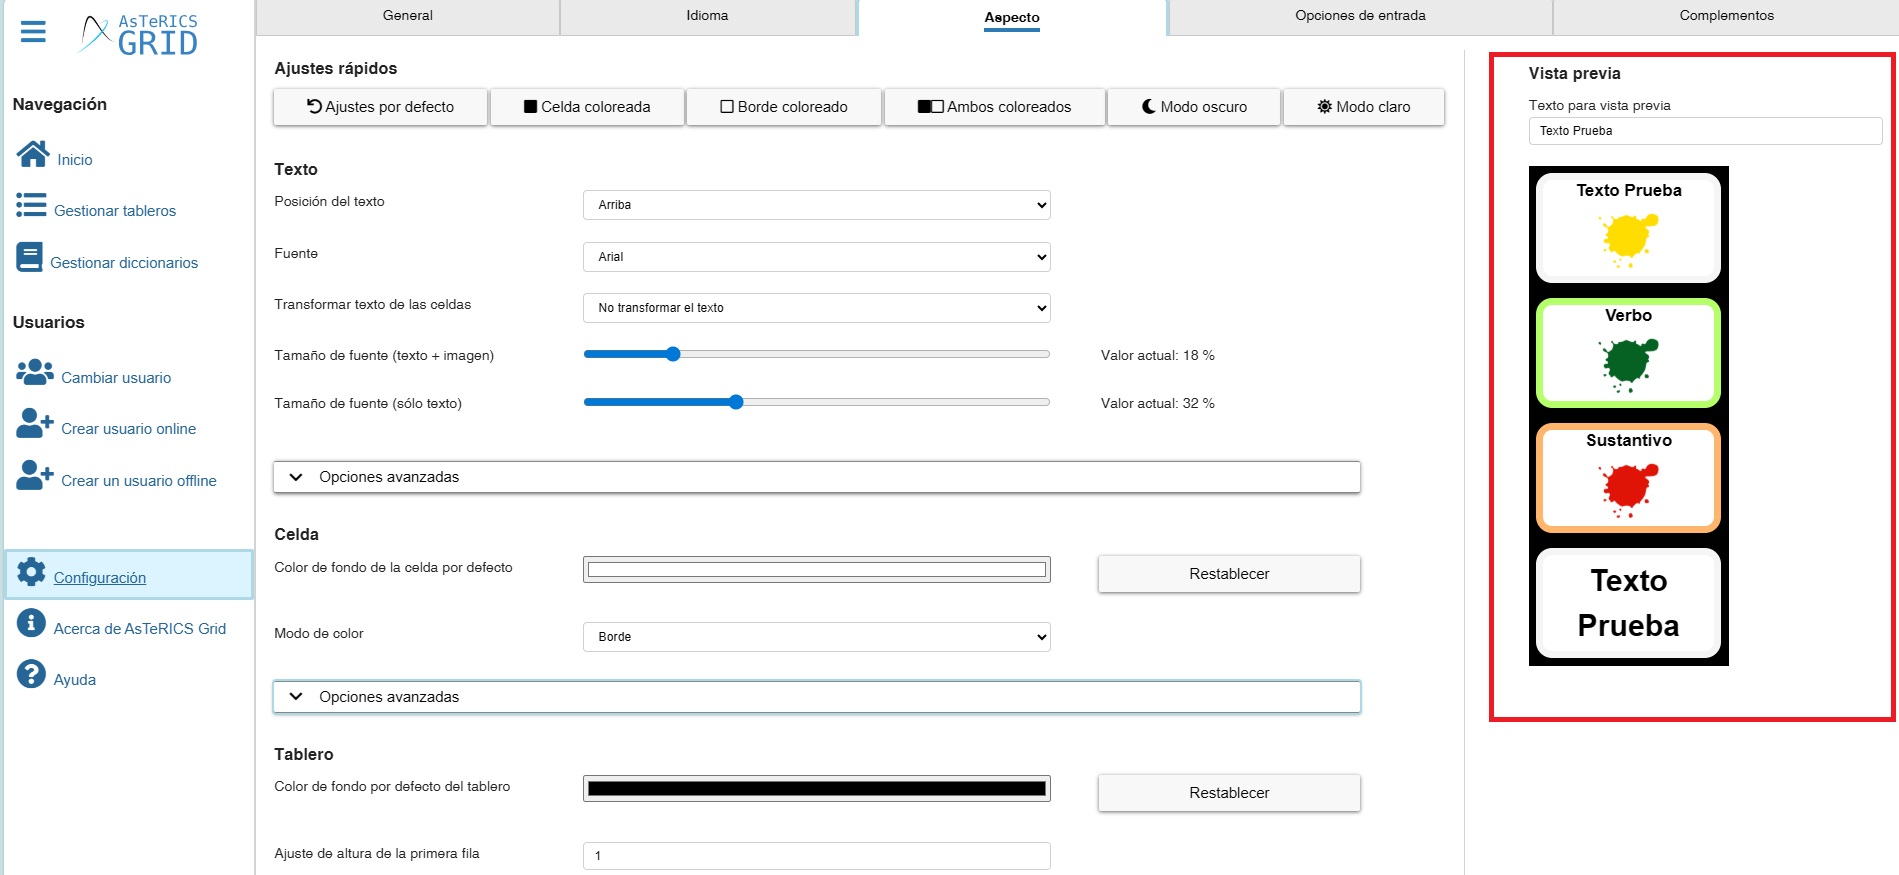
(IMPORTANT) We should always check in the communicator that the defined parameters meet our needs, since some of them can be influenced by variables such as the size of the cells, which in the preview does not always match the size they have in the communicator.
Moving on to describe the three sections of this tab, first we have QUICK SETTINGS which allow you to:

- Reset to default settings.
- Set the color mode for the background, border, or both (background + border) for the cells.
- Adjusting the communicator to light or dark mode is a very useful feature for improving visibility. It’s also worth noting that the Cell option allows you to set any desired background color, as well as any text color.
The second section is the settings related to the TEXT OF THE CELLS.
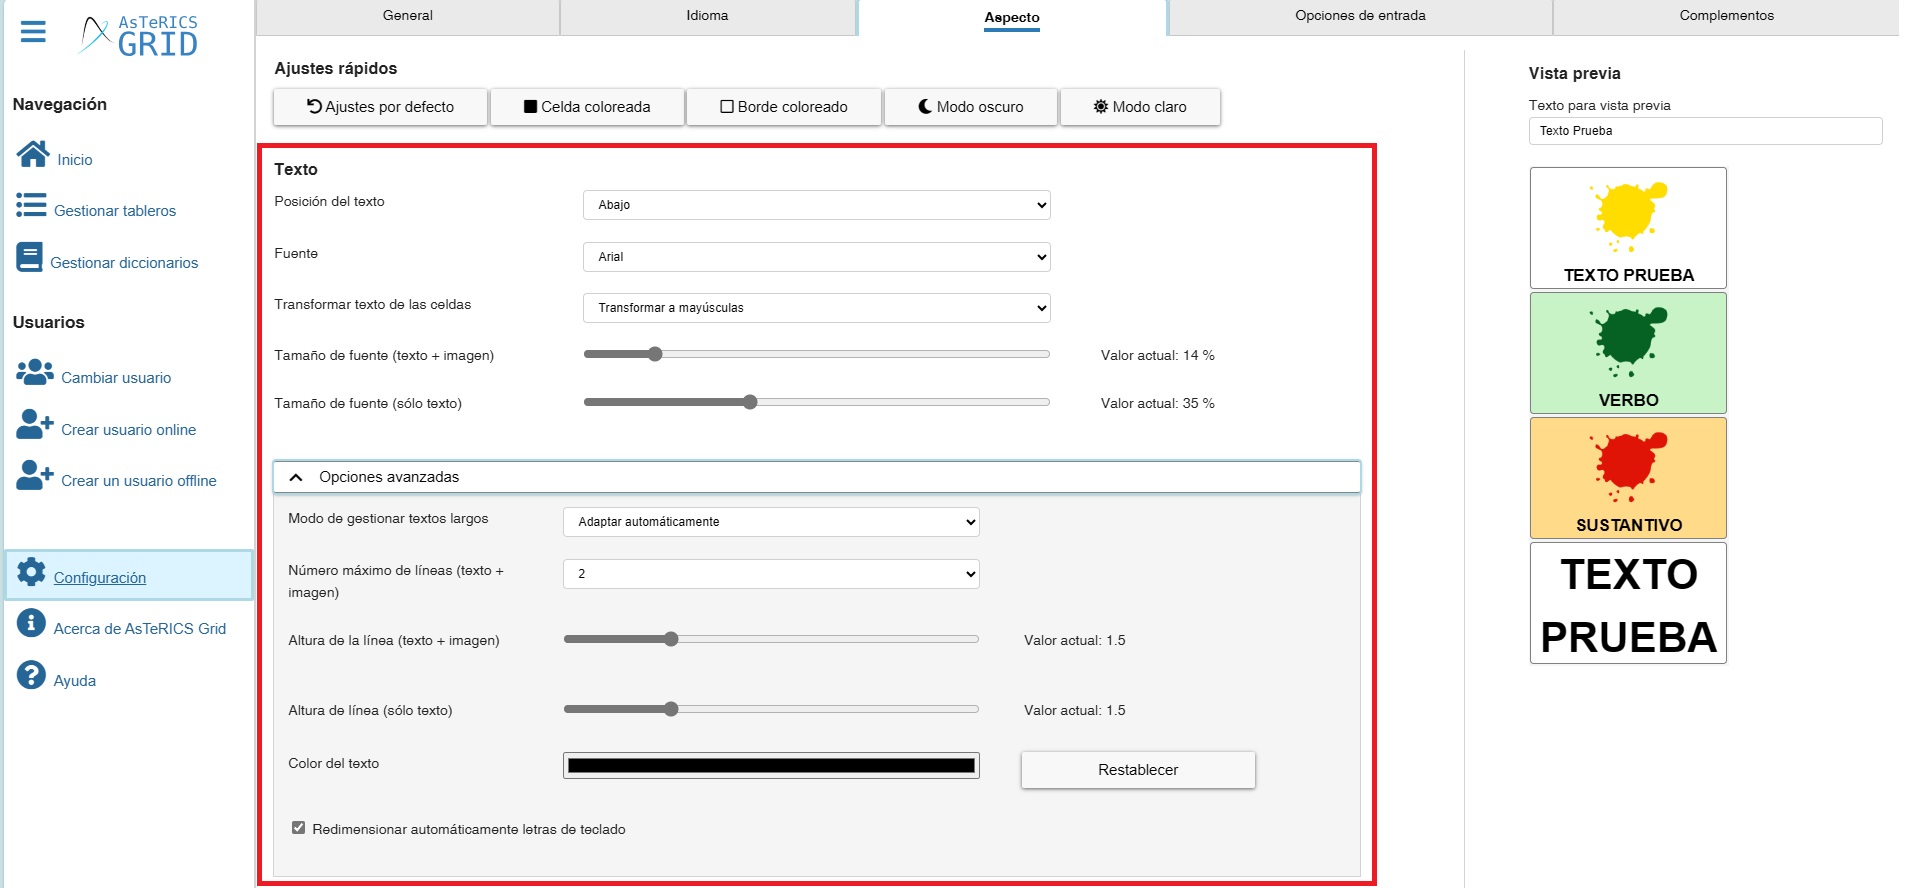
Within this section, we highlight the following parameters:
- Transform cell text: This setting allows you to force the text you’ve entered into a cell to be displayed in uppercase or lowercase, or exactly as you typed it. This setting also applies to special cells, such as those for text prediction (on keyboards), so it can be useful to force uppercase if, for example, you use a keyboard in uppercase and want the keyboard prediction cells to also display the text in uppercase.
- Font size (text + image): This setting applies to all cells containing both image and text. It’s advisable to check the font size in the communicator itself, as well as in the preview, to ensure it meets your needs.
- Font size (text only): This setting applies to cells containing only text. It also applies to special cells, such as those for text prediction. We should also check on-site whether the defined size is suitable for our communication device.
- Long text handling mode: This is an important setting if your communication system uses long texts that exceed the cell’s available space (with or without an image). In such cases, it offers three options: Auto-adapt, truncate, and truncate and add ellipses. The default mode is Auto-adapt. In this mode, if necessary, the text is displayed in a smaller font size to fit the entire cell. In the other two modes, the text is truncated after a certain number of characters. Even though the text is truncated, it is spoken aloud in full.
- Maximum number of lines (text + image): This variable is very useful for managing long texts, as it allows you to configure two lines, thus accommodating longer texts without having to cut them or reduce the font size. In return, the image accompanying the text is reduced in size. Therefore, this option can be used in conjunction with the one explained previously.
- Automatically resize keyboard letters: This option, which is selected by default, resizes the text in cells that contain only one character (no image) to fill the cell space as much as possible. It is primarily designed for keyboards, but it can also be applied to cells outside of a keyboard that contain only one letter (such as “A” or “O”).
The third section of the appearance tab allows us to configure the appearance of the CELLS.
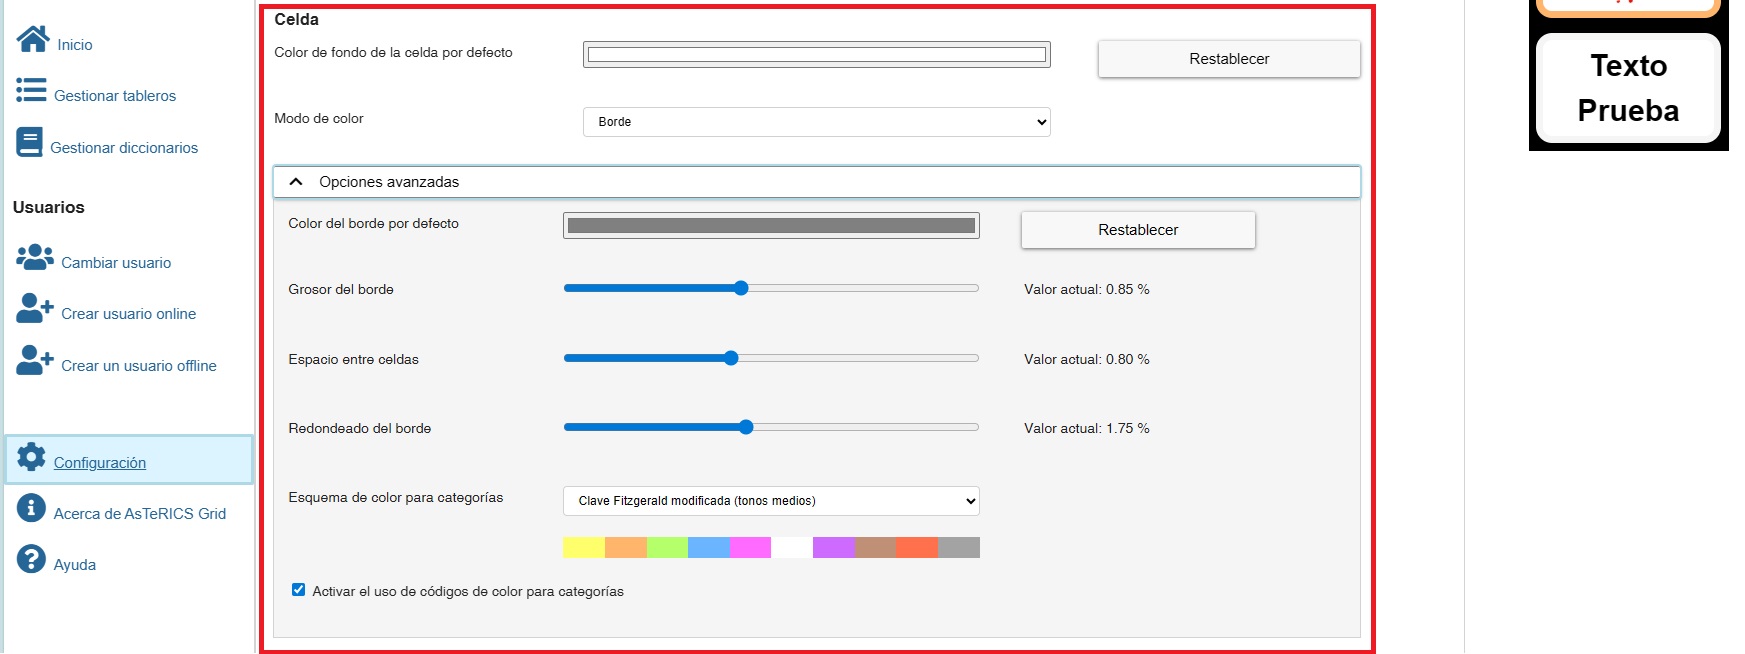
Within this section, we highlight the following parameters:
- Default cell background color: When in advanced options we have disabled the “Enable use of color codes for categories” option or we do not define categories in the cells, the cell background color will be the one we have defined in this color picker.
- Color mode: This option allows us to switch between three modes: background, border, or background+border. The background mode will display either the default background color set in Default cell background color or the colors of the corresponding category if selected in advanced options. Enable the use of color codes for categories. Border mode, on the other hand, will display either the color we have set in the Default Border Color option or the color of the corresponding category if we have that option active. Enable the use of color codes for categories. Finally, the background+border mode will display either the default background color set in Default cell background color and the border color set in the Default border color option if the use of color codes for categories is disabled, or the colors of the corresponding category if we have selected it in advanced options. Enable the use of color codes for categories. In this case, the border will be shown in a darker tone than the background so that it stands out.
- Color scheme for categories: This menu allows you to select between two color schemes for the cells where you define categories: Fitzgerald or Goosens, and three color tones for each. The Fitzgerald Extended key uses 10 categories, and Goosens uses 5.
- Activate the use of color codes for categories: as we have mentioned before, by activating this option, all cells that have a defined category (whether from the 10 of the Fitzgerald key or from the 5 of Goosens) will show the corresponding color either as the cell background color or as the border color (depending on the color mode you have set).
Finally, we have 3 parameters that allow us to configure the appearance of the cells in terms of border thickness, corner rounding, and cell spacing.
The fourth and final section we have is BOARD.

Within this section we have two configurations:
- Default background color for the board: Here we will define the default background color for the boards that make up the communication system. Later, in the settings for each board, you can customize it for each one if desired.
- First row height factor: This setting allows you to configure the height of the first row (increase or decrease it). The setting starts at 1, which means the first row will have the same height as the other rows on the board. For example, setting it to 1.5 increases the height of the first row by 50% compared to the other rows. Conversely, setting it to 0.70 makes the first row 30% shorter than the other rows. This setting applies to the global board (where the first row typically contains the accumulated phrase) and to boards where the global board is disabled.
(TRICK) One of the uses of the first row height adjustment is to be able to adjust the communicator to certain screen covers that are sold or 3D printed for tablet screens.
Input options
Within the input options we find two sections: General Options and Auditory Feedback Options.
Within General Options, we currently only have one option: “Minimum pause to accumulate and speak the same cell multiple times.” This option allows you to set a delay in seconds during which the cell is deactivated, and even if pressed, it will not be heard or added to the accumulated phrase. If we leave it at zero, the delay does not apply.
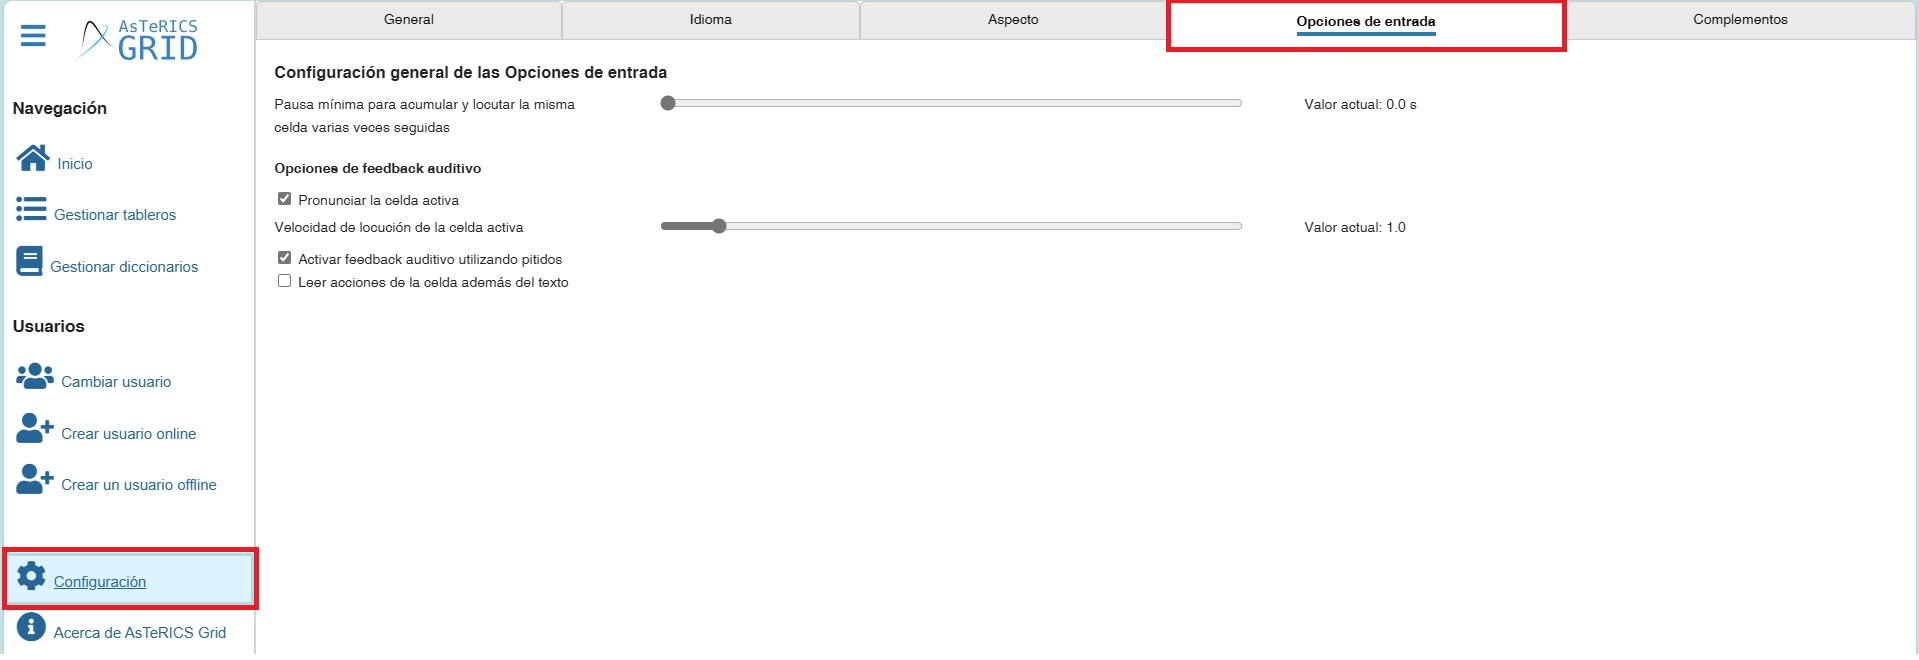
The auditory feedback options work in conjunction with the input options explained in this manual article, which we recommend you consult. Therefore, regardless of the options you can activate in this section, you must configure and activate one of the input options offered by the program.
- Speak the active cell: If you enable this option along with sequential scanning or input, the text in a cell will be automatically spoken aloud when the scan is positioned over it. Additionally, if the synthesized voice selected in the Language section allows it, you can define the reading speed.
- Activate auditory feedback using beeps: if we activate this option, a beep will be heard when the sweep changes to a new cell or a new sweep group.
- Read cell actions in addition to text: If we activate this option (along with sequential scanning or input), when the scanning is placed on a cell, it will first pronounce the text of the cell and then say the action that is associated with that cell (for example, navigation).
Integrations
Within this tab we have two sections: ARASAAC and External Voice Service.
Within the ARASAAC section, we can activate automatic grammar correction for Spanish. Its operation is explained in this chapter.
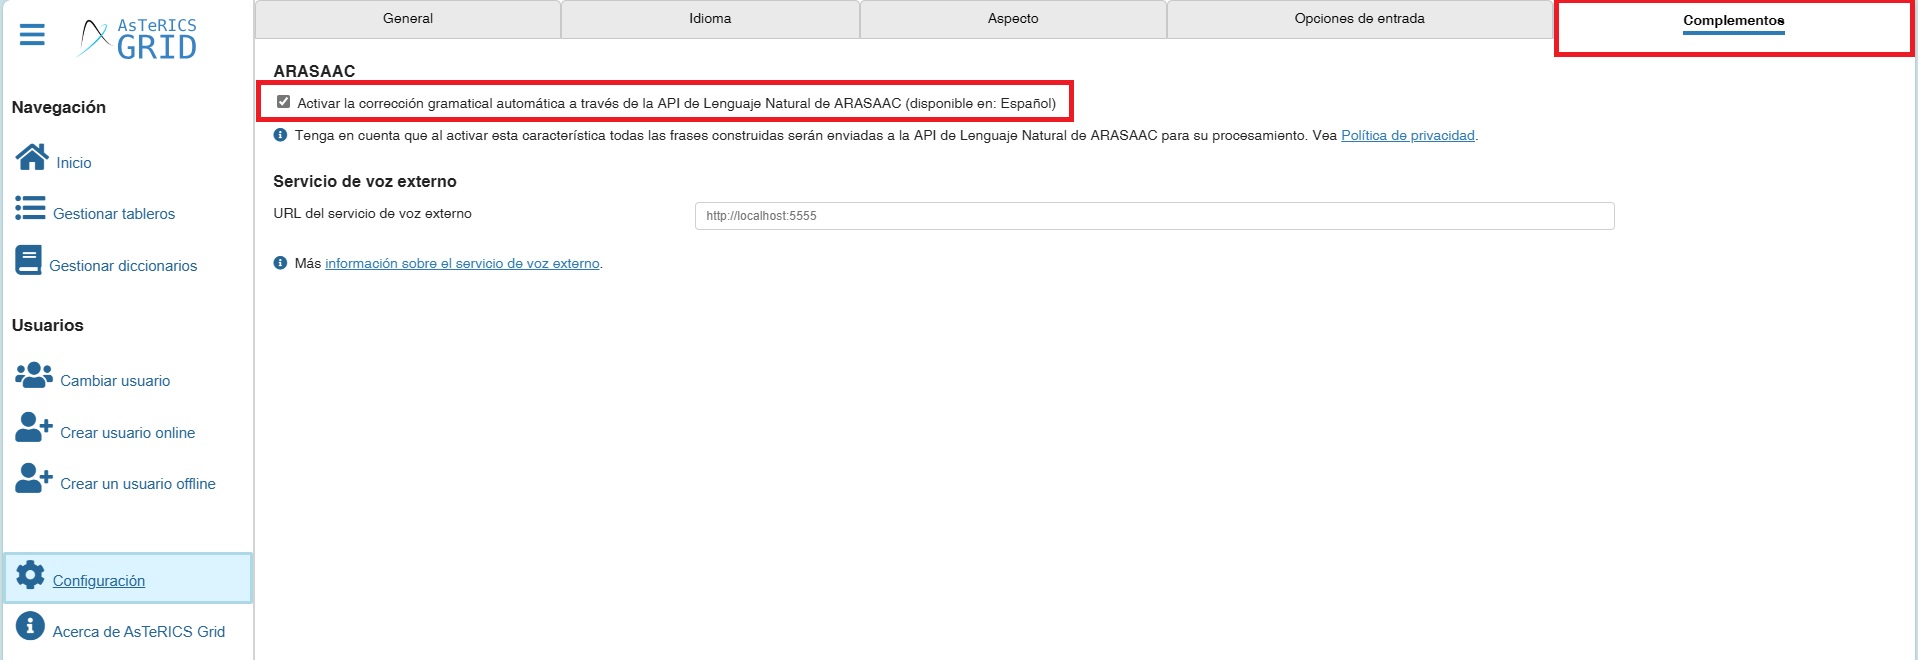
The External Voice Service section allows you to configure the URL to access an external server that hosts an online text-to-speech engine.


