


AsTeRICS Grid Dynamic Communicator
17 – Main menu – Manage grids and backups
Grid details
The Manage Grids section in the Main Menu allows you to manage all the grids in your communicator: display all the grids, create new grids, delete grids, create backups, activate the global grid, etc., among other functions.
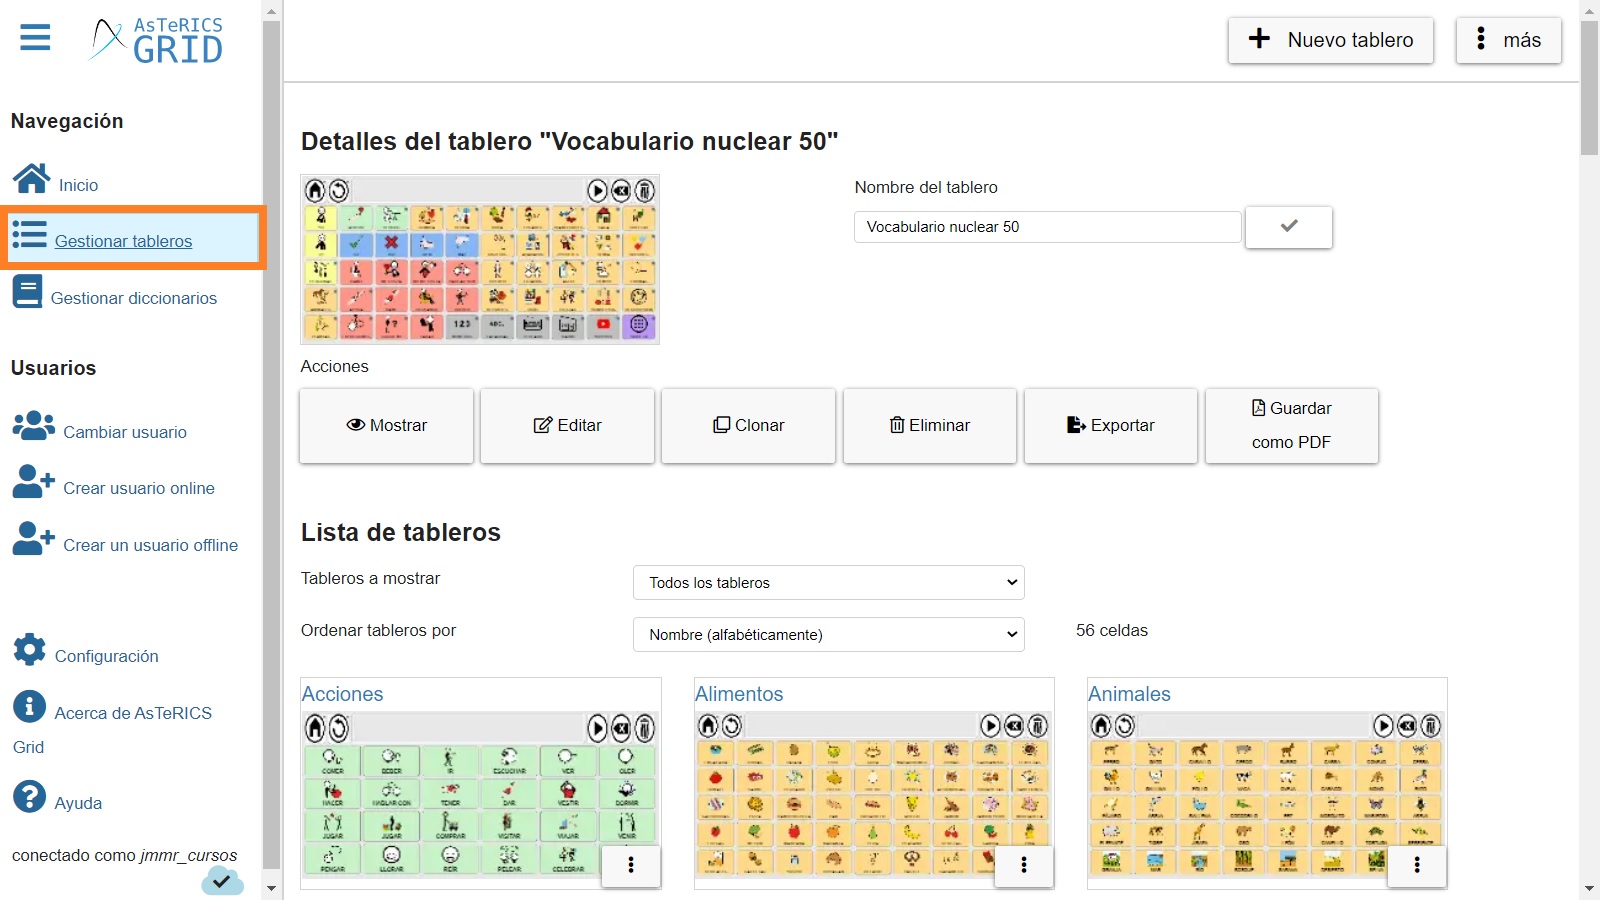
At the top right, we have the button to create a new grid and the More button, whose options are explained at the end of this tutorial.
At the bottom of the active grid, we find different options: Show, Edit, Clone, Delete, Export and Save as PDF of the current grid.
All of them are common options, although we can highlight the option to Export the current grid. This option also appears when you click the More button, so we will explain it at the end of the tutorial.
The Save as PDF option allows you to save the grid(s) in this format. In this way, we can have a printed version of our grid(s) with the same options with which it is configured.
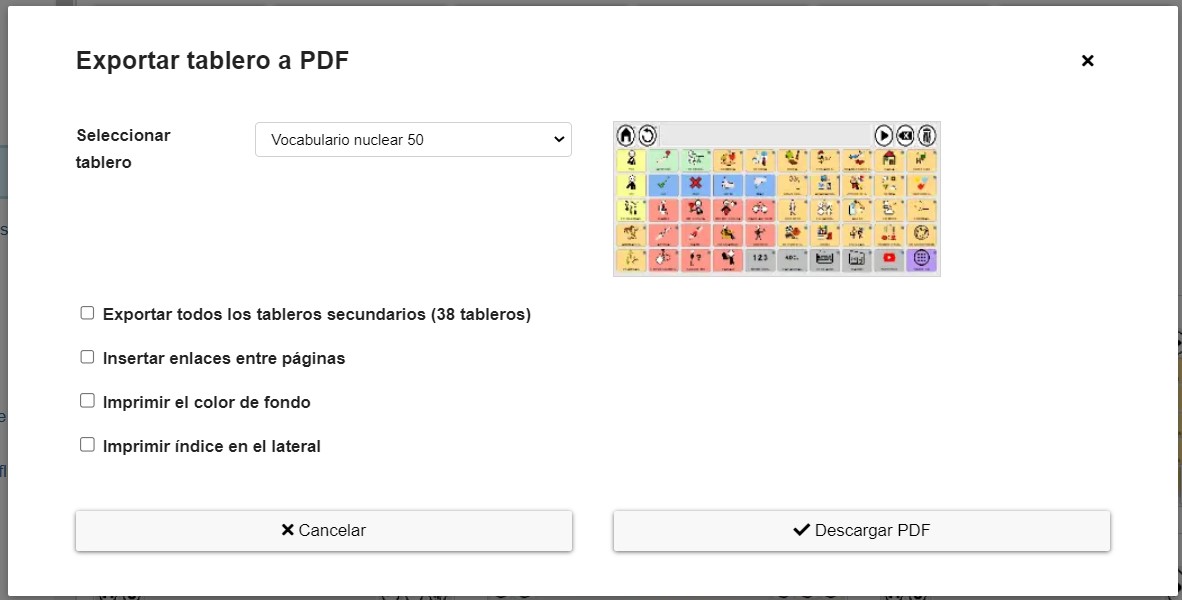
As we can see in the screenshot, we can download only the current grid or we can that are linked to this grid, even Insert the link between pages of all the linked grids. We can also print the background color (of the cells) and print the index on the side.
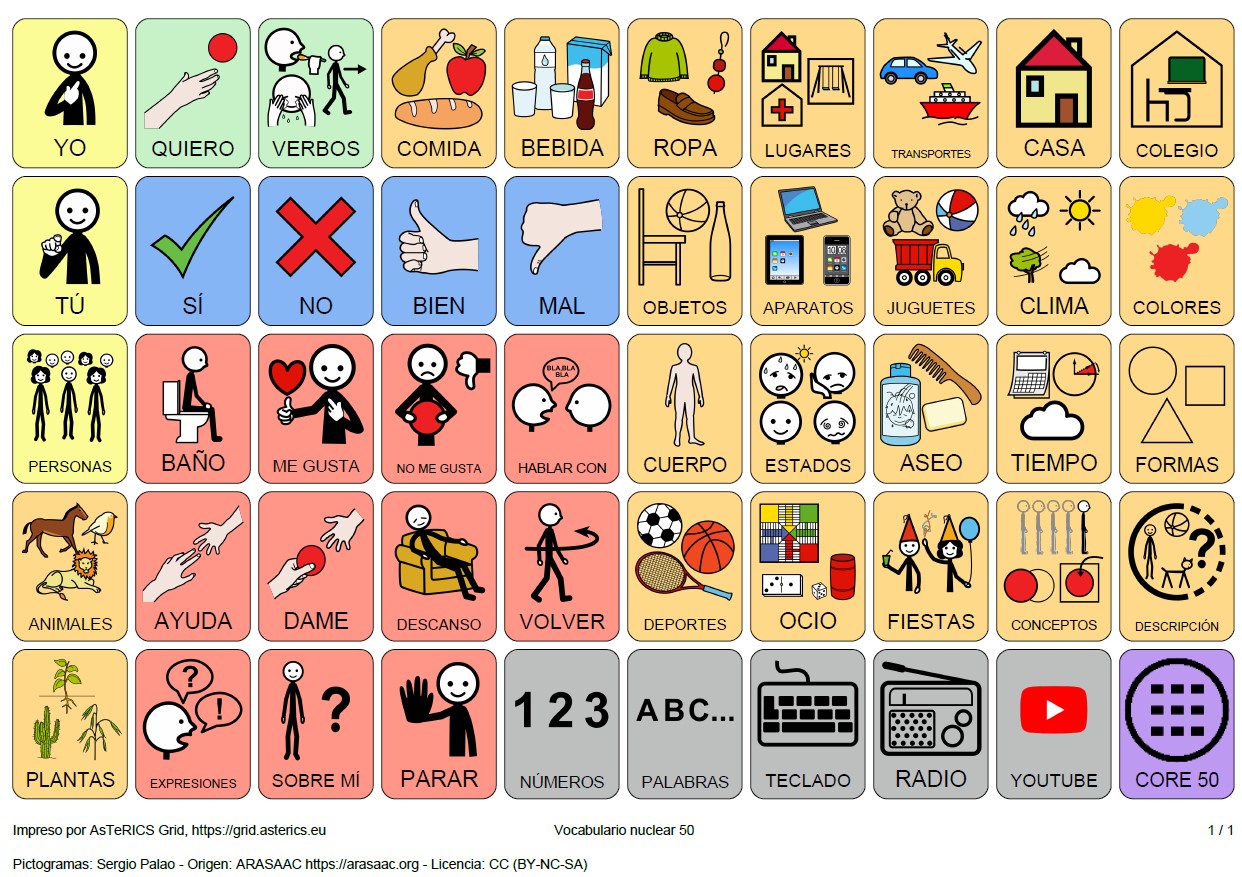
Our initial recommendation is that you perform different tests by saving in PDF format to check what happens using the different options. The most common of these will be to Print the background color, as in the following screenshot.
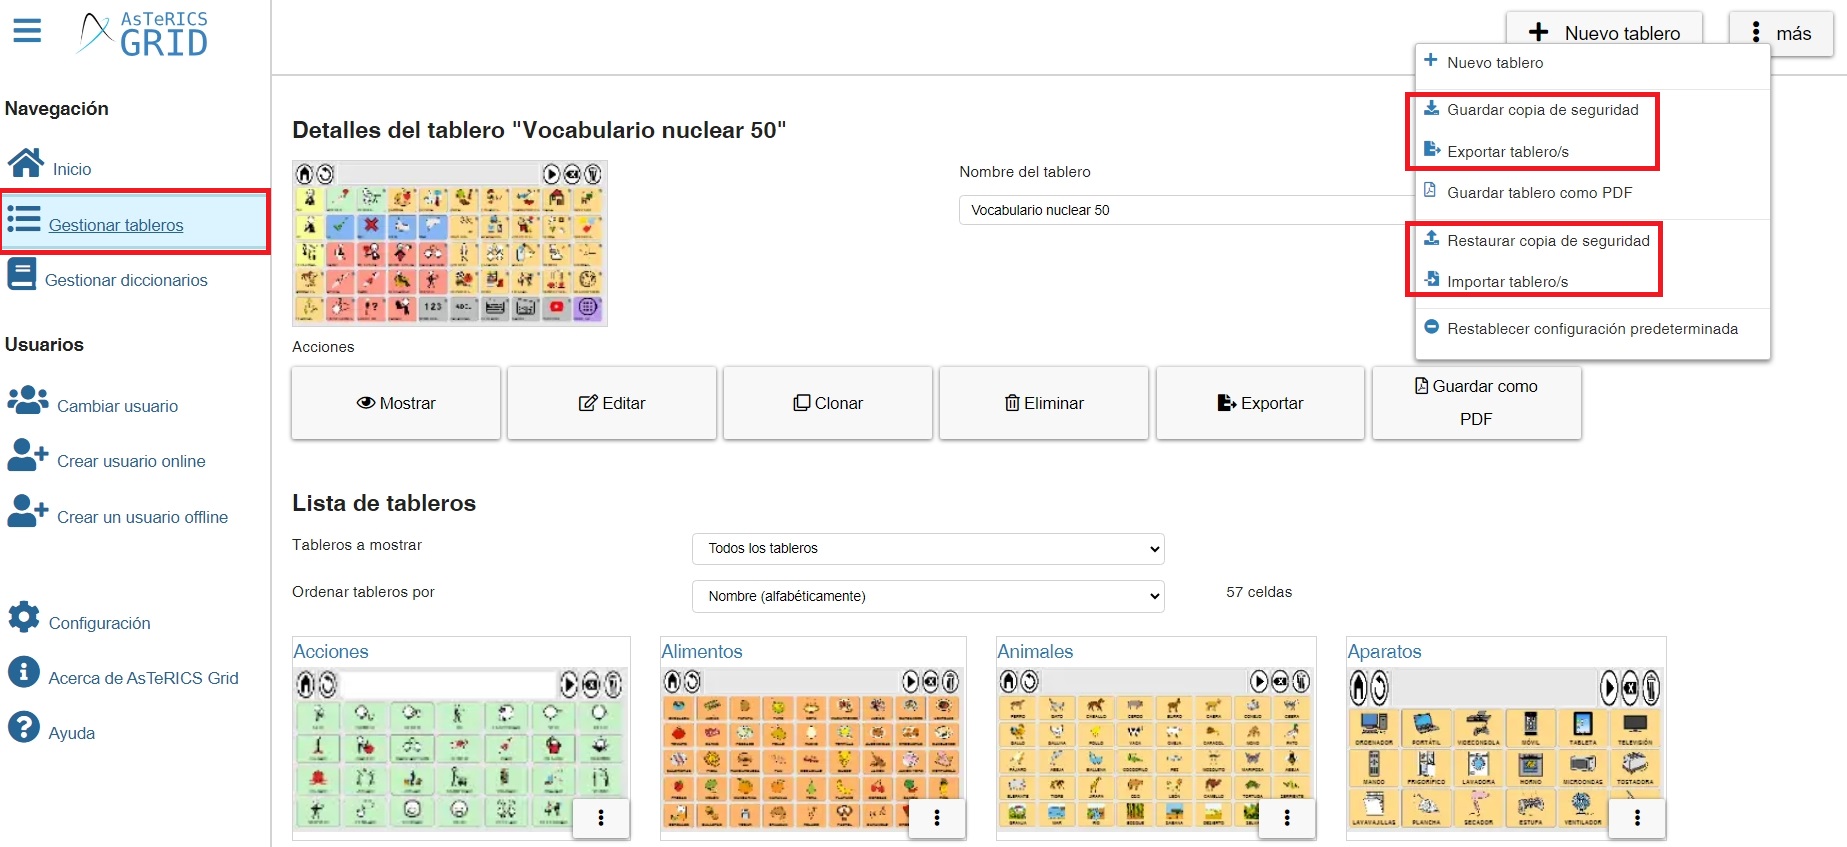
Grid list
At the bottom of the current grid, we find the Grid list of our communicator. In this list, we can visualize all the user’s grids and we can use three options:
- show All grids,
- show the Grids connected with “Home-board” or
- show the Not reachable grids.
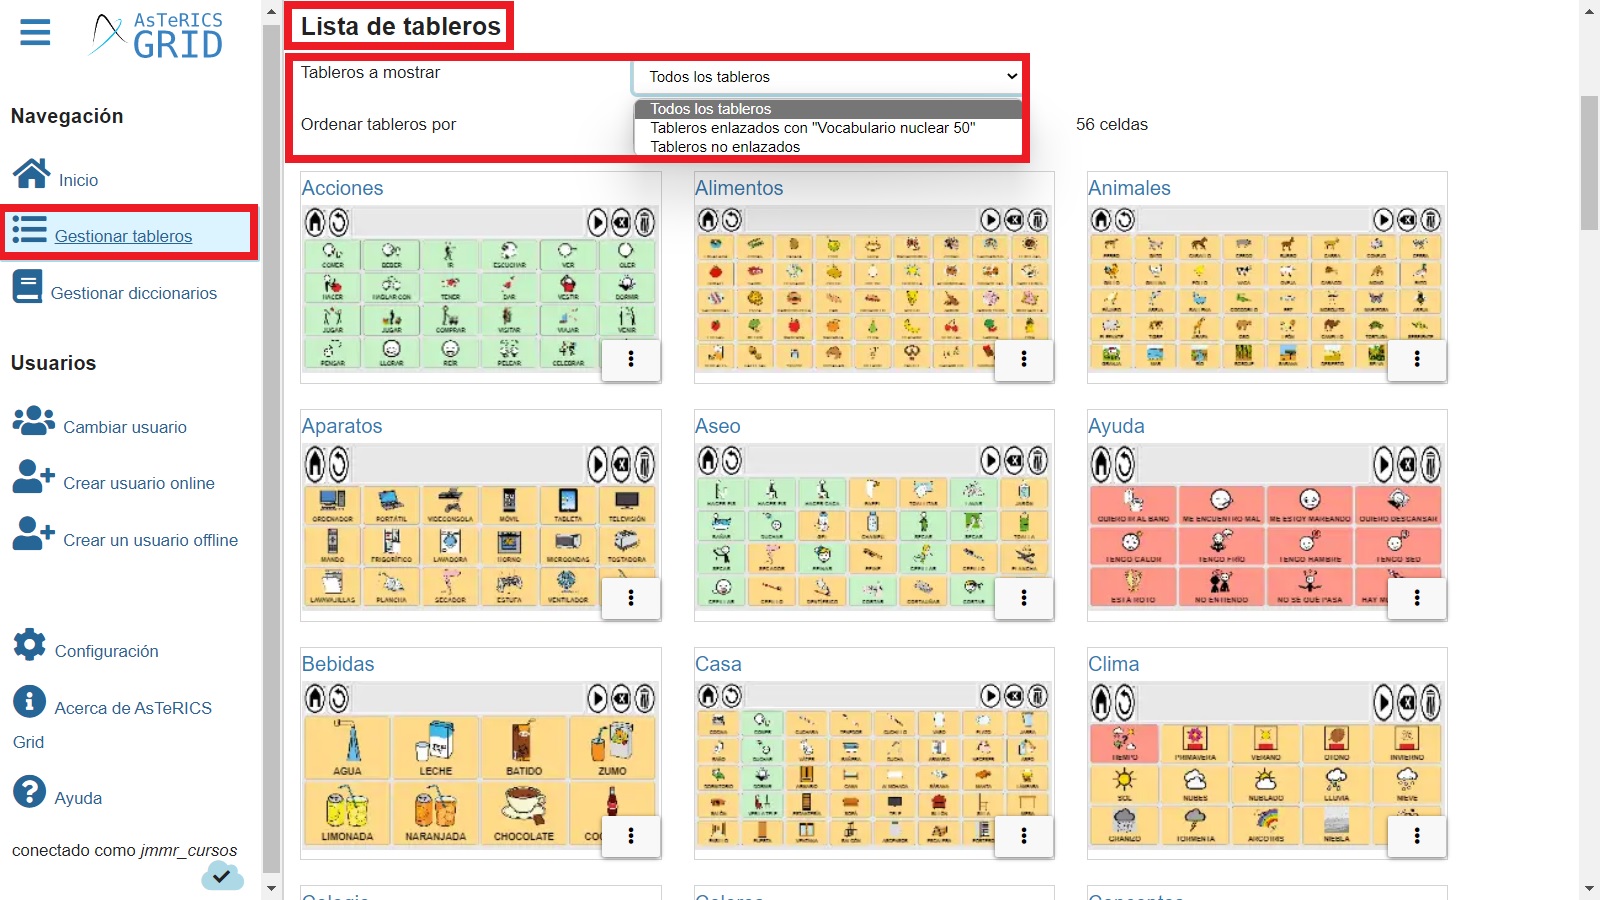 We can also Sort by label (alphabetically) and Sort by number of connections. Usually, we will use the first option more frequently.
At the bottom right of the grids, there is an icon with three dots that allows us to perform the same actions that we explained in the previous section of the Grid Details.
Global Grid
At the bottom of the page, we find the options for the Global Grid. Although we have explained it in the previous chapter, we repeat it again.
In this section we can Activate, Edit or Reset the Global Grid. Remember that this grid is the one that appears behind the communication grids and shows the cumulative phrase (collect element), together with the different actions related to that phrase.
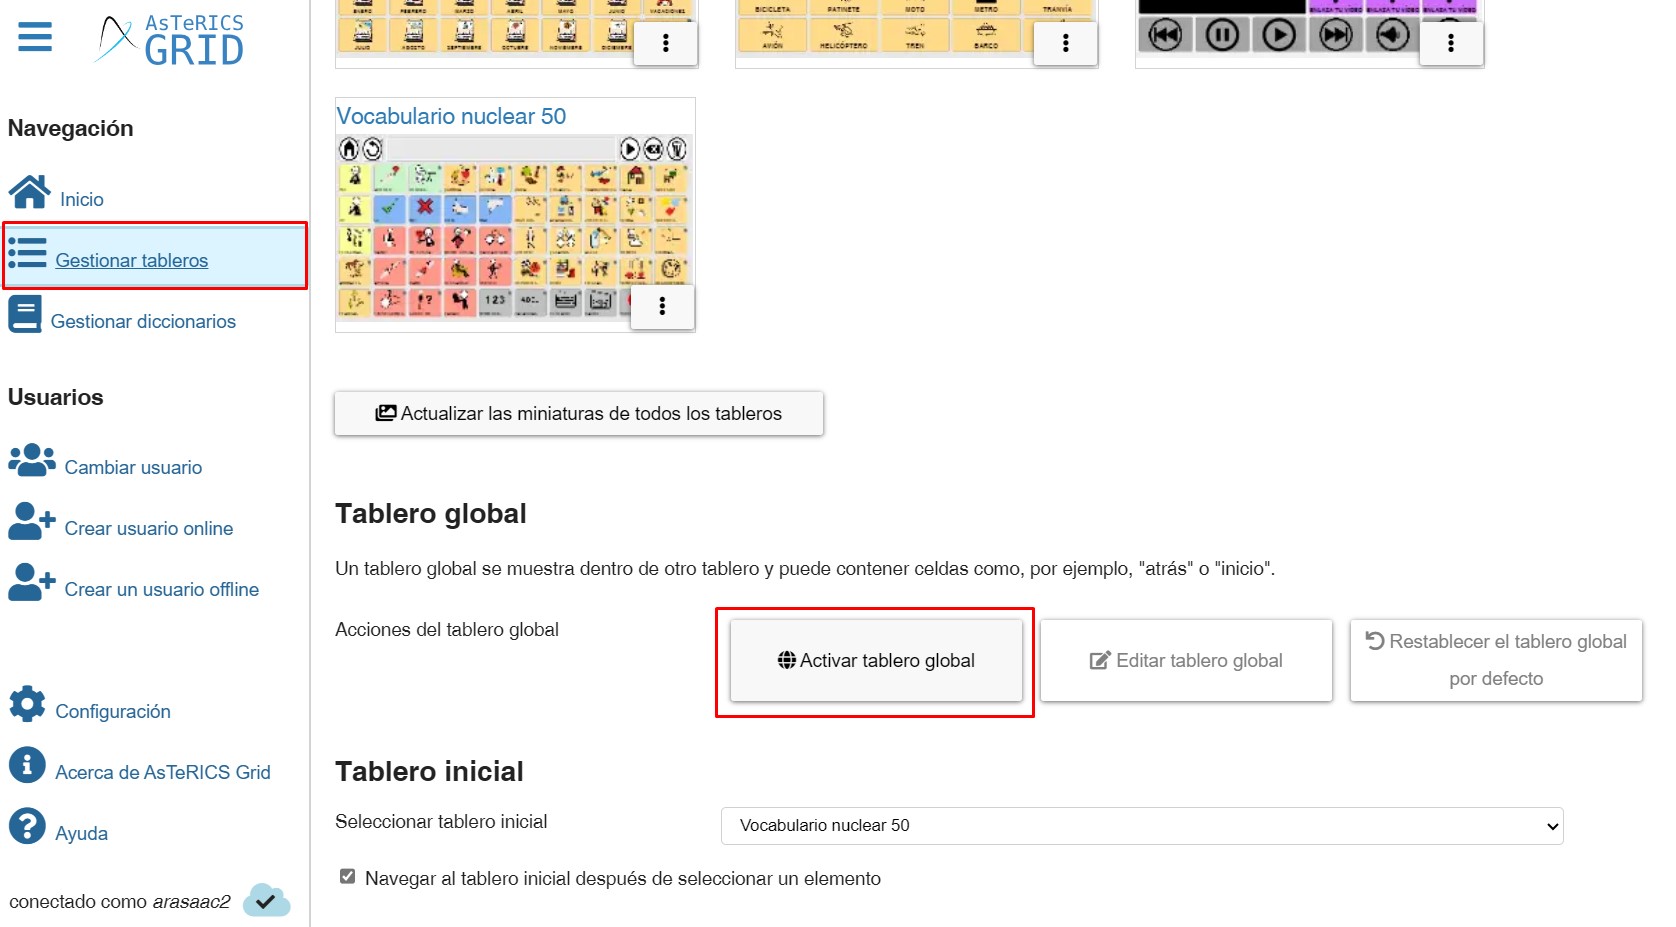
(TRICK) Sometimes our global dashboard is deactivated for no apparent reason and we no longer see the accumulated sentence and buttons such as Home, Back, Delete, ….. In these cases, simply go to this section in Manage Dashboards and click on the Activate Global grid button, as shown in the screenshot above.
Home grid.
At the bottom of the page, you will find the options for the Home Grid. Although we explained it in chapter 5, we repeat it again.
In this section we can define what our initial board will be, which will affect cells such as Home (in the global board) and options such as Navigate to Home Grid. In this section we can define what our home grid will be, which will affect cells such as Home (in the global grid) and options such as Navigate to home grid.

At any time we can change the home grid by selecting any of our list of grids. Once selected, all links in our communicator pointing to the home grid will be automatically updated to point to the newly selected grid.
Optionally we can activate the option “Navigate to home grid after selecting an item”. Once activated, the system will automatically return to the initial dashboard that has been configured when, when accessing a linked dashboard, we click on a cell that does not link to other dashboards.
More button
Finally, we have the possibility to perform another series of actions by clicking on the More button, located at the top right.
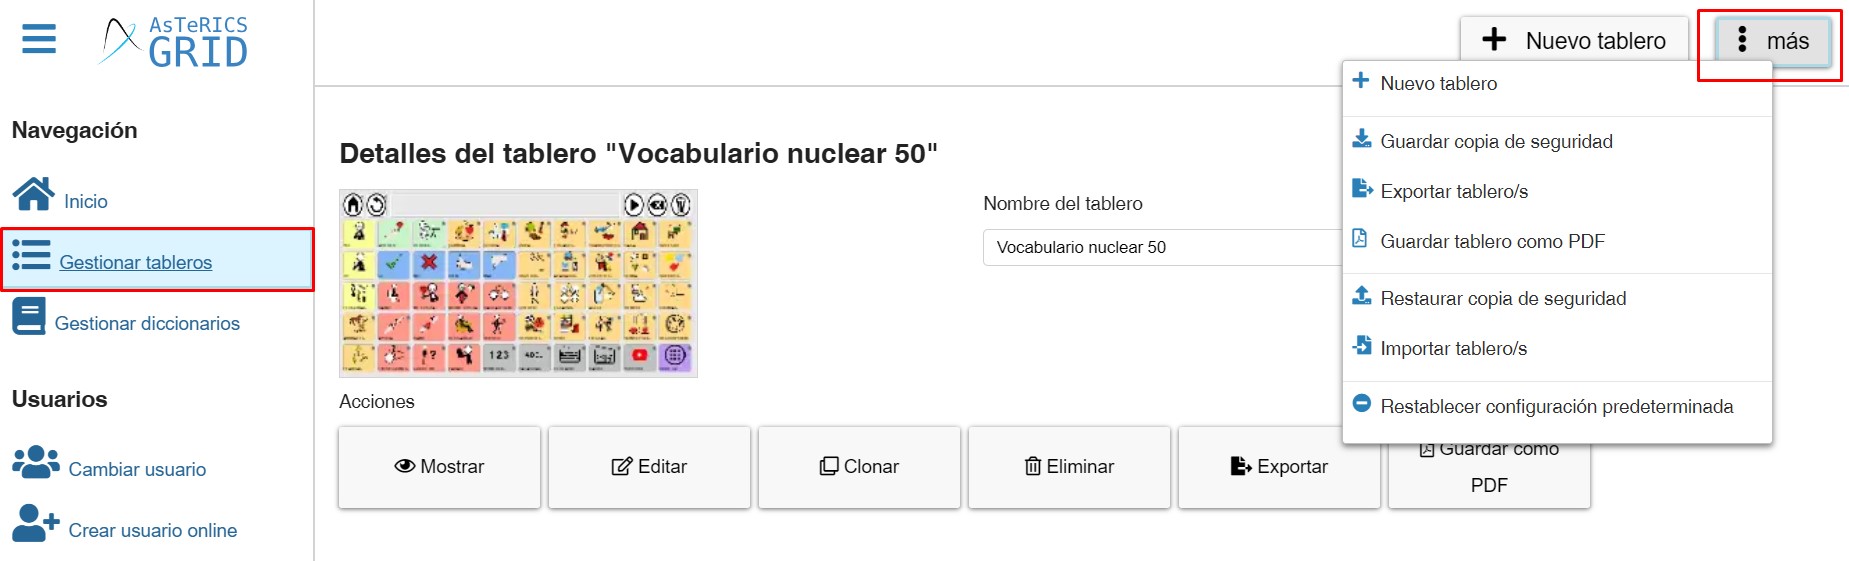
These actions are summarized as follows:
1- Create a New Grid.
2- Save backup of the entire communicator “Save backup to file” : allows you to save a backup of the active user and export it to another device. In this case, a file similar to this arasaac2_2024-01-01_12-00_asterics-grid-full-backup.grd is automatically downloaded. The file name includes the user name, the date and time and the indicative “full-backup” to indicate that it is a full copy.
Note that when we import the backup, all the communicator boards we have in the user will be deleted.
This option is interesting to always have an updated backup of all our users.
3- Save custom data to file: allows you to save a backup copy of a grid and even the linked grids. In this option, you can customise the data to be exported.
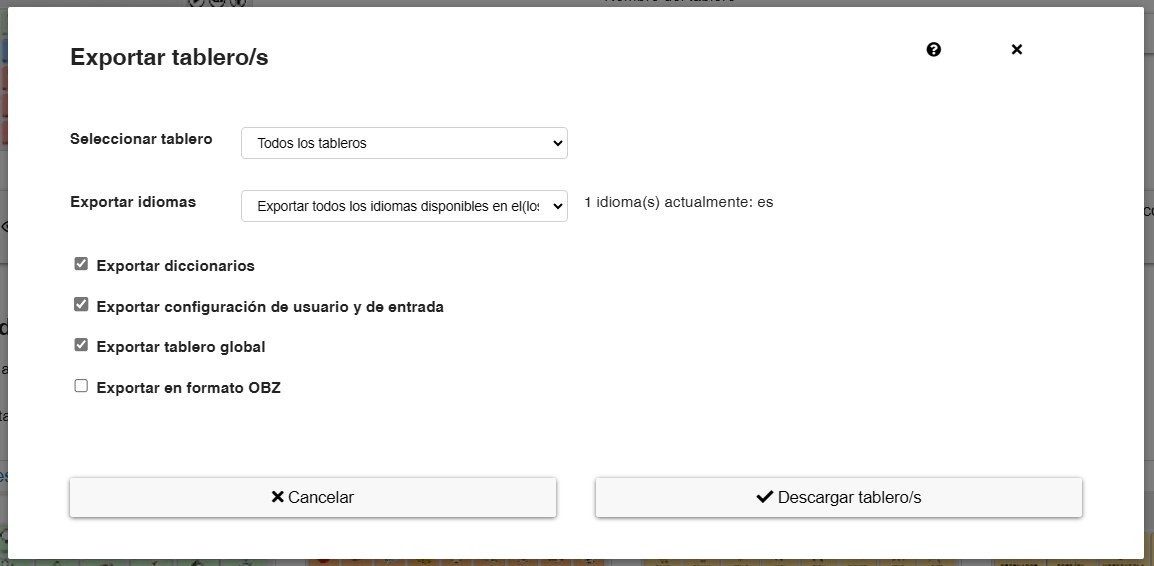
- Select grid: allows you to select whether you want to export a specific dashboard or all the available grids.
- Export languages: if you are working with a communicator with several languages we can export all the languages in which the communicator is translated or only one of them.
- Export dictionaries: it is recommended to activate this option if you are going to import the copy on a computer without an Internet connection, as the inclusion of dictionaries increases the size of the backup copy. It is easier to install the necessary dictionaries at the moment we import the copy in each of the devices we use.
- Export user settings and input config: this option should be activated when you want to create a backup copy of a specific communicator for a specific user, as it preserves the colour configuration of the communicator and the cells, the text transformation, the language of the content or the input configuration (sweep or direct selection). If we want to create a more neutral copy that is valid for different users, we do not activate this option.
- Export global grid: it is advisable to activate this option if we use the global dashboard and we want to keep the default configuration or the one we have been able to customise it with when restoring the copy. If we do not use the global grid or plan to create different global grids on the devices on which we restore it, we will not activate it.
- Export in OBZ format: if this option is activated it will generate an OBZ file instead of GRD. OBZ is a standard format (Open Board Format) for the storage of boards that is recognised by other communicators.
In this case, a file similar to this arasaac2_2024-01-01_12-00_grid_name.grd or this arasaac2_2024-06-20_13-23_asterics-grid-custom-backup.grd is automatically downloaded. The name of the file includes the user name, the date and time and the name of the board (if only one is exported) or custom-backup if it is a board and the linked ones.
4- Save grids to PDF: allows you to save the current board or all the boards in this format for later printing.
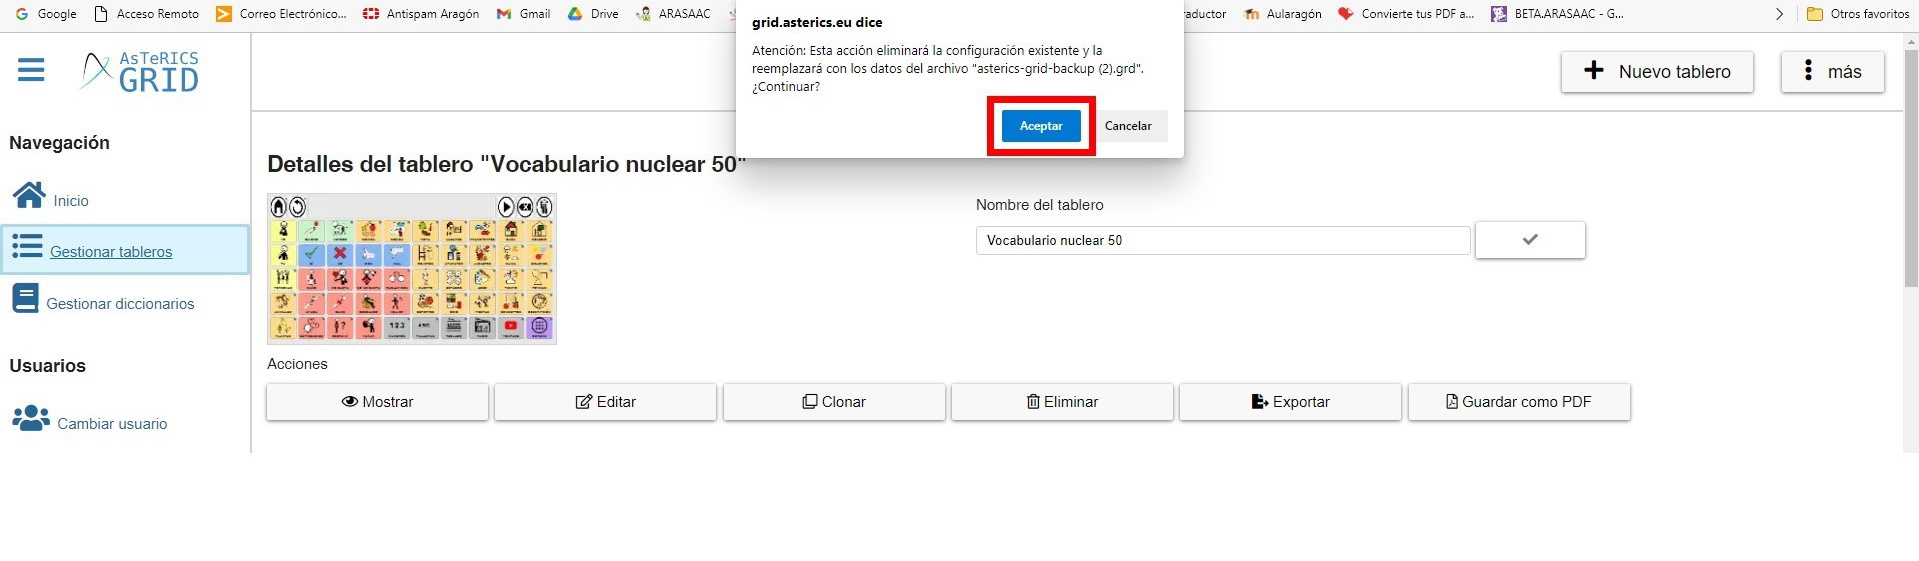
5- Restore backup from file: this option allows us to import a backup with the .grd extension on our device. When importing, the application warns us that all the current configuration will be replaced by the backup we are restoring.
6- Import custom data from file: allows you to import the file with the copy of the board/s that we have saved with the option explained above.
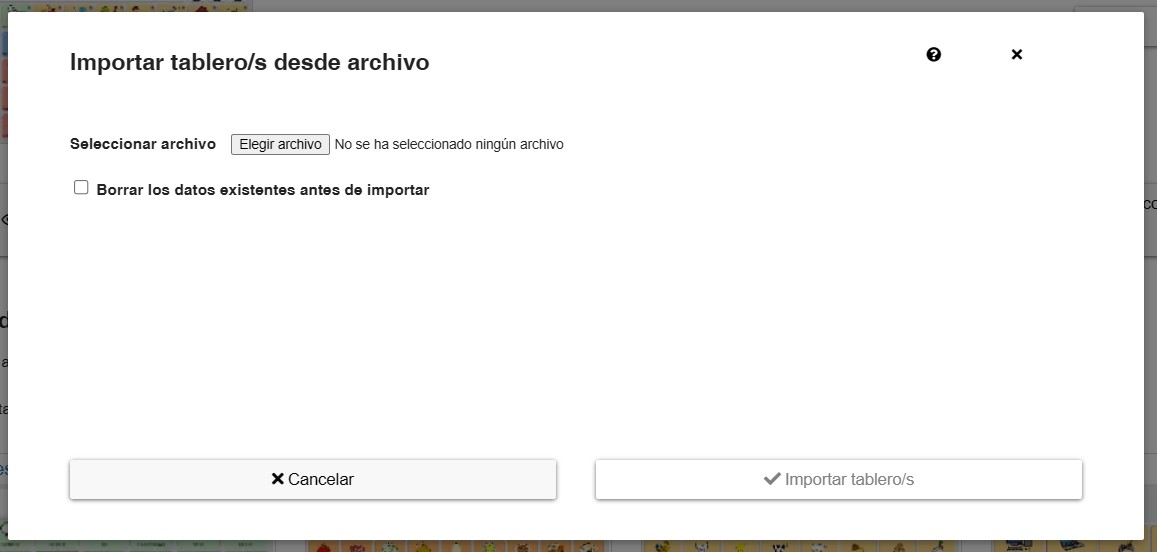
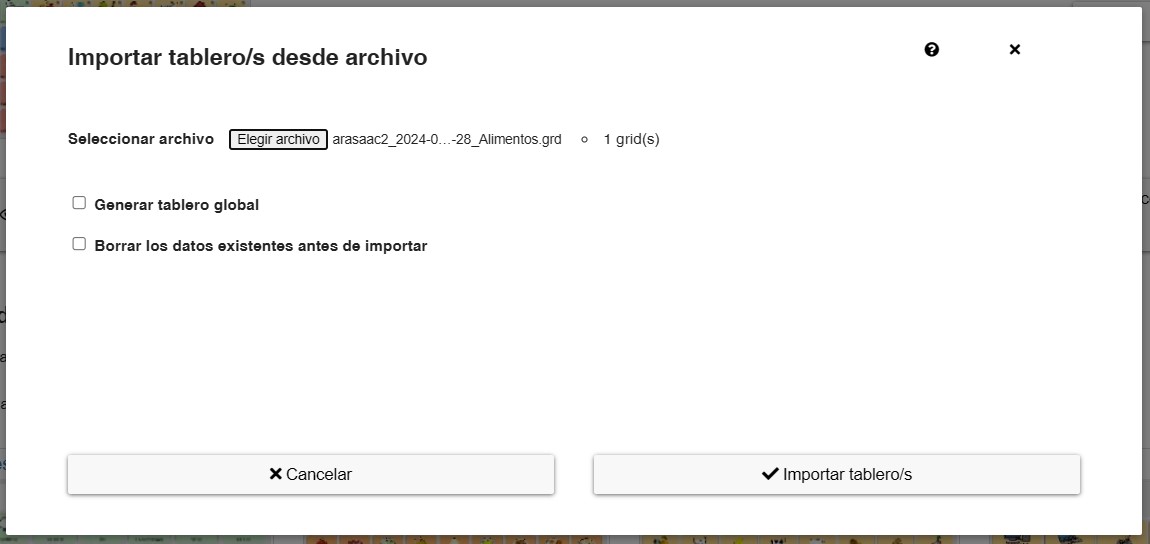
First, select the backup file (.grd) to be imported by clicking on Select file. Once selected, the system informs us of the data contained in this copy (1 board in this case). If necessary, we can enable or disable the generation of the Global Grid. It is generally not recommended.
By checking the Delete existing data before import option, we will do a clean restore without preserving the existing configuration (as the Restore backup option does). If not checked, the new imported grids will be added to the existing ones in the configuration.
7- Reset to default configuration: allows you to completely delete the current configuration and return to the communicator access screen where you can create a new communicator, import a predefined communicator or import a backup copy.


