AsTeRICS Grid Dynamic Communicator
2 – Welcome and Registration Screen
When accessing the AsTeRICS Grid communicator for the first time, a welcome or registration screen appears with two highlighted options: “Use AsTeRICS Grid without registration” or “Use AsTeRICS Grid with registration”.
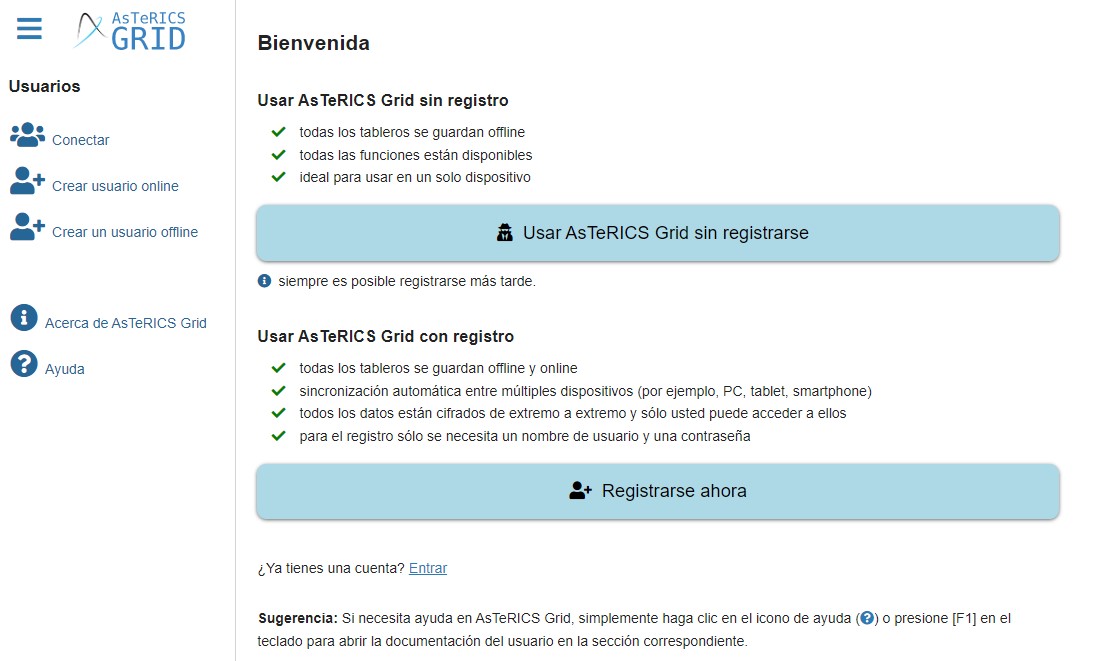
Let’s see the functionalities of the two types of access.
Use AsTeRICS Grid without registering
If we choose this option, we have access to the same functionalities as if we had registered, although we cannot synchronize the information between different devices, since we do not have a user name and password.

We can continue to use our communicator without losing the information and our work and we even have access to create and restore backups, which we can import to other devices or simply have them saved on our device or in the cloud to import them later.
It is very important to remember that all information is stored offline, so we must always use the same device and browser we have been working with.
Use AsTeRICS Grid with registration
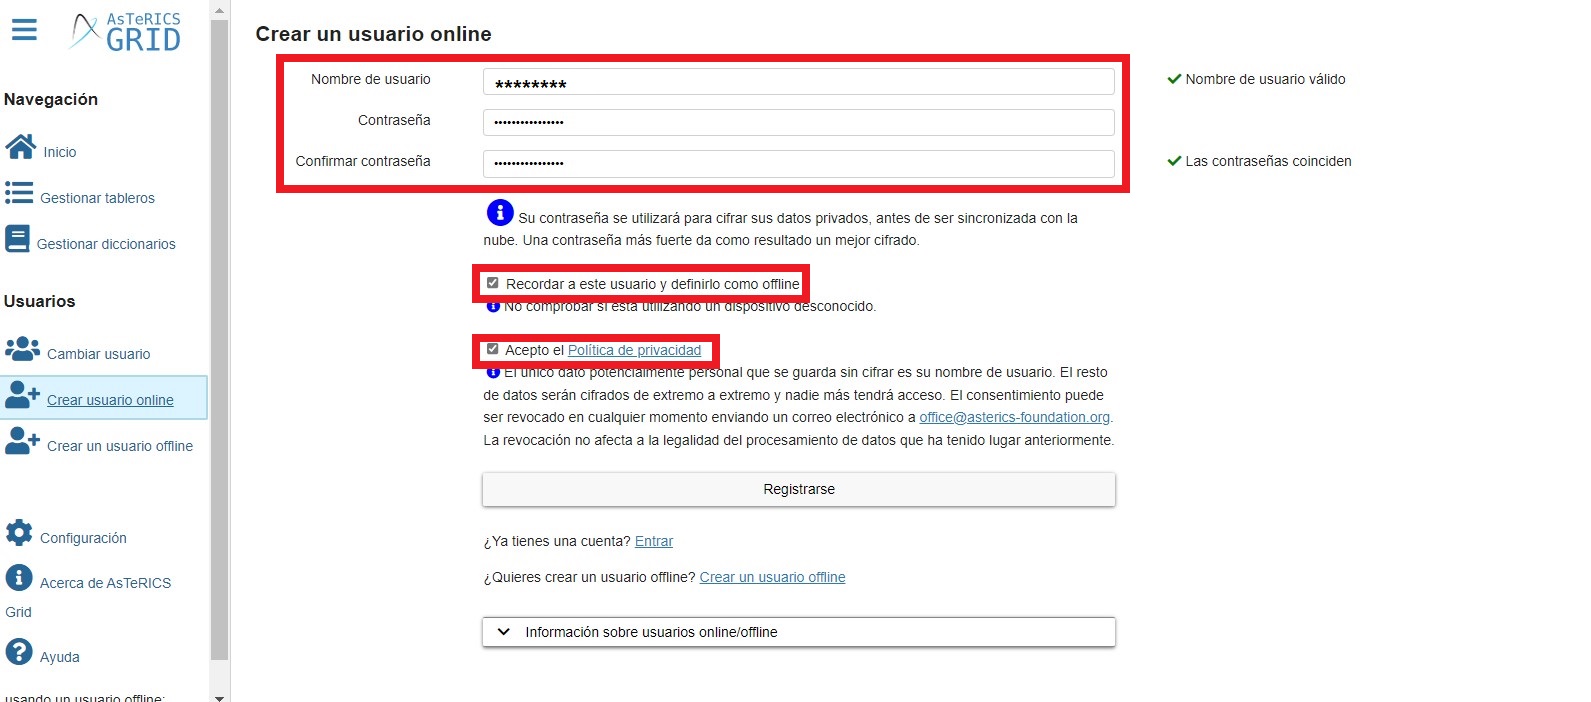
If we choose this second option, we have access to the possibility of synchronizing the user and communicator configuration between different devices and browsers using the user name and password we have entered.
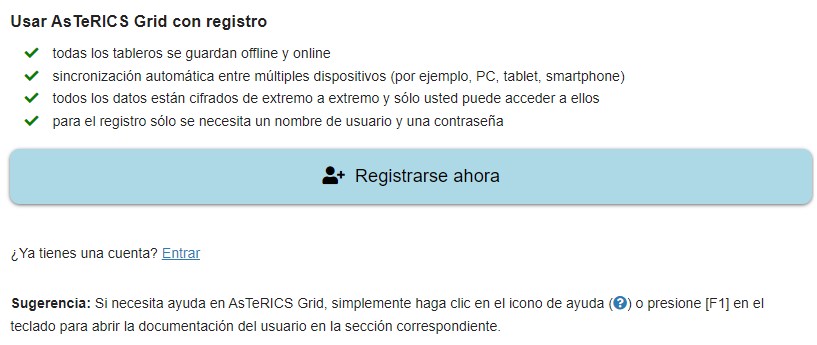
We can create as many users as necessary, but it is VERY IMPORTANT to remember and save this information (the password), because we cannot modify or reset the password.
Communicator access screen
As mentioned above, either of the two options takes us to the communicator access screen.
As we can see, there are three possibilities:
- Restore backup from file / Import custom data from file (1)
- Empty communicator (2)
- Import predefined communicator (3)

Restore backup from file / Import custom data from file (1).

Before explaining how to Restore Backup / Import custom data, it is essential to explain that we can save backups or customised data of our communicator or of a specific dashboard. In addition, AsTeRICs Grid, if we have created an online user, automatically synchronises with the server and caches on our device the changes we make on the boards or in the configuration.
We recommend that you consult the chapter in the manual that explains how to make these backups and how to import them.
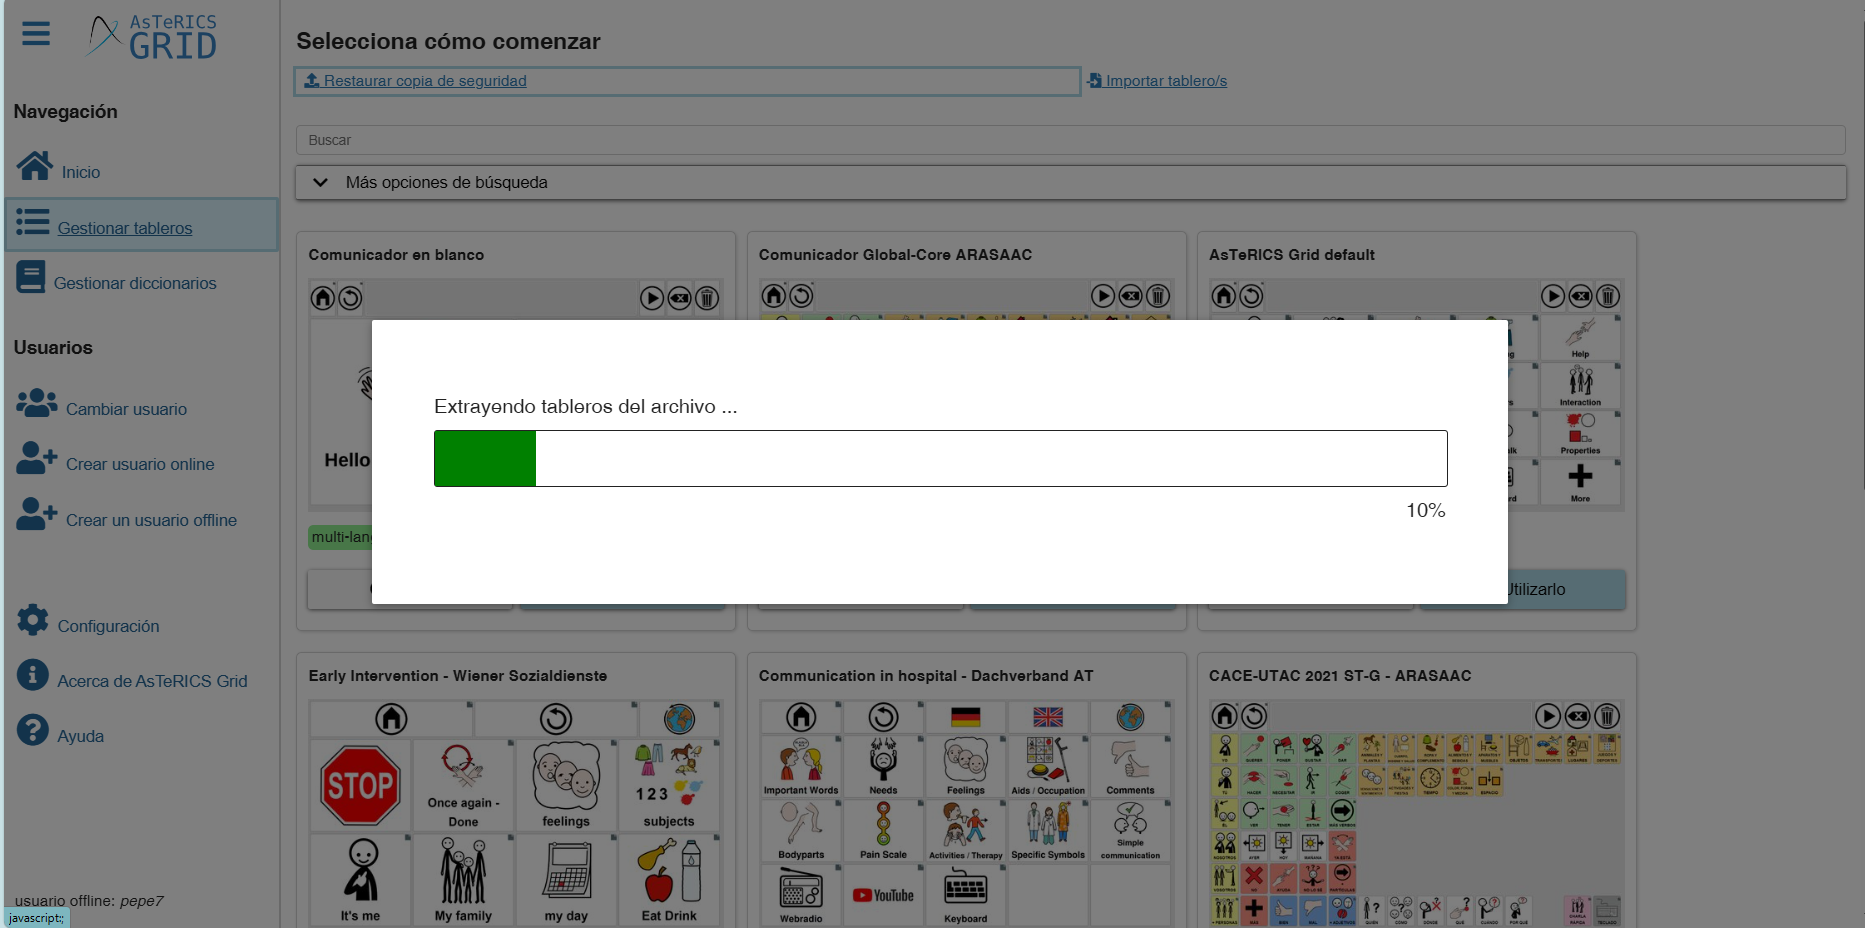
Having previously backed up a communicator or a copy of a board, click on Restore Backup from file or Import custom data from file as appropriate. A system window will then open in which you can browse for and select the grd file corresponding to the full backup or the board/s. Once selected, the import process will start.
Empty communicator (2)
If we choose the empty Communicator option, we will create an empty board and start from scratch.
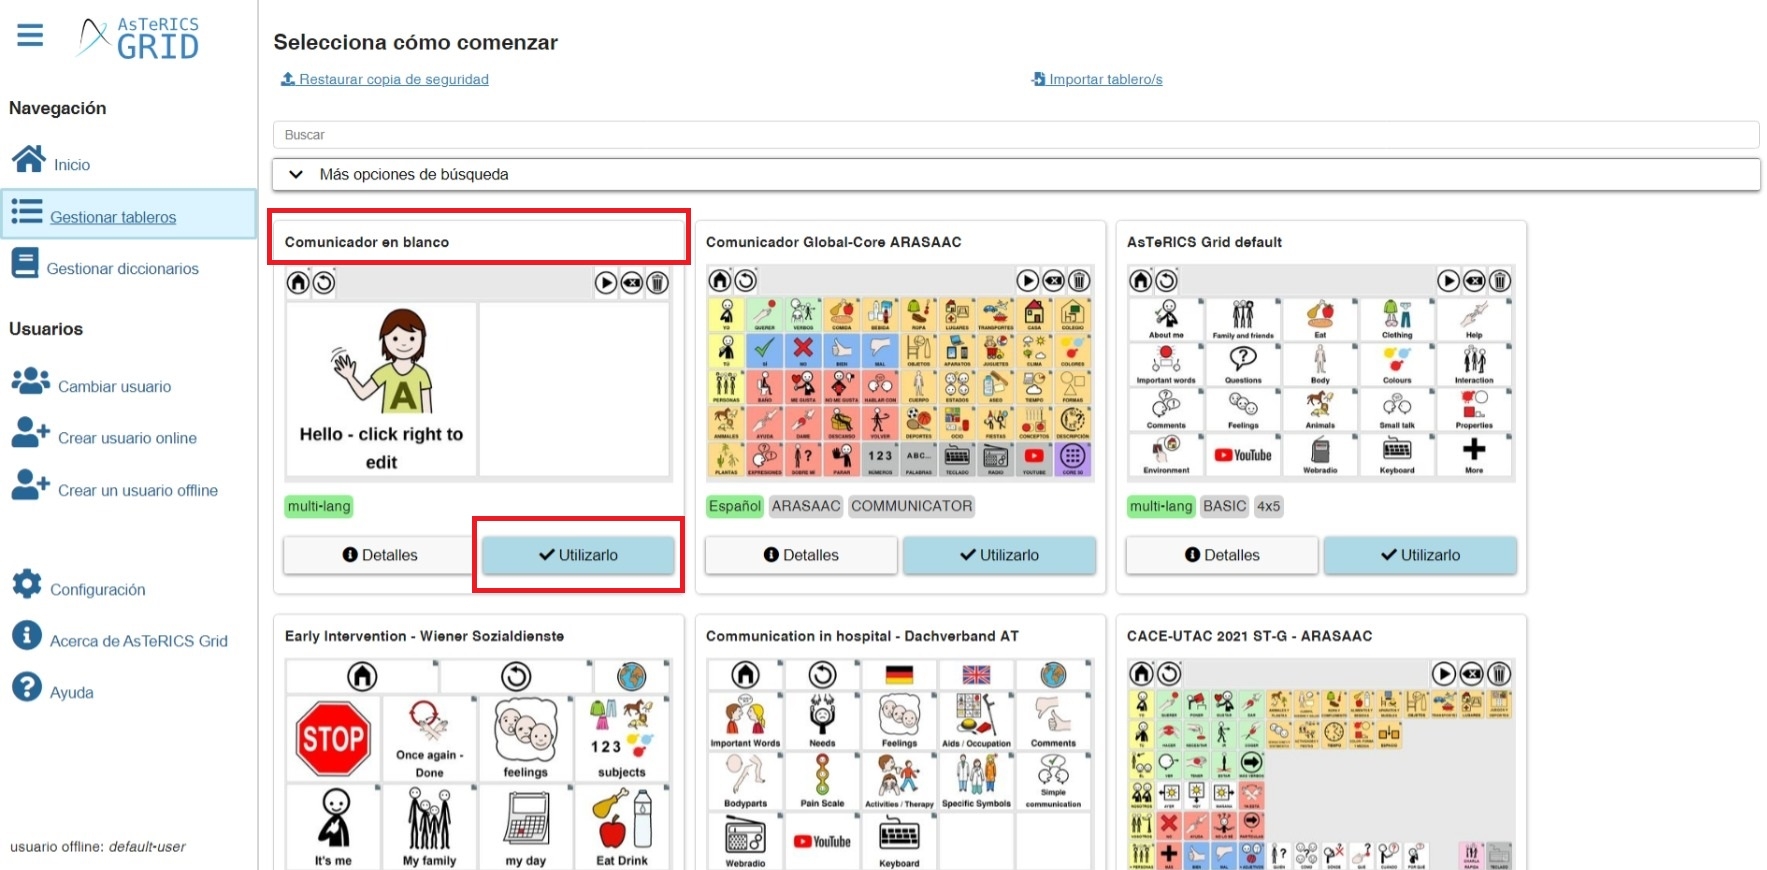
By clicking on the Use it button, an example of a modifiable dashboard appears. If you look at the upper part, you can recognise that we are in the edit mode because of the button “Editing off”. To edit the cells and access the customization tabs, we have to right-click on any of them to access the cell options submenu. You can try it with the greeting cell as well as with an empty cell.
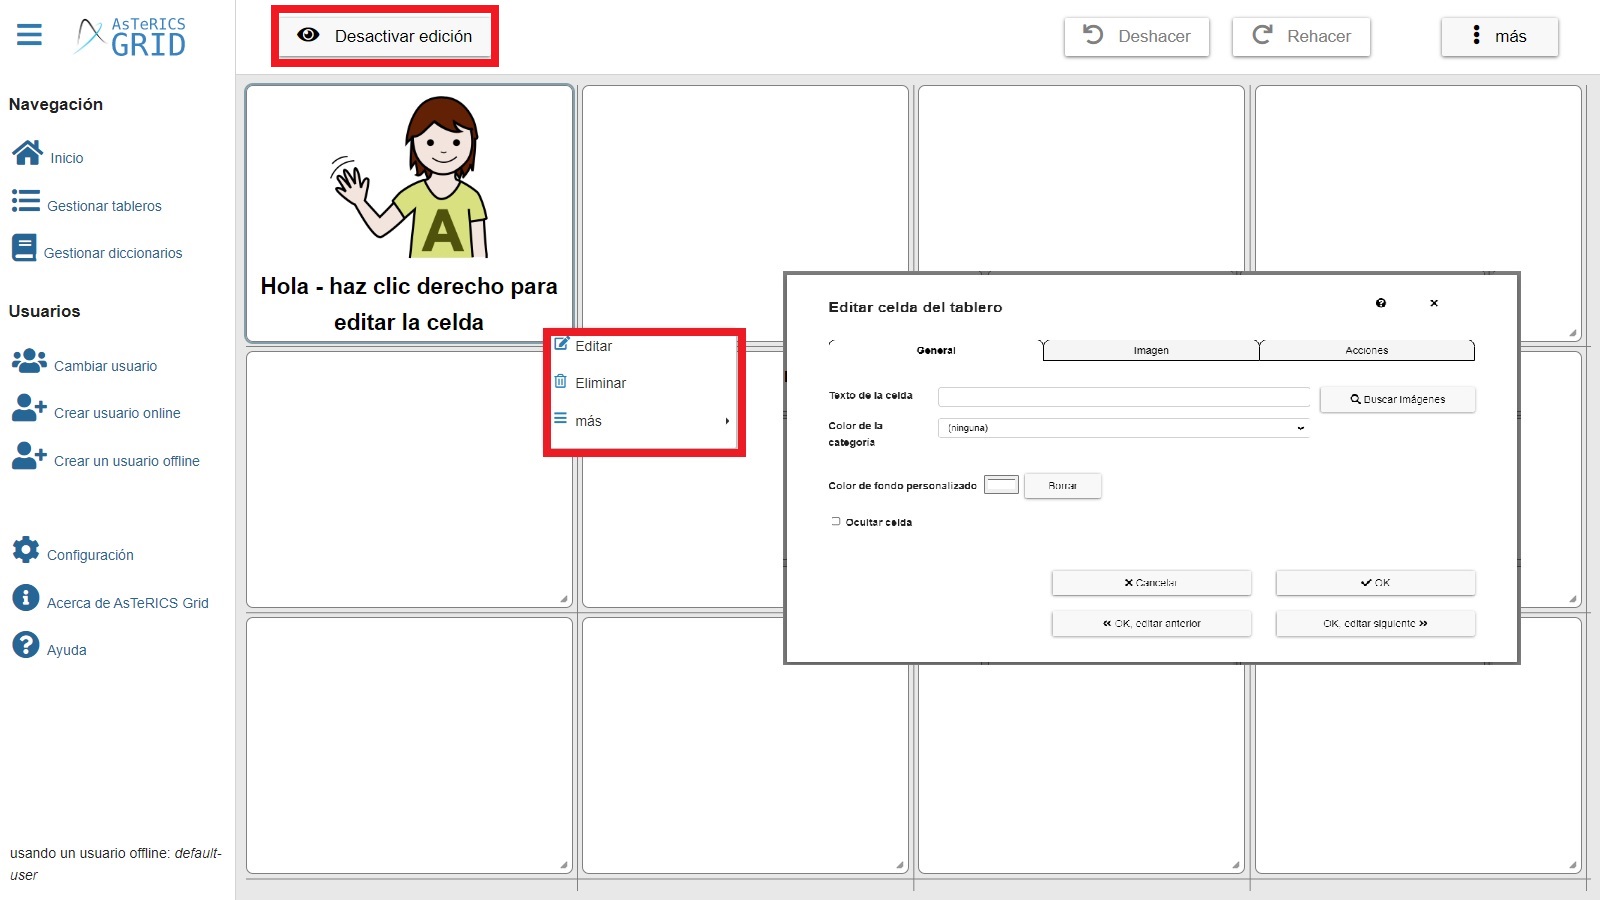
In this cell options menu we can Edit, Delete, Clone (copy the current cell to another cell on the grid), Do element action (test before executing the action we have assigned to the cell) and Move element to other grid.
The most common action is Edit, in which we access a pop-up window in which we define the Text, Image and Action of a particular cell. The operation of this window will be explained in later tutorials.
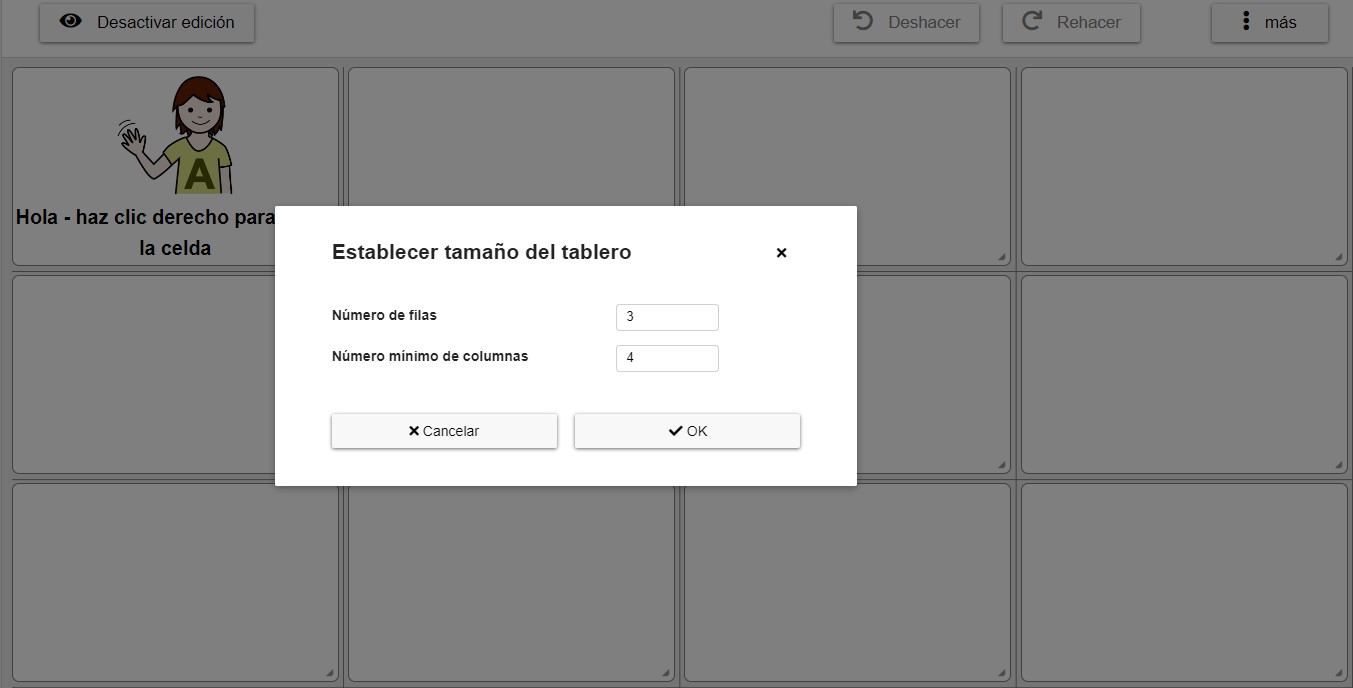
If we click on the More option, located at the top right, we access the grid options menu.
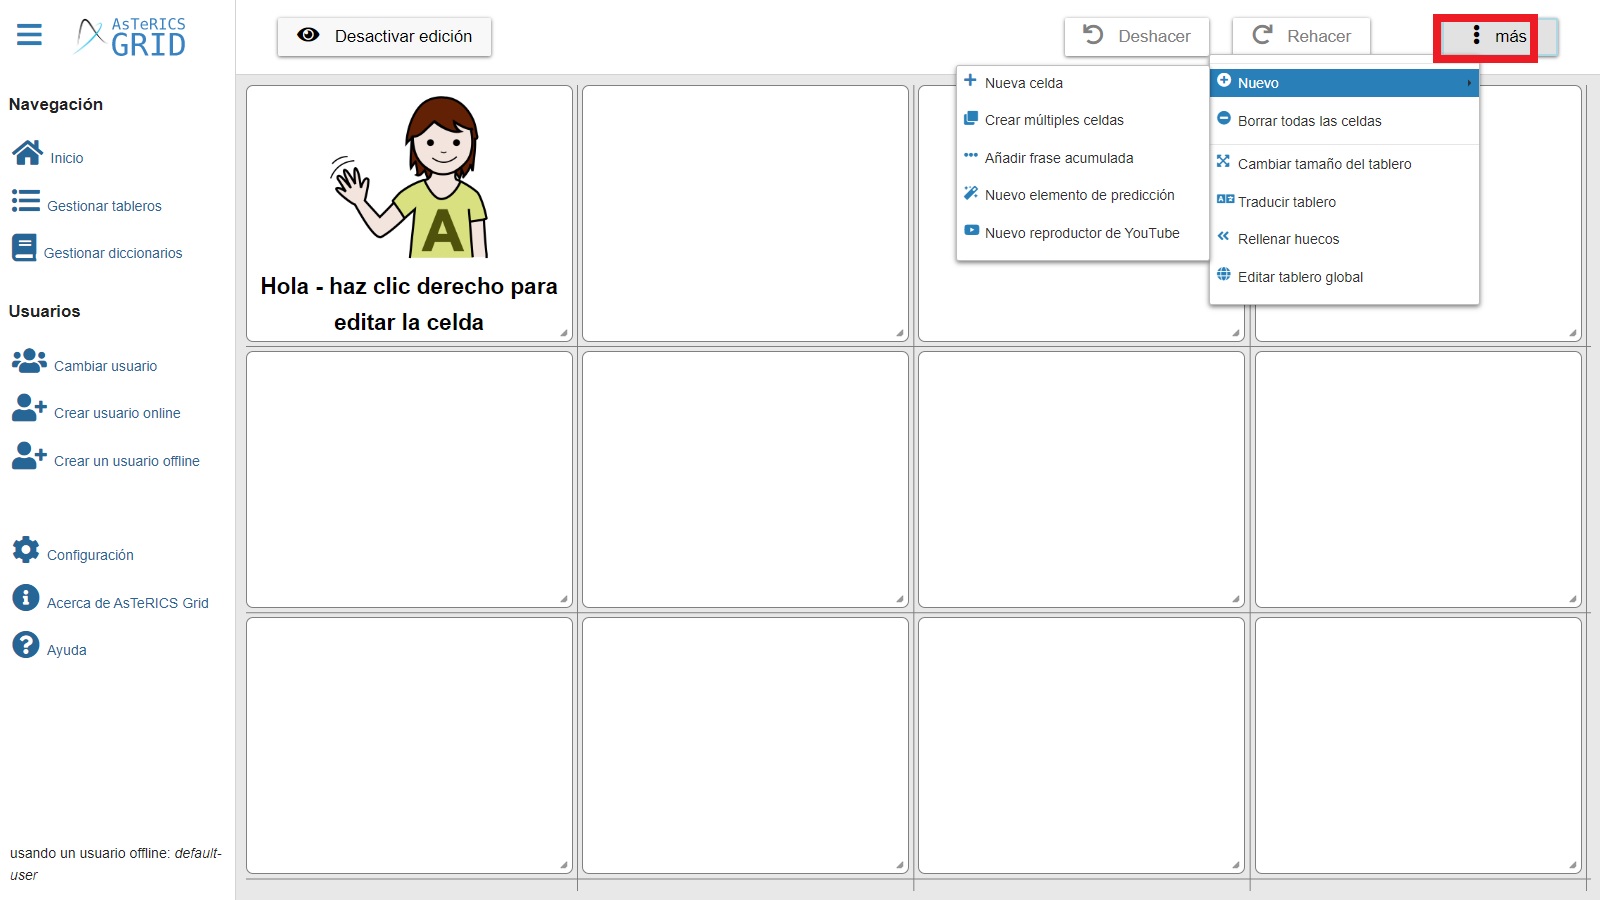
As we can see, the options menu refers to the characteristics of the grid. We will explain all of them in each of the tutorials, so we are not going to expand on them now.
The most important one at the moment may be the Change grid dimensions . If we are going to add more columns or rows to our grid, it is not necessary to delete any cells. If we are going to reduce the size of our dashboard, we recommend the option Delete grid cells (those that have no action assigned to them) or Delete all cells (all cells are deleted, including those that have functions assigned to them), in order to define the number of columns and rows of our dashboard.
We remind you that the cells (elements) can be moved and rearranged along the grid. Click on one of them and see how you can move it to the place you want. It is important to note that when reducing the number of columns or rows, all cells in the column or row must be empty.
Import predefined communicator (3)
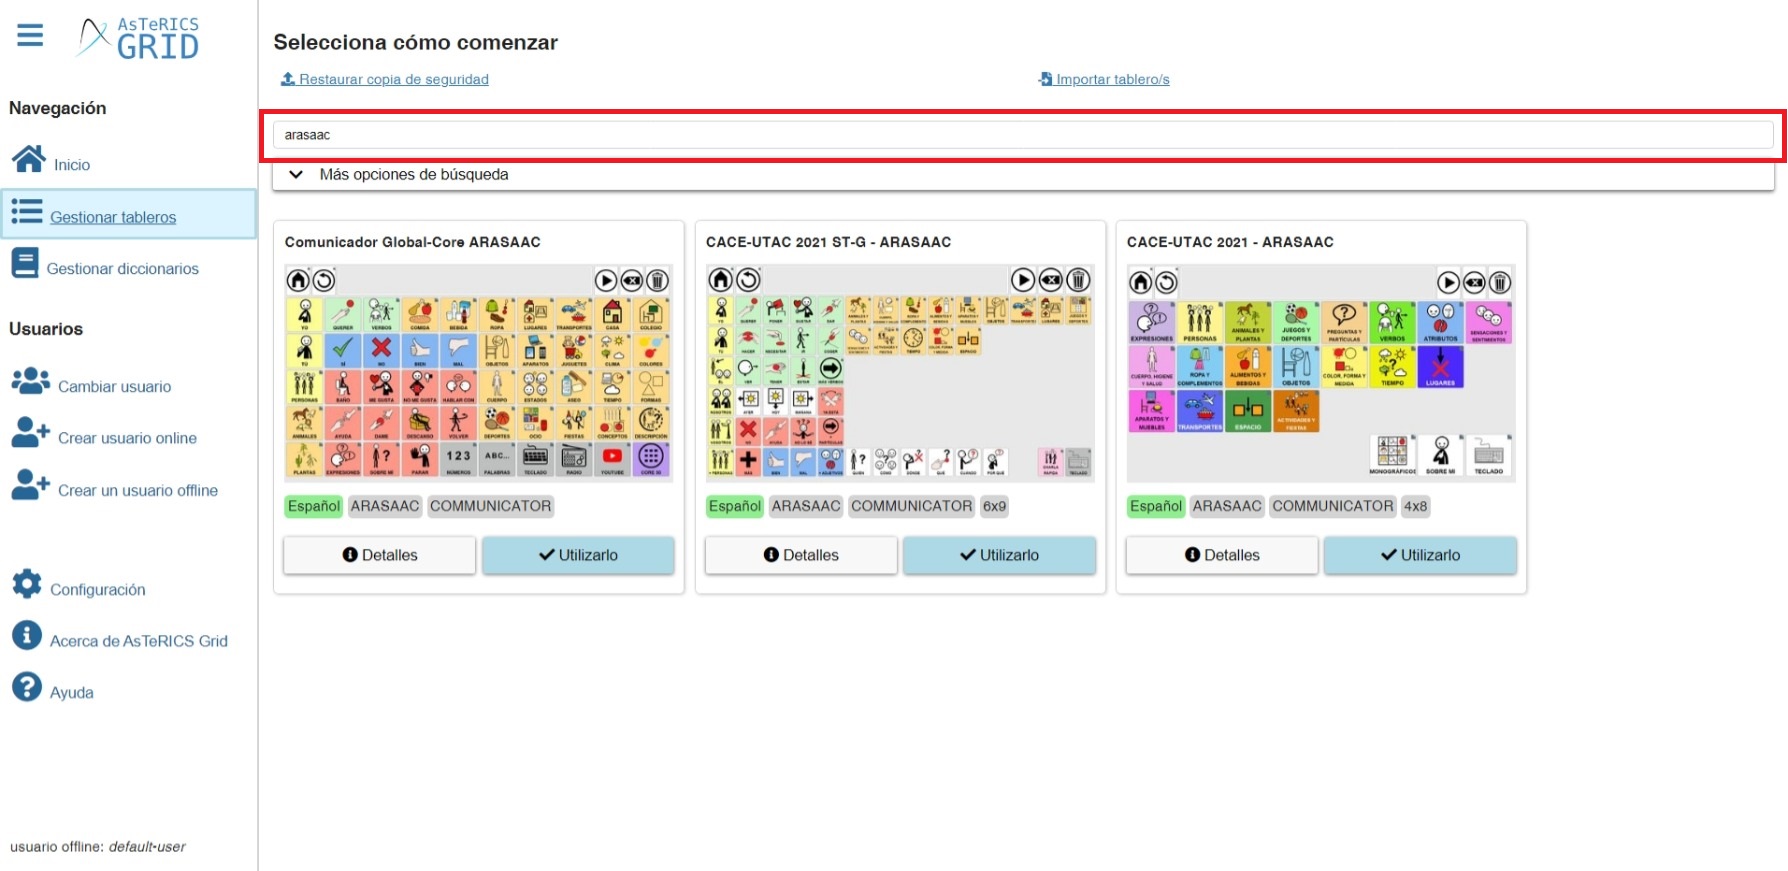
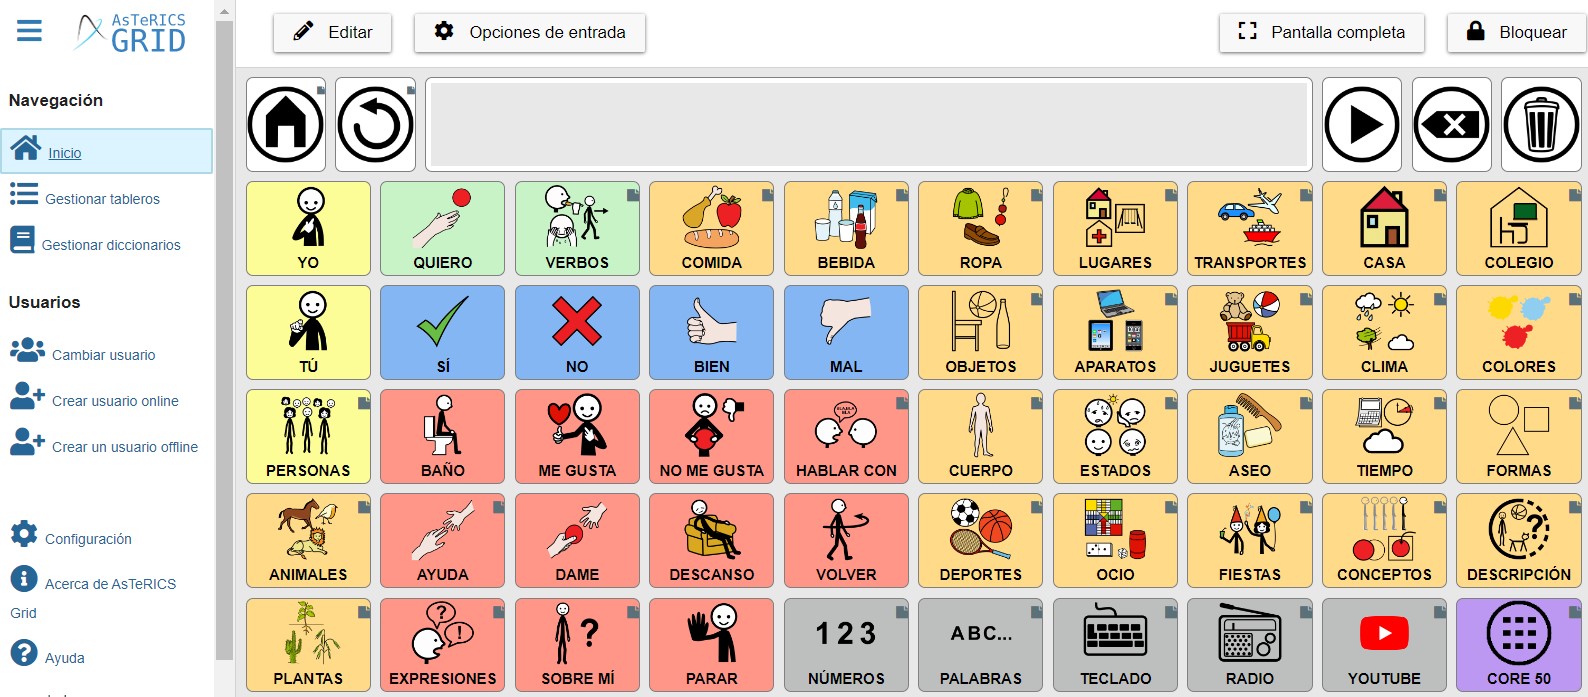
After the empty Communicator option, the system offers a number of predefined Communicators. Once imported, we can modify them according to the communicative needs of the person who is going to use them. By default, it lists the communicators that are available in the language of your browser.
The ARASAAC Global-Core Communicator has been developed by the ARASAAC team and is available in several languages (Spanish, English, German,…).
For more complete information on each communicator model and to see screenshots of it, click on the Details button.
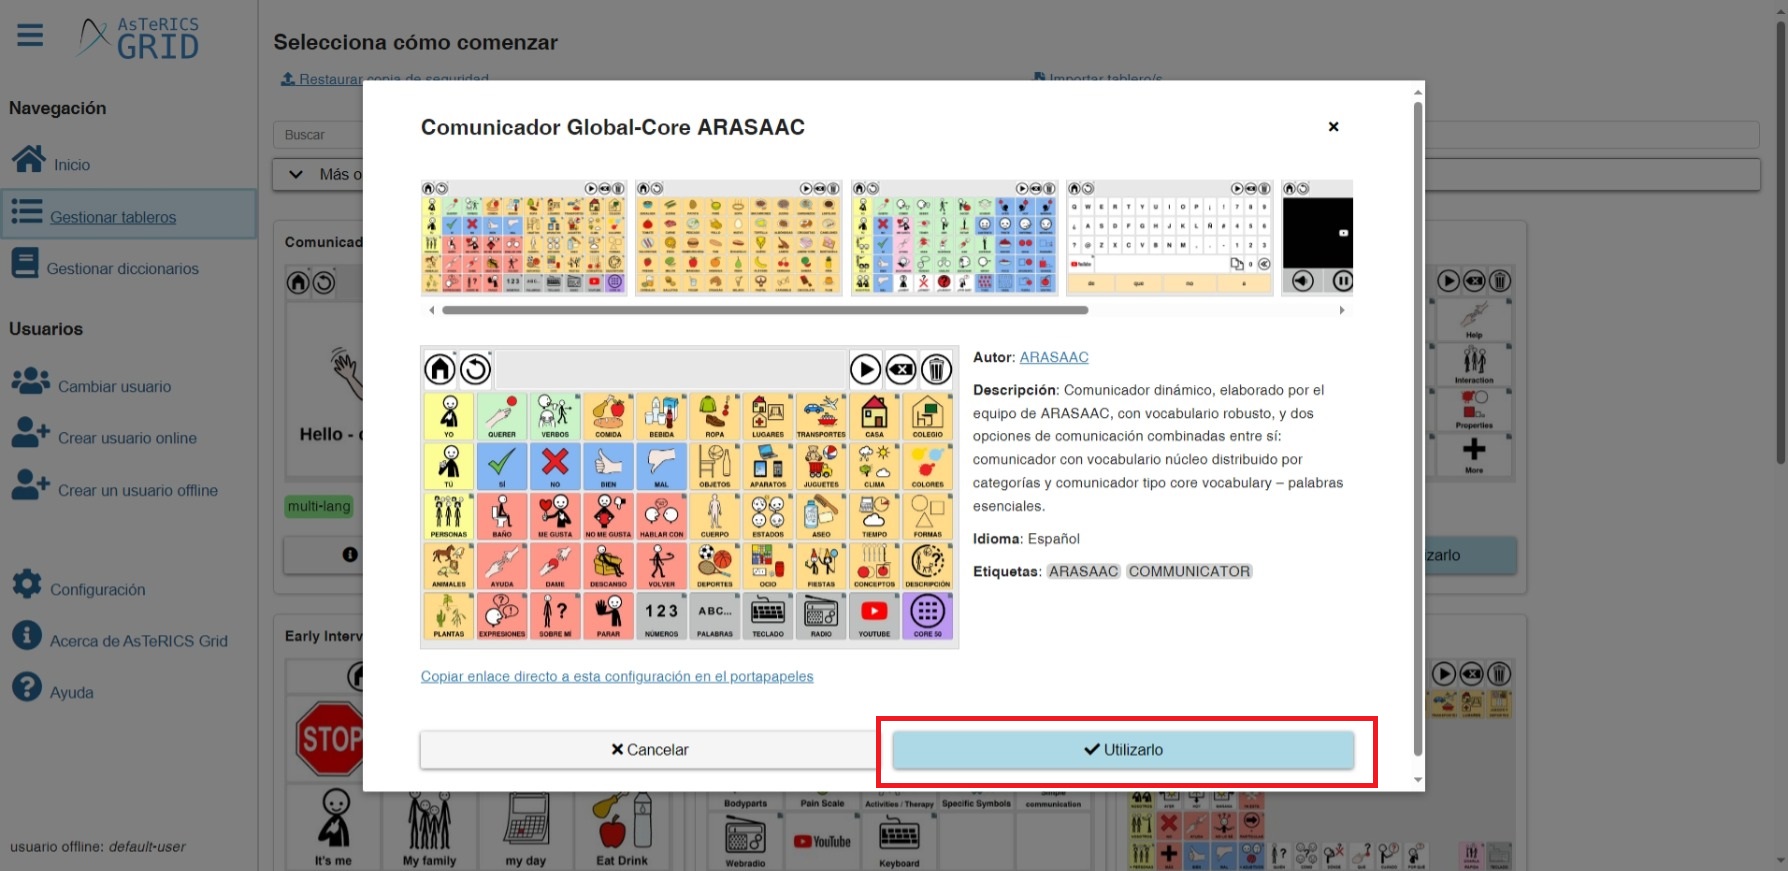
Once you have selected the communicator, click on the Use it button (either in the main window or in the details window) and, after a short period of time, the chosen communicator will be available.

The search window for predefined communicators allows us to perform searches and filter the results by different criteria that we are going to explain.
Communicators / Grids
If we drop down More search options we see the Type field. This field allows us to search for communicators or grids. By selecting Single-boards we can see some examples of individual grids that we can import to our user. If we select self-cointained we will return to the predefined communicators discussed above.
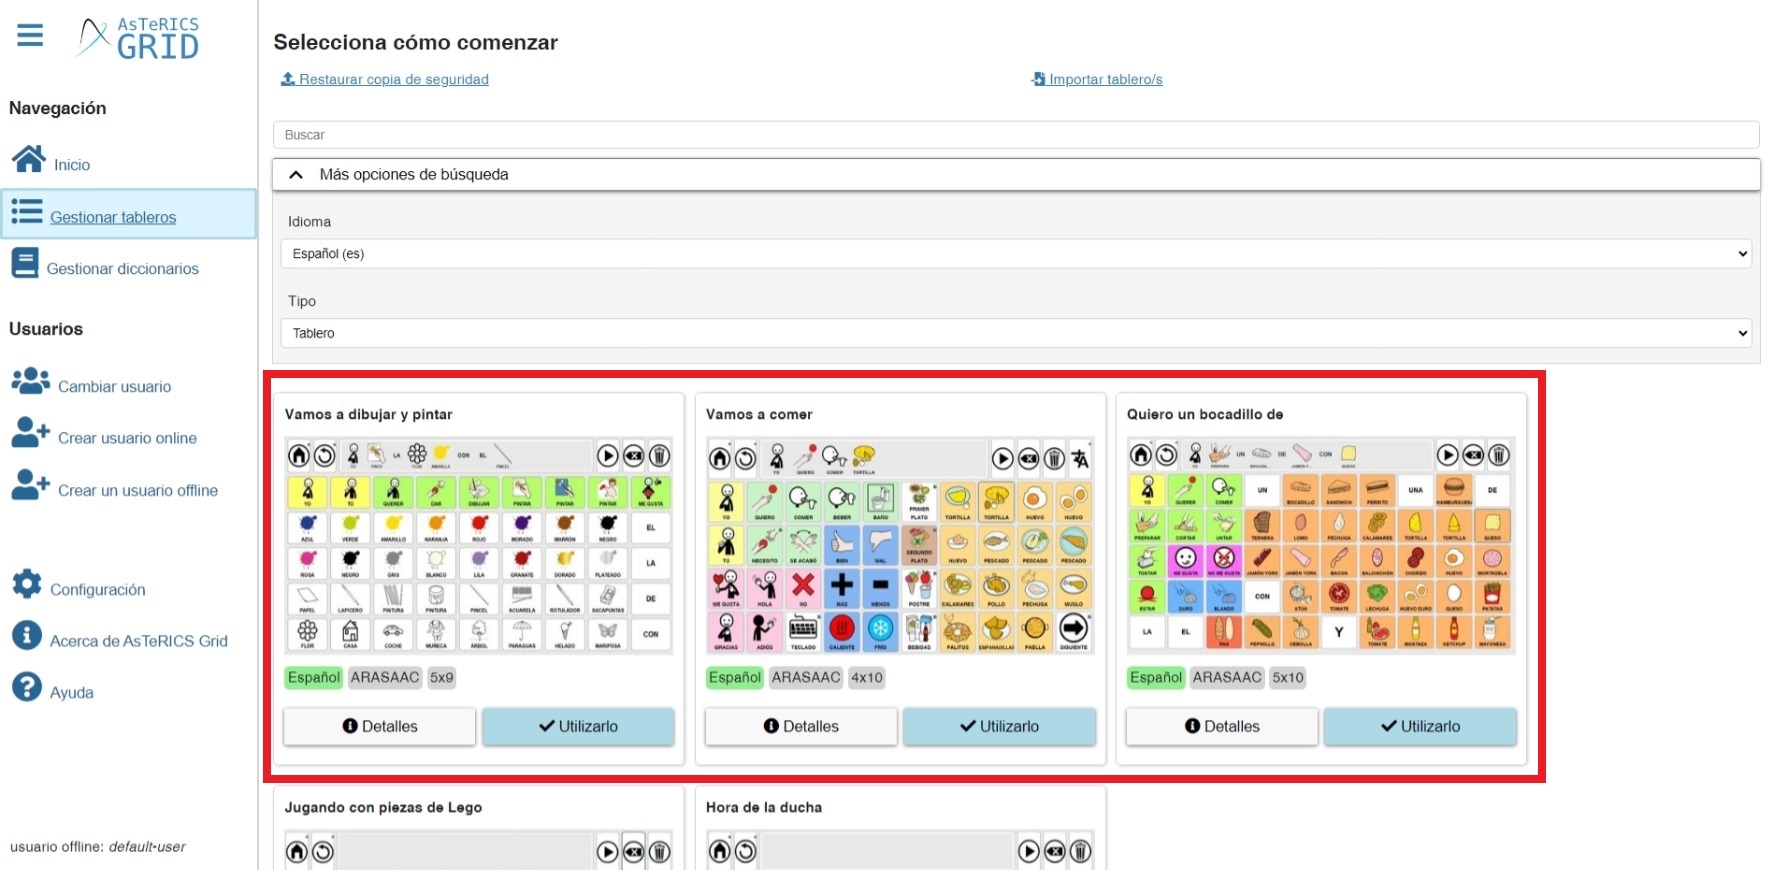
The second field to filter the search is the language. By selecting any of the languages listed, it will display those communicators or boards that are translated into that language.
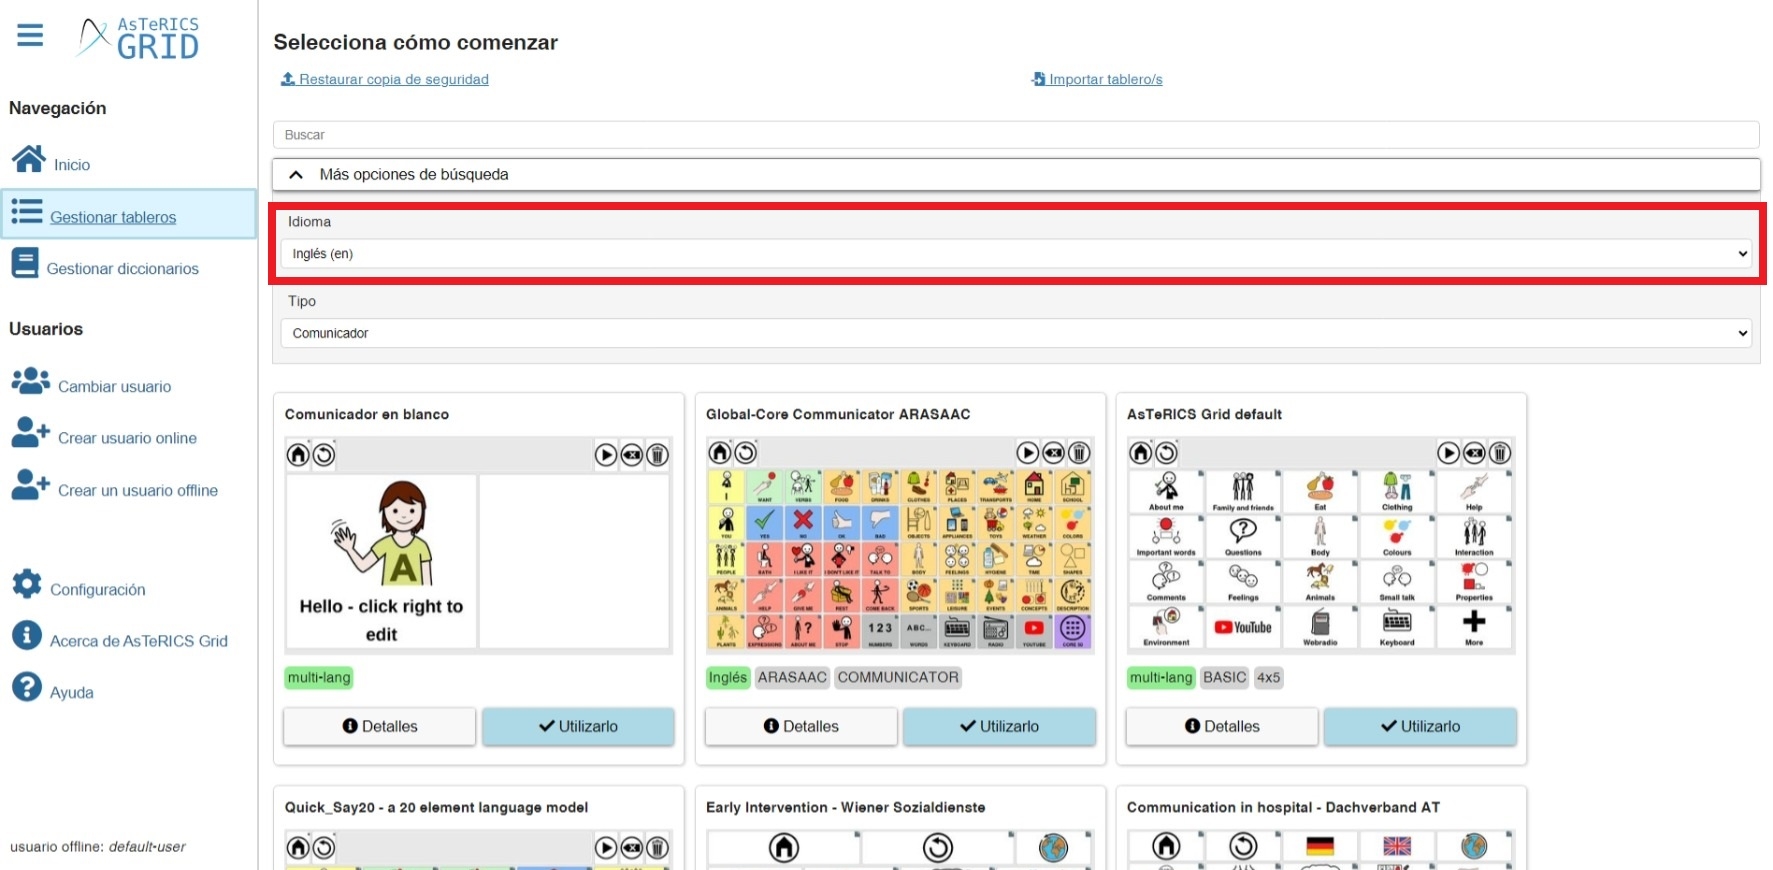
Finally, we have the possibility to search by words. Searches are carried out on the text of the description or the labels that appear in grey in the file of each model. In this way, if we search for ARASAAC, it will list those communicators that have that tag associated with them.